Processing…
Success! You're on the list.
Whoops! There was an error and we couldn't process your subscription. Please reload the page and try again.
A restful holiday break has come and gone, but cookies and hot drinks in the winter are here to stay.

As of right now, these are the only cookies I (and you) need. Butter slowly browned on the stovetop, mixed with brown sugar, egg, and just enough dry ingredients to hold the flavour together. No exceptions for using light brown sugar; you need something dense enough for mild treacly essence but which won’t distract from the brown butter, and the soft sandiness of light brown sugar does the trick.
I made these at least 5 times already both here and in Singapore. Gone-in-the-hour type cookies. Brought them for a friend’s birthday and they were scoffed in no time, too. The secret really lies in the brown butter, so make sure to melt the butter low and slow for ultimate flavour and texture.


(And yes, I prefer these cookies to Gail’s ones). So incredibly soft, chewy and delicate on the inside, with a cracked top. Chocolate all the way through, too. 100g is enough but go for 150g if you’re the sort who needs plenty in every bite.
Brown butter chocolate chip cookies (makes 6-7 medium cookies)
Ingredients
150g butter
1/2 tsp fine salt
200g light brown sugar
1 egg
170g plain, all-purpose flour
1/2 tsp baking powder
100g dark chocolate, roughly chopped
extra coarse salt (for sprinkling at the end)
Directions
First, preheat your oven to 180C(350F) and line two medium baking pans with baking parchment. In a large saucepan, melt the butter on low-medium heat until the butter starts to pop and sizzle and you can see the light-coloured milk solids separate from the brown liquid. You know you are done browning the butter when you can smell something skin to mildly burnt toffee. Turn off the heat and let the butter cool for 5 minutes in the pan before pouring it into a large bowl together with the light brown sugar. Whisk the brown butter and sugar together well, you should have something that looks like wet sand. Add the egg and whisk it in too, with the half teaspoon of fine salt, until everything is well homogenised and smooth.
Finally, tip in the flour, baking powder and chopped dark chocolate. Use a large spoon or rubber spatula to fold the dry into the wet ingredients and mix well until there are no dry floury spots left. You should have a relatively thick batter which still drops easily from the spoon with a strong flick of the wrist. Take heaped tablespoonfuls of the batter and put onto the prepared baking tray. No need to flatten the cookies, as they will flatten and spread quite a bit during the bake time. Space the cookies out so that there is at least 2 inches of space in between the cookies. Bake for 10 minutes and let them cool for at least 5 minutes on a wire rack before serving.
Once they are done baking, sprinkle on some coarse salt (I use Maldon) on each cookie. Finally, apply generously to face!
It started with a birthday. It had to be done: something simple and stress-free. This cake post has been in the works for a while, not because it necessarily needed a lot of tweaking, but more due to the fact that I haven’t taken a picture of my actual, circular cake yet, and went straight to going crazy with the blondie version, which this cake seamless transforms into. I have made olive oil cakes before, but the combination of the zing-zang-pop of tart lemons, and many glugs of heady liquid fat, is special.
I know, you’ll be standing there in your kitchen, pouring all that quality oil into your bowl, thinking, what a waste! But no! No. In the parlance of Zadie Smith’s stance on love and relationships, it hurts as much as it’s worth.

The beauty of these one-bowl recipes, as usual, lie in their ease and grace. You simply mix together the wet ingredients first, then tip in the dry, then you sprinkle on some granulated sugar before baking to get this beautiful golden, crackly top once it is finished baking in the oven.
As pictured below, I reveal to you a more behind the scenes shot of recipe testing, which included plenty of char, which I don’t mind but is not particularly photogenic. Nevertheless, it was just as sublime, darkness and all.

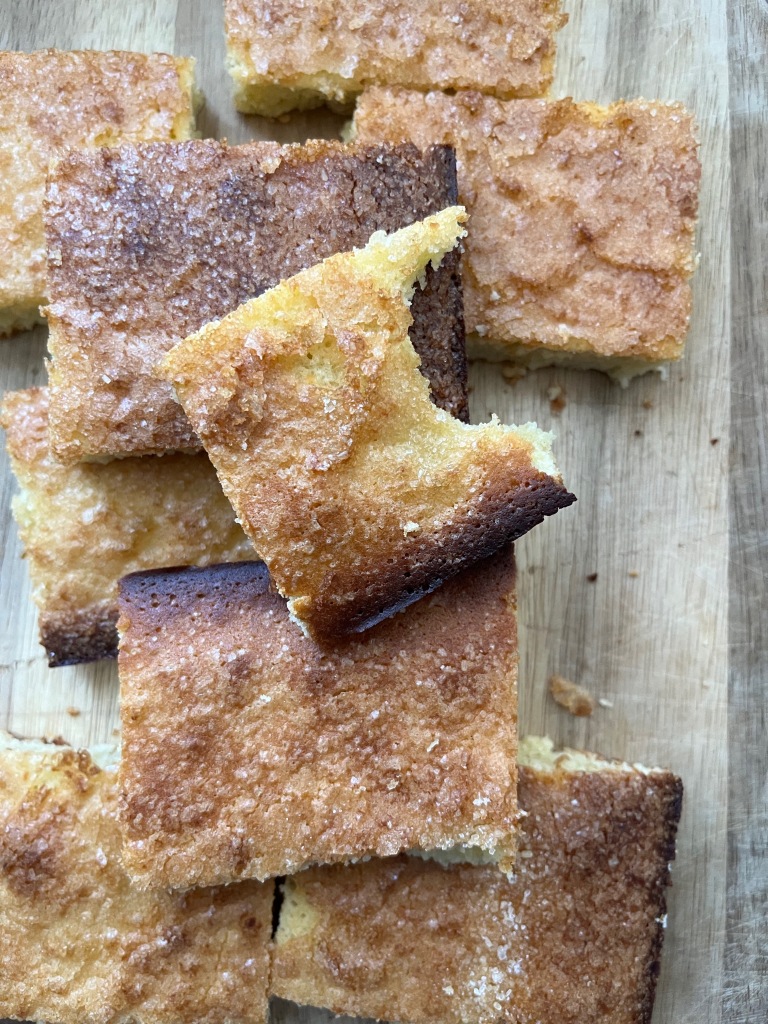
My friends being the sweet guinea pigs that they are, have been devotees of this simple yellow cake. It has crisp edges and a fudgy middle, so it is pretty much right smack in the middle of being a cake and a blondie. You truly get the best of both worlds. Although the granulated sugar sprinkle at the end of the cake-making process is optional, it’s mostly a must, making for the most delicate crispy crust hugging the top and corners.
Lemon olive oil cake (for one 9-inch cake, serves 8-9)
Ingredients
The juice and rind of 2 lemons
3 eggs
210g (around a little more than a cup) white sugar
1 tsp fine salt
250g plain flour
1 tsp baking powder
240ml (1 cup) extra virgin olive oil
3-4 tbsp granulated sugar for sprinkling
Directions
Preheat your oven to 180C (350F) and line a 9×9-inch square tin or a 9-inch circular baking pan with parchment paper. I recommend using a pan with a removeable bottom, as it makes removing the cake later a piece of cake (haha).
In a large bowl, whisk together the eggs, sugar, salt, lemon juice and rind. Tip the flour and baking powder on top, and use the same whisk to first gently whisk the flour and baking powder that is sitting on top of the liquid batter briefly, then slowly incorporate everything together until you get a nice, homogenous batter. The batter should be yellow and rather liquidy, so it drops easily from your whisk. Pour the batter (and it should be easy to pour) into your prepared pan and sprinkle on the coarse granulated sugar all over the top. You may need slightly more than the quantity described in the ingredients list, according to your taste. Bake for half an hour. Check at the half hour mark with a wooden skewer inserted into the middle of the cake; if the skewer emerges with moist crumbs, then remove and let cool for 20 minutes before cutting and serving. Bake for another 10 minutes if the skewer comes out still looking quite wet. The top should have a beautiful and the sides will have darkened slightly. Once the cake is cool, you can dust the top with icing sugar and maybe even some dried lemon slices. Serve with cream or ice cream!
Until next time,
Alex

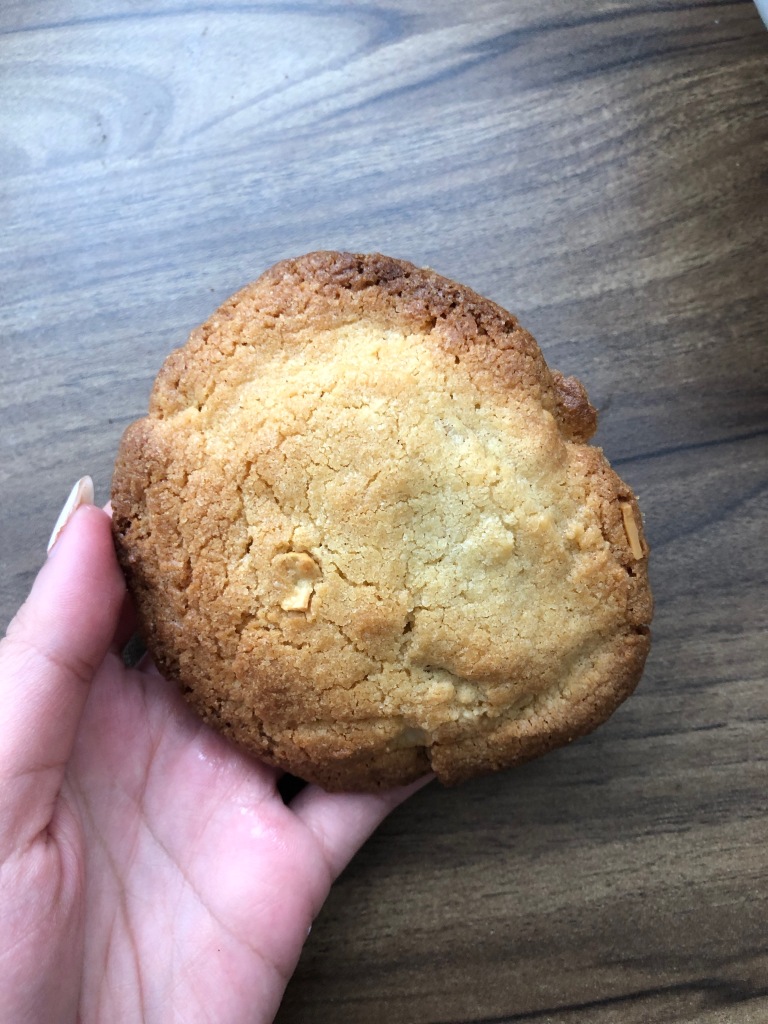
This. These! I have been making these repeatedly the past 3 or so months (aside from my banana bread). A hybrid of blondie and muffin, you get devilishly chewy edges and a soft, plump, risen middle, bursting with coffee flavour. I have no excuse for a late post, I just really have been enjoying making these and not much else, unless you count a load of pasta dishes following by disappointment with HelloFresh. I used to be a big fan, but now, not as much. So haphazard kitchen experimentation it is.


The secret ingredient is the instant coffee powder– don’t scoff until you’ve tried it. It blends in so easily with the batter and melts in the oven, but you may get little specks of the stuff in the final thing, which only enhances the coffee narrative.
Coffee blondies, makes 6-7 muffins or one loaf of blondies
Ingredients
100g butter, at room temperature
50g light brown sugar
50g white sugar
1 egg
1/2 tsp fine salt
110g plain flour
1 tsp instant coffee
1/2 tsp baking powder
Directions
Preheat your oven to 180C (350F) and prepare 6-7 muffin liners. Alternatively, grease a standard 9×5-inch loaf pan; you can use this mold for the same batter and its quantity.
In a medium bowl, whisk together the soft butter, sugars and salt using a strong metal whisk. Use a rubber spatula to help cream everything together. Once pale and fluffy, add the egg and whisk that in well. Then tip in the flour, baking powder and instant coffee. Use the rubber spatula to fold the dry ingredients into the wet.
Scoop large tablespoonfuls of batter into the muffin liners, or scrape everything into the loaf pan. Bake for 20 mins. Insert a wooden skewer into the centre after 20 minutes- if it comes out wet then bake for 3-5 more minutes, or until the skewer emerges again with moist crumbs. Let the muffin liners or loaf pan sit for 10 minutes on a cooling rack before cutting and serving. Best enjoyed alone with a cup of coffee. Perfect.

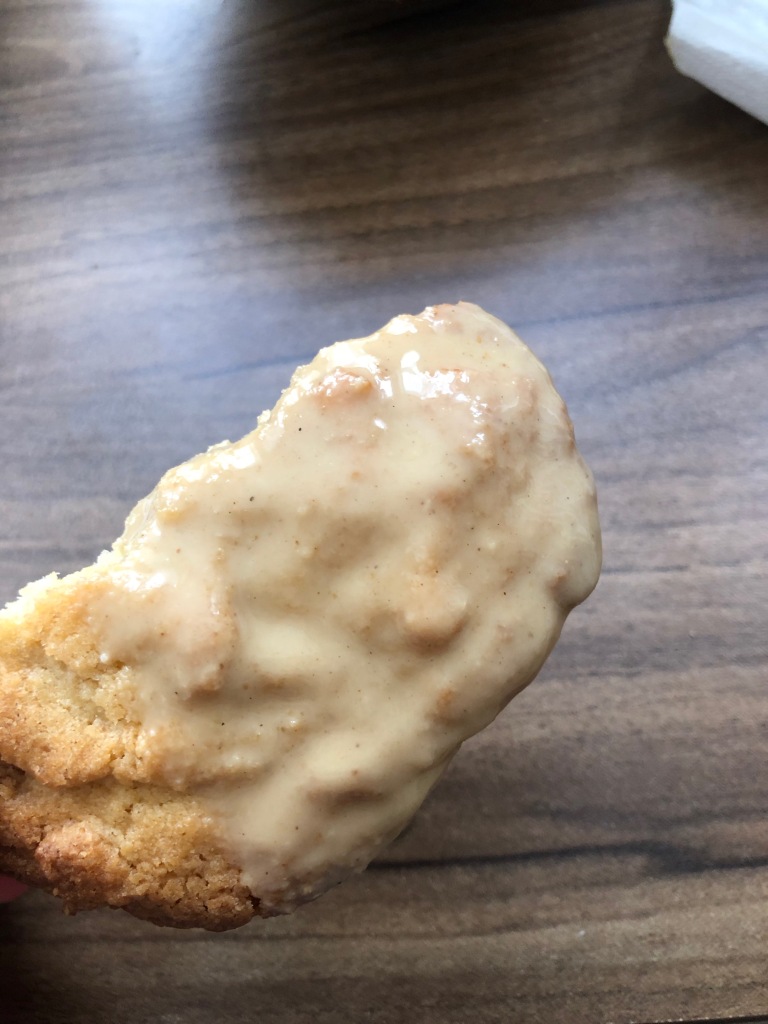
For anyone who doesn’t know, I was vegan for almost two years, not too long ago now. During that time, I discovered the versatility of the humble sesame paste. I stopped using it so much after moving to Oxford, but rediscovered how beautifully it blends into bakes just yesterday when I trialled these cookies for a third time. The taste just doesn’t fade, unlike a lot of other things like maple syrup, matcha or honey, of which you can end up using quite a bit of because the flavour is easily lost while baking. Anyway, this cookie…! It got all my flatmates’ seals of approval, much to my surprise, since tahini can very much be a love/hate thing.
The café near me actually does these amazing tahini chocolate cookies, which inspired me to make use of the stuff again. I have done tahini chocolate cookies before, but thought I would do a little twist with another earthy and grounding element- nuts. The result: fabulous. Definitely my favourite bake of June so far.
These cookies are light, chewy, not too sweet, and most importantly, the tahini is the main character of the show.
Tahini cashew cookies (makes 8-10 medium cookies)
Ingredients
100g butter, soft and at room temperature
160g white sugar
1/2 tsp salt
100g light tahini
1 egg
150g plain flour (optional: substitute half with whole-wheat flour)
1/2 tsp baking soda
1/2 tsp baking powder
50g cashews, chopped
Directions
Preheat your oven to 180C (350F) and line a baking tray with parchment paper. If you only have aluminium foil that works too, but bake the cookies for 5 minutes shorter. In a medium bowl, whisk together the soft butter, sugar and salt. Add the egg and tahini and whisk those in well too.
In a separate bowl, briefly whisk together the flour, baking soda, baking powder and chopped cashews, then tip that into the wet mix and use a rubber spatula or wooden spoon to mix everything together well. The batter should be quite sticky, not dry at all. Take heaped tablespoonfuls of batter and shape them into balls. If you want to get real precise, each medium cookie will be 52g. I did this and the yield was around 10 medium cookies.
Bake for 18 minutes but check at the 15-minute mark to see if the edges have browned slightly; once this has happened remove the tray from the oven and let them cool and set. The insides will be very chewy as they set, the edges nicely browned without being burnt.
Enjoy warm dipped into more tahini or with ice cream on top!

My first Oxford review must be dedicated to Hamblin. Not by choice, but by instinct. As I smuggled bites of their cardamom bun into my mouth while walking all that way home, I knew I found quite a gem. The long walk there from home seemed contrary to the desire to make this a regular haunt, but honestly all that fitness just fosters a more reasonable state of mind to pick and choose the baked goods, while upping the excitement along the way.
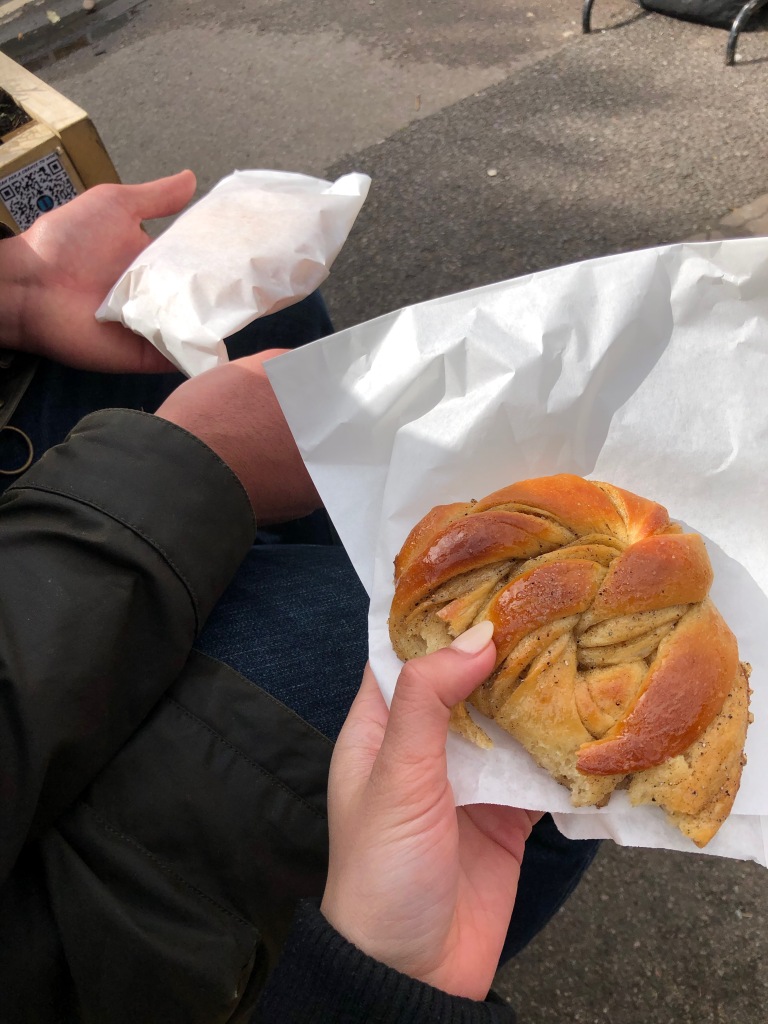
My top pick here must be the cardamom buns. They also do a whole range of other buns, including cinnamon and custard (below), but this remains top of the list for me. The edges are perfectly browned and crispy without being flaky, characteristic of a traditional cardamom bun. The cardamom flavour itself holds its own.


Leftover or stale cardamom buns are also used to make this cardamom bread pudding which is both genius and delicious. A harder, sugary crumb crowns the slab of soft, squidgy deliciousness.

This very simple cookie is chewy all the way through to the edges. This is the perfect chocolate chip cookie to me- a cute and manageable size, not too sweet, rough chunks of dark chocolate, a hearty mouthfeel with the fresh, locally-milled flour, and doesn’t leave you feeling sick, either. Speaking of flour, their infamous sourdough (below) is all the rage for all the right reasons. The crumb is thick, robust and tender, slightly stiff but never dry. The terrain is perfect for spreading on soft, salted butter.


The potato pasty sounds like an unnecessary carb-on-carb affair but I see why it’s so popular. The sizeable chunks of potato are never mushy or mixed with a bunch of random, weird herbs.
I do miss London with all her cafés, but places like this bring her right back to Oxford. There are so many hardworking, independent café owners that know exactly what they’re doing with the magic they offer day-to-day, and I’m living to promote it.

Hamblin Bread
247 Iffley Road
Oxford
Rating: 5/5
