Eggless French Toast

Processed with VSCOcam with f2 preset Processed with VSCOcam with f2 preset 
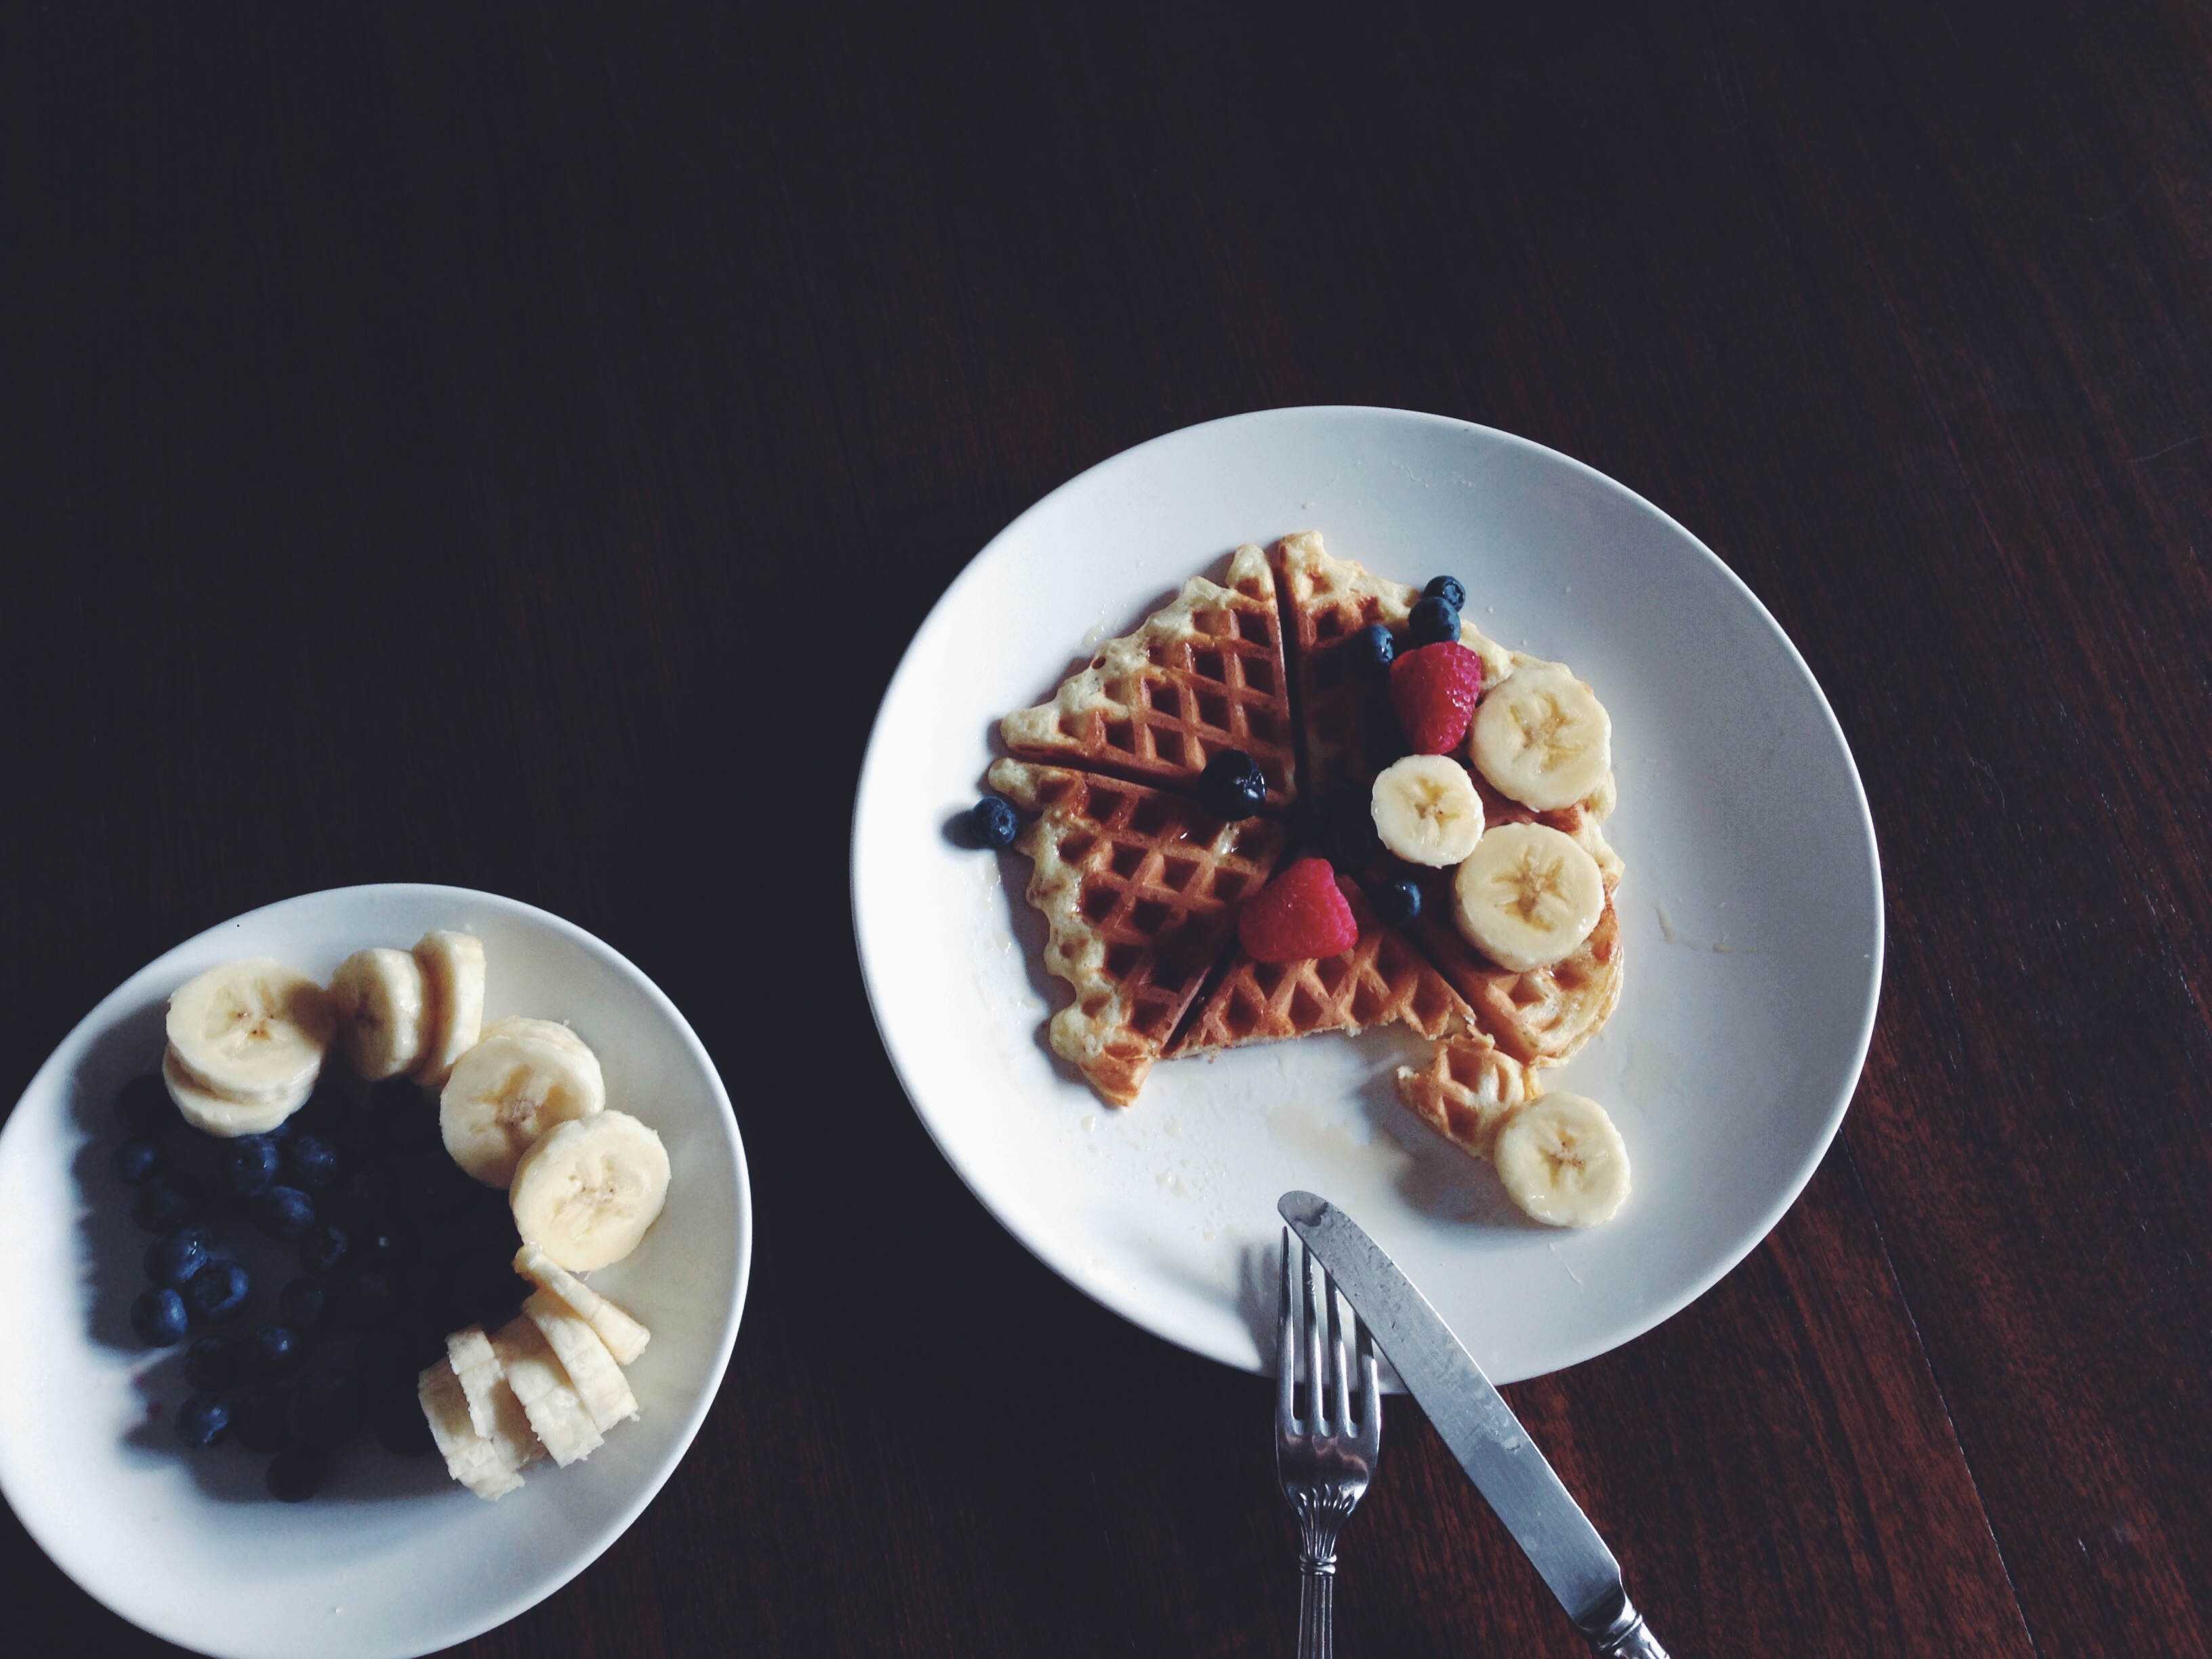
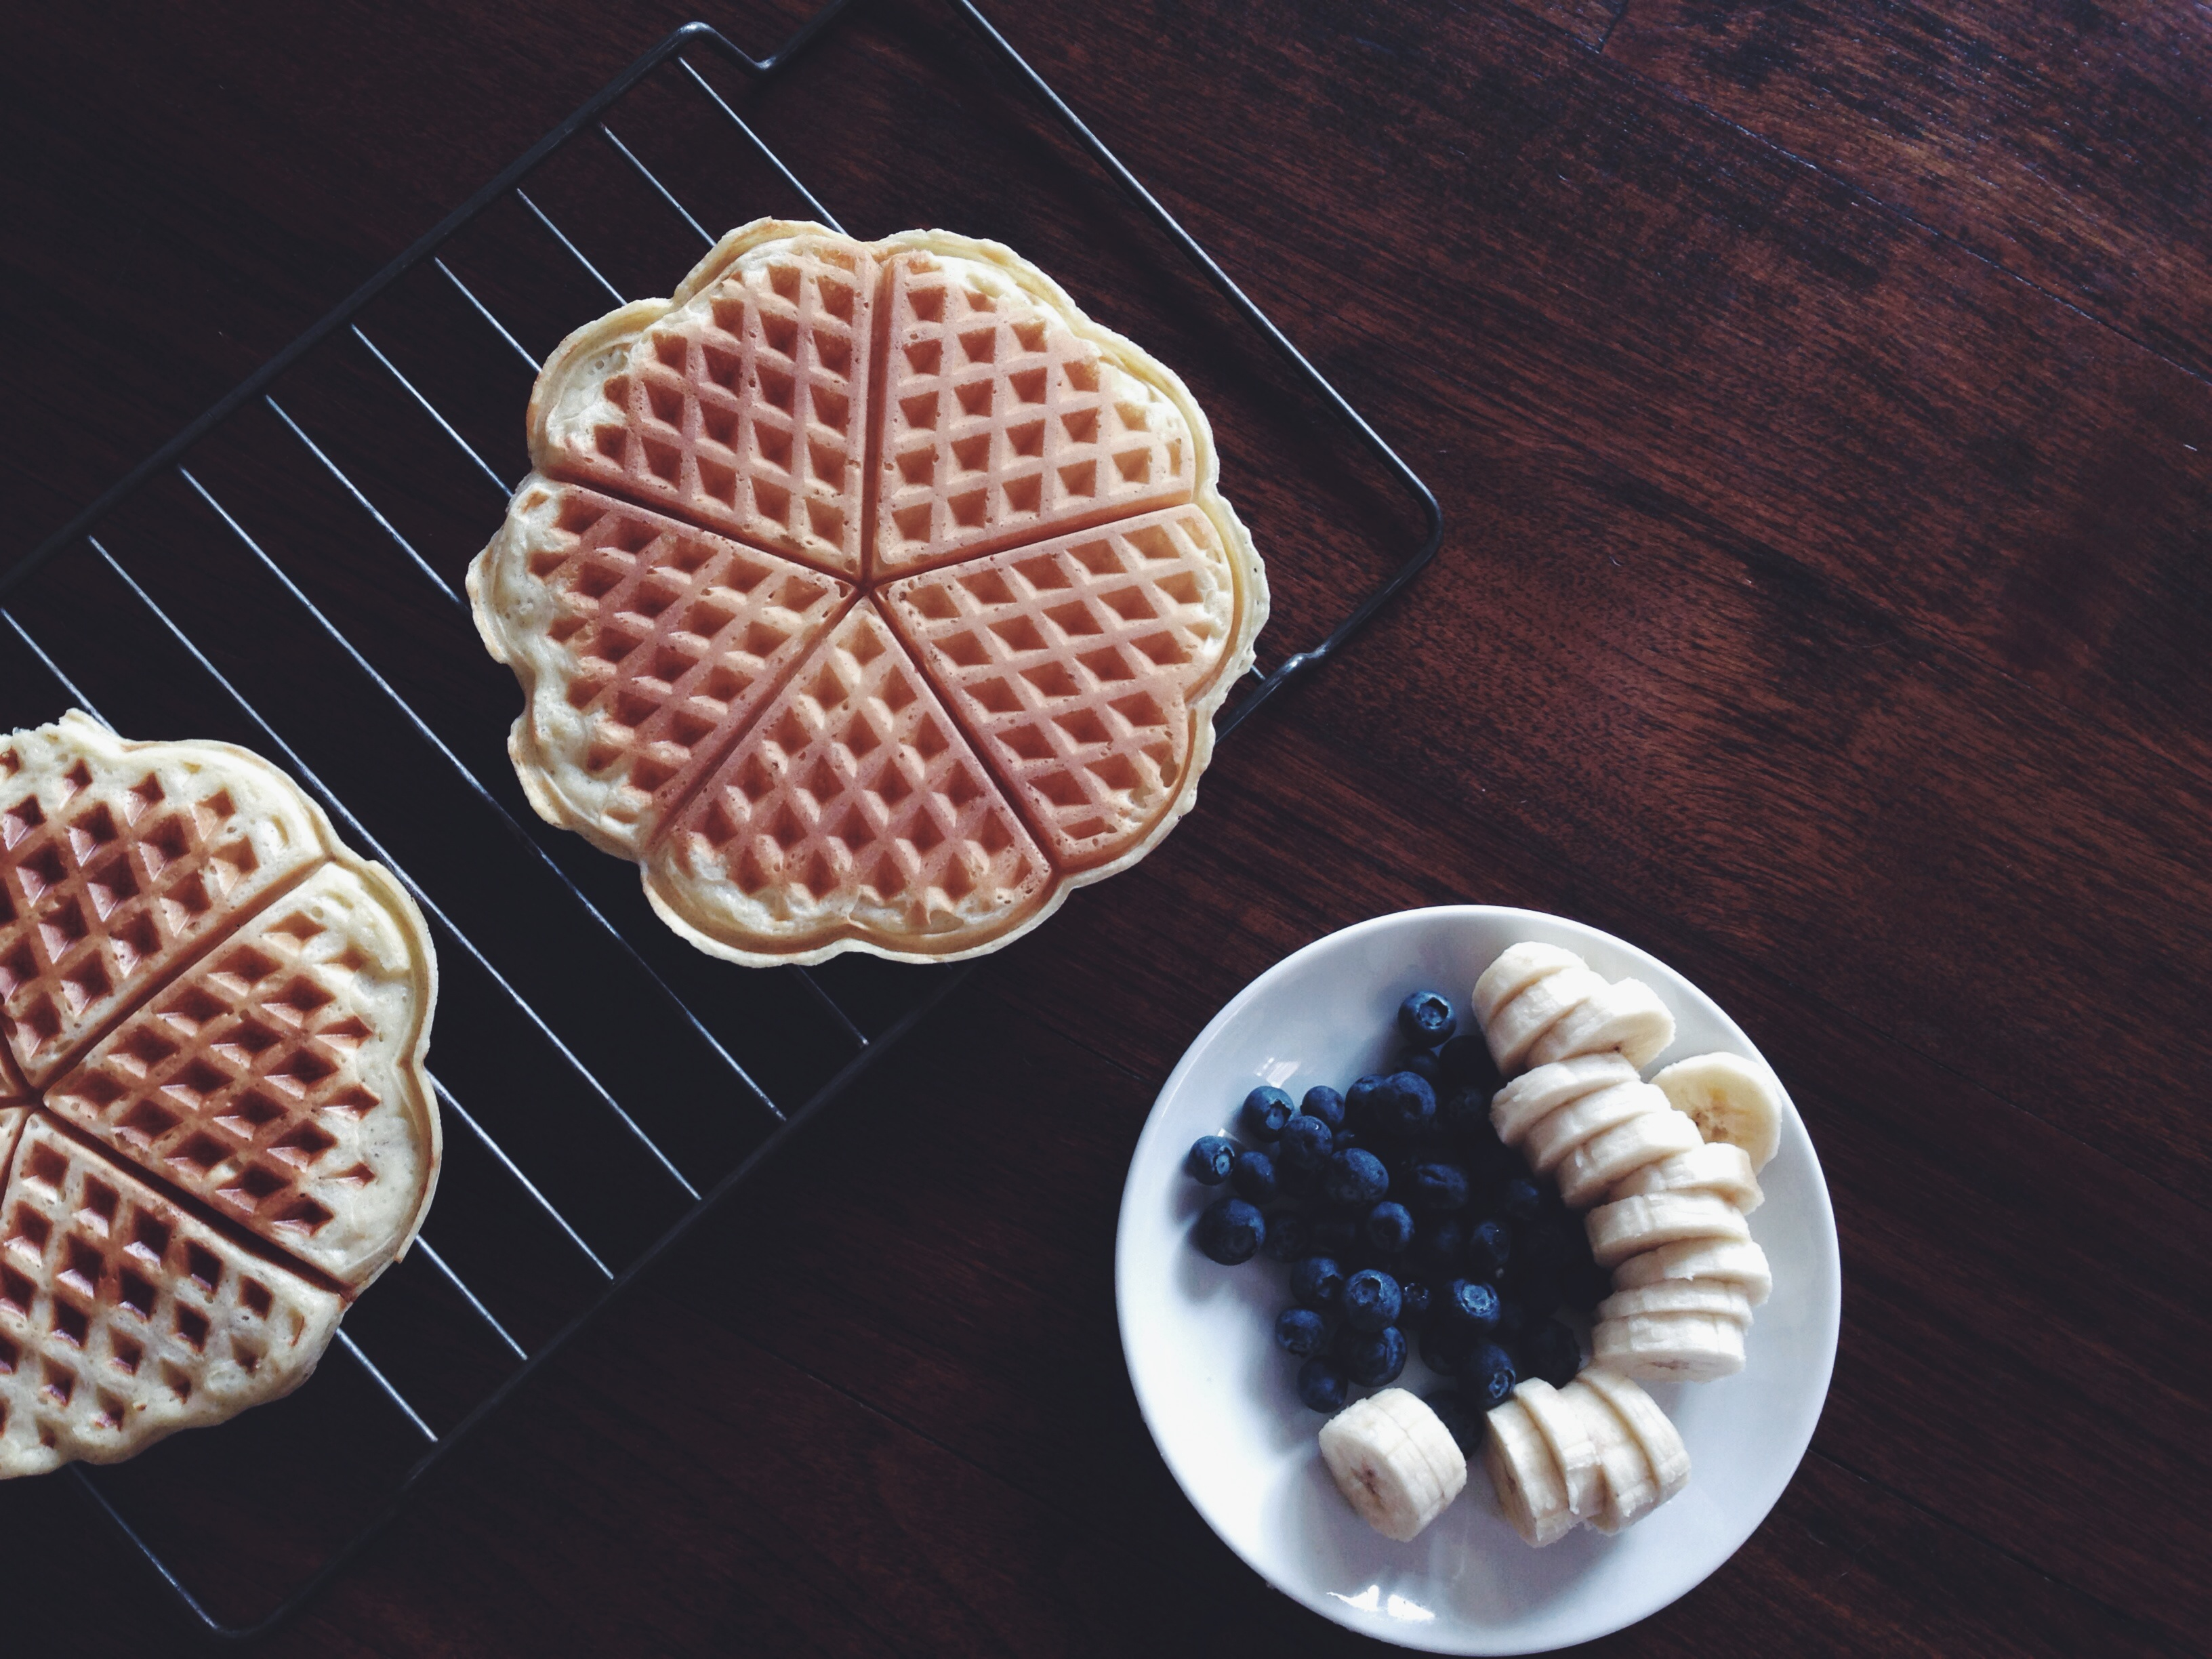
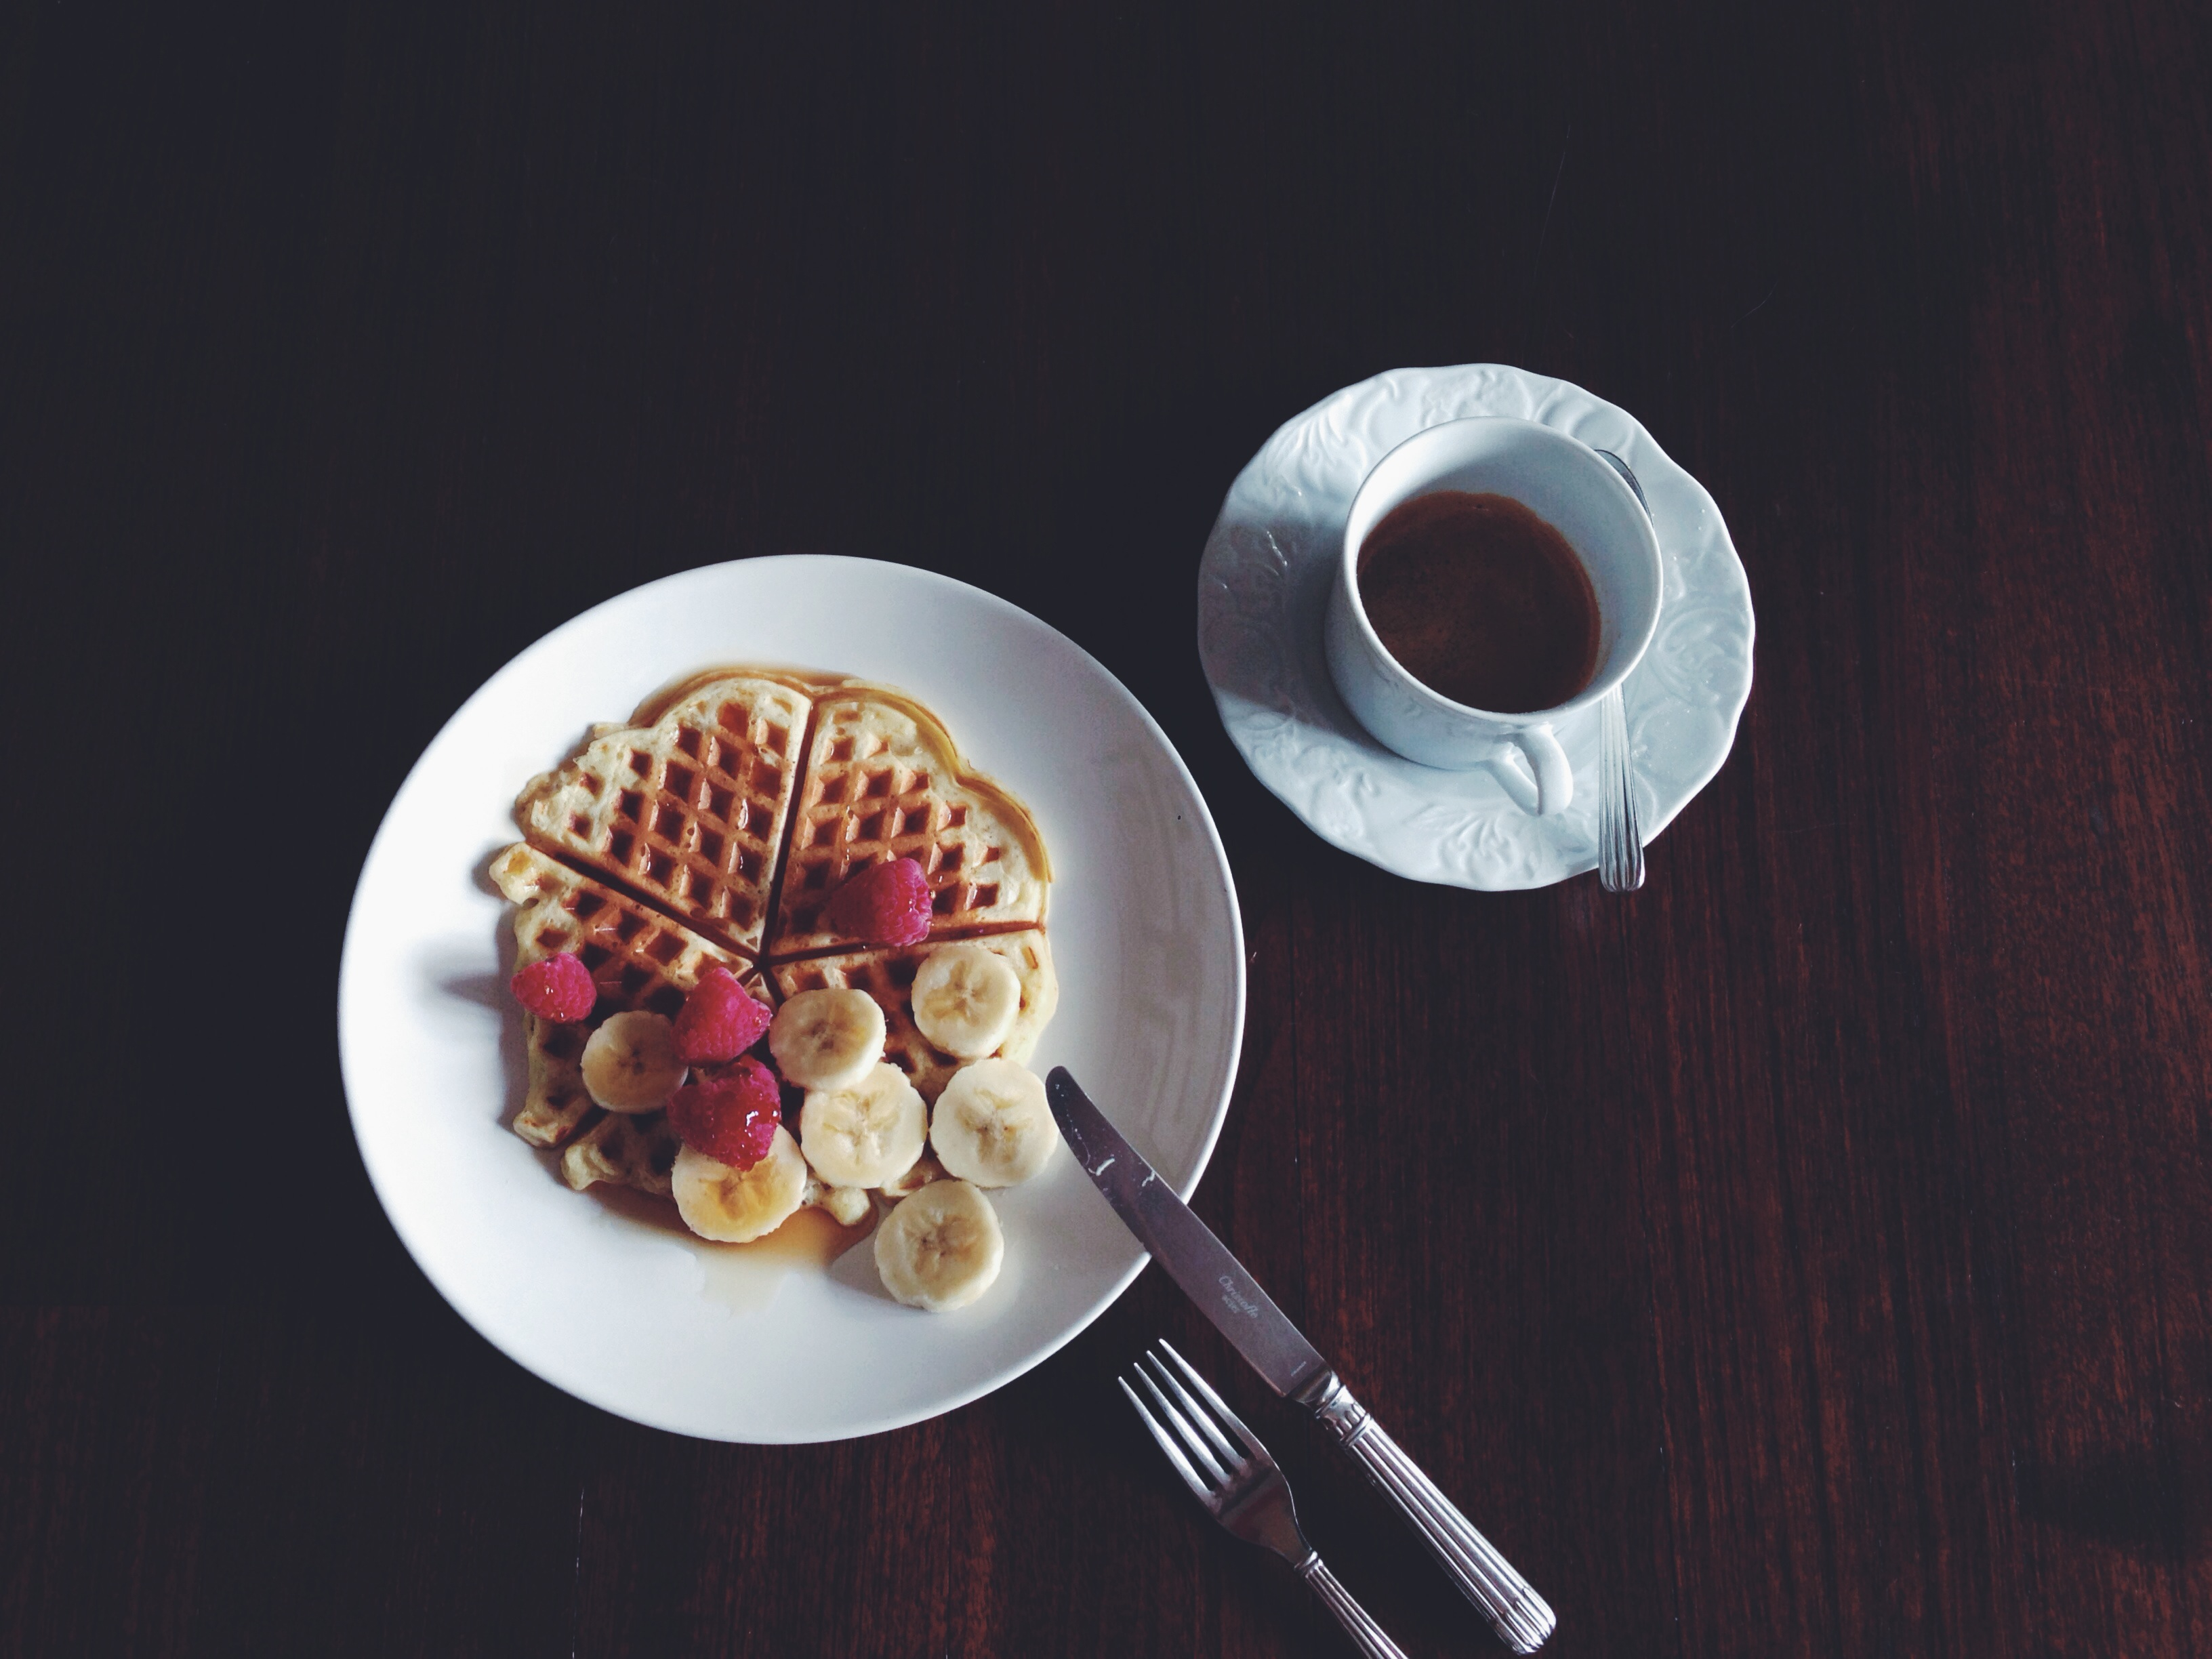
Well here’s to the longest hiatus ever, everyone! I have finally emerged from underneath the suffocating mounds of work. Free from an aching heart, mind and soul. It’s ridiculously liberating, and what better way to celebrate than a long-awaited post? It feels weird to have the time to do things like this, but I guess I better get used to it. I’ll be keeping more updated on comments, questions and posts. There’s just no excuse this time. This one’s a short recipe, nothing grandiloquent. But. This french toast is special to me because I’ve been using it quite frequently for the past 3 years or so, after modifying it myself from various sources. I only recently realised that it’s never been properly shared with anyone. It’s basically a vegan french toast recipe, with my own twist on a basic formula of mashed banana and milk. The quirk? The kind twang of yoghurt and a burst of cinnamon. Simple, fresh, wholesome. Its just french toast, but the glorious main star of the batter, mashed banana, makes for the most wonderful naturally sweet exterior. It yields a caramelised banana crust, almost with a charred taste and texture, depending on how ‘done’ you want the final result to be. Who am I kidding, it’s just french toast. But I must talk about it, before I forget tomorrow, and probably the day after. My french toast. The toppings are totally subjective. In the picture above, I used maple syrup, fruit and my mum’s homemade pistachio butter, which goes superbly with most everything you can think of. Breakfast foods, at that. Butter and maple syrup or honey would work a peach. Keep in mind that you don’t need too much sweetener thanks to the natural sweetness of the bananas. A caramelised golden banana coat to keep the inside warm and fluffy. The same goes for having it straight-up plain. Or why not make it a glorious peanut butter and jelly-stuffed sandwich. Maybe some chocolate spread and melted marshmallows. I might be taking it a bit too far here. Just, you know, some ideas. And if you have some ice cream…

Eggless French Toast For One

Preheat your pan on medium-high heat. Take two slices (or three, if you wish) of soft bread of your choice, such as buttery brioche or, unsalted butter from the fridge to let it warm up a little. Take half a banana (ripe if you’re lucky) and mash it up with a fork. Add a good splash of whatever milk (quarter cup, or 59ml) you want and mix that in well. My favourite is my mum’s gorgeous homemade almond milk– all thick, creamy and rich. Whole milk will work beautifully as well. The texture should be thick, much thicker than your typical liquidy french toast batter, and little chunks of banana are fine. Add a tablespoon of yoghurt, a squeeze of honey or any sweetener you desire, and a dash of cinnamon. Mix mix mix. Just one fork, a shallow dish and a handful of ingredients. No mess, no fuss. Take a good knob of butter (around a tablespoon) and let that sizzle on the pan. Drench both sides your slices, one by one, in the thick mixture. A little excess is fine– it actually makes for a better crust. Place slices on the preheated, buttered griddle or pan and let cook for around 2-3 minutes on each side. Have a quick peek underneath if you’re not sure, because every pan and fire is different. It should be golden, with little smears and streaks of brown, and incredibly fragrant. Once one side is done, flip using a spatula. It should take around half a minute less to cook this side. For more people, simply multiply the proportions of each ingredient appropriately.

Frozen strawberry banana slushy

Processed with VSCOcam with f2 preset

 I was trying to think of something to post, just as I was whizzing up this baby you see in the picture above. Hence, it felt rather apropos to blow away the dust on my wordpress homepage with this recipe. A smoothie, really? I daren’t label it a recipe. It’s silly to think of it as a methodical process, accessorised with a baker’s meticulousness and precision, when in reality I half-heartedly thrust a few ingredients into the magical bullet robot that is the Vitamix. Whizz-bam-shoot– done. In literally a few seconds. I apologise for being dreadfully inconsistent, and I know some people have requested me to put up something new. I’ve been so caught up with work and university applications recently, it almost feels as if I need a good amount of time to get my head together and sort my life out. This whole life thing can get pretty messy, don’t you think? I wanted to do a short write-up for the sole sake of showing just how darn easy a smoothie is. Especially this one, because it’s so easy to modify and tweak.

Processed with VSCOcam with f2 preset

 Before I list the paltry amount of ingredients (and there really is nothing more to it), I want to address one of the questions I got on my ask.fm account. A lovely someone wanted to know if and how I overcame any specific personal problem, so I guess I’ll share it here. When I was in 9th grade, I was involved in a spate of cyberbullying. I was the bullied (surprise surprise). It all started when a couple of nasty girls decided it would be fun to call me bad things. At the time, I had a Formspring account (goodness, doesn’t that word sound ancient?), and they used this platform to send anonymous questions, in which they called me all sorts of things, including a word which starts with an ‘s’ and basically means excessively promiscuous. Of course, I didn’t do anything of the sort. I think it stemmed from the fact that I happened to like someone who the bully fancied first. It was all very childish and unnecessary. And yet, it pulled me into one of the darkest phases of my life. I loved books and science and yes, I liked boys, but not to that extent. So to hear all this, from some faceless ‘stranger’, perturbed me. My self-esteem went right down the drain. I clearly remember looking in the mirror in the mornings and giving a start to my swollen eyes. Even if I woke up feeling alright, those eyes gave way to all the horrid thoughts of the day before, clouding my nights with salty waterfalls. School was an unbearable thought.

Little did I know that this person, or the supposed leader of this small group, was someone I considered one of my very good friends. Someone I shared secrets and corny jokes with. Someone I sat next to the year before in English class. One day I couldn’t take the online comments any longer, and told my mum. Initially, I desperately didn’t want to get her involved, because I refused to make a mountain out of a molehill. But the pain ate at my gut for days on end. Rumours about me spread in school. All these false, ear-bending whispers. I didn’t know who to trust, who I could talk to. I couldn’t concentrate on anything else properly. Thank goodness I confided in her, for it felt like the biggest load was lifted right off my shoulders. She was shocked, but sympathetic. ‘God, of course not!’ I shrieked, when she told me she was making plans to report it to the school councillor. I would be known as the coward without the confidence to face the enemy. But how could I, given I had no clue who it was? Ah, my mother. I’m truly grateful for her existence; she really did make me feel at least thrice as better. Her support was solid, unwavering. It always has been. Anyways, as I was about to report the situation to an ‘adult figure’, one of the bullies confessed to me in school. Just one. Although I was hurt, I was grateful she approached me, for at least then I didn’t have to walk around school suspecting the motives of every single person I walked past.

Ultimately, what helped me recover from that phase was confidence. Confidence to just take one step forward, and stop caring so much about what other people thought of me. The melodrama made me value who my close friends really were, and I’m grateful for all the new ones I’ve made in recent years. The bullies made my life a living nightmare for a while, especially at that age when social circles pretty much determined my degree of self-worth. But that’s exactly it– for a while. The Bard says that ‘time and the hour runs through the roughest day’. You can’t trust everyone, but you can trust yourself to let your confidence do the talking. It was simply no use to let myself be bogged down by mere comments, or let the quality of my life suffer. Be confident. Be independent. Smoothies help too, you know.

Processed with VSCOcam with f2 preset Processed with VSCOcam with f2 preset


Frozen strawberry banana slushy (serves 1)

One cup of frozen strawberries 

One frozen, ripe banana

half cup milk of choice (I used almond here)

2 tablespoons greek yoghurt

good squeeze of thick honey or maple syrup, if you’re feeling particularly decadent (the imprecision here is horrifying, but in the morning, with gunk-crusted eye corners and droopy lids, a ‘good squeeze’ is indeed subjective…)

Optional: a few cubes of pineapple/ handful of spinach/ a splash of vanilla extract

To freeze the fruit, chop your bananas into rough coins and lay them in a single layer on a tray, before putting it in the freezer. The single layer makes it easier to remove when you take it out of the freezer, though you have to wait a couple of minutes or so. You could just put them in a bowl, but it’ll take a tad longer to thaw. It’s like a nightly ritual for me. I should really start doing normal teenage things….

In the morning, or whenever you feel like having something luscious, creamy and refreshing, throw all the ingredients into your Vitamix or blender, and… well, not much explanation is needed from this point, is there? Adjust the thickness to your liking, by adding more frozen fruit or more milk, to make it thicker or thinner respectively. Stick in a straw or opt instead for the frozen fruit-stache. That’s a fun one. I personally like it very thick and icy, so I can spoon it all with glee. Morning ice cream, anyone?

Overnight Yeast Brown Butter Waffles

Processed with VSCOcam with f2 preset

Curved edges. Waffles. Graphs and polynomials. It’s officially that time of year again, when the work eats at you like a parasite but the grey matter just doesn’t feel quite up to it. I wish I could blog more regularly, but then again it’s pretty comforting to know that I’ve found a nice momentum, one which doesn’t eat into too much of my time. Seeing that mock exams are nearing, this will probably be the last post for quite a while. But back to the subject and good mood of it all. This waffle beats so many I’ve tried elsewhere, and it was only my first time!

I don’t think it’s right to proclaim myself a waffle lover without having tried to make the enigmatic things myself. I mean honestly, I’ve tried too many to keep track. Call one a café hopper, waffle connoisseur, waffle whatever, but what’s criticism without humility gained from the unpredictability of a single waffle iron? And what better way to celebrate life in all its breakfast-laden glory than to use my new Severin waffle maker, with its sweet little collar? I didn’t know where to start. The problem I always have, with any recipe, is choosing from the countless resources available online. My favourite waffle, after a million waffle outings, is one with both an outrageously crisp edge, surface and interior, with just a tinge of fluffiness strewn throughout it’s (preferably thin) body. Nothing bread-dense nor tooth-shattering. It’s towards the tooth-shattering end of the spectrum, but not at all dramatic. See the picture above? Yeah, that was more of a trial. Crisp factor improved as the ladling progressed. I’m still learning, friends. It’s earthy, dark from the searing heat of the iron, mildly sweet and crisp. This recipe provides the perfect overall texture, and the secret lies within the use of both yeast and brown butter, to create a good deal of air pockets for providing the perfect crunch and chomp on first bite, and a hot, hot oven, to maintain and finalise the crisp created by the heat of the iron. The best thing is that you throw everything together the night before, which takes practically no time at all, and simply ladle in the batter into a preheated iron the morning after. Zilch waiting.

Processed with VSCOcam with f2 preset


After scrolling through so many Swedish waffle recipes, I eventually settled and adapted a normal one, which isn’t exactly made for a Swedish waffle iron, but hey, it’s a waffle iron all the same. It has one job, for goodness sake.

I myself enjoy a thin, absurdly crisp waffle with tart fruit, or a small side of crisp bacon and banana coins, which complements the mildly sweet nature of the main centrepiece. Simple. Maple syrup is must; I don’t think honey, thick or runny, or anything else actually (Hershey’s chocolate or agave syrup is a straight-up no) will ever live up to the honest, musty notes of the former majesty of a condiment.

Processed with VSCOcam with f2 preset

Processed with VSCOcam with f2 preset

Just a note on the pictures above: As you can see, the edges are not at all firmly crisp and only the centre yielded the perfect bite. After increasing my oven temperature and watching over my waffle babies oh-so carefully, I found that the perfect time to remove them was approximately 3-5 minutes. This will ensure a perfect crust and crunch both immediately after removal, and the texture is lovingly sustained for a good few minutes afterwards. This means that my sisters could still be getting washed up in the bathroom upstairs and by the time they’re ready, the waffles don’t go all soft and moist (gross!). As compared to the original recipe, I actually added a little more yeast than intended, and used a slightly lower oven temperature, since the first trial using the higher temperature of 180C caused a couple of burnt accidents. My own fault, really, but the end result was nothing short of spectacular. I also used vanilla extract in place of the vanilla paste, and it was perfectly fine, together with a hit of cinnamon and nutmeg, for a little aroma and spice-bite.

Yeast Waffles (makes 4-5 thin waffles. Adapted from here; this article opened my eyes to the wonderful world of waffle-making and brown butter. Brown butter is gorgeous. BB. So. Gorgeous.)

30g unsalted butter

125g all-purpose flour

1 egg

1 tbsp castor (fine) sugar

1 tsp fine salt

1 tsp instant yeast

1/2 tsp each of ground cinnamon and nutmeg (omit if you wish to keep your waffles plain)

200ml whole milk

The night before

That’s it! So, here we go. Make the brown butter. Melt the butter in a small saucepan (it won’t look like a lot), and continue to heat until you observe small flecks in the pan and the most gorgeous nutty smell starts wafting around the kitchen. These are the milk solids separating from the liquid. Keep heating over a medium heat; it will bubble and crackle. You’ll be able to see the entire thing darken, from a yellow pool of liquid with odd white bits into a golden amber. You might have to sweep up the bits of foam and bubbles to check the colour. At this point, remove the white flecks with a spoon. Set it aside, either on the counter or in the fridge. Put it in the fridge if you’re scared you overworked the lump of butter, but it should really be fine.

In a large bowl, whisk together the flour, sugar, salt and yeast. Whisk in the egg, and before it’s fully incorporated (it’ll look like a groggy mess of egg-white and yellow splotches), add the milk in thirds. Add a third, whisk. Add the second third, whisk. After all the milk is stirred in, add the vanilla, cinnamon, nutmeg and brown butter, and gently fold everything together. The batter will be of a medium-thick consistency. If it looks too thick, add a tablespoon or two more of milk. Cover the bowl with a piece of cling film or aluminium foil and pop it in the fridge.

The morning after

Preheat your oven (this is the important step!) to 170C (340F). Remove the bowl from the fridge and turn on your waffle maker. By now you should know that these things are worth investing (in my brutally honest opinion). Mine is preheated within five minutes, and turn it to its highest setting. While waiting for everything to warm up (oven, iron and batter), make a cup of good iced coffee (or tea, if you’re that sort) and ready whatever toppings you want. Use a small ladle or quarter-cup measurement to ladle in the batter, spreading it evenly. Follow the instructions on your own iron’s manual for heating and cooking. Mine take 5 minutes exactly to reach that perfect brown shade and hard exterior. You can keep peeking under (though not too much) to check on how it’s doing. Once it’s done to your liking, immediately remove it from the iron using a spatula and pop it into the hot oven. Ladle in more batter for your second waffle. The waffle will be perfectly crisp and golden after a couple minutes in the oven, but just check on them to be sure, and don’t burn the babies.

I’m thinking of trying out a chocolate batter next time round, and perhaps changing the volume of brown butter used. In the meantime, these work a treat. Anyone can do it.


Dark chocolate ice cubes (chocolate slushy shortcut)

I thought up this idea when I was drinking my special, potent daily brew of iced coffee.

I hate, no, loathe overly diluted coffee. The delicate roast and finish is lost in the watery jiggliness of whatever is left behind, the robust body of the bean practically eliminated from the equation altogether. It hurts, it saddens!

Until I got this baby together. Now, my coffee shall never suffer. This turned my brew into a chocolate coffee dream, the finishing sips thick and sublime. I first came across this genius of a put-together here (no, I refuse to call it a recipe, because the steps are too excruciatingly simple for that tiresome label). And trust me, they work a dream. Each little cube, no matter what size or shape your mould, is like a little frozen chocolate treat, rich and chocolatey, retaining the perfect degree of creaminess without yielding its form too quickly. 

Processed with VSCOcam with f2 preset
left– after the potion has melted a little, around 15 minutes after pouring over cold milk and leaving in the fridge to thaw just a little

Processed with VSCOcam with f2 preset

Dark chocolate ice cubes, from here

1/4 cup good cocoa powder

2 cups hot, recently boiled water

1/4 cup agave syrup/ liquid sweetener of choice

1 teaspoon each of vanilla extract and salt (optional)

Steep the cocoa in the boiled water and syrup, or alternatively heat ingredients in a saucepan until you reach the boiling point. Once this point is reached, bring heat down to a simmer. Add the vanilla and salt if you want. The original recipe does not call for either but I found it really gave it the extra pizzaz. Leave the mixture to cool for 5 minutes before pouring into an ice cube tray. Mine made around 14 large ice cubes, and this was after I cleverly managed to spill some of the mixture from the saucepan. Well done, Alex.

Leave for a few hours or overnight, and there you’ll have the most delectable, convenient chocolate treat. Eat it by itself (no teeth breaking included, hoorah!) or pour over your favourite iced coffee blend. I think the best way to have it is in a small glass of cold milk. Leave it to thaw for a few minutes before going in with a teaspoon or firm straw, and hack at it like child’s play. I swear, it makes the best chocolate slushy, or, I dare say, de-caffeinated frapp.

Carrot Cake

An indecent post, if you ask me. And this late? Oh, but you just might thank me with this one.

Processed with VSCOcam with f2 preset

Processed with VSCOcam with f2 preset


I’ve been waiting, for what almost seems like forever, to bake a carrot cake. Just once, just once! I told myself. I had to, I needed to. One of those quintessential baking know-hows. Pretty high up on the list of any baker’s signature recipes. What really got me excited was when I saw this recipe. It was then, and only then, that I had the overwhelming urge to grate some carrots and start a cream cheese party. To whip up a storm without a care in the world. I really think something like cream cheese frosting is worth the extra effort, and this is one of the best recipes I’ve tried. It beats the previous one I’ve used on cupcakes or swirled into the fudgy bosom of a brownie, with the perfect 1:3 butter to cream cheese ratio. Beats it all. 

What I particularly like in this version is the addition of applesauce, which yields an incredibly moist, wholesome and dense texture. This is by no means one of your airy-fairy cakes. No, this is a gleaming, robust, I’ve-got-more-substance-than-your-typical-vanilla-cupcake cake. Almost matronly. I implore you to try it. I’ve carried out the recipe twice– once just to test it, with a single layer, and the second to finalise my own proportions and make it my own, essentially, with a double layer and plenty of cream cheese frosting to oozing from the sides and spread all over. In the second trial, I used dark muscovado sugar instead of normal brown, which made the resulting cake even more dense and lovely, but if you prefer a slightly lighter texture, then be my guest and use the alternative. Truly deluxe, from yours truly. 

Processed with VSCOcam with f2 preset Processed with VSCOcam with f2 preset Processed with VSCOcam with f2 preset Processed with VSCOcam with f2 preset

Carrot Cake (serves 8-10, makes 2 layers)

Ingredients for the cake

150g unsalted, softened butter

3 eggs

70g chopped pecans or walnuts, or both (I used a mixture of both, and use more if you prefer a nutty surprise in your cake), and some additional (play around with the measurements here) chopped nuts for the decoration later on.

half cup white sugar

half cup firmly packed brown sugar (or dark muscovado if you’re feeling all sultry)

2 tsp vanilla extract

1 1/4 cups all-purpose flour

2 tsp baking powder

2 tsp baking soda

1 tsp salt

2 tsp ground cinnamon

230g finely grated carrots

half cup applesauce (if you use unsweetened, add an extra tablespoon of white sugar)

Ingredients for cream cheese frosting

100g room temperature butter (I really loved using salted, but unsalted is fine too)

300g room temperature cream cheese (it has, has to be very soft and pliable!)

1 1/2 cups powdered sugar, measured after sifting

2 tsp vanilla extract

Heat your oven to 177 degrees C (350 degrees F). Start by grating your carrots (I used around 3 large ones, but just as long as you get to 200-230g) Grease and flour 2 6 or 7-inch baking pans. In a large bowl and using either a hand mixer or a normal whisk and your more than capable biceps, beat the eggs and sugar together until pale and slightly fluffy. Your arms will ache and start screaming at you. Ignore their cries and carry on headstrong. Add the softened butter (half melted is perfect) and vanilla and beat to combine.

In a separate, smaller bowl, whisk together the flour, leavening agents, salt and cinnamon. The original recipe calls for this to be sifted into the wet ingredients, but I just stirred it in with a spatula. Softly fold it in, but don’t mix it in all together at once. When there are still streaks of white in the pale batter, tip in the grated carrots, chopped nuts and applesauce. Fold in until just combined. The batter should be rather wet. Divide batter between the two tins (I used a weighing scale to be more accurate at this point), and pop it in the oven for 43-45 minutes. Mine took 45; I took it out at 43 the first time and it didn’t have as nice a solid, cake-like texture, the crumb a little weak despite being very, very tasty. So 45 it was, and what a difference 45 made. Of course, it all depends on oven temperature and your climate and whatnot, so just check with a wooden skewer at 40 minutes to be on the safe side. 

When you’re waiting for it to bake, make the frosting. In a large bowl with an electrical whisk (the electrical sort really helps this time), beat the butter and vanilla until smooth and soft. Then beat in the softened cream cheese and finally, the powdered sugar. The cream cheese must be at room temperature, else you’ll end up with unsightly, miniature, irritating lumps of white in the batter. Like those ungodly whiteheads. You don’t want that. Scrape down the sides of the bowl with a spatula and just give everything a gentle mix to ensure a homogenous result. Once the cake is completely cool, which will take at least an hour (it’s worth it, promise), gently tip it out and use an offset spatula to spread about half of the frosting onto the first layer, then plop on the second layer and do the same. To speed up the cooling process, put the cake in the fridge after around 20 minutes. If you wish to do a crumb coating first and frost the sides as well, then go ahead. It just means you have to put less frosting on the first and second layers (around 1/3, not a half). So simple, this cake. Because it’s on the denser side, I didn’t have to use a serrated knife to cut through any layers, and both layers were stacked right side up, so no cutting of tops was needed.

Once it’s all assembled, sprinkle on some chopped nuts, or if you want, desiccated coconut or coconut flakes. I think the latter gives off a more pristine, sophisticated vibe, whilst the nuts make it more rugged and rustic. This cake is dense, sweet, and lovely on its own. Pair it with some good vanilla ice cream, but I think it’s better left alone. It keeps for around a week in the fridge, so have fun picking at the frosting at midnight!

Processed with VSCOcam with f2 preset