Chocolate Orange Pillow Pancakes

A little twist goes a long way in adding nuanced distinctions to established flavour profiles. I’ve always loved the classic combination of chocolate and orange, so I thought, why not try it in my all-time favourite fluffy pillow pancake recipe?

I remember finalising the recipe for this more than a year ago, and it still hits all heart strings every time I make them. No longer am I caught in the ugly morning mire of doubt and indecision. I love making new things and experimenting with different simple techniques, but what’s the use of a whole stack of badly-risen or bland pancakes when you know there’s one that’s always got your back?

Processed with VSCO with f2 preset Processed with VSCO with f2 preset

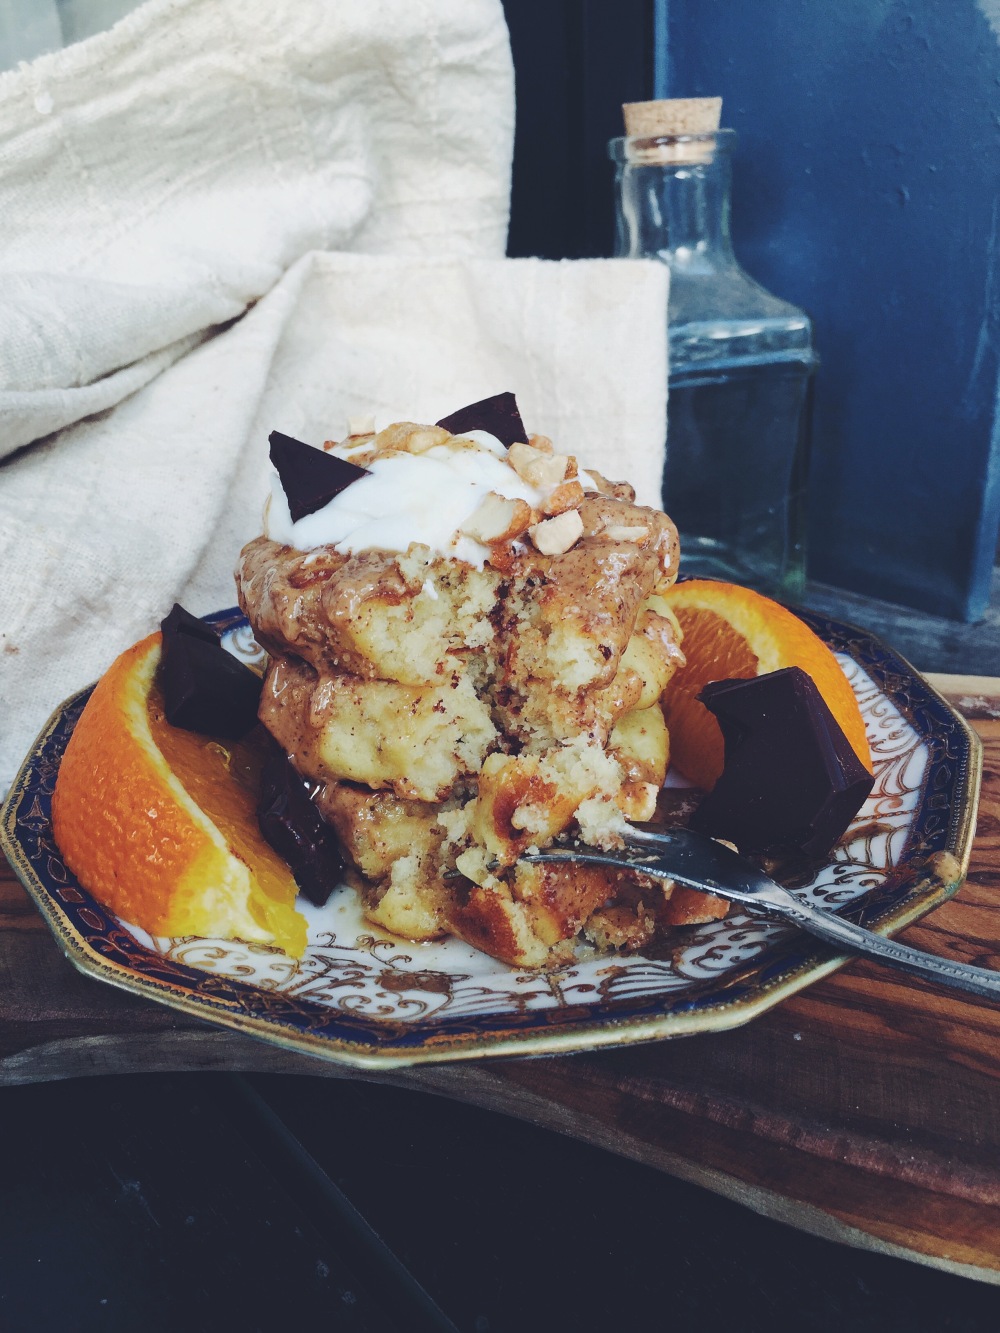
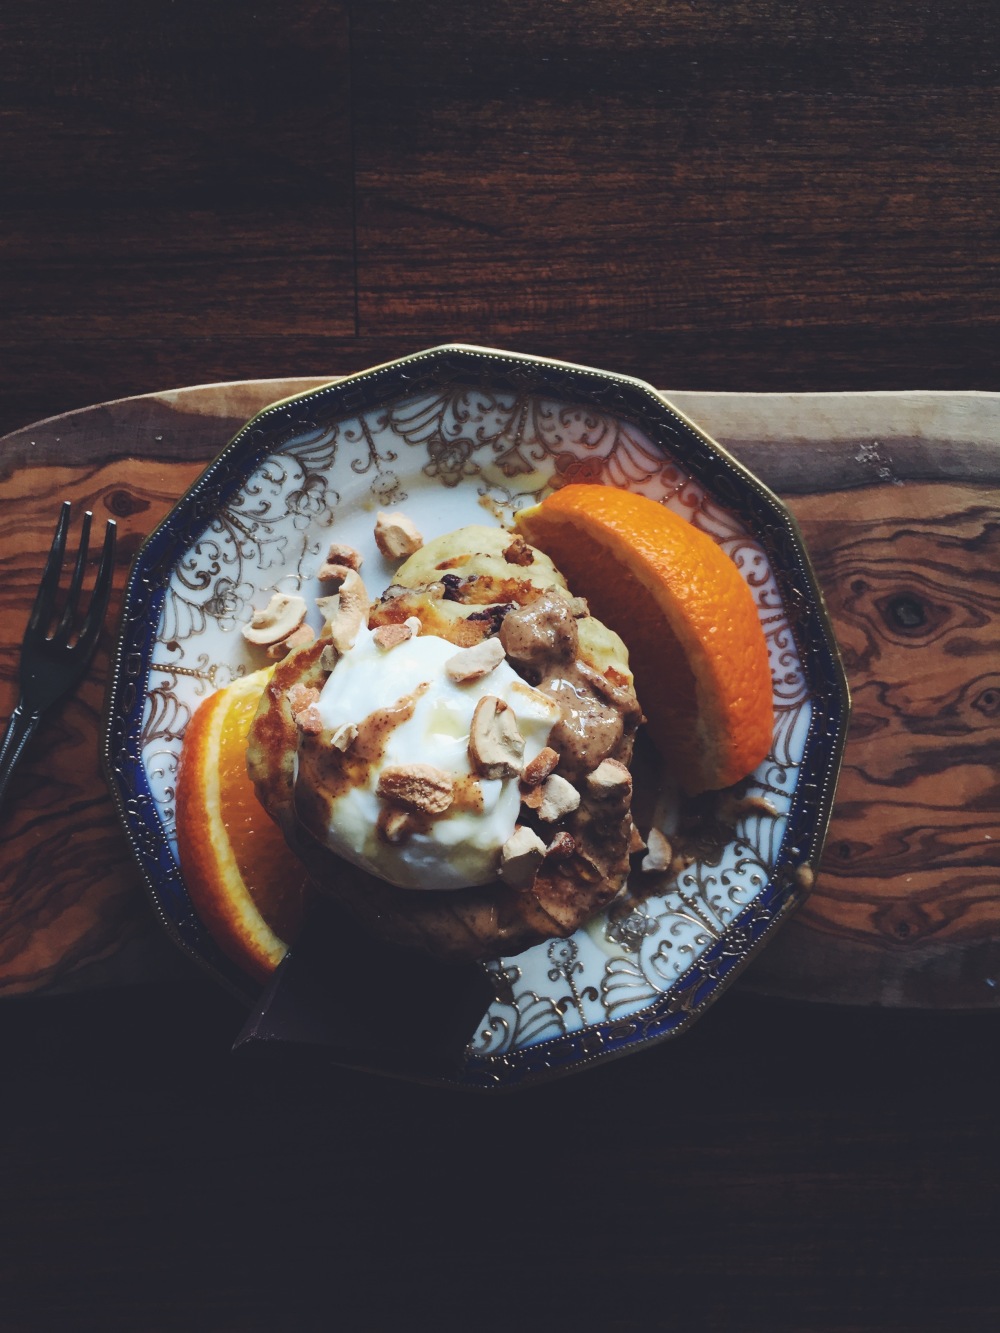
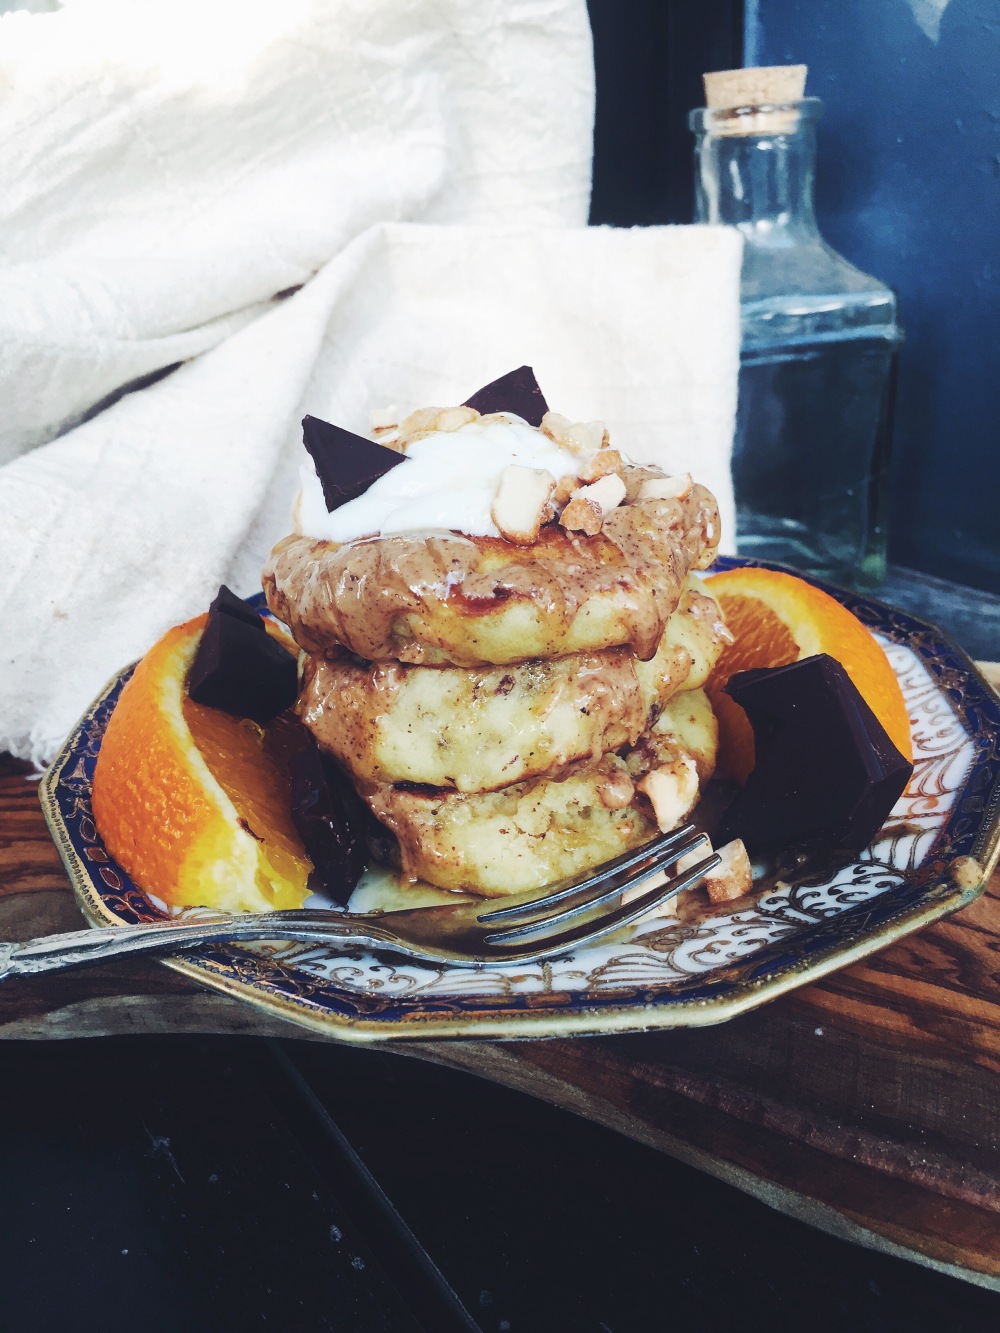
Made with real, fresh orange juice, speckled with chopped up bits of dark chocolate. Saturday respite never did look or taste so good. The tang is subtle and almost sophisticated when paired with more grown-up type chocolate.

Processed with VSCO with f2 presetProcessed with VSCO with f2 presetProcessed with VSCO with f2 preset Processed with VSCO with f2 preset

Chocolate Orange Pillow Pancakes (makes around 10, adapted from my classic pillow pancake recipe)

Ingredients

190g all-purpose flour

3 tbsp white sugar

generous pinch of salt

1 tsp baking powder

1 tsp baking soda

1 egg

50g unsalted butter (slightly less than 4 tbsp)

1 tsp vanilla extract or the insides of half a plump vanilla bean (or a skinny meek one)

120ml (1/2 cup) whole milk/ buttermilk; use store-bought or make your own by mixing 230ml whole milk with 1 tbsp white vinegar, and let the mixture sit for 5 minutes before using).

30g chopped dark chocolate (I used a bar of 70% cocoa content)

120ml (1/2 cup) freshly-squeezed orange juice; about one medium orange

Directions

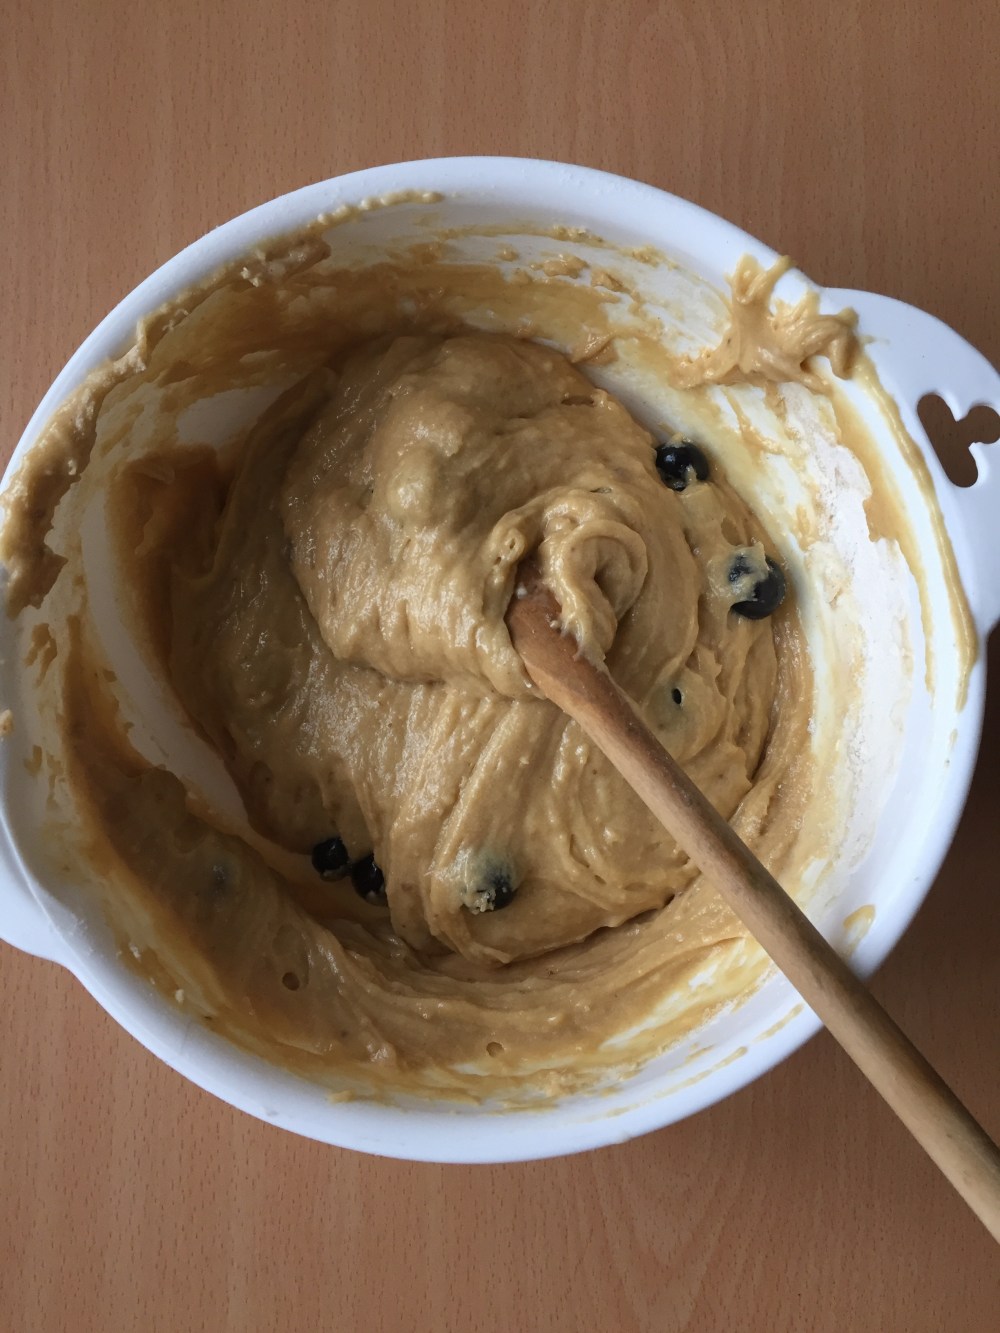
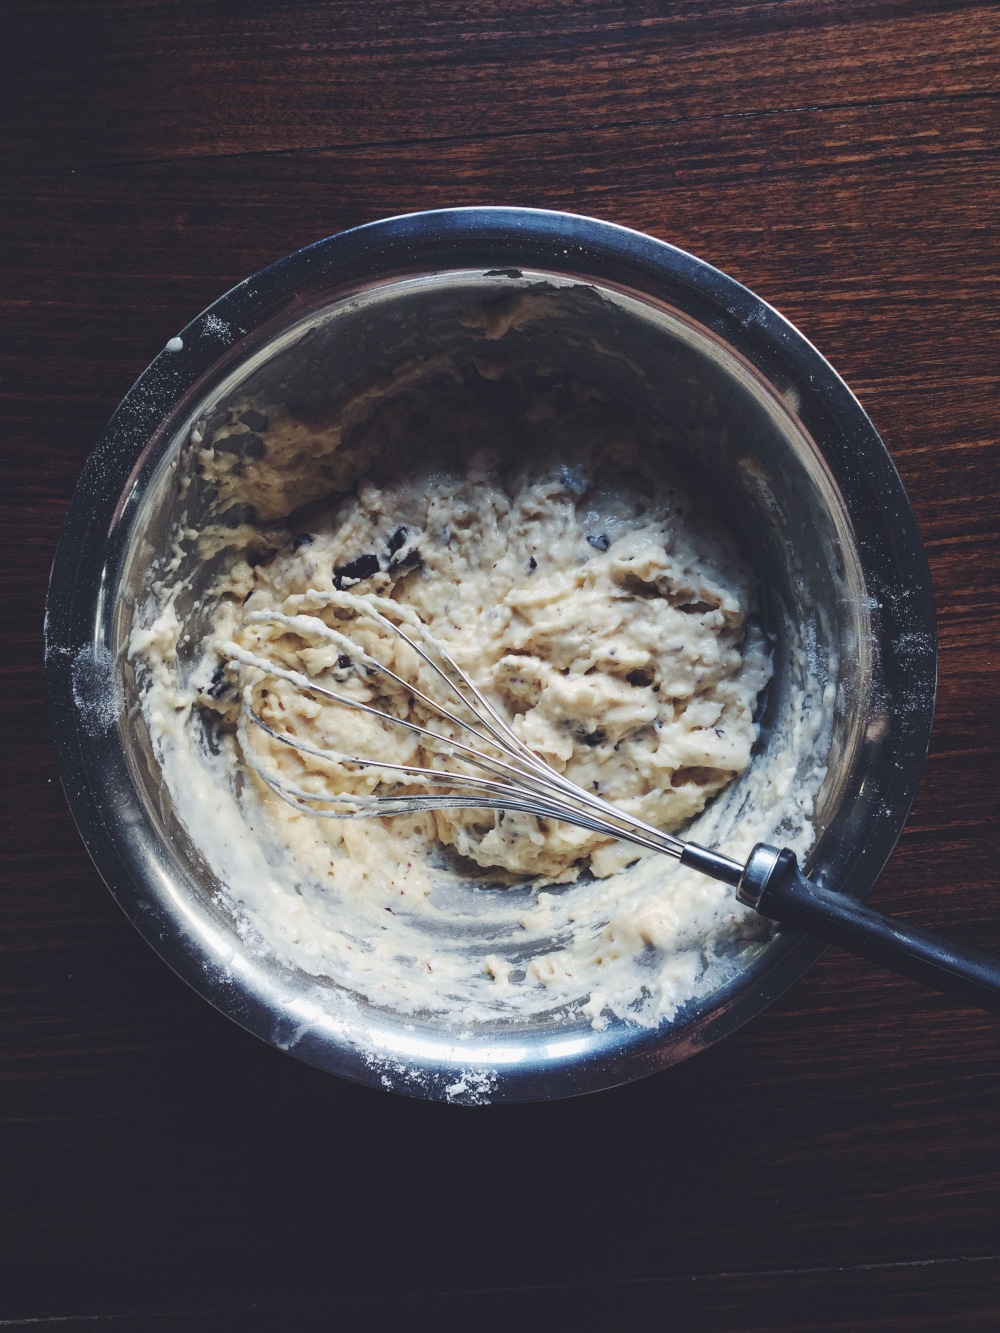
In a large bowl, whisk together the dry ingredients (flour, sugar, salt and leavening agents). In a small microwave-safe bowl, melt the butter in a microwave and set it aside, letting it cool. In another medium bowl, whisk together the egg, buttermilk, orange juice, vanilla and melted butter. Pour the wet mix into the dry mix and mix briefly with a wooden spoon or a normal dinner spoon. Continue to mix until everything is justt combined, which means there will still be a few lumps, but no more streaks of flour. The batter will be thick and somewhat lumpy.

Preheat your pan on medium heat and ready some butter. You know the pan is hot enough when you flick a little water onto its surface and there’s a clear sizzle. At that point, generously butter the pan and ladle tablespoonfuls of batter. I didn’t have to wait for bubbles to pop before flipping; the batter is thicker than usual and there’s no need to wait. Flip the pancakes when you notice the edges stiffening a little, or when you can slide your spatula whole underneath the bottom of the pancake. It will rise a little upon flipping, as if that action gives it life, and hence, breath. The surface should have a brown mosaic thanks to the hot butter. Once the second side is done (will take no more than 20 seconds), let cool on a paper towel. As mentioned above, these freeze wonderfully, so you can make a whole batch, have a small stack and stash the rest in a ziploc bag in the freezer. Easy!


Date Custard Tart with a Pistachio Crust

Processed with VSCO with f2 preset

In spite of all the pre-planning in the world, my usual baking endeavours still entail some degree of dilly-dallying beforehand. Well, not this time. I was standing in the kitchen, and knew I wanted a tart. A good tart with a finely baked crisp crust, and some sort of fudgy, gooey middle. Something with depth and exuberance and sin all round.

Put simply: I’ve been sooo into dates recently. Nothing really beats a huge, gooey medjool date. Peel one open and you get an untidy split down the middle, unveiling a thin seed and bountiful, sweet, sticky flesh. Yum. So… Date, custard, pistachios? A combination you would perhaps find in a specialty baking store, and a combination I almost haphazardly threw together. A combination that works.

Processed with VSCO with f2 presetProcessed with VSCO with f2 presetProcessed with VSCO with f2 preset

Little Maddie was all too keen on having her nose pressed up against the side of the tart shell. I look at her differently now, especially after finishing Eating Animals by Foer. I personally hold many strong views on meat-eating now, but that’s a whole other story that deserves its own section or post.

The crust itself is made of just a few things, and is completely eggless– roasted pistachios, flour, butter, sugar and salt. Et Voila. All you really need is a food processor, otherwise you could really just buy ground pistachios and mix the rest in by hand. And the custard? Another story of ease.

Processed with VSCO with f2 presetProcessed with VSCO with f2 presetProcessed with VSCO with f2 presetProcessed with VSCO with f2 preset

Dates smushed in the middle of a dense custard, offering perfect contrast to the hard exterior. The crust is buttery and flaky, holding little resistance to any give, thanks to the lack of eggs. What I like is that you can eat this tart alone hot or cold, or with ice cream/ cold whipped cream. I had a thin slice straight out the oven with a scoop of plain vanilla ice cream, which was absolute heaven. The next day, I tried it cold as I put the remains in the fridge, and that was equally sublime. The custard was more set, but if you prefer it a little more warm and watery, all you have to do is microwave it for a couple of minutes.

Processed with VSCO with f2 presetProcessed with VSCO with f2 presetProcessed with VSCO with f2 presetProcessed with VSCO with f2 preset

Date Custard Tart with a Pistachio Crust (makes 2 9-inch round tarts, or one 9-inch round and one 4×11-inch rectangular, adapted from here)


Ingredients:

For the crust:

290g (around 10oz or 2 cups) roasted, de-shelled pistachios (salted/unsalted)

260g (2 cups) plain flour

225g (1 cup) white sugar

pinch salt (not needed if you’re using salted pistachios)

250g (2 sticks+13g) unsalted butter, at room temperature


For the filling:

9 medjool dates

300ml heavy cream

1 tbsp vanilla bean paste, or 2 tsp vanilla extract

2 heaping tbsp greek yoghurt (can substitute with more heavy cream or sour cream)

4 egg yolks

3 tbsp sugar


Directions:

In a food processor, grind your pistachios until you get a coarse meal. Chuck in the flour, sugar and salt, and pulse until everything is well incorporated. Tip the mixture into a large bowl and whisk (or mix with a wooden spoon) everything, making sure the pistachio meal is evenly distributed in the dry mix. Add the softened butter, get your hands in and mix everything together. This shouldn’t take too long. The dough will be easy to break apart, yet dense and moist. Put the bowl containing the dough into the fridge for 20 minutes. Preheat your oven to 180C (350F).

After 20 minutes, take the dough out and ready your tart tins. Greasing isn’t necessary because all the butter in the dough does just the job, but if your tart molds are old and not very trustworthy, then go ahead and give them a light greasing. Break your dough in half (or store half in the freezer if you’re just making one tart) and press into your tart mold, making sure to have a thick enough layer on the bottom and sides. Bake the tart for 15 minutes.

While the crust is baking, make the filling. Whisk together the egg yolks and sugar for 5 minutes straight, or until visibly light, runny and fluffy. Whisk in the cream, yoghurt and vanilla. Once the tart crust is half-baked, remove from the oven and press in you (de-seeded) dates as shown in the picture above. The heat of the oven will soften them even more, making the insides even gooier, if such a word could exist. Pour the custard on your tart(s), then put back carefully in the oven and bake for another 10-12 minutes. Check the tart at 10 minutes– the top might have some soft brown, caramelised patches. The tart should still hold a little wobble when nudged at the side.

Remove from the oven and set on a heatproof mat or stand to let cool for a while before cutting. Eat hot with ice cream, or store in the fridge for a while, before tucking into it cold.

Salted Honey Espresso Baked Doughnuts

Processed with VSCO with f2 preset

A doughnut embodies whimsicality, but sometimes it just seems like all the dovetailing attempts have been done through and through. As I type, my mind is bathed in a blur of facts and complicated scientific concepts in preparation for the upcoming finals, like little entangled confused tendrils. However, this idea of whimsicality pulled me through a short while, sparked by an unanticipated café encounter. Being in the kitchen getting my hands dirty is more therapeutic than anything; I never saw it as something I feel obliged to do for the sake of this blog’s up keeping. Such breaks seem to serve as mind-remodelling moments, themselves acting as platforms upon which motivation is furthered and concentration enhanced. That being said, it will probably be a while before my next post, because the library beckons far too often nowadays.

Ah right, that unanticipated encounter. The other day I was at one of the most popular coffee hits around Covent Garden with a good friend, and was particularly inspired by a bucket of Joe and Seph’s posh caramel and espresso popcorn. Enamoured me so much so that I just had to buy a bucket of the stuff.

Processed with VSCO with f2 preset

Well the whole baking attempt ended with me sprinkling chopped up bits of popcorn on top (alongside whole ones right into my mouth, of course), which is an optional addition. I simply did so whilst reminiscing the root of this flavour combination. The sugary hit of caramel and espresso reeled me in, and I wanted to recreate that sweet-bitter juxtaposition in this doughnut recipe.

It’s simple and takes just 15 minutes to bake, and who doesn’t adore that? I’ll never get tired of these simple and crazy quick recipes. I’ll just let the pictures do most of the talking.

Soft and fluffy, espresso and honey-infused baked doughnuts, topped with a honey glaze and coarse salt

Processed with VSCO with f2 presetProcessed with VSCO with f2 presetProcessed with VSCO with f2 presetProcessed with VSCO with f2 presetProcessed with VSCO with f2 preset

Coarse salt doesn’t adulterate the final texture, serving only to enhance the sweetness and soft bite of just-baked dough. The idea of the cake doughnut doesn’t get old to me, because ease of make aside, there are just too many possibilities, and you can top them with anything, and can’t go wrong.

Processed with VSCO with f2 presetProcessed with VSCO with f2 preset

Salted honey espresso baked doughnuts with a salted honey glaze (makes 6 mini doughnuts)

Ingredients

For the doughnuts:

145g (1 cup + 3-4 tbsp) self-raising flour, or use all-purpose flour and add 1/2 tsp of baking powder and 1/4 tsp baking soda

pinch salt

2 tbsp cocoa powder

1/2 tsp cinnamon

50g (1/4 cup) white sugar

30g (2 heaped tbsp) melted butter

60ml espresso (1/4 cup) –instant powder permitted, but straight from the bean is your best shot

1 egg

60ml (1/4 cup) milk

2 tbsp runny honey


For the glaze:

1 tbsp honey

1 tsp cocoa powder

85g icing sugar

pinch salt

coarse salt for sprinkling

3-5 tbsp milk


Directions

Preheat your oven to 177C (350F) and butter a 6-doughnut pan. In a large bowl, sift together all the dry ingredients– flour and necessary leavening agents, sugar, cinnamon, cocoa powder and salt.

In a separate, smaller bowl, whisk together the melted butter (that’s been left to cool a while, so you don’t end up cooking the egg!), egg, espresso, milk and honey, until everything is nicely incorporated. Pour the wet mix into the dry and mix until everything is just combined.

Bake the doughnuts for 12-15 minutes; test with a wooden skewer at 12 minutes. If it comes out clean, you’re good to go. While they’re baking, whisk together the icing ingredients with a fork. You should have a thick and runny, light brown-pink glaze.

Once the doughnuts are done, leave to cool in the pan for a while before removing. Dip the top in the glaze, then sprinkle with coarse salt. YUM GUYS.

Check out my other baked doughnut recipes!

Brown butter maple bacon doughnuts

Strawberry chocolate vanilla bean doughnuts

Maple syrup doughnuts (with glaze variations)

Hot cross cookie butter doughnuts

Spiced nutella-stuffed doughnuts


White Chocolate Macadamia Peanut Butter Bars

Processed with VSCOcam with f2 preset Processed with VSCOcam with f2 preset

Back to basics.

Nothing like a simple sin. Currently sitting in a café trying to remember just about every detail of my most recent creation. The coffee is making me buzz and I’m surrounded by 5 different accents. Just one thing springs to mind– how lucky I was to have yielded the results that I did with the oven that makes my heart quake.

White chocolate, peanut butter and macadamia nuts make up the base of this simple bar recipe, adapted from my favourite and reliable cinnamon roll blondies. They’re ridiculously simple to make, and yield the same squidgy and chewy innards as in the aforementioned recipe, save for a larger, thicker batch because I doubled the ingredients to suit my 10×10-inch pan. Golden crust, chewy edges and squidgy half-baked middle, chock full of white chocolate and crunchy bits of macadamia.

Peanut butter replaces half the butter quantity as stated in my original recipe, for a full-on peanut buttery experience. Though the flavour is more mild than overpowering, it adds a wonderful thickness and complements the brown sugar, the main sweetener in this bar recipe, the tinge of molasses further characterising this brown-sugar-cinnamony wonder.

Processed with VSCOcam with f2 preset Processed with VSCOcam with f2 preset

White Chocolate Peanut Butter Macadamia Bars (makes a thick batch in a 9×9 or 10×10-inch pan), adapted from my favourite cinnamon roll blondie recipe

Ingredients

For blondies:

250g (2 cups) all purpose flour

1/2 tsp baking powder

½ tsp baking soda

pinch salt

2 tsp ground cinnamon

70g (5 tbsp) salted/unsalted butter, melted in the microwave

130g (½ cup) smooth peanut butter

80g chopped white chocolate, 20g chopped macadamias (or you could use Rittersport’s 100g bar of macadamia-studded white chocolate!!)

40g more of chopped white chocolate and macadamias (combined), for sprinkling on top afterward

220g (1 cup) dark brown sugar, packed

200g (1 cup) white sugar

2 eggs

2 tsp vanilla extract

2 tbsp whole milk


For frosting:

5 heaping tbsp hazelnut chocolate spread

5 heaping tbsp smooth peanut butter

1/2 tsp vanilla extract


Directions

Preheat your oven to 177C (350F) and grease (and line if you want) a 9×9 or 10×10-inch square pan. Make sure your butter is microwaved until all melted–do this in a microwave-safe bowl in a 30-second increment and set aside to cool.

In a medium bowl, whisk together the flour, cinnamon, leavening agents and salt. Tip in your chopped white chocolate and macadamias and briefly toss in the flour mix to coat everything well. In a larger bowl, whisk together the eggs, two sugars, vanilla extract, melted butter and peanut butter. Pour the dry mix into the wet mix and fold until everything is well incorporated. You may or may not need all 2 tbsp of milk, but add until you achieve a smooth dropping consistency. The batter should be light brown and will stick to your spoon or spatula until a sharp flick of the hand will force the batter to drop back into the bowl. Pour the batter into your pan and smooth the top with a spatula. Bake in your preheated oven for 15-17 minutes.

Whilst the bars are baking, whisk together the ingredients for the frosting. Roughly chop the extra white chocolate and macadamias. Once the bars are cooked, leave to cool for at least 15 minutes before slicing into however many bars you like. Use a knife to spread some frosting on each, then sprinkle on the chopped white chocolate and macadamias.


Tahini Blueberry Muffins

Processed with VSCOcam with f2 preset Processed with VSCOcam with f2 preset

I know the words tahini and blueberry make this sound pretty much holy, but the taste of these muffins are as lascivious as muffins can get. Not that muffins are meant to be lascivious or anything– they’re always taken as the granny-pants-boring stuff; the complete opposite. I abhor incorrect grammar and the use of words like lascivious in inappropriate contexts, but the fluff on this thing, flavours and textures made me think of that very word, so that they shall be. These muffins are so good, so simple, so delicious (and sexy).

IMG_4615Processed with VSCOcam with f2 preset

I think spontaneous, successful experiments call for celebration. It almost feels like a good replacement for the lack of dirty hands-on lab practicals the past week, though I’m eternally grateful for that one incredibly eye-opening introduction to anatomy dissections. As I peered under each vertebrate (cervical, thoracic, lumbar and coccygeal), fiddled with the moist muscle (sorry for the unappealing alliteration right there) and poked and prodded at the nerves and meningeal layers, I witnessed the magic that is the human form. I crave more of it now. There’s something grossly satisfying in touching something which you know is all you, and at the same time, everyone else. It’s universal, it’s each of us, it’s everyone.

The hands-on itch was a bit delayed– got home and had the blinding urge to experiment and yield results. Delicious results And seeing that I was visiting my fellow foodies Emily and Ella that night (!!), to make something not akin to your typical baked product felt quite appropriate. With lots of tahini and blueberries on hand, these babes were born.

I’ve recently been reading up a lot on our attitudes towards food, health and nutrition, and even with all the information and resources around us, am still boggled by the fact that so many of us are tricked into what I call ‘fake healthy’ eating. Different things may work for different people, but ultimately even the whole notion of ‘striving for balance’ proves to be an inherent problem. We all possess different gut flora, different sets of genes, different intolerances– how are we to rely on anything we hear, see and touch? Is the market trustworthy, justifiable? Diet. Oh, that contentious word.

Yes, it’s good to experiment and see what works for you (no meat, no eggs, etc), but I think it’s high time we stop believing everything we hear, and start listening to our bodies. I know, that phrase is so repeated it’s practically proverbial. And yet, it’s the one thing we must always remember. Chowing down on that Special K and sugary yoghurt isn’t a crime, but advertising betrays the truth, and unless your reward circuitry systems are truly messed up, there’s no saving anyone. All that sugar is practically like lifting up your shirt sleeve and injecting cocaine. So as much as I love sugar, sugar and more sugar, I’ve also become keenly aware on what’s right, and what’s just downright harmful (basically excessive consumption).

These muffins aren’t 100% healthy, but I’m ok with that, and you should be, too.

Because it’s a bloody muffin, guys.

Processed with VSCOcam with f2 preset

Tahini Blueberry Muffins (makes 6 large muffins, lightly adapted from my nut-butter-stuffed matcha cupcake recipe)

Ingredients

130g (1 cup) plain flour

70g (1/3 cup) white sugar

75g (1/3 cup) packed dark brown sugar

1 1/2 tsp baking powder

1/4 tsp baking soda

pinch salt

2 eggs

113g (1/2 cup) unsalted butter

80ml (1/3 cup) tahini

1 tsp vanilla extract

50g (1/2 cup) fresh blueberries


Directions

Preheat your oven to 170C (340F) and line a muffin tin with liners, or simply place some cupcake/muffin liners on a baking tray.

In a medium bowl, briefly whisk together the flour, two leavening agents and salt. Dump in your blueberries and lightly toss to coat in flour.

In another large microwave-safe bowl, microwave your butter for 20 seconds until partially melted. Whisk the butter and two sugars in this bowl (quick creaming method) to aerate the mixture slightly, for at least a minute. Add the 2 eggs, vanilla and tahini, and whisk everything together well. Pour the dry mix into the wet mix, and use a wooden spoon or spatula to gently fold in the dry mix until everything is just combined.

Spoon the batter into 6 muffin liners, and bake in the preheated oven for 25-28 minutes. The muffins are large ones, so they need time to rise and brown. Check them at the 25-minute mark– a wooden skewer inserted right in the middle should come out clean. They should have a medium brown, almost caramelised and slightly domed top. You might even need a whole half hour. The insides will be fluffy and tender.

These muffins are best served the day they’re made, but you can keep them for an extra 1-2 days in an airtight container. Otherwise, freeze any uneaten ones in the freezer and microwave when the mood hits.