Condensed milk Tahini Flapjacks

img_4609

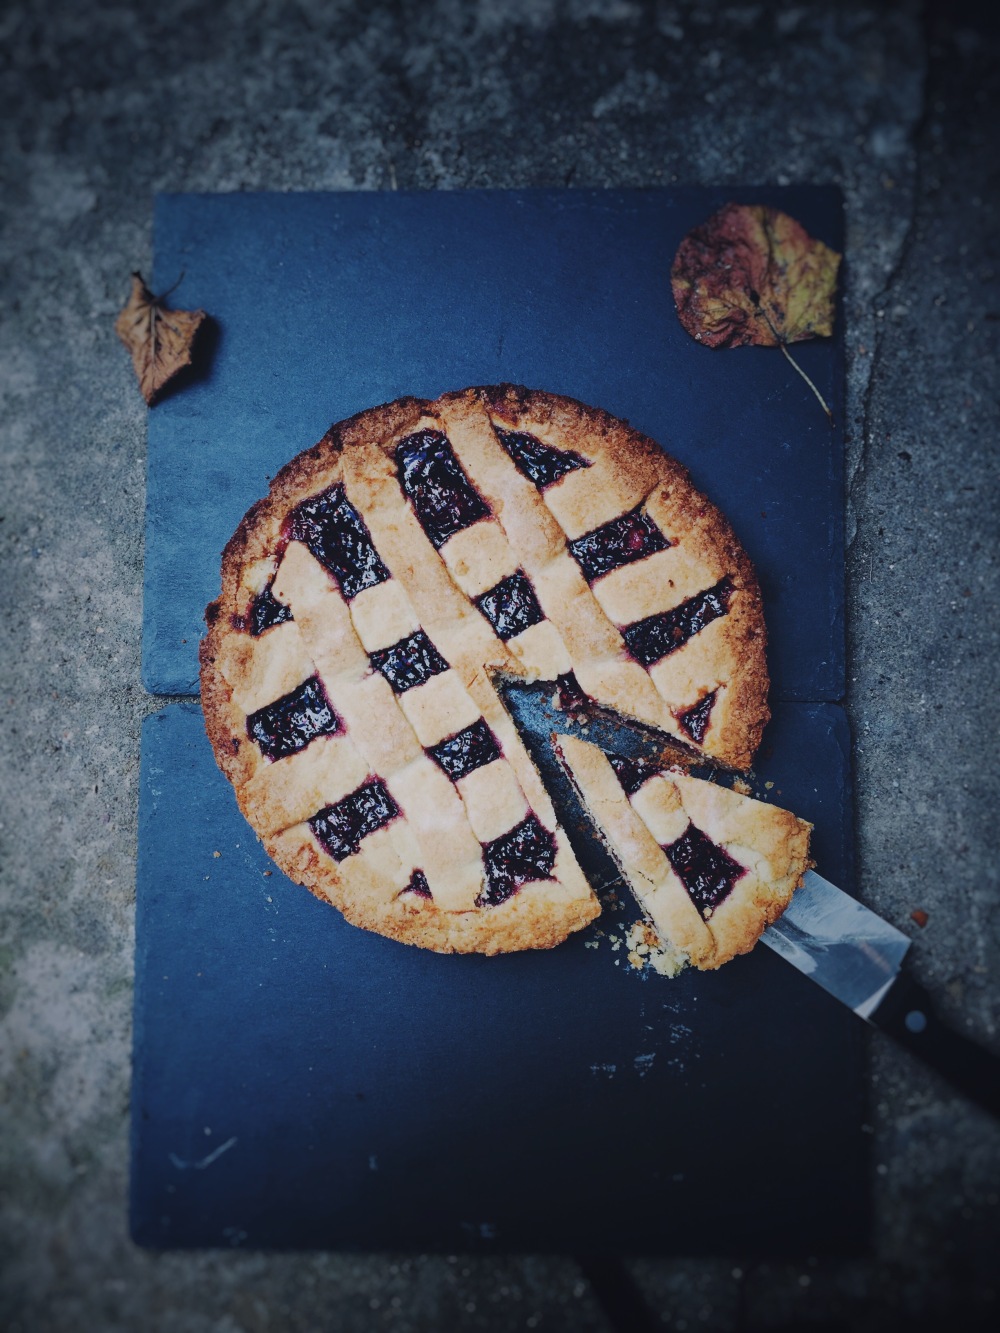
The past weekend was one of the best that could’ve possibly been. The late Saturday afternoon welcomed a trip to Borough Market, undoubtedly one of my favourite places in one of my favourite cities. It’s here that I came across ‘flaxjacks’ by Flax Farm, a specialty flapjack store that uses cold-pressed linseed (flax) and linseed oil to add more bang for your buck. As I savoured their bestseller (apricot, orange and pumpkin seed), I realised not once have I tried making this classic, stereotypically English treat. With a new stock of ingredients haphazardly put together, the task had to be completed.

Processed with VSCO with f2 preset Processed with VSCO with f2 preset

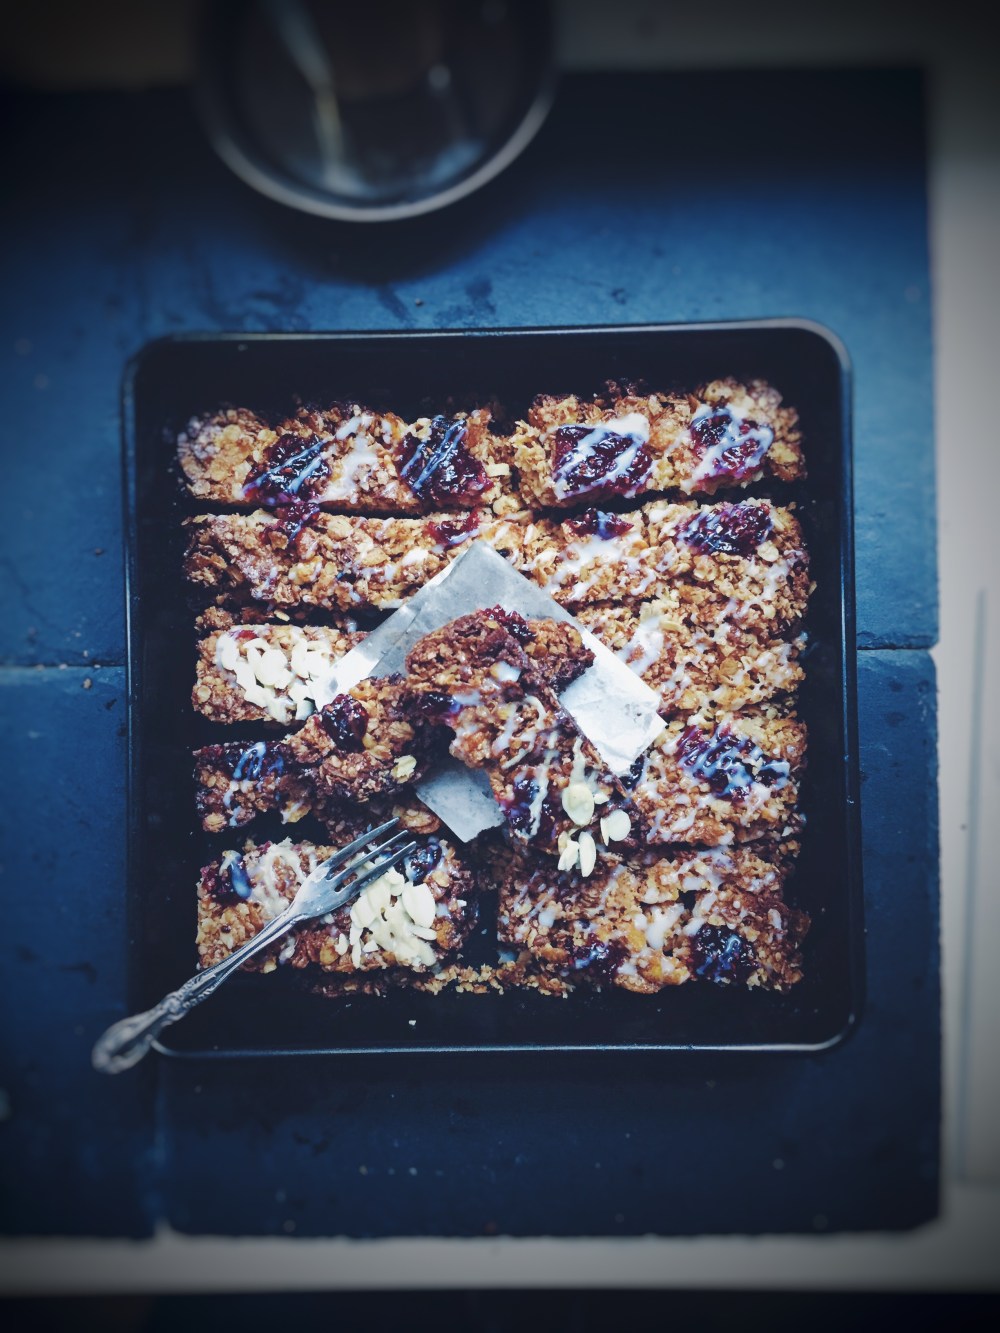
Just a week into school has gifted the worth of baking once more; each bout of newness allowing ingress of a more meditative mode. All very complementary. Though I’m not used to making or eating flapjacks, I adore its solemn simplicity, both in character and assembly. It’s all just a matter of mixing together the traditional group of ingredients: rolled oats, golden syrup, butter and brown sugar. I changed the ingredients and proportion of this make-up, replacing most of the glucose bits with condensed milk, tahini, and, yes, golden syrup for good measure. Jam is then blobbed on top, which melts a little into the jacks and prove a firm, jammy consistency after baking.

Gooey tops slathered in the familiar milky sweetness of condensed milk, hard, well-cooked bottoms. I like the crunch of an edge and a little bit of snap when it comes to anything oat bar-y, and this recipe really did the trick with that. If you’re into less hard bars, simply bake them for a little while less.

img_4610

Condensed milk Tahini Flapjacks (makes 16 rectangular bars)

Ingredients

200g butter

pinch of salt

90g condensed milk

20g golden syrup

5 tbsp brown sugar

200g porridge/rolled oats

120g cereal of choice (I used cornflakes, crushed briefly before addition)

4 tbsp tahini

7-9 tbsp raspberry jam


Directions

Preheat your oven to 180c and briefly butter a 8×8 or 9×9-inch pan. Line your pan with some parchment, if you wish. Melt the butter in a saucepan over medium heat. Add the salt, sugar, condensed milk and stir over the heat for a couple of minutes. Take the pan off the heat and mix in the oats, cereal and tahini with a wooden spoon. Press this mix into your pan to form an even layer. Dollop the jam however which way you want on your flapjacks; I did it in a 3×3 fashion. Bake the bars in your preheated oven for 35 minutes. Check them at the half-hour mark– if they are golden-brown on top, take them out. The bars may be soft to touch, but will harden as you let them cool on the counter. After letting them cool for 10 minutes, drizzle with more condensed milk and tahini, add some sliced almonds (optional, I added them for textural variety), and cut into bars. These are best eaten the same day, but can be stored at room temperature or the fridge for up to a week.


Linzer Torte

img_4256

After Linz, in Austria, and said to be the oldest cake in the world. I love how a new recipe lets in some learning. It’s so easy to forget how something so ubiquitous so brims with history. Imagining this torte being caressed by a medieval stranger in 1696 and then being made by someone in the current century is mystical, almost haunting.

Have finally settled into the new house before the advent of a new term, routine is taking form once more; something I’m so grateful for and excited about after a deleterious flight which messes up the mind and shakes up calm. Excitement must be the shorthand term for what I felt once reunited with some favourite people after what seemed to be forever. It only seemed natural to bake something to celebrate. Something incredibly simple but so satisfying.

The crust is traditionally laced with ground almonds and made with egg yolks. It’s also typically decorated with flaked almonds, but  I made do with just a simple lattice and sugar to top before the oven-throw. The filling is probably the easiest in the world. I made do with raspberry jam, which you can make yourself or simply use store-bought. Once baked, the interior becomes thick, glistening and gooey, perfectly holding form for clean cuts and gooey bellies.

Processed with VSCO with f2 preset Processed with VSCO with f2 preset

Linzer Torte (makes one 9-inch tart)

Ingredients

165g plain flour, plus more for the counter

100g ground almonds

155g caster sugar

150g cold butter, cut into cubes

1 tsp ground cinnamon

1/2 tsp salt

1 egg, beaten

250g good quality raspberry jam


Directions

Grease your tart tin and preheat your oven to 190C. In a bowl, whisk together the flour, sugar, cinnamon, ground almonds and salt. Rub in the cubes of butter into the flour mix until the mixture resembles coarse breadcrumbs. Add the egg and mix until you get a moist dough. Since this dough is quite sticky, I found it helpful to lightly flour the tin and my hands for easy molding. Remove about a quarter of the dough and set aside, this will be for the lattice top. Take the bulk of the dough and press neatly into the bottom and up the shallow sides of the tart tin. Press the dough into the ridges of the sides of the tin, and use a sharp knife to trim off excess around the rim.

Fill the tart with the raspberry jam and spread it around evenly. Flour your work surface and put the remaining quarter of dough you set aside on the surface. Roll into a rectangular slab that’s 3mm thick and just long enough to stretch the diameter of your tin. Cut into 6 strips. Lay three on your tart horizontally, and then the next three vertically.

Sprinkle the top of the tart with caster sugar, then bake for 25 minutes. Check at the 20-minute mark. It should be golden-brown on top, and some jam may be seeping in between the lattice hold. That’s ok, nice and rustic. Cool in the tart tin for at least 10 minutes before removing, slicing and serving.

Salted Vanilla Crispy Custard Puffs

Processed with VSCO with f2 preset Processed with VSCO with f2 preset

Though I hate to be picky, I guess I still can be. Almost every week, my mother buys bolo buns, or ‘pineapple buns’, for my sisters. These are sweet buns filled with sticky red char siu (sweet barbecued meat) filling, covered in a yellow tortoiseshell of crackly sugary goodness. It’s those charming cracks, glistening coats of crisp comprising pull-apart little tiles on each little bun, that get to me, more so than any other part. As I picked childishly at the top once, I was reminded of my first try of choux au craquelin, or crispy cream puffs with a similar sort of topping. Remembering I had some leftover custard that I used to make salted custard lava french toast earlier on in the week, the idea of custard puffs ossified.

Processed with VSCO with f2 preset Processed with VSCO with f2 presetProcessed with VSCO with f2 preset Processed with VSCO with f2 preset

Cutting into a crispy, sugary coat to be greeted by voluptuous spillage of vanilla-speckled, slightly salty custard is one of the most lascivious but gratifying actions one can do. Hear the crackle, wade deep. The salt plays up the sweet, giving the drag of thick and cream a bit of angle, an edge. The craquelin itself may have been enough to satisfy me, but it’s a bite that makes the experience whole.

The last time I played with choux was probably more than a year ago, and a repeat this time reminded me of the requisite care in perfecting the robust dough which is easy to let fall apart if you overlook the temperature and timing of each ingredient addition.

Processed with VSCO with f2 preset Processed with VSCO with f2 preset

Salted Vanilla Crispy Custard Puffs (makes 6-7 medium puffs)

Ingredients

For the choux buns:

75g plain flour

50g butter

2 eggs, beaten

120ml water

1/2 tsp salt


For the craquelin (crispy top):

85g butter, softened

100g white caster sugar

100g plain flour


For the salted vanilla custard:

110g white sugar

3 tbsp cornstarch

1 tsp salt

4 egg yolks

beans of one vanilla pod or 1 tbsp vanilla bean paste

30g butter

720ml milk


Directions

First, make the custard. In a large saucepan over medium heat, bring the sugar, cornstarch, salt, egg yolks and milk to a boil. Add the vanilla, then let the mixture continue to boil for 15-18 minutes. Use a wooden spoon to stir the mixture occasionally. Take off the heat when you see that the custard has thickened and readily coats the back of your spoon. Add in the butter and stir to mix. Pour the custard into a bowl, cover with cling film and let this rest in the fridge while you make the remaining components.

Preheat your oven to 177C (350F) and prepare a baking tray lined with parchment paper for the choux buns. Make the craquelin: in a bowl, mix the ingredients for the craquelin together until you get a buttery dough. Roll the dough into a ball and put into  a plastic ziploc bag, sealing it. Use a rolling pin to roll the dough out till it’s 2-3mm thick in the bag. Put this in the freezer.

Next, make the choux buns. In a saucepan over medium heat, bring the butter, water and salt to a boil. Once you see that the butter has all melted, add the flour. Use a wooden spoon or whisk to incorporate until you get a dry-looking dough. Take off the heat and let the mixture rest for 2 minutes. Then, slowly whisk or beat in the eggs. It’s the eggs that provide the lift to the batter, readying it for the perfect little pocket in the middle. I like to do this in 3 additions. It’s important to keep whisking here and to do this slowly, as sudden contact between the hot dough and eggs and cause the eggs to scramble. The dough should be stiff enough to hold a peak when you lift up your spoon or whisk. Put the choux bun paste into a piping bag and pipe circles that are 3cm in diameter onto the baking tray, doing a little swirl at the top. Wet your finger with a little water and press down ever so slightly on top, so you get a more aesthetically pleasing puff.

Take your craquelin out of the freezer and cut out circles 3cm in diameter from the frozen, buttery block. Despite freezing, the slab is still relatively easy to break. You can use a metal cutter or knife to cut out the circles. Place the circles on the choux paste, and then bake in your preheated oven for 20 minutes.

After baking, let the buns cool for 15 minutes on the tray. Take your cooled custard out of the fridge and put into a piping bag. Poke the tip of the piping nozzle into the bottom of a puff, and pipe until you feel some resistance at the point of contact between nozzle and puff. There is quite a bit of weight difference. Repeat for the other puffs. These buns can be stored in the fridge for 2 days or frozen for longer storage. If they have gone all soft after a while, you can re-crisp them in an oven, just bake them at 160C for 5 minutes.


Review: Paddy Hills

DSCF8810DSCF8811DSCF8812

Another day, another café. I’ve done a little review on Paddy Hills before, but I could not pass up the chance to visit again to sample a few items on their new menu. When I stepped through the entrance doors, I was reminded why, when I first visited more than a year ago, I kept telling myself, ‘come back, you gotta come back’. I haven’t done a review in aeons, but this place deserves one, and more to come.

Having been to many a ‘hip’ café before, safe to say that Paddy Hills lives up to its hyped name. A little off the beaten track at South Buona Vista, interior brimming with rustic majesty, flooded with wood and light. Tiles, the most beautiful navy wall, smiles. A close friend and I sat down excitedly, and were first served drinks.

DSCF8815

Iced Matcha. Creamy, thick, rich. This reminded me of Haagen Dazs’ green tea ice cream blended with a little milk. Perhaps just a little too sweet for a sustained sip, but refreshing nonetheless.

DSCF8819

Bubbly Yuzu. This fared well for the both of us. The bubbles added a lovely flair, but it was the perfect ratio of sparkle to sweet of the drink itself, combined with the textural difference of plum and grape jello, that really made this a special, whimsical drink.

DSCF8816DSCF8818

Berry Muffcakes! Complete with vanilla bean ice cream cubes, magic mango balls, a garden of berries, chocolate sauce and chocolate crumble. OK, these are not part of their new or limited-time-only menu, but I just have to throw these in because… I mean, can you not see the pictures above. It’s just ridiculous. After trying these the first time a while ago, I immediately started writing about them because I was so enamoured by its spot-on texture and toppings. I’ve had my fair share of hotcakes and this was by far the best I’ve tried. Friends, I do not joke. Crispy, robust edges, fluffy, pale yellow cakey belly, a firm, browned bottom. Not too sweet, either. There’s nothing more you can ask for.

DSCF8817

Winter Truffle Fries. Golden fries, shaved pecorino, and shaved black truffle. Some truffle aioli on the side, because what’s lush without sin? Truffle fries have a bit of a confusing rep because it’s true you can’t actually taste truffle; its expensive scent enhances the whole fry-eating experience. For a limited time only, I implore you all to get your hands on these absurdly crisp, golden strings of heaven. If you’re like me and enjoy crispy-only fries, as if they were fried through and through and then fried just once more, then get your foodie selves down to Paddy Hills stat (yeah, they definitely beat PS Café’s).

DSCF8820

Truffle Breakfast. House-cured salmon, soft scrambled eggs and shaved truffle on a bagel, with house-cured bacon, sautéed mushrooms, and arugula.

I don’t consume much meat, but I daresay the few bites I took were tender like none. The bagel was crisp and chewy; eggs silky, creamy and buttery without being cloying or gloopy. The milky, more earthy flavours of truffled egg and mushroom complemented the cured meats which cut through with a blaze trail of umami. A king-sized, well-balanced dish.

As the meal came to an end, it started to darken outside. The light all at once was harsh, then subdued. The sky gradient followed the rise and defeat of our appetites, as we looked despondently at our leftovers. Full, happy, done.


Paddy Hills

38 South Buona Vista Road

Weekdays:  10 30am-5pm, 6-10pm
Weekends: 9am-5pm, 6-10pm

6479 0800


Blueberry Danish+ exciting news

Processed with VSCO with f2 preset

New season of the Great British Bakeoff? Yeah, almost started sweating. Just so happened that the dawn of another exciting slew of episodes coincided with my mum’s genius decision to buy the ever-charismatic Paul Hollywood’s How to Bake cookbook. So there I was, eagerly thumbing through, and I finally settled on his recipe for raspberry danishes. Having never experimented with proper danish pastry before, I figured it only wise to follow his method step by step, in true apprentice fashion. Tweaked it a little to use the ripe, slightly tart blueberries I had instead, and dressed it up with homemade frangipane and a salted caramel glaze instead of the stated recipe’s citrus-based one. I now fully understand why people labour over laminated dough; all those hours folding, pressing and refrigerating are truly worth it in the end. The result proved to be gold– flaky, golden pastry, buttery and beautiful. Not much sugar needed, just let the dough do the talking. Anyone who’s keen on trying laminated dough, be it this/ croissants/ pain au chocolat etc, should definitely try this take (this is easier if you live in a cold country, but if not, please make sure that air-con is on full blast!)

Before I get on with the details and modifications, I want to share something pretty exciting with you. Ever since kindergarten I’ve always wanted to write a book, be it on something big or small, short or long, personal or informative. There’s something about holding a book– reading, absorbing, loving it, that beats few other physical and mental experiences. Having finished a recent research internship that served well to enhance this innate lust for creative and relatable matter, I was immediately compelled to start. Though I shan’t disclose any details, I do plan to include a few new surprise recipes in this personal project!

Processed with VSCO with f2 preset

Blueberry Danish with a Salted Caramel drizzle (makes about 25 pastries)

Ingredients

For the dough: 

one batch of Paul Hollywood’s Danish pastry dough 


For the frangipane (adapted from Martha Stewart’s ‘Bostock’ recipe):

50g (2/3 cup) whole, raw almonds

100g (1/2 cup) granulated white sugar

85g (6 tbsp) softened, unsalted butter

1 egg

2 tablespoons all-purpose flour

1 tablespoon vanilla

3/4 teaspoon salt


For the salted caramel drizzle:

50g (around a half cup) white sugar

47g salted (!!) butter

1 1/2 tsp fine salt

120ml (1/2 cup) heavy whipping cream (either single or double is fine)


Extras:

a punnet of fresh blueberries, to be used before and after baking.

4 heaping tbsp of marmalade


Directions

Make the dough according to Paul’s instructions (so perfect for beginner’s and what a wonderful result you’ll yield!). Top tip: make sure you’re in a cool environment, to prevent any of all that butter from melting. Preserve the future of your unbaked dough.

Modifications:

During the last fridge prove, preheat your oven to 200C and start on the frangipane and salted caramel for the drizzle. For the frangipane, process the almonds and sugar  together in a food processor until you get a texture close to coarse meal. Add the rest of the frangipane ingredients and blend until smooth.

For the salted caramel, heat sugar in a medium saucepan over medium heat, stirring occasionally with wooden spoon. Continue to do so until all the sugar melts into a pool of dark, glossy amber liquid. Once this stage is reached, add the salted butter. It’s a pretty vigorous reaction, this one. Stir with spoon to help the melting process. Once all the butter has melted, slowly add in heavy whipping cream. This part is even more vigorous that the previous one; it will spit and rise as it starts to boil. Let the mixture boil like this for another minute before taking the pan off the heat. Let cool for another couple minutes before stirring in the salt. For the icing, mix with enough icing sugar so you get a thin drizzling consistency.

Once the dough has finished proving in the fridge, ready around 3 baking pans and cut out some parchment paper to fit each. Remove the dough from the fridge, lightly flour your work surface and roll out the dough till it’s about 7-8mm thick. With the help of a ruler, cut out squares measuring 7x7cm. At each corner, use a sharp knife to cut diagonally towards the centre, about 3cm in. You should get what looks like a box with 4 straight scores running from each of the 4 corners, without any of the lines overlapping since you don’t cross the middle. Take one corner and fold it towards the middle, then alternate with the remaining 7 corners, so you end up with a 4-segmented parcel. Put a teaspoon of frangipane on each pastry, then plop 2-3 fresh blueberries on top. Beat an egg and brush the exposed pastry with the egg wash.

Bake in the preheated oven for 15-20 minutes. Once out, brush with warmed marmalade (simply warm the marmalade in the microwave for 20 seconds), then drizzle on the salted caramel icing. Add more fresh blueberries, and devour immediately or soon. These can be kept in the fridge for a couple of days, just remember to toast before consuming.