Coffee Blondies

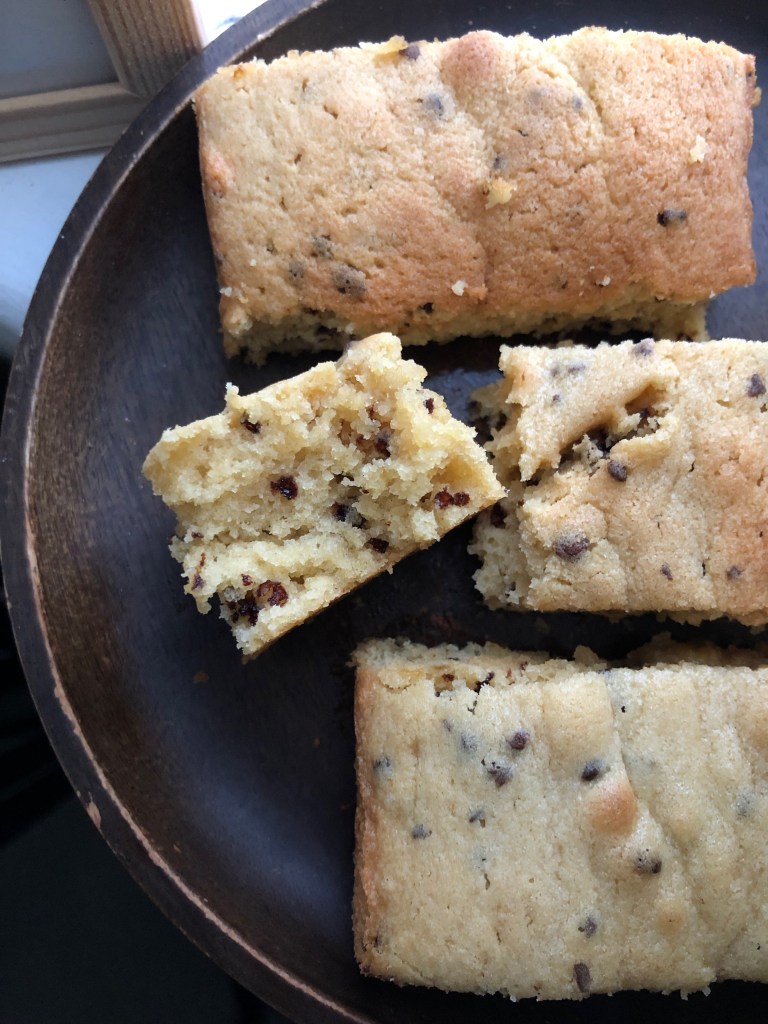
This. These! I have been making these repeatedly the past 3 or so months (aside from my banana bread). A hybrid of blondie and muffin, you get devilishly chewy edges and a soft, plump, risen middle, bursting with coffee flavour. I have no excuse for a late post, I just really have been enjoying making these and not much else, unless you count a load of pasta dishes following by disappointment with HelloFresh. I used to be a big fan, but now, not as much. So haphazard kitchen experimentation it is.

The secret ingredient is the instant coffee powder– don’t scoff until you’ve tried it. It blends in so easily with the batter and melts in the oven, but you may get little specks of the stuff in the final thing, which only enhances the coffee narrative.

Coffee blondies, makes 6-7 muffins or one loaf of blondies

Ingredients

100g butter, at room temperature

50g light brown sugar

50g white sugar

1 egg

1/2 tsp fine salt

110g plain flour

1 tsp instant coffee

1/2 tsp baking powder

Directions

Preheat your oven to 180C (350F) and prepare 6-7 muffin liners. Alternatively, grease a standard 9×5-inch loaf pan; you can use this mold for the same batter and its quantity.

In a medium bowl, whisk together the soft butter, sugars and salt using a strong metal whisk. Use a rubber spatula to help cream everything together. Once pale and fluffy, add the egg and whisk that in well. Then tip in the flour, baking powder and instant coffee. Use the rubber spatula to fold the dry ingredients into the wet.

Scoop large tablespoonfuls of batter into the muffin liners, or scrape everything into the loaf pan. Bake for 20 mins. Insert a wooden skewer into the centre after 20 minutes- if it comes out wet then bake for 3-5 more minutes, or until the skewer emerges again with moist crumbs. Let the muffin liners or loaf pan sit for 10 minutes on a cooling rack before cutting and serving. Best enjoyed alone with a cup of coffee. Perfect.

Tahini Cashew Cookies

For anyone who doesn’t know, I was vegan for almost two years, not too long ago now. During that time, I discovered the versatility of the humble sesame paste. I stopped using it so much after moving to Oxford, but rediscovered how beautifully it blends into bakes just yesterday when I trialled these cookies for a third time. The taste just doesn’t fade, unlike a lot of other things like maple syrup, matcha or honey, of which you can end up using quite a bit of because the flavour is easily lost while baking. Anyway, this cookie…! It got all my flatmates’ seals of approval, much to my surprise, since tahini can very much be a love/hate thing.

The café near me actually does these amazing tahini chocolate cookies, which inspired me to make use of the stuff again. I have done tahini chocolate cookies before, but thought I would do a little twist with another earthy and grounding element- nuts. The result: fabulous. Definitely my favourite bake of June so far.

These cookies are light, chewy, not too sweet, and most importantly, the tahini is the main character of the show.

The only way to eat it

Tahini cashew cookies (makes 8-10 medium cookies)

Ingredients

100g butter, soft and at room temperature

160g white sugar

1/2 tsp salt

100g light tahini

1 egg

150g plain flour (optional: substitute half with whole-wheat flour)

1/2 tsp baking soda

1/2 tsp baking powder

50g cashews, chopped

Directions

Preheat your oven to 180C (350F) and line a baking tray with parchment paper. If you only have aluminium foil that works too, but bake the cookies for 5 minutes shorter. In a medium bowl, whisk together the soft butter, sugar and salt. Add the egg and tahini and whisk those in well too.

In a separate bowl, briefly whisk together the flour, baking soda, baking powder and chopped cashews, then tip that into the wet mix and use a rubber spatula or wooden spoon to mix everything together well. The batter should be quite sticky, not dry at all. Take heaped tablespoonfuls of batter and shape them into balls. If you want to get real precise, each medium cookie will be 52g. I did this and the yield was around 10 medium cookies.

Bake for 18 minutes but check at the 15-minute mark to see if the edges have browned slightly; once this has happened remove the tray from the oven and let them cool and set. The insides will be very chewy as they set, the edges nicely browned without being burnt.

Enjoy warm dipped into more tahini or with ice cream on top!

Review: Hamblin Bread, Oxford

My first Oxford review must be dedicated to Hamblin. Not by choice, but by instinct. As I smuggled bites of their cardamom bun into my mouth while walking all that way home, I knew I found quite a gem. The long walk there from home seemed contrary to the desire to make this a regular haunt, but honestly all that fitness just fosters a more reasonable state of mind to pick and choose the baked goods, while upping the excitement along the way.

Cardamom bun

My top pick here must be the cardamom buns. They also do a whole range of other buns, including cinnamon and custard (below), but this remains top of the list for me. The edges are perfectly browned and crispy without being flaky, characteristic of a traditional cardamom bun. The cardamom flavour itself holds its own.

Custard bun
Cardamom bread pudding

Leftover or stale cardamom buns are also used to make this cardamom bread pudding which is both genius and delicious. A harder, sugary crumb crowns the slab of soft, squidgy deliciousness.

Chocolate chip cookie

This very simple cookie is chewy all the way through to the edges. This is the perfect chocolate chip cookie to me- a cute and manageable size, not too sweet, rough chunks of dark chocolate, a hearty mouthfeel with the fresh, locally-milled flour, and doesn’t leave you feeling sick, either. Speaking of flour, their infamous sourdough (below) is all the rage for all the right reasons. The crumb is thick, robust and tender, slightly stiff but never dry. The terrain is perfect for spreading on soft, salted butter.

Sourdough
Potato cheese pasty

The potato pasty sounds like an unnecessary carb-on-carb affair but I see why it’s so popular. The sizeable chunks of potato are never mushy or mixed with a bunch of random, weird herbs.

I do miss London with all her cafés, but places like this bring her right back to Oxford. There are so many hardworking, independent café owners that know exactly what they’re doing with the magic they offer day-to-day, and I’m living to promote it.

Hamblin Bread

247 Iffley Road

Oxford

Rating: 5/5

No-fuss Tahini Bars

There is always something therapeutic about making bars. It’s pretty easy to do, for a first, and also hard to mess up, even if you miss a few tablespoons of an ingredient here or there. These tahini bars are quick, simple, and you will want to make them more than once. The perimeter is more cakey than chewy, and the middle holds a fudgy consistency. Delicious.

I have made tahini bars before, but these are extremely no-fuss, and simple substitutions (for example, using just brown sugar or vegan egg in place of the normal eggs here) suffice. I don’t know when I will get sick of tahini, but until then, I’ll be making these bars.

No-Fuss Tahini Bars (makes 9 medium bars)

Ingredients

130g plain flour

1/2 tsp baking powder

1/4 tsp baking soda

70g butter, melted (in a microwave)

1/2 tsp fine salt

1 egg

150g light brown sugar

90g tahini (around 1/3 cup)

Directions

If you haven’t already, melt your butter in a microwave by placing it in a microwave-safe bowl and microwaving on high in 30-second increments or until completely melted. Preheat your oven (no-fan setting) to 180C and line a square 8×8-inch or 9×9-inch pan with baking parchment.

In a medium bowl, whisk together the flour, baking powder and baking soda. In a separate, larger bowl, whisk together the melted butter, sugar, salt, egg and tahini. Fold the dry ingredients into the wet ingredients using a rubber spatula. Pour the batter, which should be quite runny, into the prepared pan, and bake for at least 25 minutes, or until a wooden skewer inserted into the middle comes out with moist crumbs. If the batter is still wet, bake for 5 more minutes. Take the pan out and leave it to cool for at least 10 minutes before cutting into squares and consuming .

Peanut Butter Sand Cookies

On today’s episode of ugly delicious, I welcome the peanut butter sand cookie.

Soft, crumbly cookie with hard edges and a distinct peanut flavour

Pretty much a peanut butter crumble in a cookie. I think I cracked these cookies the second time. The first time, I deemed them too dry, although a friend told me that they were just to her taste. The second time, they retained the typical chew of your denser peanut butter cookie, but also had a soft, almost melt-in-your-mouth crumbly consistency. I couldn’t help but think they resembled sand somehow, hence the name.

You can use processed peanut butter here, but the natural oils of natural peanut butter, when blended into the rest of the liquid part of the batter, makes for an extra smooth and delicious result. Definitely go ahead and use chunky peanut butter too, if that’s your preference.

It’s all about the texture here. My go-to cookie is rich and chewy with hard edges, but this is quite something, too. When you bite into the cookie, you get a pure peanut butter flavour dispersed through large, fluffy crumbs, and then as your teeth sink in, all that strong flavour concentrates into a grind of chew at the end of the bite.

Another one-bowl wonder!

Peanut butter sand cookies (makes 6-7 large cookies)

Ingredients

110g peanut butter (preferably natural peanut butter but use any sort you like)

110g unsalted butter

1/2 tsp fine salt

90g brown sugar

1 egg

135g flour

1/2 tsp baking soda

optional: 100g chocolate chips, and flaky sea salt for sprinkling on top

Directions

Preheat your oven to 350F (180C) and line a baking tray with baking parchment.

If your butter or peanut butter is hard, place them in a microwave-safe bowl and microwave for 30 seconds or until soft to touch, not melting. In a medium bowl and using a whisk, whisk together the butter, peanut butter, salt and brown sugar until it looks light and fluffy, at least 2 minutes. Beat in the egg and whisk that in too.

Add the flour, baking soda and optional chocolate chips. Use a spatula to fold the dry ingredients into the wet, bringing everything together until you get a sticky, thick batter. Use an ice cream scoop or your hands to scoop large golfball-sized clumps of batter onto your prepared pan. Sprinkle on the optional coarse salt on top. Bake for 10 minutes, then take them out and let cool and set for another 10 before eating. These cookies keep well for up to 3 days in an airtight container at room temperature, but you can also freeze them. Take out and microwave one for up to 2 minutes with a break after a minute, for a warm cookie. Best eaten with vanilla ice cream, or with a steaming cup of milky coffee!