Citrus Curd Yoghurt Pillow Pancakes

Processed with VSCOcam with f2 preset Processed with VSCOcam with f2 preset

Pancake Alex struck again at precisely 6am yesterday morning. I decided it had been a while since I did a post on my pillow pancake series specifically, so today I present to you a modification on my all-time favourite pancake recipe

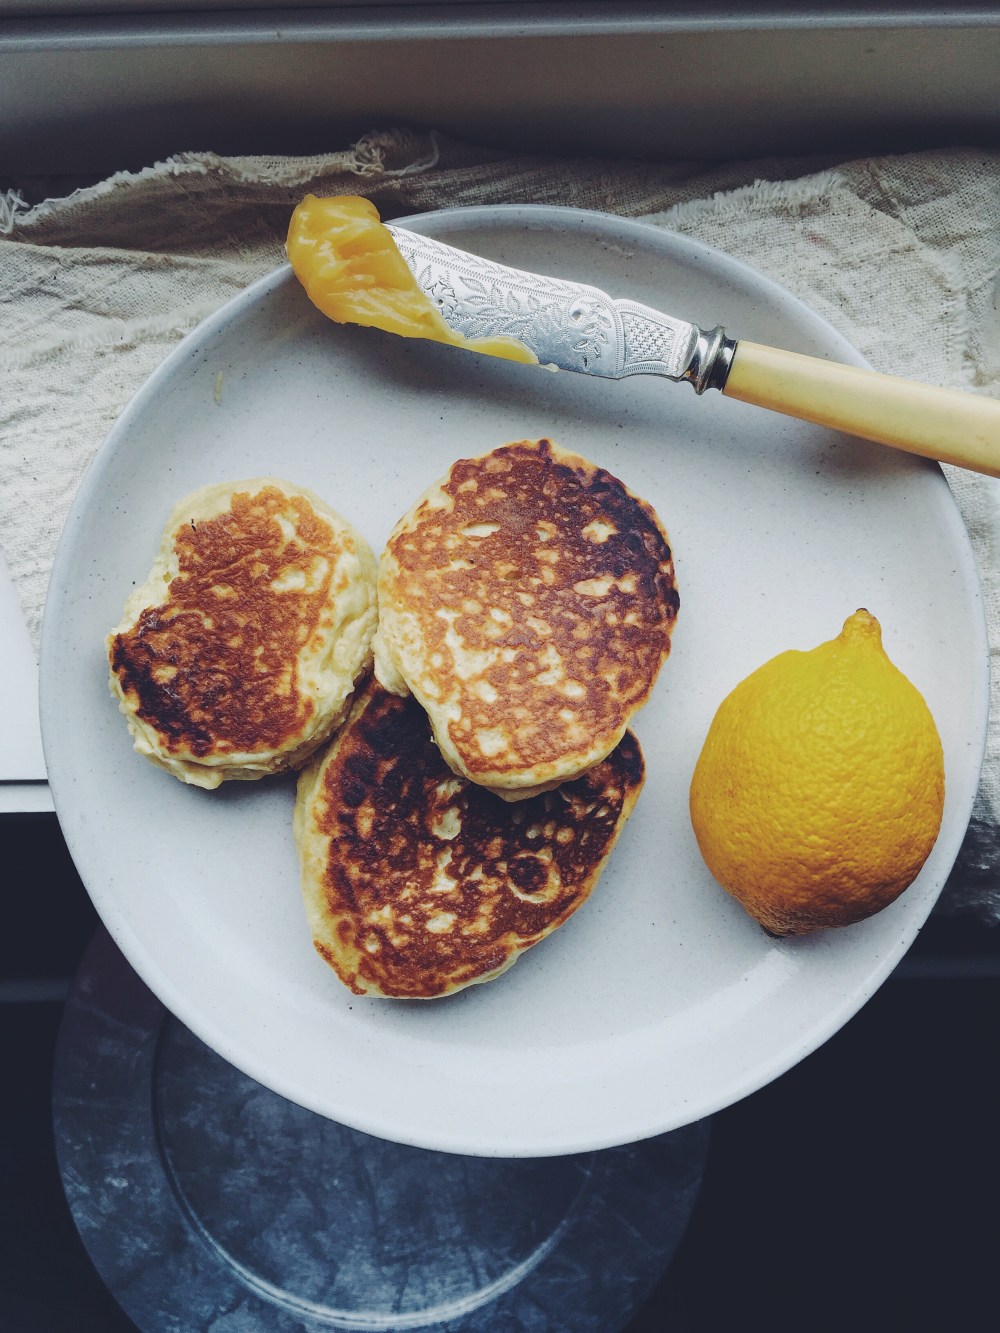
Thick and fluffy (it’s a little ridiculous) pancakes made with yoghurt and citrus curd. I used lime here, but grapefruit/lemon would work just as well.  The morning was ripe with possibility, and pancakes make everything else in your day that much more worth looking forward to.

Processed with VSCOcam with f2 presetProcessed with VSCOcam with f2 preset

I mean, I’ve done lots of pancake variations, and have mixed up the ratios of flour, sugar, eggs, melted butter and what have yous many a time, but it’s this dry mix ratio of 1.5 cups flour, 1 tsp baking powder, 1 tsp baking soda and a generous pinch of salt that makes this recipe live finely up to its name. They aren’t called pillow pancakes for nothing. They have body. They have soul.

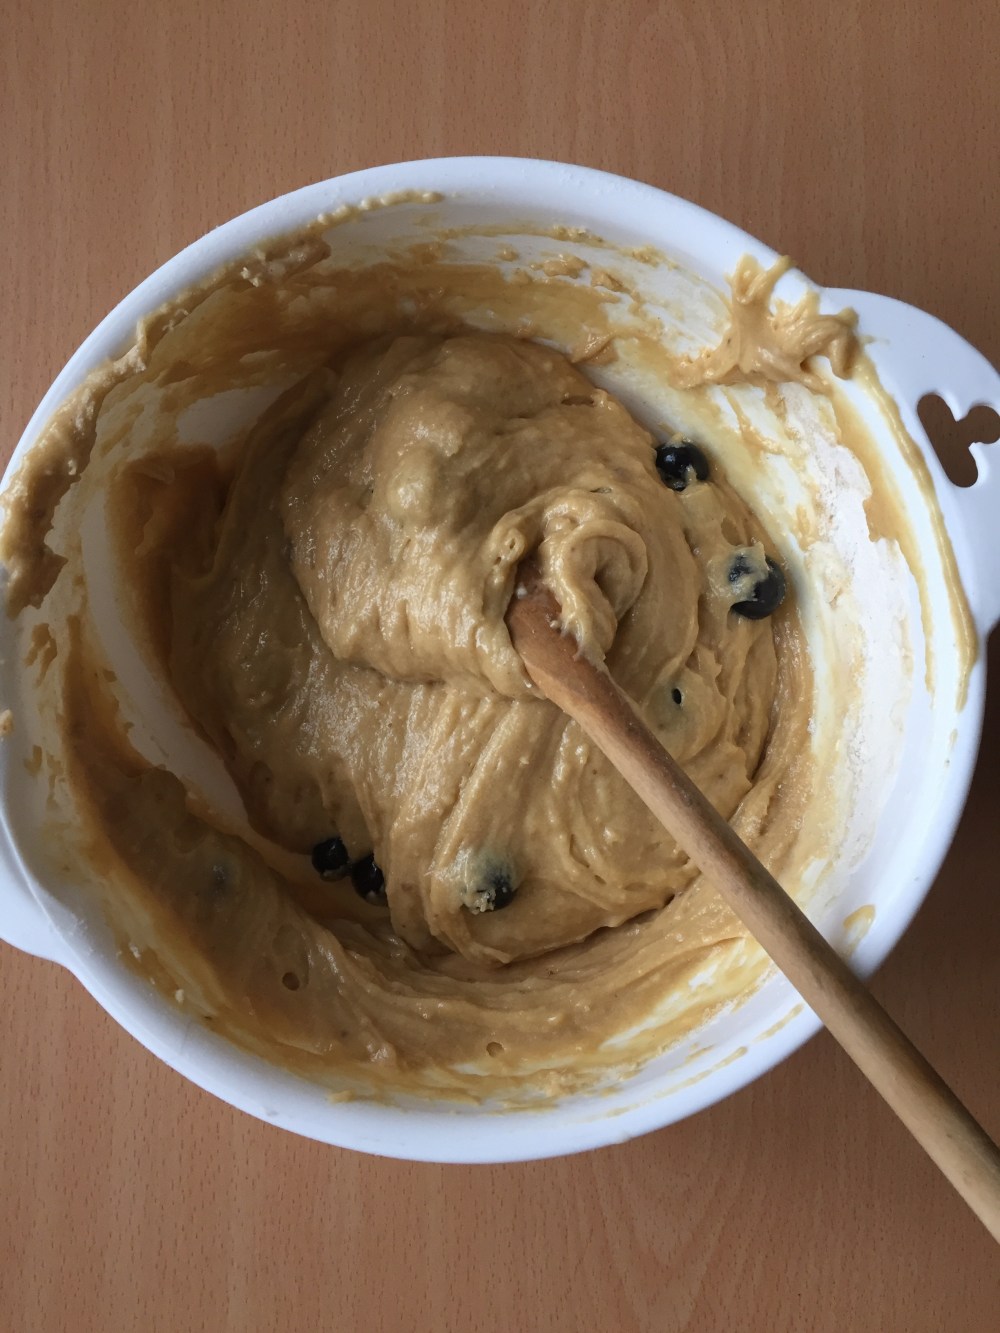
So it’s simple as that in the beginning. Whisk together your dry ingredients in a larger bowl, whisk together your wet ingredients in a separate bowl, pour wet into dry with a generous puddle of melted, unsalted butter, mix briefly, ladle.

Processed with VSCOcam with f2 preset Processed with VSCOcam with f2 preset

The only real difference here is in the wet mix. It differs from my favourite classic pancake recipe by incorporating, of course, yoghurt, which is what produces a slightly stickier, almost yeast batter-like texture, and citrus curd. In this case, a whole 1/4 cup of lime curd, and I shamelessly use cups here because this tried-and-tested recipe works every time I use cups; you just have to make sure that you gently level off the top of the cup (when it comes to flour and such) using the back of a knife. Other minor changes involve a slightly reduced amount of melted butter (the yoghurt and curd compensate for that nicely), as well as half the amount of milk needed.

Processed with VSCOcam with f2 preset Processed with VSCOcam with f2 preset

So fluffy, so perfect with an extra dollop of yoghurt and a drizzle of honey and maple syrup. The fluff.

Processed with VSCOcam with f2 preset Processed with VSCOcam with f2 presetProcessed with VSCOcam with f2 preset Processed with VSCOcam with f2 preset

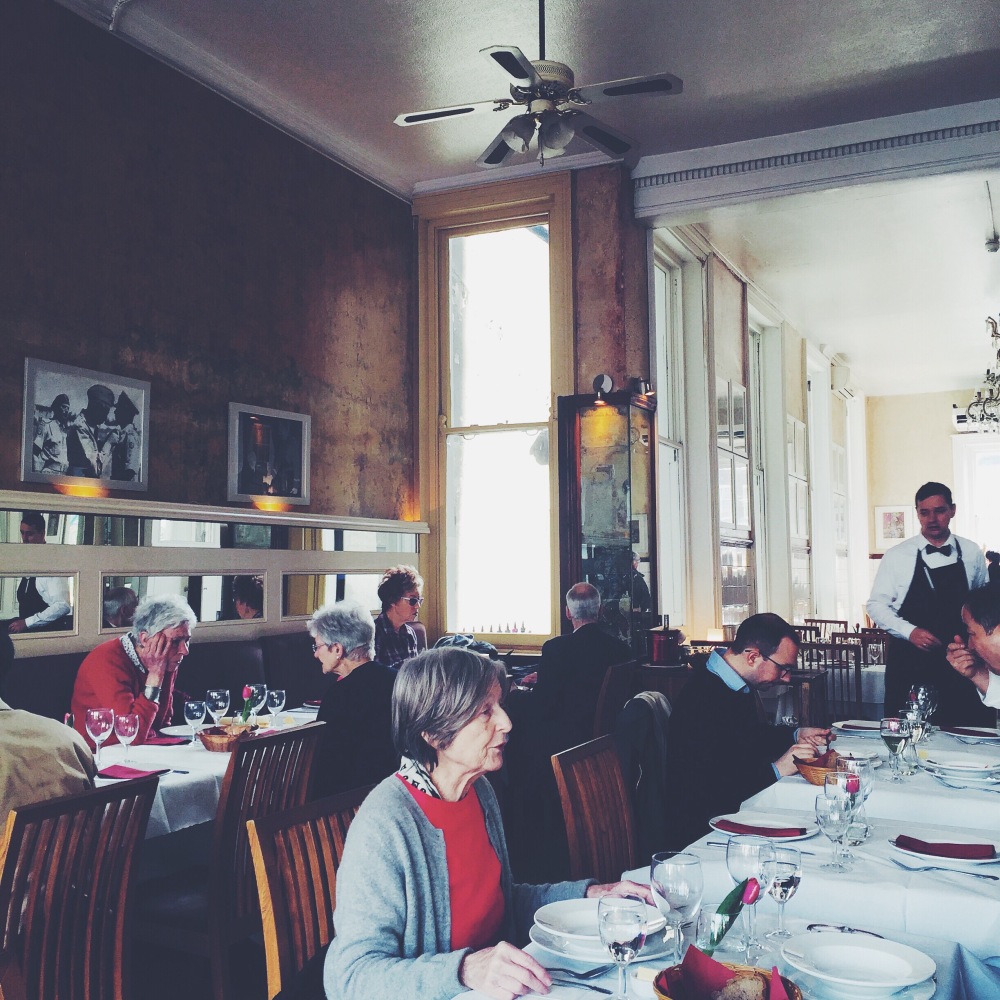
Thought it would be nice to end off with a little glimpse into my common commute to Charing Cross hospital, through Margravine cemetery. All sounds a bit austere, but it’s really one of the most beautiful walks.

Citrus Curd Yoghurt Pillow Pancakes (makes 6-8 medium pancakes)

Directions

Follow the steps for making my classic pillow pancakes here, but this time substitute the wet mix with 1/2 cup (120ml) milk of choice, 1/2 cup whole milk yoghurt, 1/4 cup citrus curd of choice, 1 egg (as per usual) and 4 tbsp (60g) melted butter.

Tip: Make sure to spread out the thick batter after ladling into the pan, else one side will cook too fast.

Serve with fresh fruit, yoghurt and a drizzle of honey.


White Chocolate Macadamia Peanut Butter Bars

Processed with VSCOcam with f2 preset Processed with VSCOcam with f2 preset

Back to basics.

Nothing like a simple sin. Currently sitting in a café trying to remember just about every detail of my most recent creation. The coffee is making me buzz and I’m surrounded by 5 different accents. Just one thing springs to mind– how lucky I was to have yielded the results that I did with the oven that makes my heart quake.

White chocolate, peanut butter and macadamia nuts make up the base of this simple bar recipe, adapted from my favourite and reliable cinnamon roll blondies. They’re ridiculously simple to make, and yield the same squidgy and chewy innards as in the aforementioned recipe, save for a larger, thicker batch because I doubled the ingredients to suit my 10×10-inch pan. Golden crust, chewy edges and squidgy half-baked middle, chock full of white chocolate and crunchy bits of macadamia.

Peanut butter replaces half the butter quantity as stated in my original recipe, for a full-on peanut buttery experience. Though the flavour is more mild than overpowering, it adds a wonderful thickness and complements the brown sugar, the main sweetener in this bar recipe, the tinge of molasses further characterising this brown-sugar-cinnamony wonder.

Processed with VSCOcam with f2 preset Processed with VSCOcam with f2 preset

White Chocolate Peanut Butter Macadamia Bars (makes a thick batch in a 9×9 or 10×10-inch pan), adapted from my favourite cinnamon roll blondie recipe

Ingredients

For blondies:

250g (2 cups) all purpose flour

1/2 tsp baking powder

½ tsp baking soda

pinch salt

2 tsp ground cinnamon

70g (5 tbsp) salted/unsalted butter, melted in the microwave

130g (½ cup) smooth peanut butter

80g chopped white chocolate, 20g chopped macadamias (or you could use Rittersport’s 100g bar of macadamia-studded white chocolate!!)

40g more of chopped white chocolate and macadamias (combined), for sprinkling on top afterward

220g (1 cup) dark brown sugar, packed

200g (1 cup) white sugar

2 eggs

2 tsp vanilla extract

2 tbsp whole milk


For frosting:

5 heaping tbsp hazelnut chocolate spread

5 heaping tbsp smooth peanut butter

1/2 tsp vanilla extract


Directions

Preheat your oven to 177C (350F) and grease (and line if you want) a 9×9 or 10×10-inch square pan. Make sure your butter is microwaved until all melted–do this in a microwave-safe bowl in a 30-second increment and set aside to cool.

In a medium bowl, whisk together the flour, cinnamon, leavening agents and salt. Tip in your chopped white chocolate and macadamias and briefly toss in the flour mix to coat everything well. In a larger bowl, whisk together the eggs, two sugars, vanilla extract, melted butter and peanut butter. Pour the dry mix into the wet mix and fold until everything is well incorporated. You may or may not need all 2 tbsp of milk, but add until you achieve a smooth dropping consistency. The batter should be light brown and will stick to your spoon or spatula until a sharp flick of the hand will force the batter to drop back into the bowl. Pour the batter into your pan and smooth the top with a spatula. Bake in your preheated oven for 15-17 minutes.

Whilst the bars are baking, whisk together the ingredients for the frosting. Roughly chop the extra white chocolate and macadamias. Once the bars are cooked, leave to cool for at least 15 minutes before slicing into however many bars you like. Use a knife to spread some frosting on each, then sprinkle on the chopped white chocolate and macadamias.


Tahini Blueberry Muffins

Processed with VSCOcam with f2 preset Processed with VSCOcam with f2 preset

I know the words tahini and blueberry make this sound pretty much holy, but the taste of these muffins are as lascivious as muffins can get. Not that muffins are meant to be lascivious or anything– they’re always taken as the granny-pants-boring stuff; the complete opposite. I abhor incorrect grammar and the use of words like lascivious in inappropriate contexts, but the fluff on this thing, flavours and textures made me think of that very word, so that they shall be. These muffins are so good, so simple, so delicious (and sexy).

IMG_4615Processed with VSCOcam with f2 preset

I think spontaneous, successful experiments call for celebration. It almost feels like a good replacement for the lack of dirty hands-on lab practicals the past week, though I’m eternally grateful for that one incredibly eye-opening introduction to anatomy dissections. As I peered under each vertebrate (cervical, thoracic, lumbar and coccygeal), fiddled with the moist muscle (sorry for the unappealing alliteration right there) and poked and prodded at the nerves and meningeal layers, I witnessed the magic that is the human form. I crave more of it now. There’s something grossly satisfying in touching something which you know is all you, and at the same time, everyone else. It’s universal, it’s each of us, it’s everyone.

The hands-on itch was a bit delayed– got home and had the blinding urge to experiment and yield results. Delicious results And seeing that I was visiting my fellow foodies Emily and Ella that night (!!), to make something not akin to your typical baked product felt quite appropriate. With lots of tahini and blueberries on hand, these babes were born.

I’ve recently been reading up a lot on our attitudes towards food, health and nutrition, and even with all the information and resources around us, am still boggled by the fact that so many of us are tricked into what I call ‘fake healthy’ eating. Different things may work for different people, but ultimately even the whole notion of ‘striving for balance’ proves to be an inherent problem. We all possess different gut flora, different sets of genes, different intolerances– how are we to rely on anything we hear, see and touch? Is the market trustworthy, justifiable? Diet. Oh, that contentious word.

Yes, it’s good to experiment and see what works for you (no meat, no eggs, etc), but I think it’s high time we stop believing everything we hear, and start listening to our bodies. I know, that phrase is so repeated it’s practically proverbial. And yet, it’s the one thing we must always remember. Chowing down on that Special K and sugary yoghurt isn’t a crime, but advertising betrays the truth, and unless your reward circuitry systems are truly messed up, there’s no saving anyone. All that sugar is practically like lifting up your shirt sleeve and injecting cocaine. So as much as I love sugar, sugar and more sugar, I’ve also become keenly aware on what’s right, and what’s just downright harmful (basically excessive consumption).

These muffins aren’t 100% healthy, but I’m ok with that, and you should be, too.

Because it’s a bloody muffin, guys.

Processed with VSCOcam with f2 preset

Tahini Blueberry Muffins (makes 6 large muffins, lightly adapted from my nut-butter-stuffed matcha cupcake recipe)

Ingredients

130g (1 cup) plain flour

70g (1/3 cup) white sugar

75g (1/3 cup) packed dark brown sugar

1 1/2 tsp baking powder

1/4 tsp baking soda

pinch salt

2 eggs

113g (1/2 cup) unsalted butter

80ml (1/3 cup) tahini

1 tsp vanilla extract

50g (1/2 cup) fresh blueberries


Directions

Preheat your oven to 170C (340F) and line a muffin tin with liners, or simply place some cupcake/muffin liners on a baking tray.

In a medium bowl, briefly whisk together the flour, two leavening agents and salt. Dump in your blueberries and lightly toss to coat in flour.

In another large microwave-safe bowl, microwave your butter for 20 seconds until partially melted. Whisk the butter and two sugars in this bowl (quick creaming method) to aerate the mixture slightly, for at least a minute. Add the 2 eggs, vanilla and tahini, and whisk everything together well. Pour the dry mix into the wet mix, and use a wooden spoon or spatula to gently fold in the dry mix until everything is just combined.

Spoon the batter into 6 muffin liners, and bake in the preheated oven for 25-28 minutes. The muffins are large ones, so they need time to rise and brown. Check them at the 25-minute mark– a wooden skewer inserted right in the middle should come out clean. They should have a medium brown, almost caramelised and slightly domed top. You might even need a whole half hour. The insides will be fluffy and tender.

These muffins are best served the day they’re made, but you can keep them for an extra 1-2 days in an airtight container. Otherwise, freeze any uneaten ones in the freezer and microwave when the mood hits.

No-bake Chocolate Peanut Butter Tahini Oat Bars

Kind of a mouthful. The good sort.

Processed with VSCOcam with f2 preset Processed with VSCOcam with f2 preset

Some breathing time during the week makes way for occasional creative insight. The early morning heralds possibility, and it’s only when my head hits the pillow that I realise how startlingly tired I am from the events of the day. The night pulls you in. Processed with VSCOcam with f2 presetProcessed with VSCOcam with f2 preset Processed with VSCOcam with f2 presetProcessed with VSCOcam with f2 presetProcessed with VSCOcam with f2 preset Processed with VSCOcam with f2 preset

There are so many things that make life sweet. Like this recipe. But there are also the cute coffee shop corners, insightful nutrition links I keep finding online, and inspiring folk everywhere. Here in London especially, there’s just no shortage of things to do, eat and see.

But yes. There’s just so much yes in this recipe.

No-bake chocolate peanut butter oat bars, bound together with earthy tahini, maple syrup and oats. 

There’s:

  • no flour
  • no egg
  • no sugar (as in your typical white sort, but the maple syrup provides all the goodness, and a wonderful flavour dimension)

and heck, even though I love all these things, it just means another 3 things you don’t have to lack and cry over. Easy.

The formula is simple, the taste lush. You don’t need much to handle in the first place. In fact, it’s so simple I won’t even provide a proper list of ingredients. Just some instructions, with a few cup measurements thrown in here and there. Oh right, and you need a pan. But I thought you would’ve figured that out.

Processed with VSCOcam with f2 preset Processed with VSCOcam with f2 presetProcessed with VSCOcam with f2 preset

No-bake Chocolate Peanut Butter Tahini Oat Bars (makes 36 medium bars in a 9×9-inch baking pan)

Grease (line if you wish) a 9×9-inch baking pan. In a saucepan over low heat, melt together 100ml (a little more than 1/3 cup) maple syrup, 113g (one stick) salted butter, 270g (1 cup) peanut butter (smooth or chunky, do as you wish) and 180g of chopped dark chocolate. This will take about 3-5 minutes.

Take off the heat and stir in 80ml (1/3 cup) tahini, a half cup of chopped nuts (or more chopped chocolate), and 135g (1 1/2 cups) whole rolled oats. Pour the thick mix into your pan and let sit in the fridge until firm– around 30 minutes (yes that’s it!)

Cut into bars with a sharp knife and have a ball. There’s no real need to dress these up with anything, but I imagine them nice with chocolate hazelnut spread or more peanut butter on top.

Chocolate Coffee ‘Mochi’ Cake

Processed with VSCOcam with f2 preset

I guess I should stop with the chocolate some time. Some time. In the future. Not now.

It’s been weeks since I left Japan, but I occasionally find myself reminiscing bits and parts of it. The little alleys, and corners, and scarily magnanimous people. Oh right, and the food. That.

I remember strolling into a little sweets shop with the rest of the family, and we were greeted by mile-high packs of mochi– little rice cakes made with Japanese glutinous rice. Mochi’s kind of like a magic food, consisting of polysaccharides, proteins, lipids and water. All weaved together to form this sticky, chewy, yet delicate mass. The gel-like consistency is actually due to lack of amylose in the starch grains of mochi rice, and it’s that sort of texture I wanted to recreate in this cake.

When I came across Food 52’s recipe for a chocolate mochi snack cake, I knew I had to give it a shot (and a little twist). Now I didn’t have the sort of rice necessary to make traditional mochi, but rice flour came close enough. And so rice flour it was.

I know I know, it’s a chocolate cake. Yet it’s much more than that. It’s akin to something bolder, and brighter, yet lighter. The crumb is so fine, yet each slice is perfect and straight-edged, holding its own, each bite one of chocolatey integrity.

This cake has:

  • an almost-crisp, sugary, crusty top
  • a soft, incredibly fine-crumbed interior
  • oozing pockets of chocolate chunks
  • a slightly squidgy, chewy middle
  • me smitten

Processed with VSCOcam with f2 preset Processed with VSCOcam with f2 preset

The secrets here are the addition of coffee, use of confectioner’s sugar, and the melting of chocolate, butter and honey as one of the first steps. Take your time making this– it’s simple but harbours close precision. I couldn’t resist adding a dash of coffee into the wet mix, and the result was moist and fragrant. You won’t regret dashing out to get that extra pack of confectioner’s sugar either– it yields the most fine and delicate cake crumb.

Yeah, pretty ethereal.

Processed with VSCOcam with f2 preset Processed with VSCOcam with f2 preset

Chocolate Coffee ‘Mochi’ Cake (adapted from Food 52’s chocolate mochi snack cake recipe; makes a thick 9×9 pan of cake)

Ingredients

325g (2 cups) rice flour (I used Doves Farm)

190g ( 1 1/2 cups) confectioner’s sugar

1 tbsp baking soda

pinch coarse salt

180g (1 heaping cup) dark chocolate (70% cocoa), chopped into chunks

1.5 tbsp honey

1 tsp vanilla extract

2 eggs

500ml (2 cups) whole milk

120ml (1/2 cup) coffee (I used instant– one tablespoon dissolved in half a cup of boiling water, but use the better stuff if you can!)

113g (1/2 cup) salted/unsalted butter

160g (slightly less than a cup) chopped dark chocolate, mixed with 2 tbsp extra of rice flour

5 tbsp maple syrup/honey (for the topping)


Directions

Preheat your oven to 180C (350F) and grease and line a 9×9-inch brownie pan.

In a medium-large bowl, whisk together the rice flour, sugar, baking soda and salt. Put the 180g of chopped dark chocolate, butter and honey into another bowl and microwave for 1 minute. Take it out and stir until you get a smooth, homogenous mixture. Alternatively, do the same in a saucepan and over a low-medium heat.

Scrape the smooth chocolate mix into a large bowl (large because it’s going to hold quite a volume), then stir in the 2 eggs, milk, coffee and vanilla extract. Add the dry mix and fold into the wet mix until you get a smooth, rather wet, light brown batter. Probably much wetter than what you would expect, but not as sticky or glutinous as your typical brownie batter. Then stir in the extra 160g of chocolate chunks mixed with the extra 2 tbsp of rice flour.

Scrape the batter into your greased pan, and bake for 50 minutes in the preheated oven. Once out of the oven, pierce random parts of the cake with your fork or knife, then drizzle over the honey/maple syrup. Leave to cool for half an hour, then cut and serve. This cake can be kept for a week in an airtight container in the fridge, but as the original recipe from Food 52 states, it does taste better at room temperature (ah, what are microwaves for). Serve on its own, though it’s also delicious with a heavy hand of chocolate spread (as shown above) or whipped cream.