One Bowl Banana Coconut Mini Bundts


Processed with VSCO with f2 preset

Sitting here at midnight, only thinking about the transience of so much. Day by day, shadows work their way around my feet. Before I’ve even come to terms with fact that term time is almost up, people in other unis have started summer, champagne bottles are being popped. Hyperactivity everywhere.

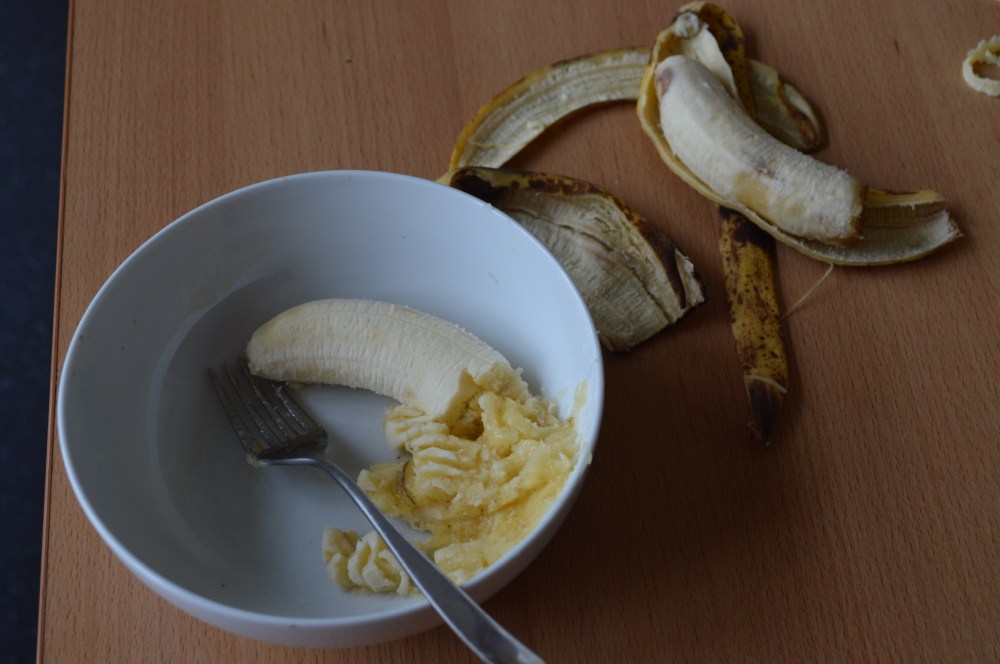
With all the frantic house-hunting and exam stress (and worrying over the efficacy of actual study technique), there’s comfort in the close strong bonds you know you always have with loved ones, and the smell of something warm and sugary rising in the oven. I knew I had to use my one precious, scratched mini bundt pan at some point before the end of first term. I hauled all my stuff from Singapore for a reason, right? Yeah, it’s been a while, but mea culpa.

Before I move on, a few things that’ve caught my eye this week. I do feel more inclined to share what I read regularly on this platform, which is pretty much everything nutrition/science-related:

Fascinating

Darya keeps linking the best, most informative and relevant articles

‘good science writing is not just about about turning over conventional wisdom about complex things.’ So much yes.

Love this man. A great retelling

And now.

DSC_4155Processed with VSCO with f2 presetDSC_4161Processed with VSCO with f2 preset

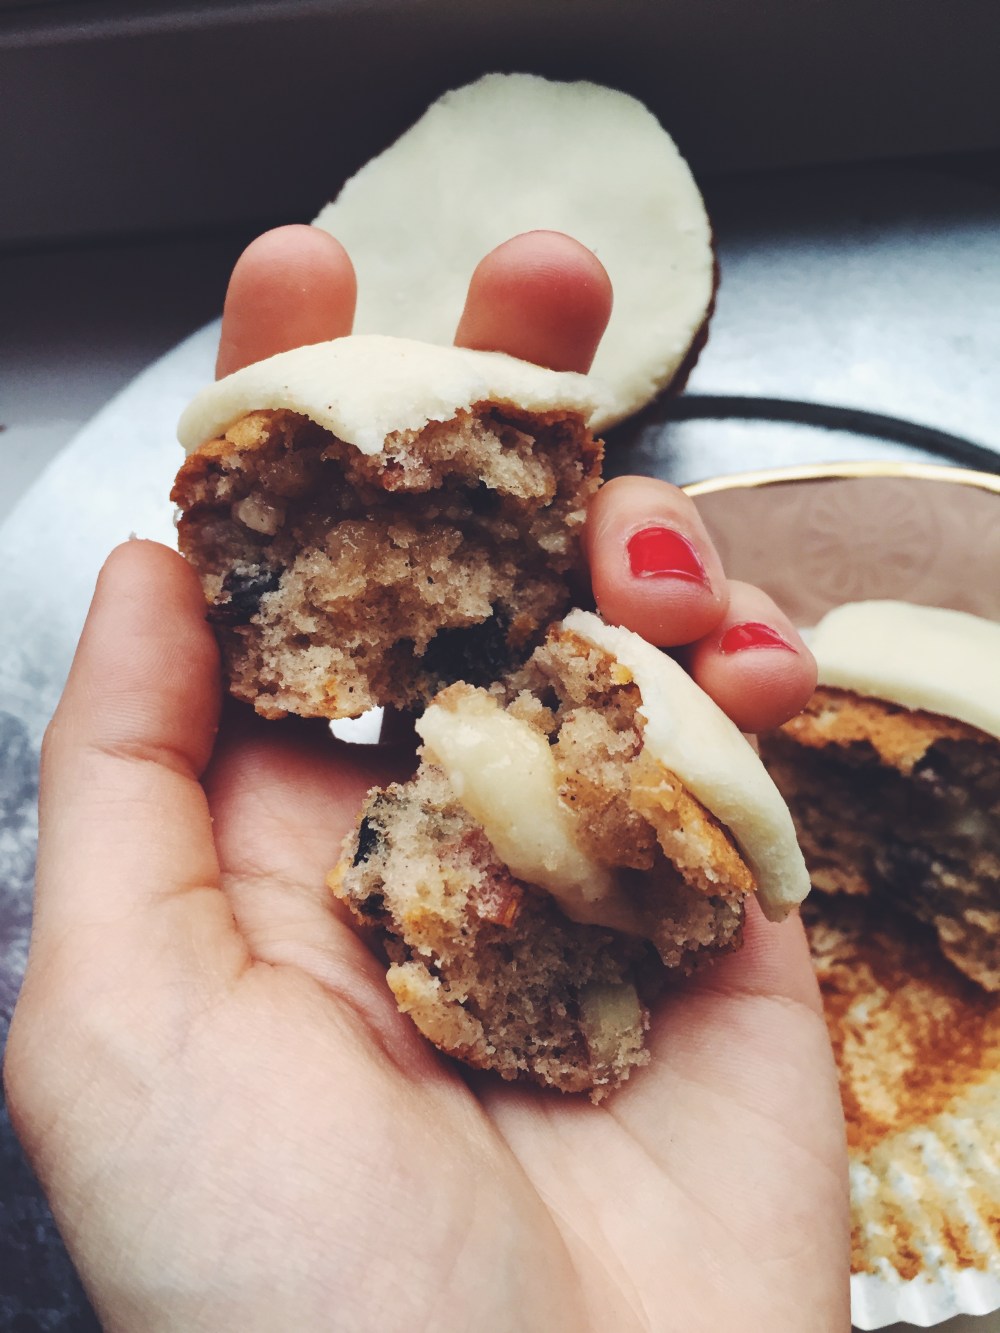
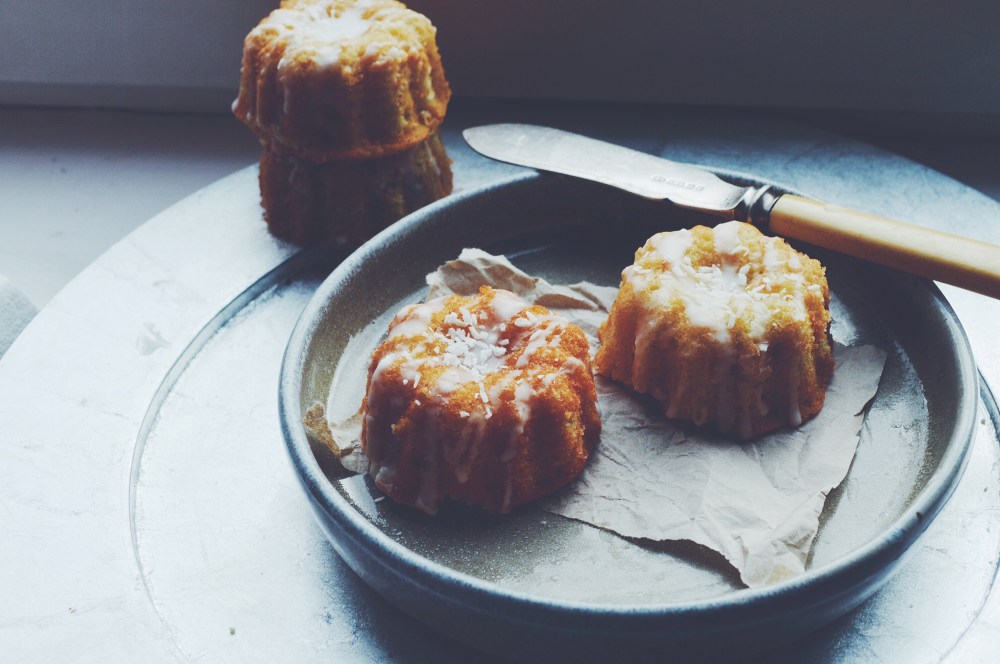
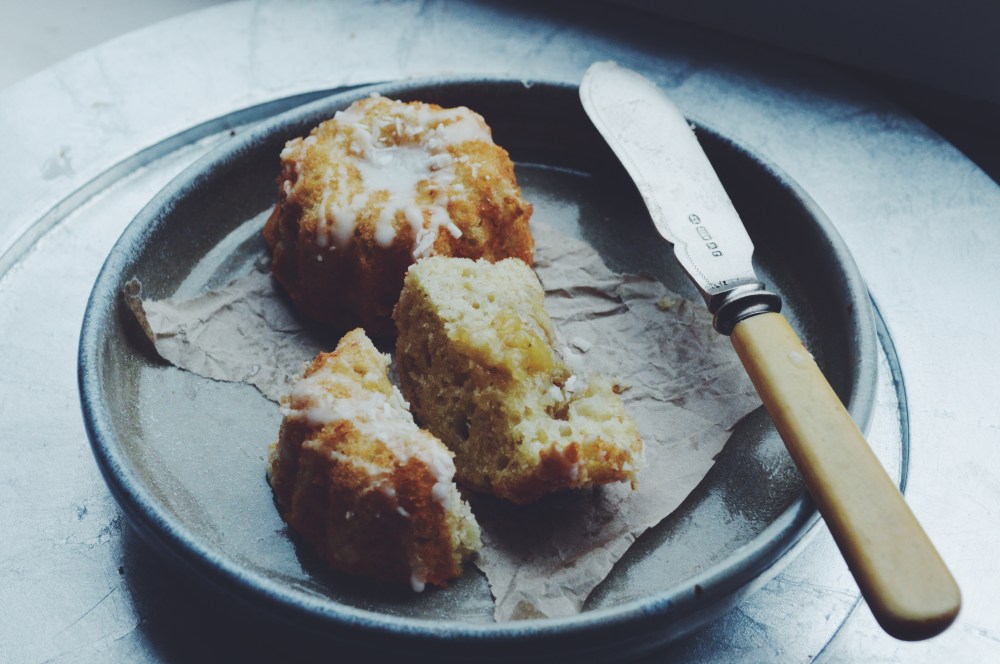
The fluffiest, softest mini cakes you will ever make, stuffed with mashed banana, topped with a coconut milk icing.

Now with blogging comes honesty. I’m not kidding when I add the ‘you will ever make’ bit, because they really truly are.  I just can’t kid when it comes to this sort of thing. Despite its ease and speed, this recipe has yielded the softest cake texture I have attempted by far. Stuff of cloudy dreams. I hate overhyping something, but the excitement is all too real right now. THE absolute best bit?

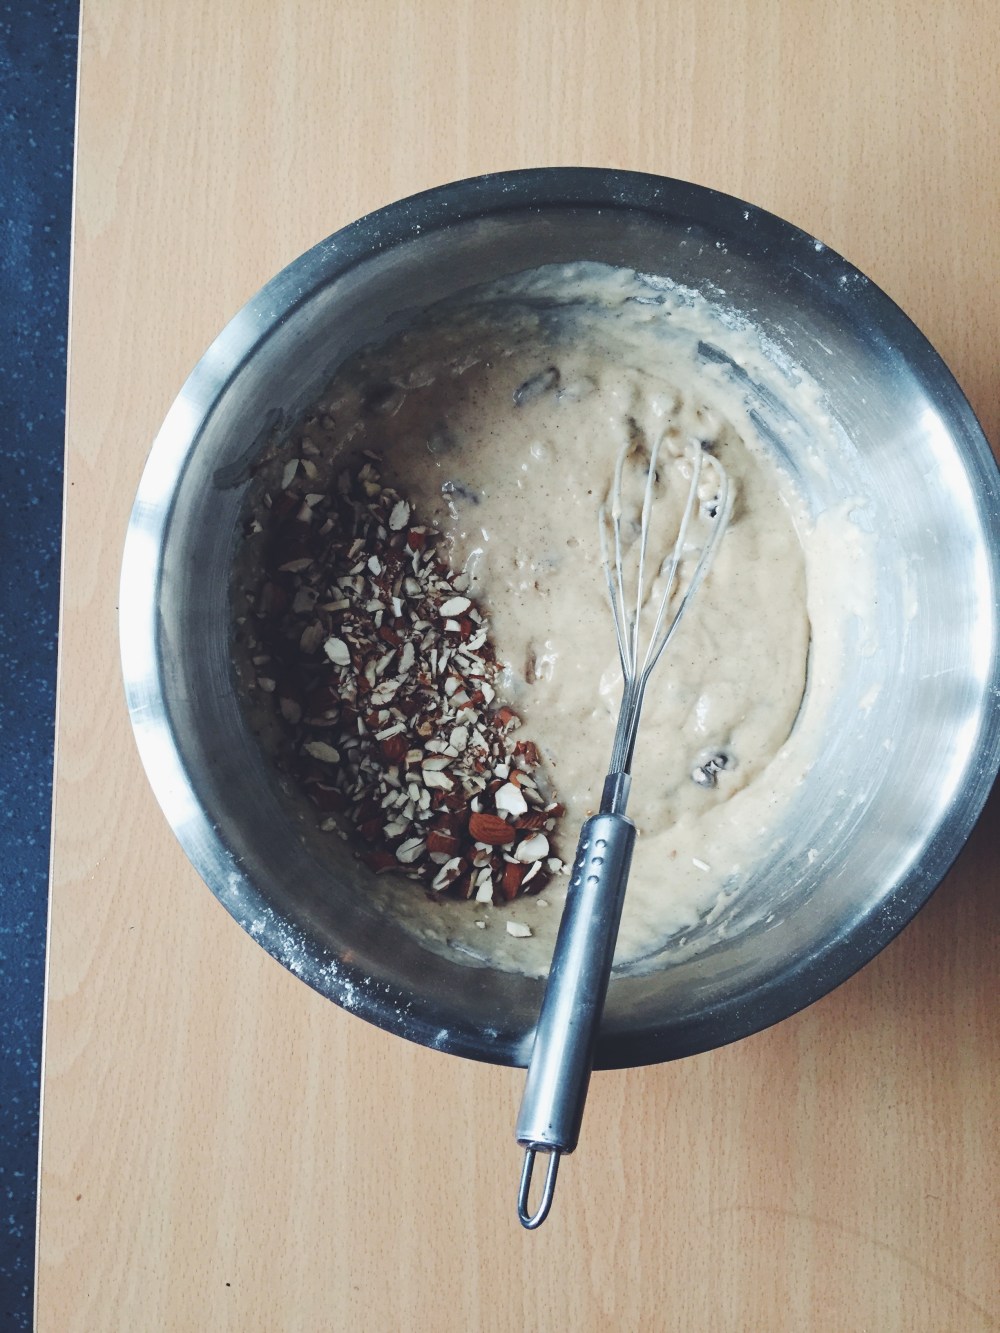
It’s all made in one bowl, just a bit of mixing, no elbow grease or sweat or fiddling whatsoever. No worrying about whether you have to ‘make time’, because you will have the time.

Processed with VSCO with f2 presetProcessed with VSCO with f2 presetProcessed with VSCO with f2 presetProcessed with VSCO with f2 presetProcessed with VSCO with f2 preset

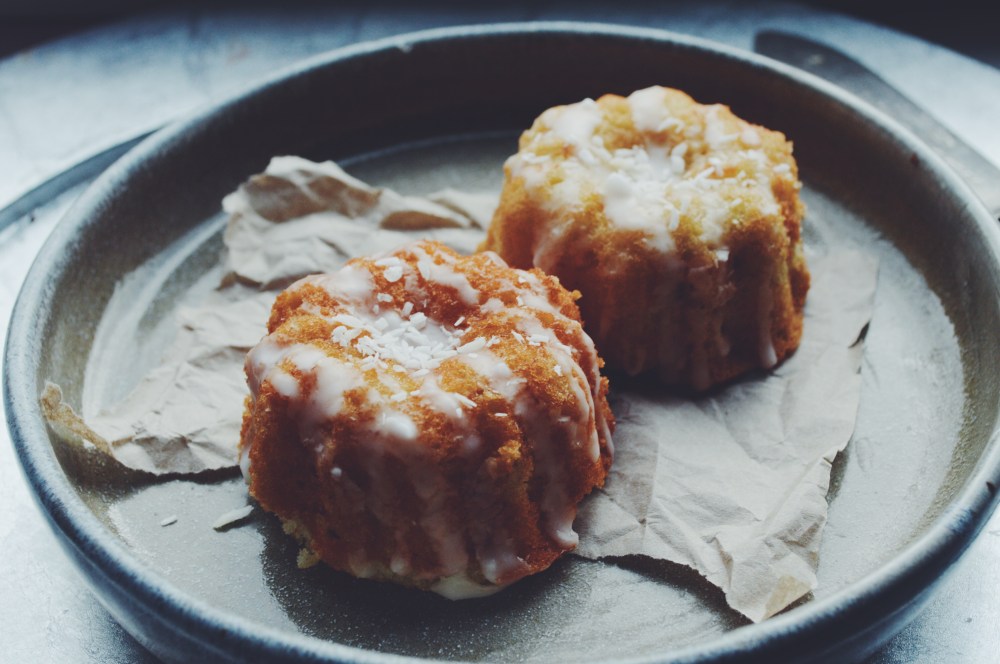
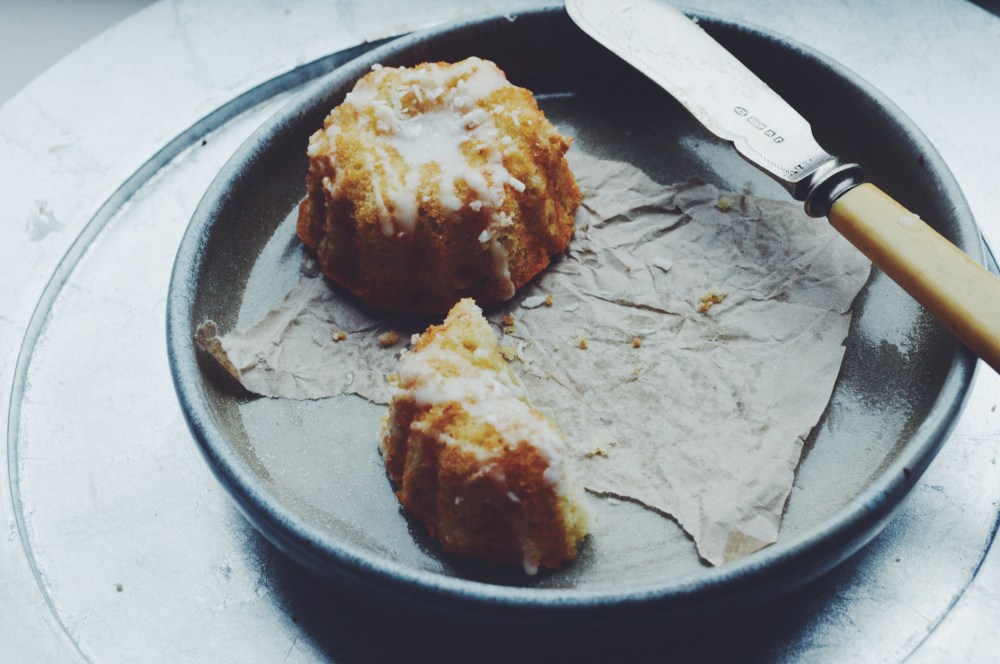
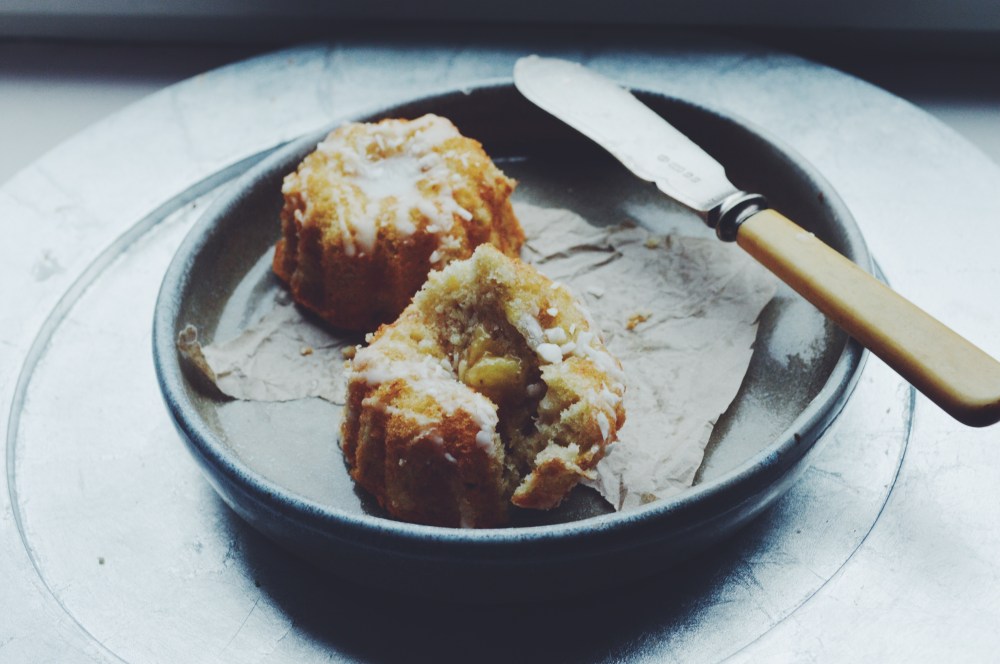
These little cakes really are quite special. Perhaps it’s the irresistible fluff factor, or the mashed banana in the middle, making it a triple-layer banana hit. Probably both, not forgetting the slightly balmy, creamy addition of coconut. The next time I make these, I’ll add more coconut extract for an extra exotic kick. The delicacy of the crumb in this cake deserves the trueness of flavour.

You definitely don’t need a mini bundt pan for these, and can do the same thing in a mini muffin tin, or spread the batter in a square tin and bake for the same amount of time, then cut little squares/whatever your wild heart desires out of the final product.

And if you’re in the mood for more…

Feeling like cookie butter?

Or perhaps a little lemony?

Clearly I’ve run out of humour.

Processed with VSCO with f2 preset

One Bowl Banana Coconut Mini Bundts with Coconut Icing (makes 12-14 mini cakes)

Ingredients

For the cakes:

60g soft, unsalted butter

1 1/2 mashed bananas (should amount to a half cup)

an additional 2 mashed bananas for the filling

225g (1 cup) white sugar

2 eggs

60ml each of coconut cream and coconut milk

1 teaspoon vanilla extract

190g (1 1/2 cups) all-purpose flour mixed with a half tsp of baking powder (alternatively, use self-raising flour)

quarter teaspoon of salt


For the coconut milk icing:

2-3 tbsp coconut cream (or use coconut milk)

75g icing sugar


Directions

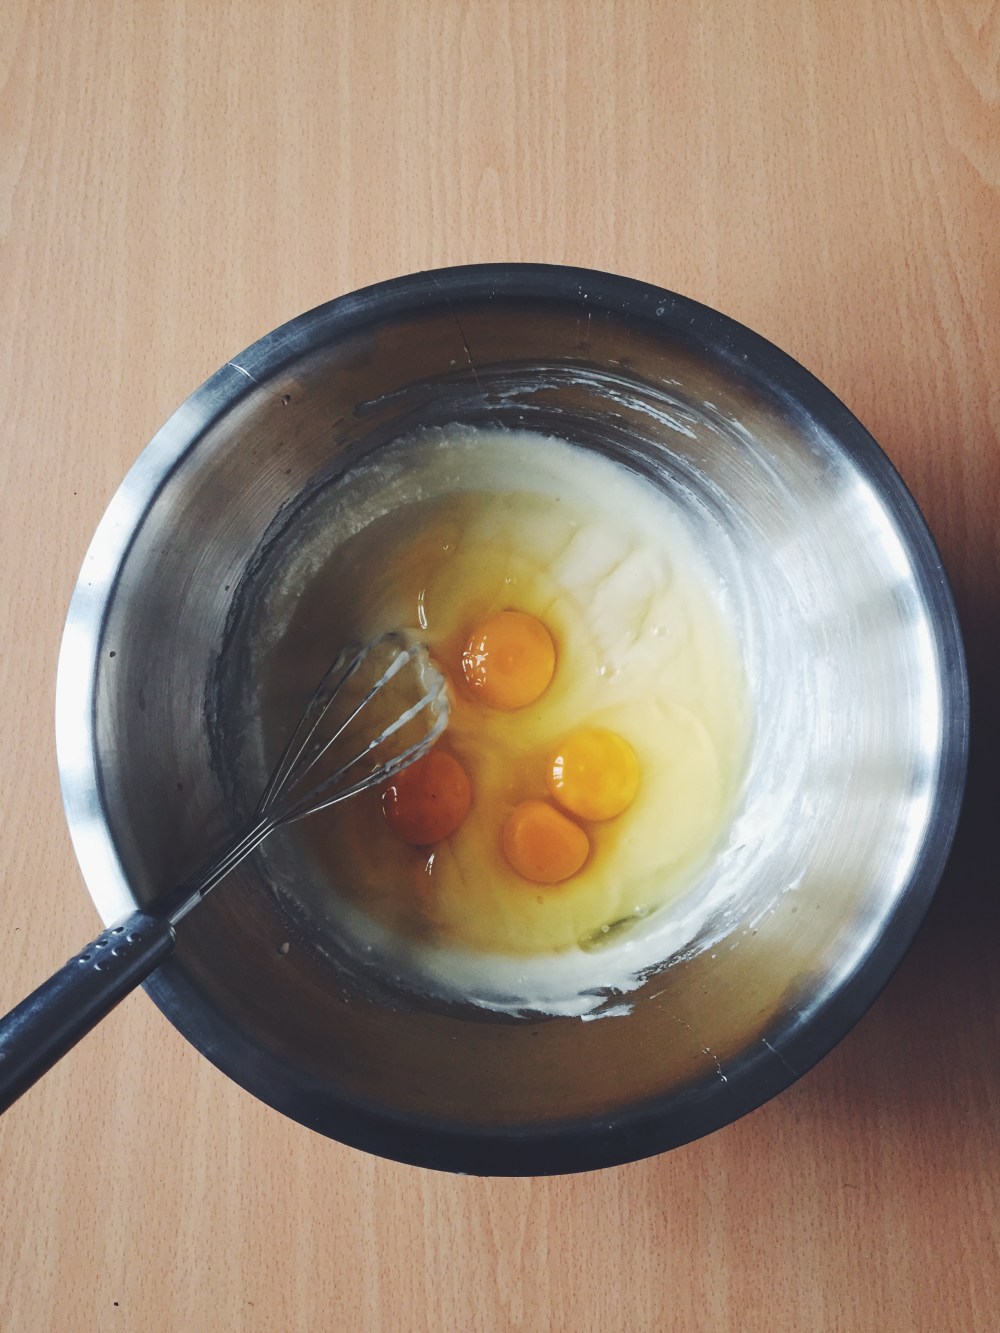
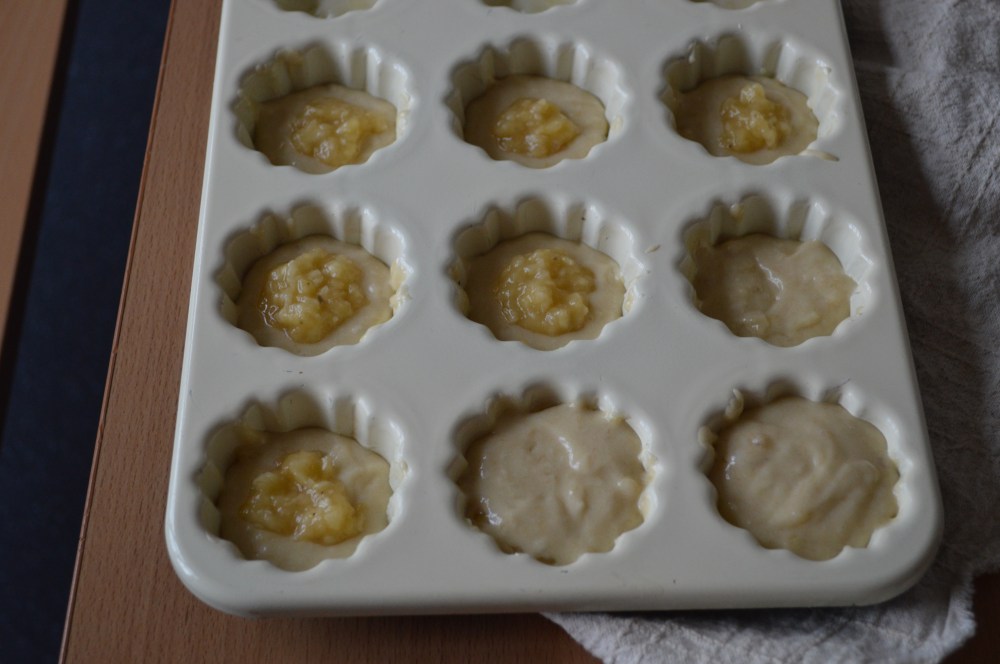
Preheat your oven to 180C (350F) and butter your mini cake/bundt/muffin tin. In a microwave-safe bowl, heat the butter and mashed banana together in a microwave to add a little caramelised effect to your already-ripe bananas, around 20 seconds. Pour contents into a larger bowl (makes mixing a bit easier later on), then add all the other ingredients for the cake, except for the 2 mashed bananas which you need for the filling afterwards.

Spoon a tablespoonful of batter into the bottom of a well in your tin, add a teaspoon of mashed banana in the middle, then fill the rest of the well with batter. Bake in the preheated oven for 18-20 minutes (mine were fine at 18). Whilst they are baking, mix the icing ingredients in a bowl and set aside. It’s hard to test for doneness due to the moist banana filling, but a little poke into the sides with a wooden skewer should reveal a mostly clean tip. A few moist crumbs clinging to the tip are fine; these cakes are pretty fragile and need to rest in the tin for a good 20 minutes before removing anyway.

If using a mini bundt pan, use a serrated knife to cut the tops off (these make wonderful little snacks). Loosen the edges with a blunt knife (just use a normal dinner knife), then tip the pan over to remove the little cakes. You don’t need to do this if using a normal muffin or cake tin. Drizzle with the coconut icing and top with coconut flakes. Fragile, sugarplum fairy-esque teatime treats await.


Gin-roasted stuffed pears with yoghurt

Processed with VSCO with f2 preset Processed with VSCO with f2 preset

I call it a grand break. A super grand one. I don’t want to sound hubristic, but damn this was one irresistible breakfast.

I like sticking with familiarity on most days– oats, toast, my beloved french toast. The classic stuff. But sometimes change awakens and broadens your horizons, and what oftentimes seems like an alarming shock to the system turns out to be inspiriting.

Processed with VSCO with f2 presetProcessed with VSCO with f2 presetProcessed with VSCO with f2 preset

So you buy a pear. That’s the first step. The first step in this magical process.

Take a knife, cut it in half. Then take a melon baller and core it, or be like Alex and not actually have one of those, and use a knife instead to cut out little half=spheres from each half. Chop up some almonds and dark chocolate (because chocolate and pears! Unfortunately the picture above was before the chocolate stuffing bit), then stuff the middles with the mix.

Then you roast it with gin, cinnamon and honey. After some research, I found that roasting something for 15 minutes retains the most (around 40% of whatever you’re using) alcohol, so I tested it, and it turned out sublime.

Processed with VSCO with f2 presetProcessed with VSCO with f2 preset

Then you eat this lump of caramelised, tender deliciousness with thick Greek yoghurt, drizzled with whatever you want. That day in particular necessitated honey, a little almond butter and this divine mango chutney that a friend recently purchased for me (hi Claire!!).

The warm, firm yet soft pear complements the creaminess and sourness of the yoghurt just perfectly. Nuts provide crunch, the cocoa and cinnamon add a sultry dimension, one of apt luxury.

Processed with VSCO with f2 preset

Gin-roasted stuffed pears with yoghurt (serves 1, but can be scaled up or down)

Ingredients

1 firm pear (Bartlett/ Concorde)

4 tbsp unflavoured or flavoured gin (I used gooseberry which is sweeter, so you might need less with something unflavoured/stronger)

small handful (around 1 oz or 28g in total) of chopped almonds and dark chocolate

1 tsp ground cinnamon

1 tbsp honey

80-100g yoghurt (of course this bit is completely up to you, but this ratio works well)

topping options: honey, maple syrup, berries, more nuts


Directions

Preheat your oven to 180C (350F). Cut and core your pear (or, as I said earlier, be like me and forgo the melon baller, instead using the same knife to just cut half-spheres in each pear half).

Add one tablespoon of gin to each ‘hole’, and leave for around 30 seconds to let the pear soak it up. Then add your mix of chopped almonds and chocolate to each half. After filling, add one tablespoon of gin to each half again, drizzling all over the pear. Sprinkle on the cinnamon and drizzle the pear with honey.

Place in the preheated oven and roast for 15 minutes, no more and no less. If your pears don’t lie flat, use a knife to cut a little bit off the backs of the pear halves so that they do.

Remove from oven and serve with yoghurt, together with whatever toppings you want!


Marmalade White Chocolate Breakfast Pudding (for one)

Processed with VSCO with f2 preset

Books and (hopefully efficient) memory work make up the corpus of my life right now, but that won’t stop these mini experiments.

The classic milk/dark chocolate and orange combination has been done countless times before, so I thought, why not give the slightly neglected white stuff a chance? Stuck my hand far at the back of my cupboard and broke a bar into chunks. Threw it into the mix. It did just the trick.

Ah, that char? Yeah, the oven wasn’t being a very agreeable host that morning. I made a few recipe modifications after taking all necessary photos, and am pleased to say that the final product, the second shot, went into the hoop. Pretty darn delicious. Spongy and fluffy in the middle, sweet like dessert, but the orange peel almost makes it wholesome. Firm, caramelised top and bottom crust. And of course, like pretty much most of my recipes, this is easy easy easy. 5 minutes tops for everything.

Before I leave you to it, check out these links:

Make these cookies. The only minor change I made was substituting half of the milk chocolate with white chocolate (can you tell I’m on a bit of a white kick?), but the results were glorious. The resting method that relaxes the gluten and lets the flour absorb as much of the liquid as possible yields teh chewiest, gooiest, YUMMIEST cookie.

‘Large claims and scant evidence’ indeed

Brings me to tears. Perhaps it’s all the minor keys and tinkling notes, but listening to this particular composer has a serious emotional effect on me.

Processed with VSCO with f2 presetProcessed with VSCO with f2 preset Processed with VSCO with f2 preset

Marmalade White Chocolate Breakfast Pudding (serves 1)

In a small bowl, whisk together one egg yolk, a splash of vanilla extract and 3 tbsp sugar until mixture goes slightly pale.

Add a pinch of salt, a half tsp of baking powder, 2 tbsp flour, 1.5 tbsp marmalade (I like thick chunks of rind in mine, but do so with whatever sort you prefer), and 2 tsp whole milk.

Add a handful of white chocolate chunks (around 15-20g) and mix. Pour everything into a microwave-safe mug or ramekin, and microwave for 1.5 minutes (90 seconds) on high. Check after 1 minute- it might be done by then. A wooden skewer inserted in the middle should come out clean.

My first spontaneous pairing with thick greek yoghurt convinced me that that, together with more marmalade and white chocolate, make for the best toppings to eat with this pudding.

Double Marzipan (simnel-style) Cupcakes

Processed with VSCO with f2 preset

A lightly spiced, currant and nut-stuffed fluffy cupcake, with a layer of marzipan on top and in the middle. 

I’ll tell the truth– I had no idea my usual Saturday baking experiment was really of traditional substance. All I knew was that I needed to use the marzipan which called my name out sadly every time I opened the little pantry door, as well as the currants I kept for but never used over the Christmas break. So I diddle-daddled, thumb-twiddled, and decided to make these 2-layer marzipan currant cupcakes, only to realise after a bit of research later that these babies are already a thing, and what adorable, moreish things they looked right there on my screen. And so I made them, with heavy tweaks. And loved them.

Processed with VSCO with f2 presetProcessed with VSCO with f2 presetProcessed with VSCO with f2 presetProcessed with VSCO with f2 preset

This cupcake is truly a thing of beauty– the crumb is of unbeatable lightness, yet the crumbs adhere just the right amount to each other so the cake itself is not too forgiving; the top and bottom bits of the middle layer of marzipan ooze into the adjacent airy crevices a tad, sweet goo cemented to buttery crumb, like little cilia on epithelia (is that too far).

Processed with VSCO with f2 preset

The amount of eggs used in this recipe is almost double what I expected, but all at the right cost, for that volume provided the perfect amount of moisture, lightness and bind. I substituted the oil with melted butter because I didn’t have any oil on hand, and used almonds and yoghurt as extra additions. Another thing I love is that the use of mostly liquid ingredients here lessens the workload and time needed to make these (by the way, the perfect cook time here is ~25 minutes, tried and tested).

Processed with VSCO with f2 preset

Once out of the oven, the flat top so characteristic of cupcakes as well as the sides boast an almost-firm, sugary crust, which is why I highly recommend eating these straightaway or at least the same day, for the following day that outer texture will be much less pronounced.

That belly goo, though.

Double Marzipan (simnel) Cupcakes (makes 12, heavily adapted from BBC Food)

Ingredients

450g marzipan

275g white caster sugar

115g (one stick or a half cup) butter, microwaved until softened (melted is fine too)

4 eggs

3 heaping tbsp (50g) honey

1 tsp vanilla extract

200g plain all-purpose flour, plus some extra for rolling out marzipan.

2 tsp baking powder

1 tbsp cinnamon

1/2 tsp nutmeg

60g (1/4 cup) cream cheese, at room temperature (I microwaved mine to quicken the warming process)

60ml (1/4 cup) yoghurt

150g raisins or currants, or use a mix of both

100g chopped/flaked almonds


Directions

Line your cupcake tin with 12 liners, and preheat your oven to 180C (350F). Roll the marzipan out on a surface lightly floured, or lightly dusted with some icing sugar. Cut out 24 discs– 12 that are 6cm wide, and 12 that are 5cm wide. All should be 3mm thick, as specified in the original recipe (lesson learnt: using an actual ruler beats doing this by eye by a mile).

In a medium bowl, briefly whisk together the flour, baking powder, spices, chopped almonds, and currants/raisins. In another, larger bowl, whisk together the sugar, melted butter, cream cheese, yoghurt, honey, vanilla and eggs.

Tip in the dry mix and mix until everything is well incorporated.

How easy was that.

Spoon a tablespoonful of batter into the first liner. Place a 5cm-wide circle of marzipan on top, then fill the liner with batter until it’s 3/4 full. Bake in the preheated oven for 25 minutes. Check with a skewer to see if it comes out clean.

Once the cupcakes are out, top each with the 6cm-wide marzipan circles. It’s important, as the recipe states, to do this while the cupcakes are still warm, for this helps seal the top bits of marzipans to the cupcakes, forming a nice and even (and aesthetically pleasing) layer.

For reasons mentioned above, try your best to consume these the same day. Nevertheless, these may be stored in an airtight container for 2-3 days.


Cinnamon Sugar-crusted Cream Cheese-stuffed French Toast

Processed with VSCO with f2 preset

There’s french toast, and then there’s cinnamon sugar-crusted french toast with a cream cheese filling and warmed berries. It’s your pick.

There are no extravagant steps, not too much brain energy involved. You dip good bread in luscious custard (or do it the eggless/vegan way), dip that in cinnamon sugar, fry in a pan.

Then you spread some cream cheese frosting (not the bought stuff, no no) on one slice, layer with warmed berries, layer on the other slice.

Then you ooh and aah for a bit, drizzle with maple syrup, and then EAT. Cream cheese and berries ooze out the sides, berries give up their juice.

That right there is the best morning.

Processed with VSCO with f2 preset

The cinnamon sugar crust is key. It’s what takes this to a whole new level, and adds a luxurious sweetness so you don’t need as much maple syrup later on.

Sweetened cream cheese may be substituted for yoghurt here, but I find the cream cheese adds proper oomph, volume, and just the right amount of tang. Together with the warm berries, this makes the perfect french toast sandwich.

Processed with VSCO with f2 preset

Cinnamon Sugar-crusted Cream Cheese-stuffed French Toast (makes 1 sandwich)

Ingredients

For the french toast:

2 slices fresh challah/white sandwich bread/sourdough, around 3/4-1 inch thick (I keep mine in an airtight bag in the freezer, and let thaw for a half hour before I need or want to use it)

1 egg

60ml (1/4 cup) milk

1 heaping tbsp ground cinnamon + 6 tbsp white sugar

splash vanilla extract

butter for frying


For the cream cheese filling and warmed berries:

2 heaping tbsp cream cheese spread

1 tsp milk

1 tbsp icing sugar

handful of berries of choice (I used blueberries and raspberries)


Directions

In a shallow bowl, mix together the cinnamon and sugar and set aside. Preheat your pan on medium-high heat. In another bowl, whisk together the egg, milk and vanilla extract. Once pan is hot, add a knob of butter and listen out for a sizzle; if the butter browns too quickly turn down the heat a little.

Take one challah slice and dip in the eggy batter for 10 seconds. Flip and do the same for the other side. It should be soaked through but not falling apart. Lift up the slice and let excess batter drip down, then immediately lay in the bowl containing the cinnamon sugar. Turn the slice and coat the other side.

Do the same with the second slice, then place both slices in the hot pan for frying. Wait 20 seconds for the first sides to fry, then flip. Wait a little longer, around 30-40 seconds, if you prefer a less soggy middle for your french toast (I like mine pretty soggy and saturated). The second side will take shorter to cook, so remove once you like the doneness.

In the same pan, add a little more butter, then plop in your berries. Let cook and sizzle– they will yield their juices after around 4-5 minutes of cooking and become warm and soft. Mix together the ingredients for the cream cheese filling.

Spoon the cream cheese and berries onto one slice of bread and then layer on the second slice. Finally, drizzle everything with good maple syrup.