Orange Chocolate Bars with Mascarpone and Honeycomb

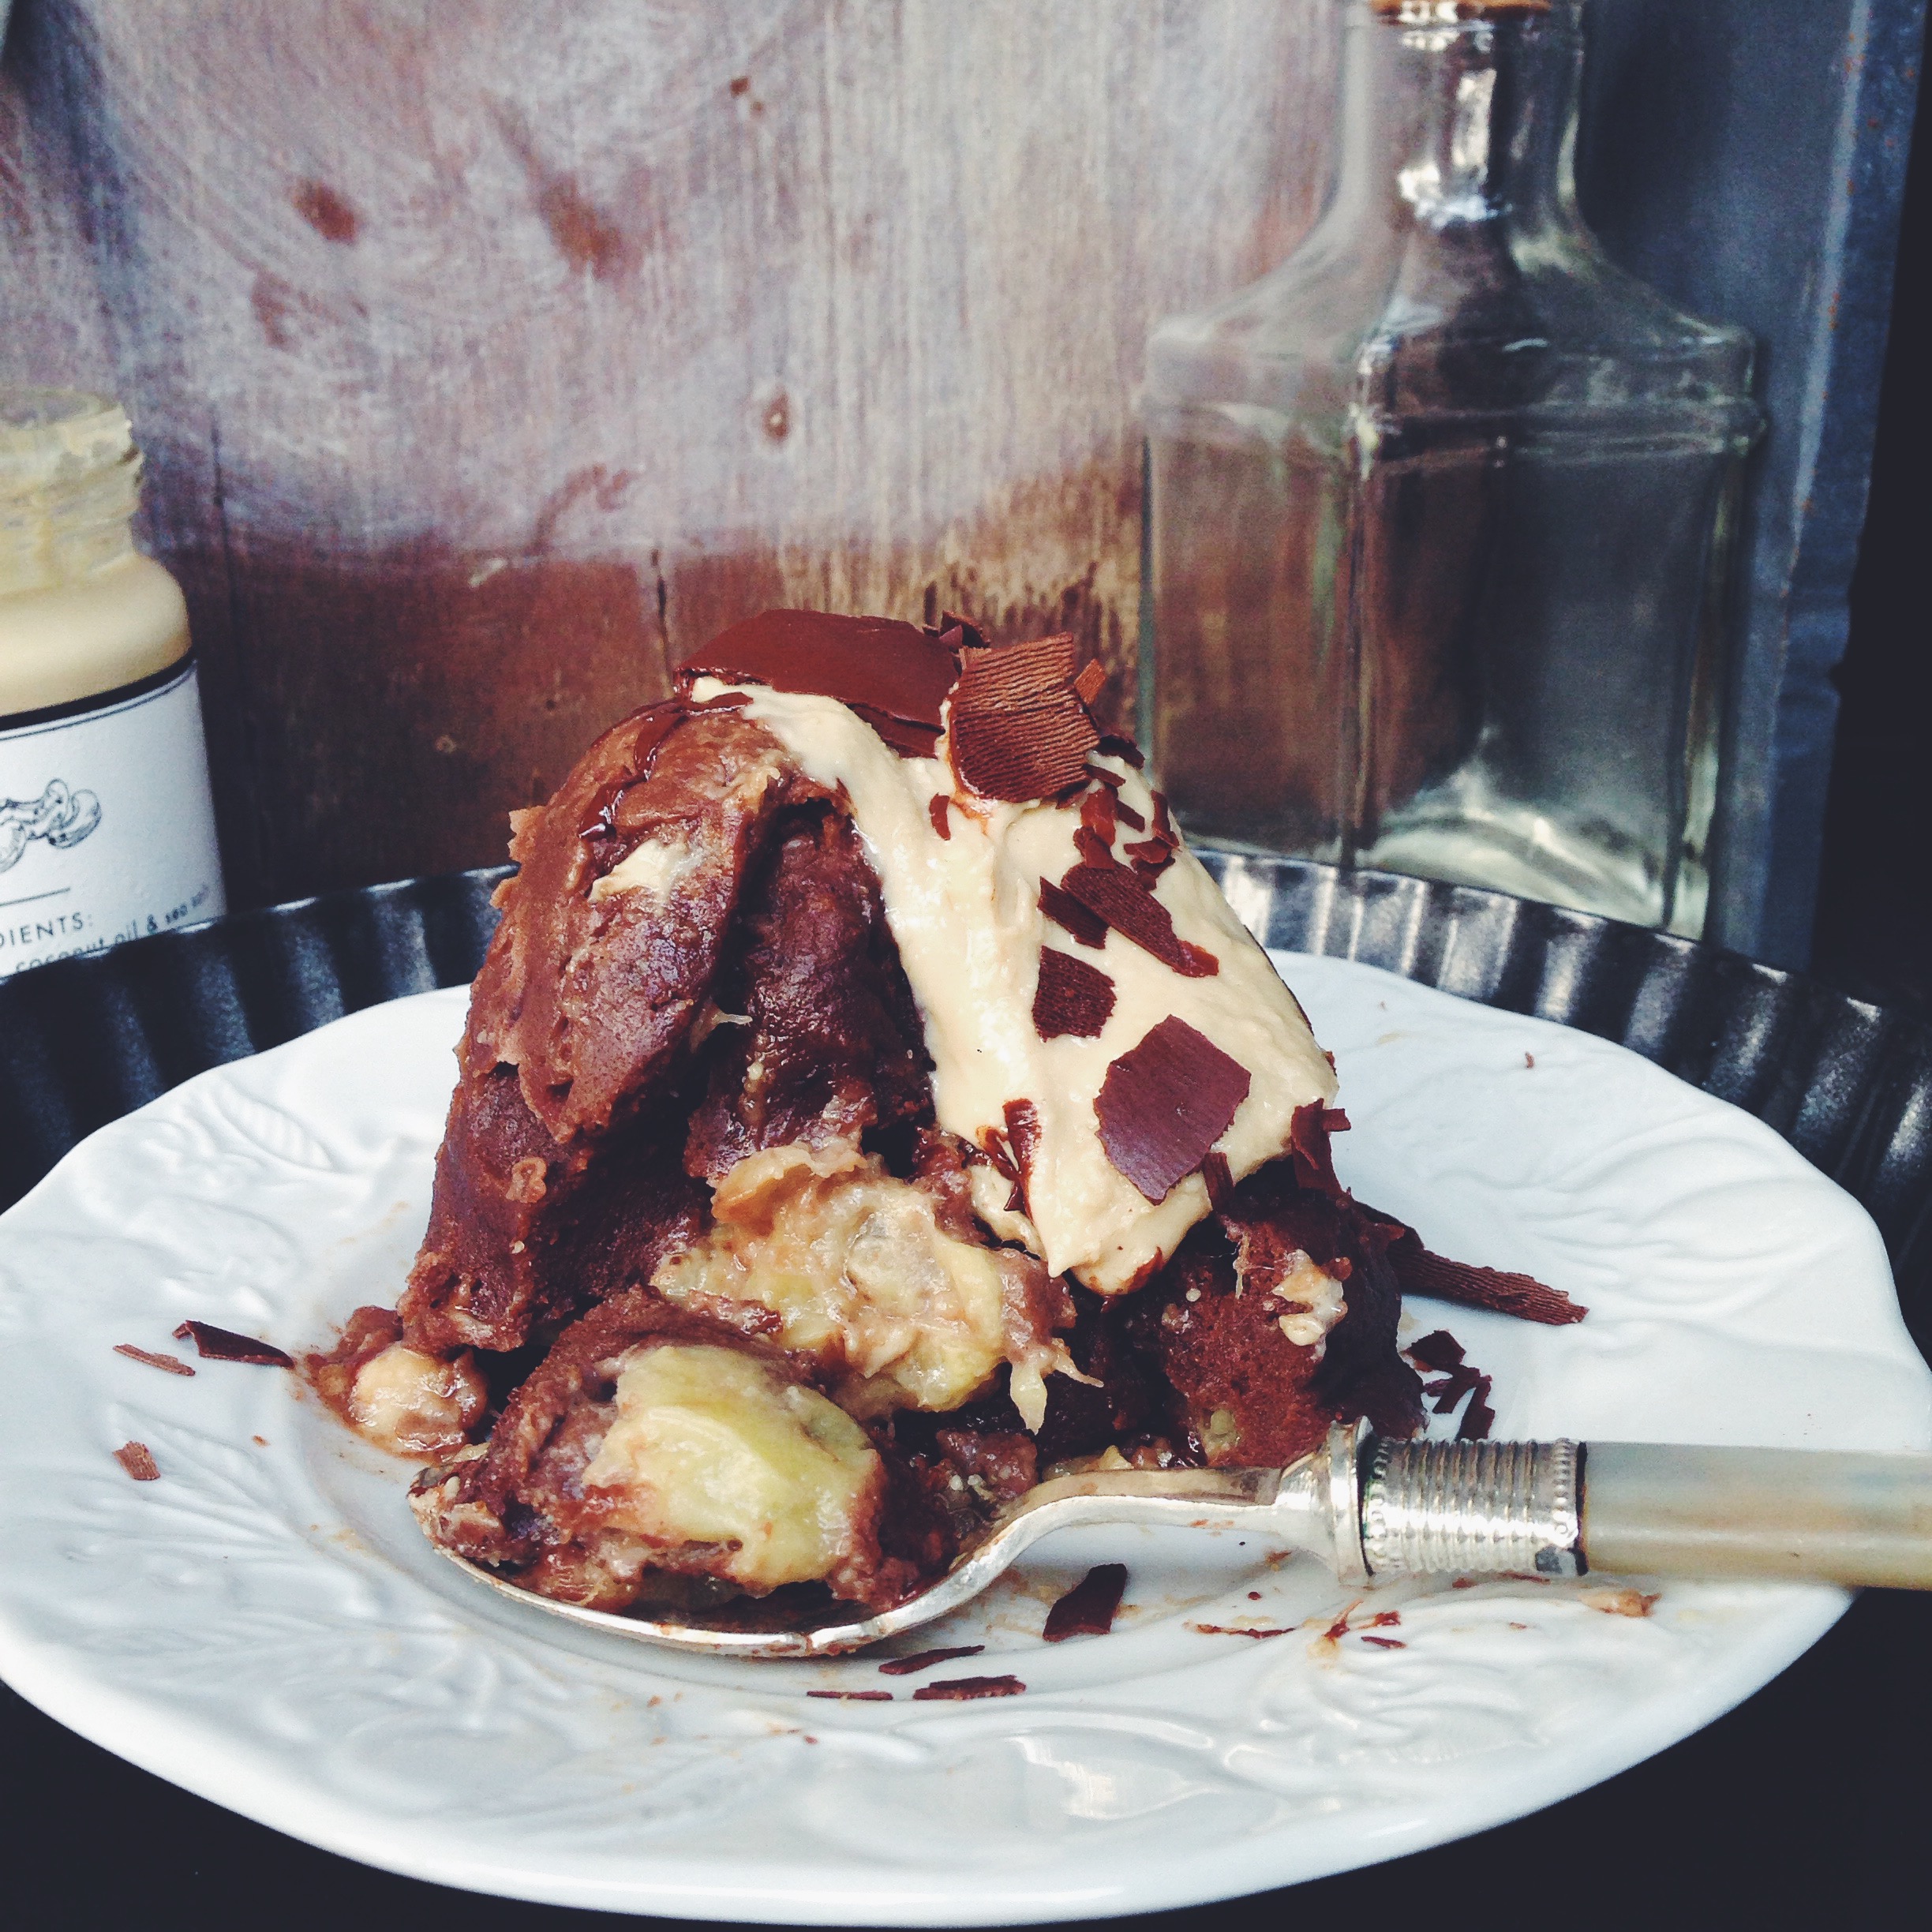
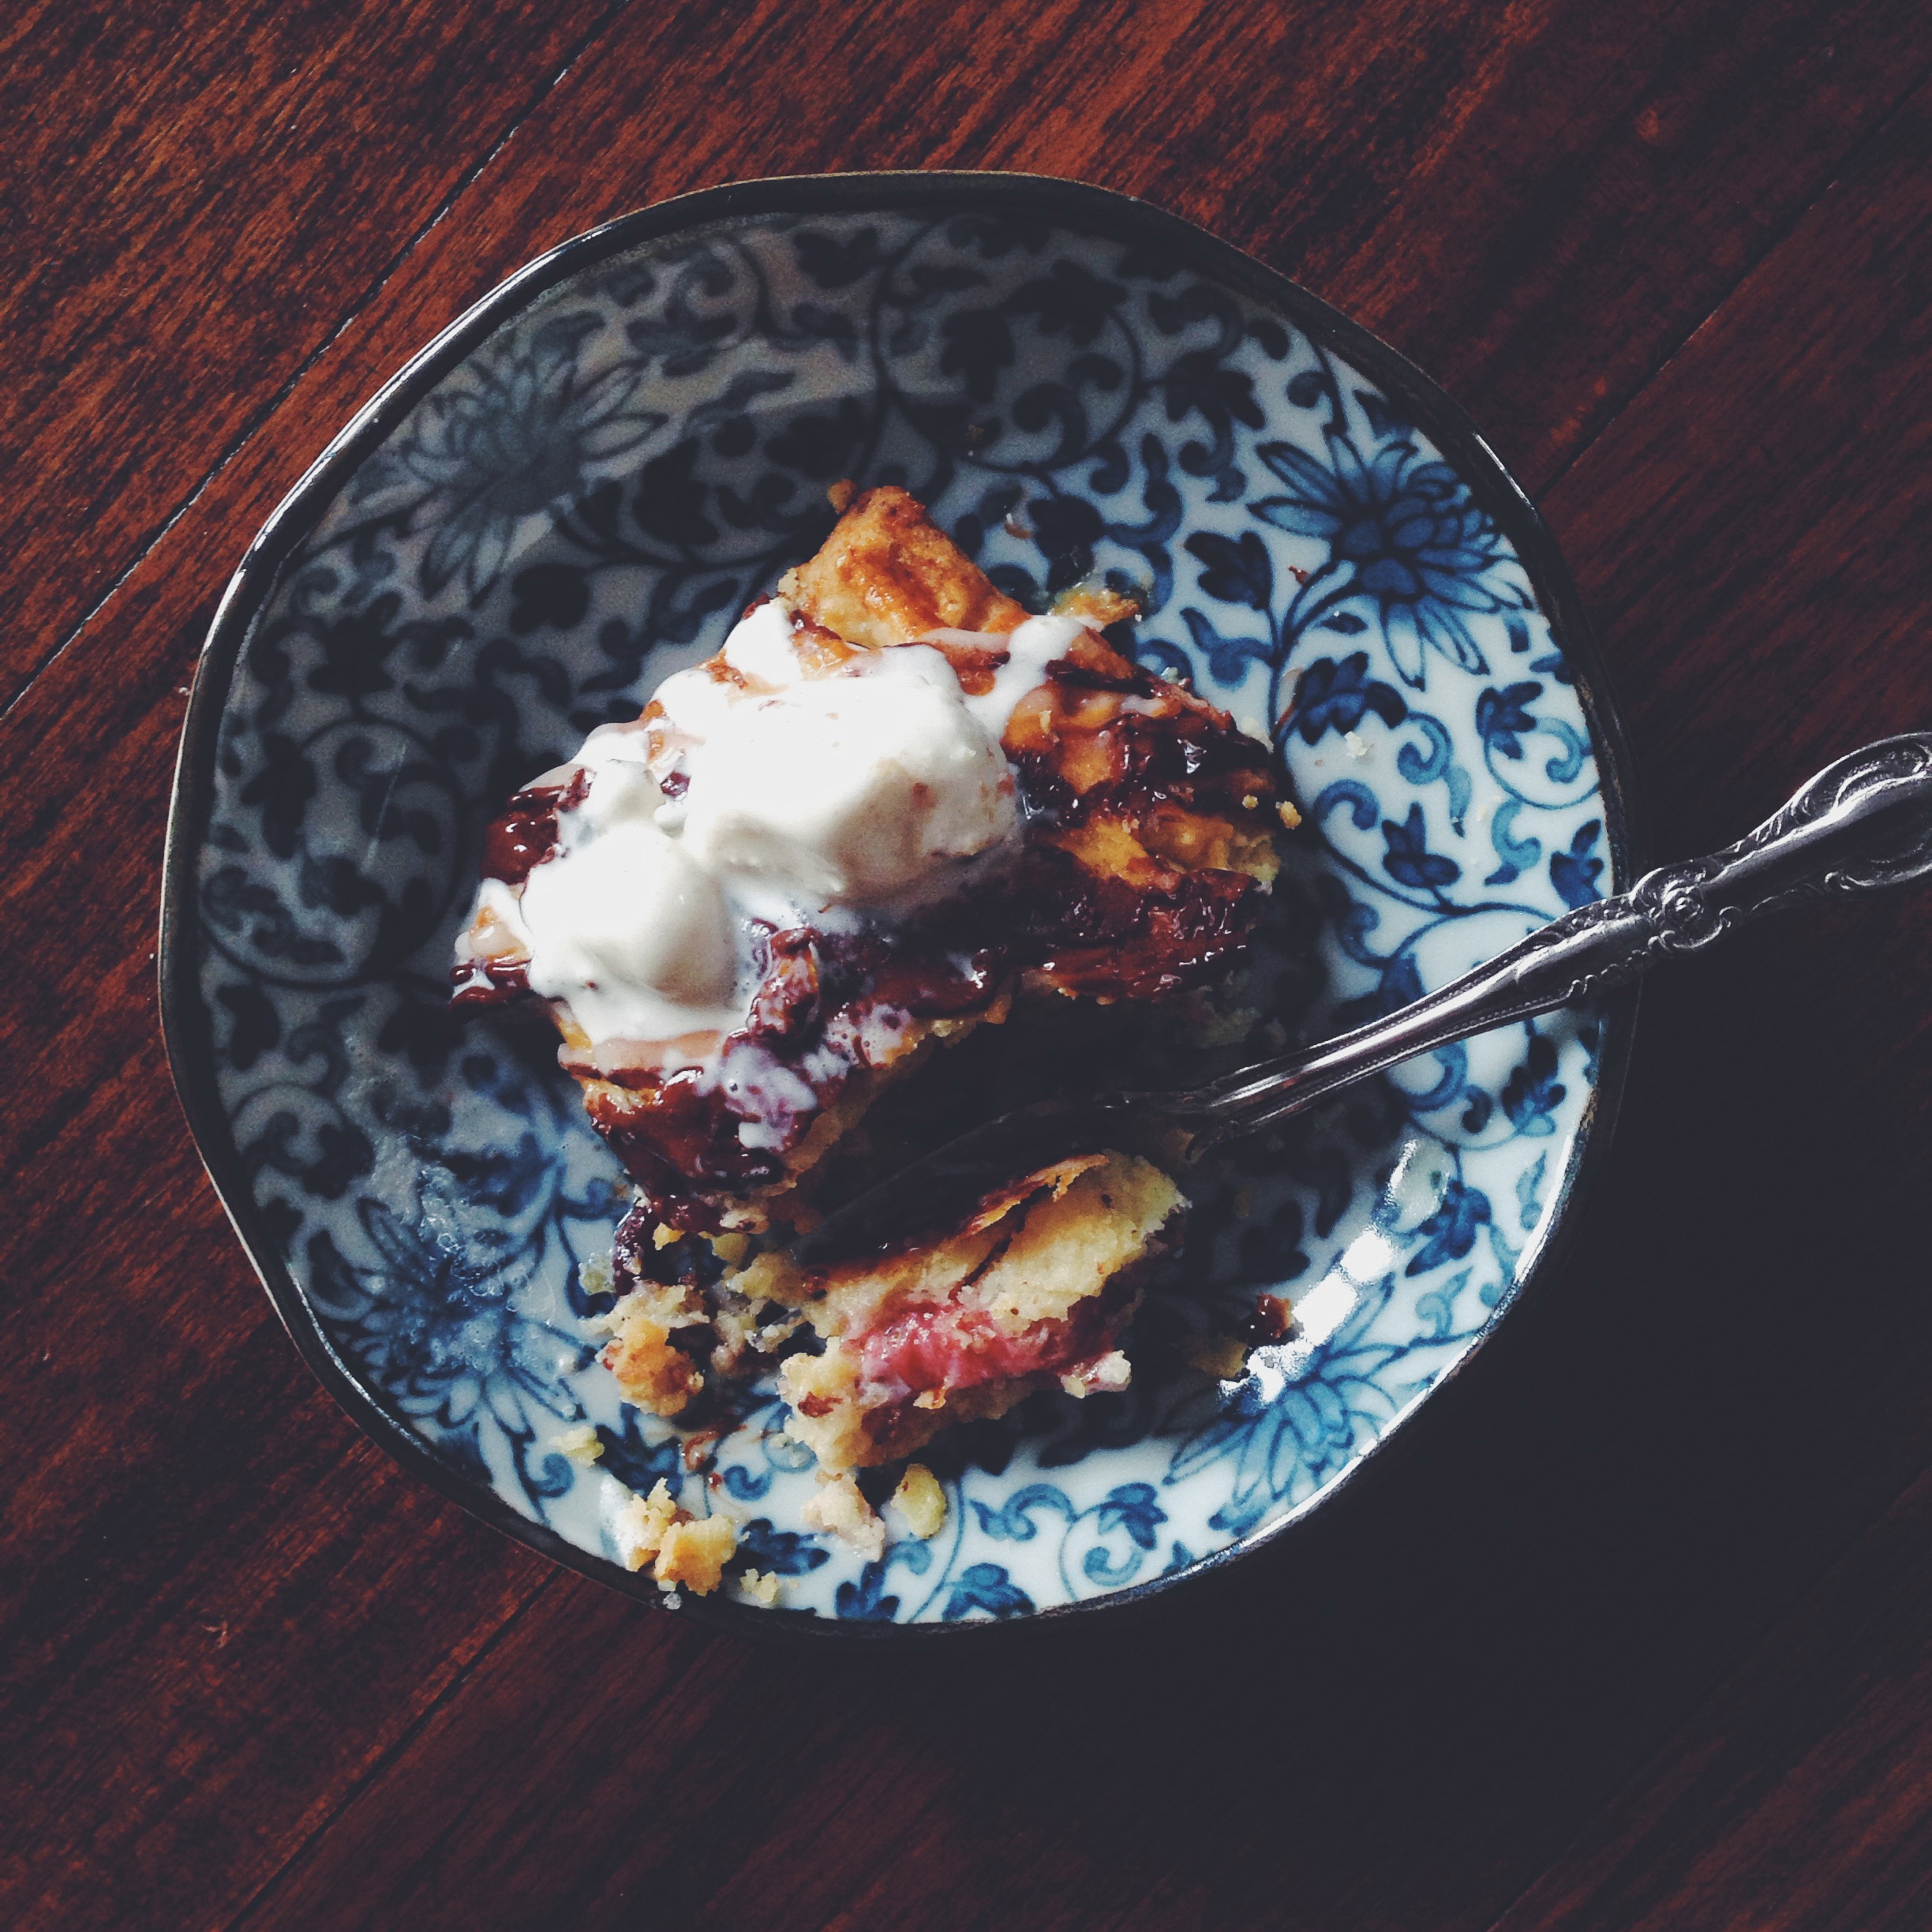
This morning, my fork did all the talking, and I let it. Let’s get to the meat before I lose your attention.

The four main components here may sound frivolous, but get along like four great friends. Anyone else here like Terry’s chocolate oranges (insert happy girl with hands over her head emoji here)? If you do, I kid you not, these will satisfy you any time of day, and this batch makes quite a lot, so the satisfaction isn’t short-lived. Here we have a sweet and sticky baked citrus batter topped with a rich chocolate glaze (all delectable frozen goo and sludge), on a double butter crust, topped with mascarpone (no, I didn’t make this, ha), and honeycomb.

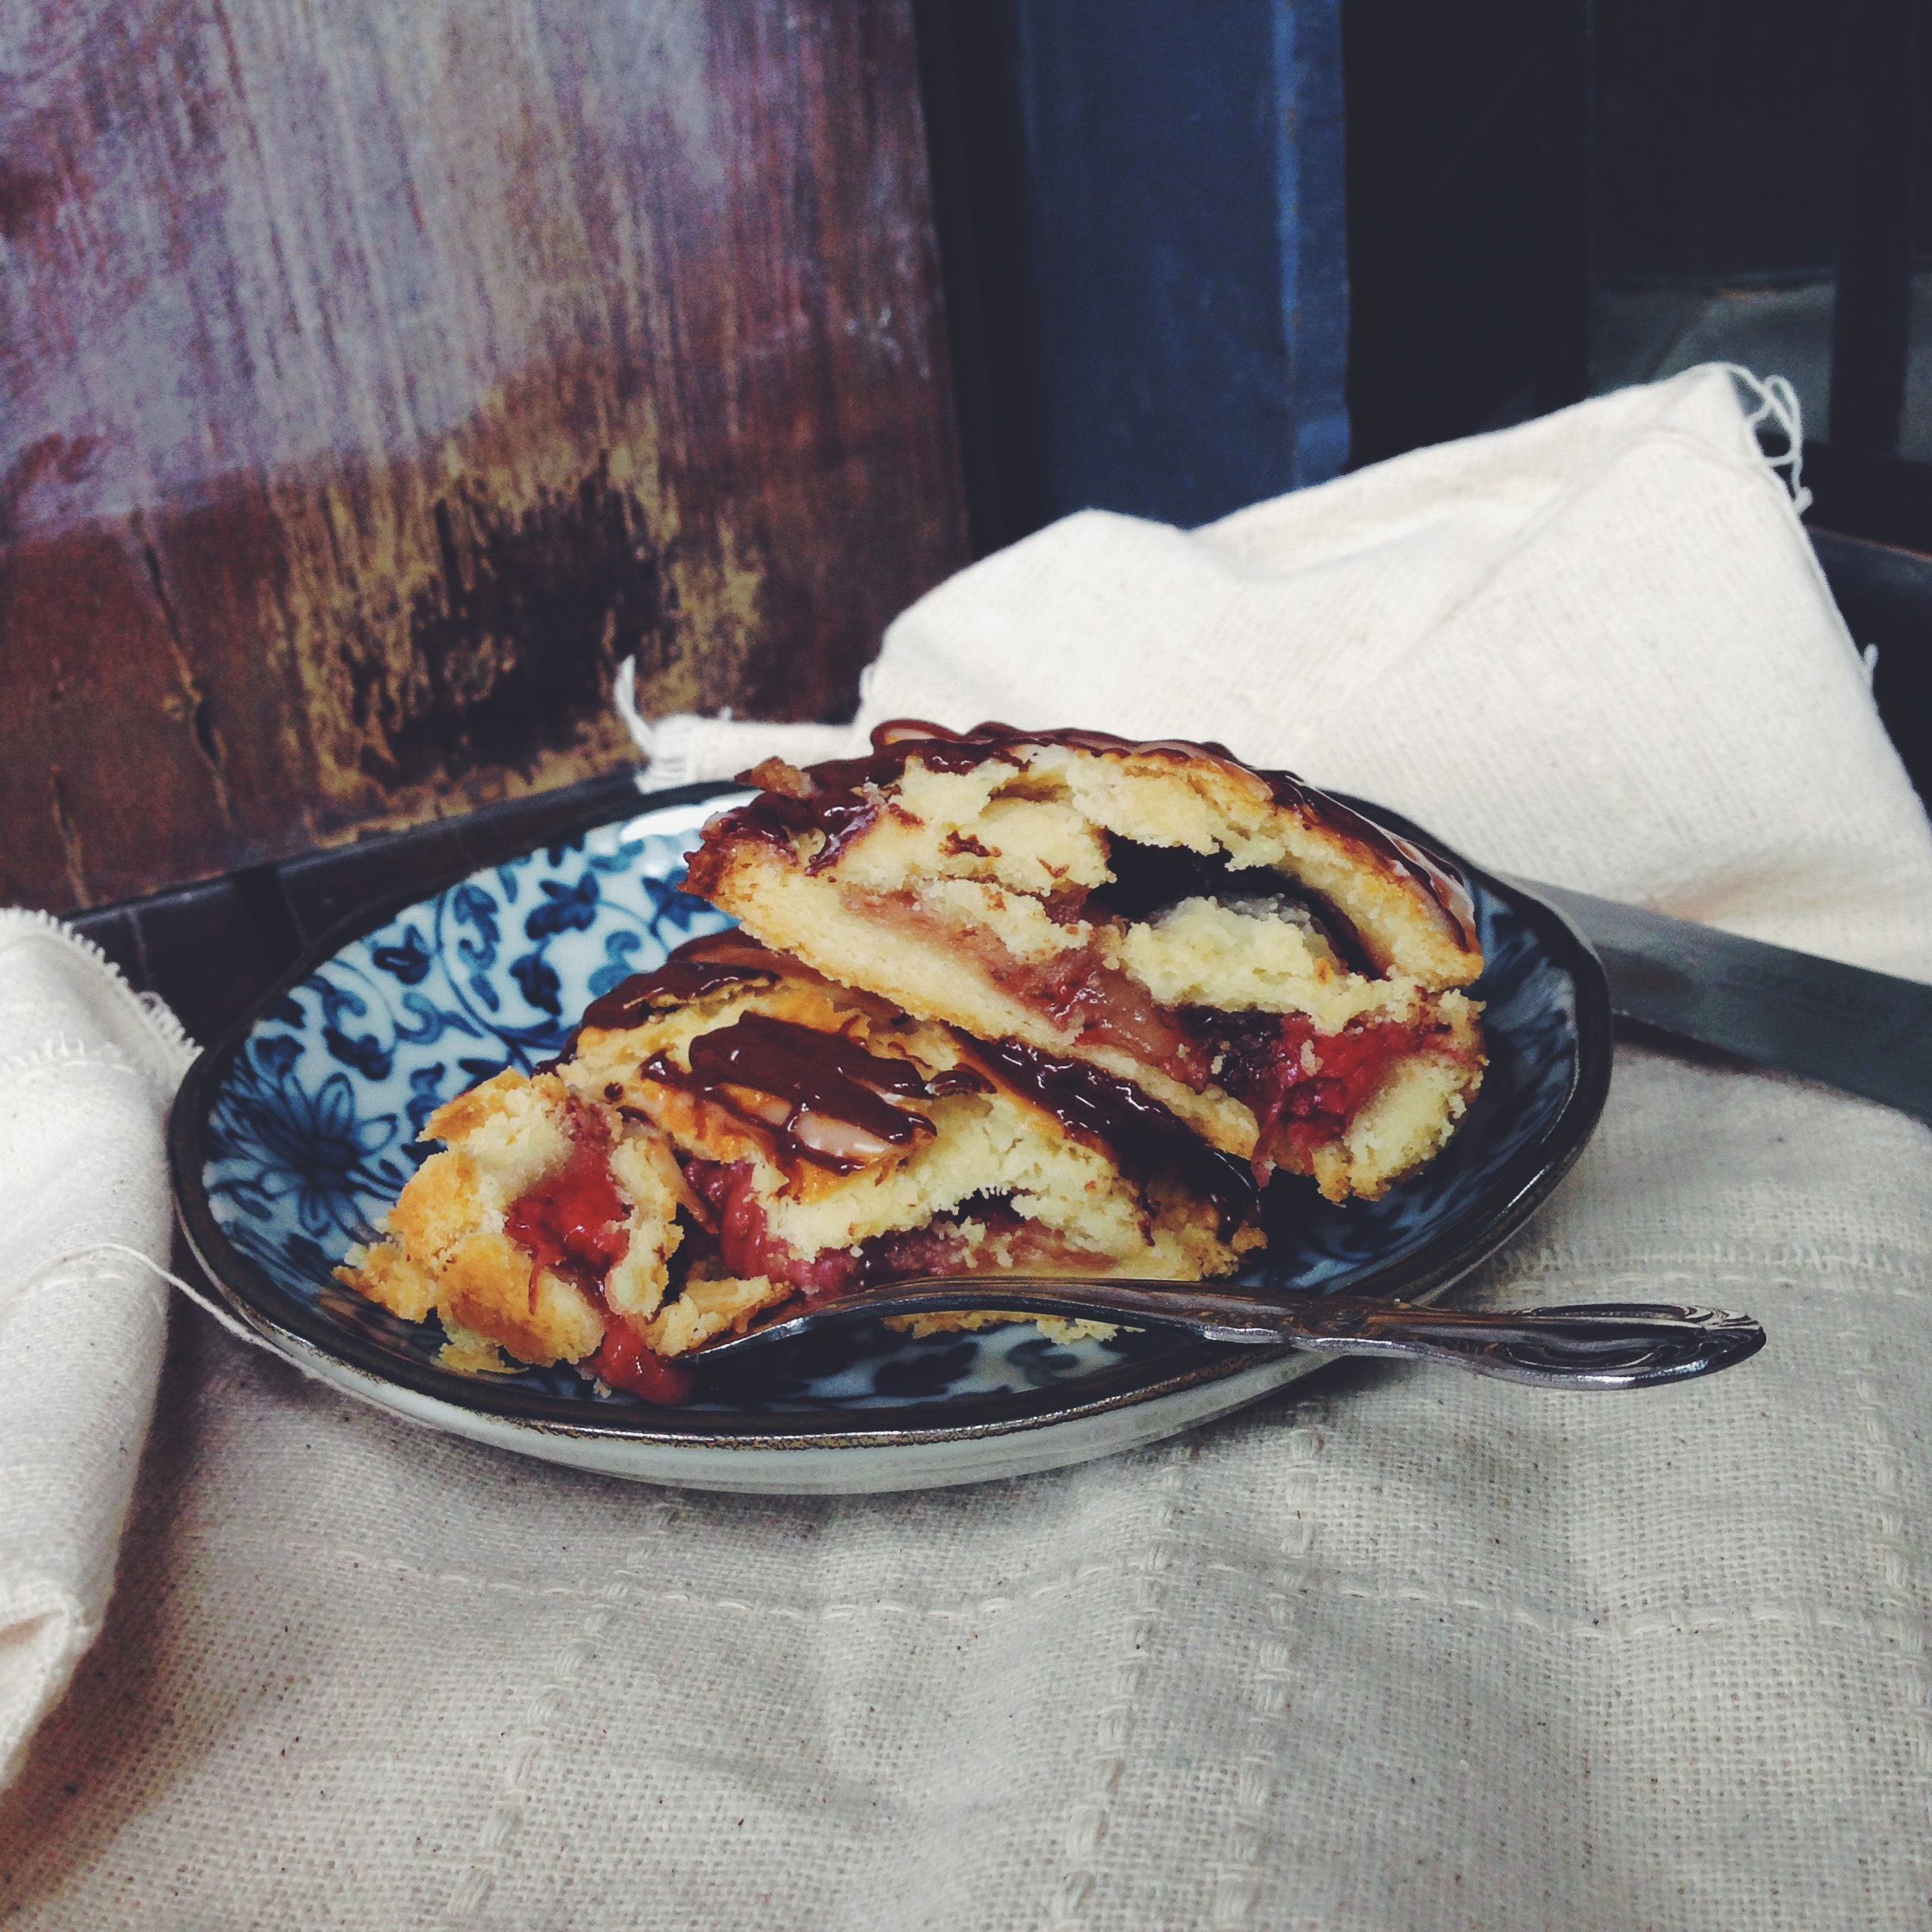
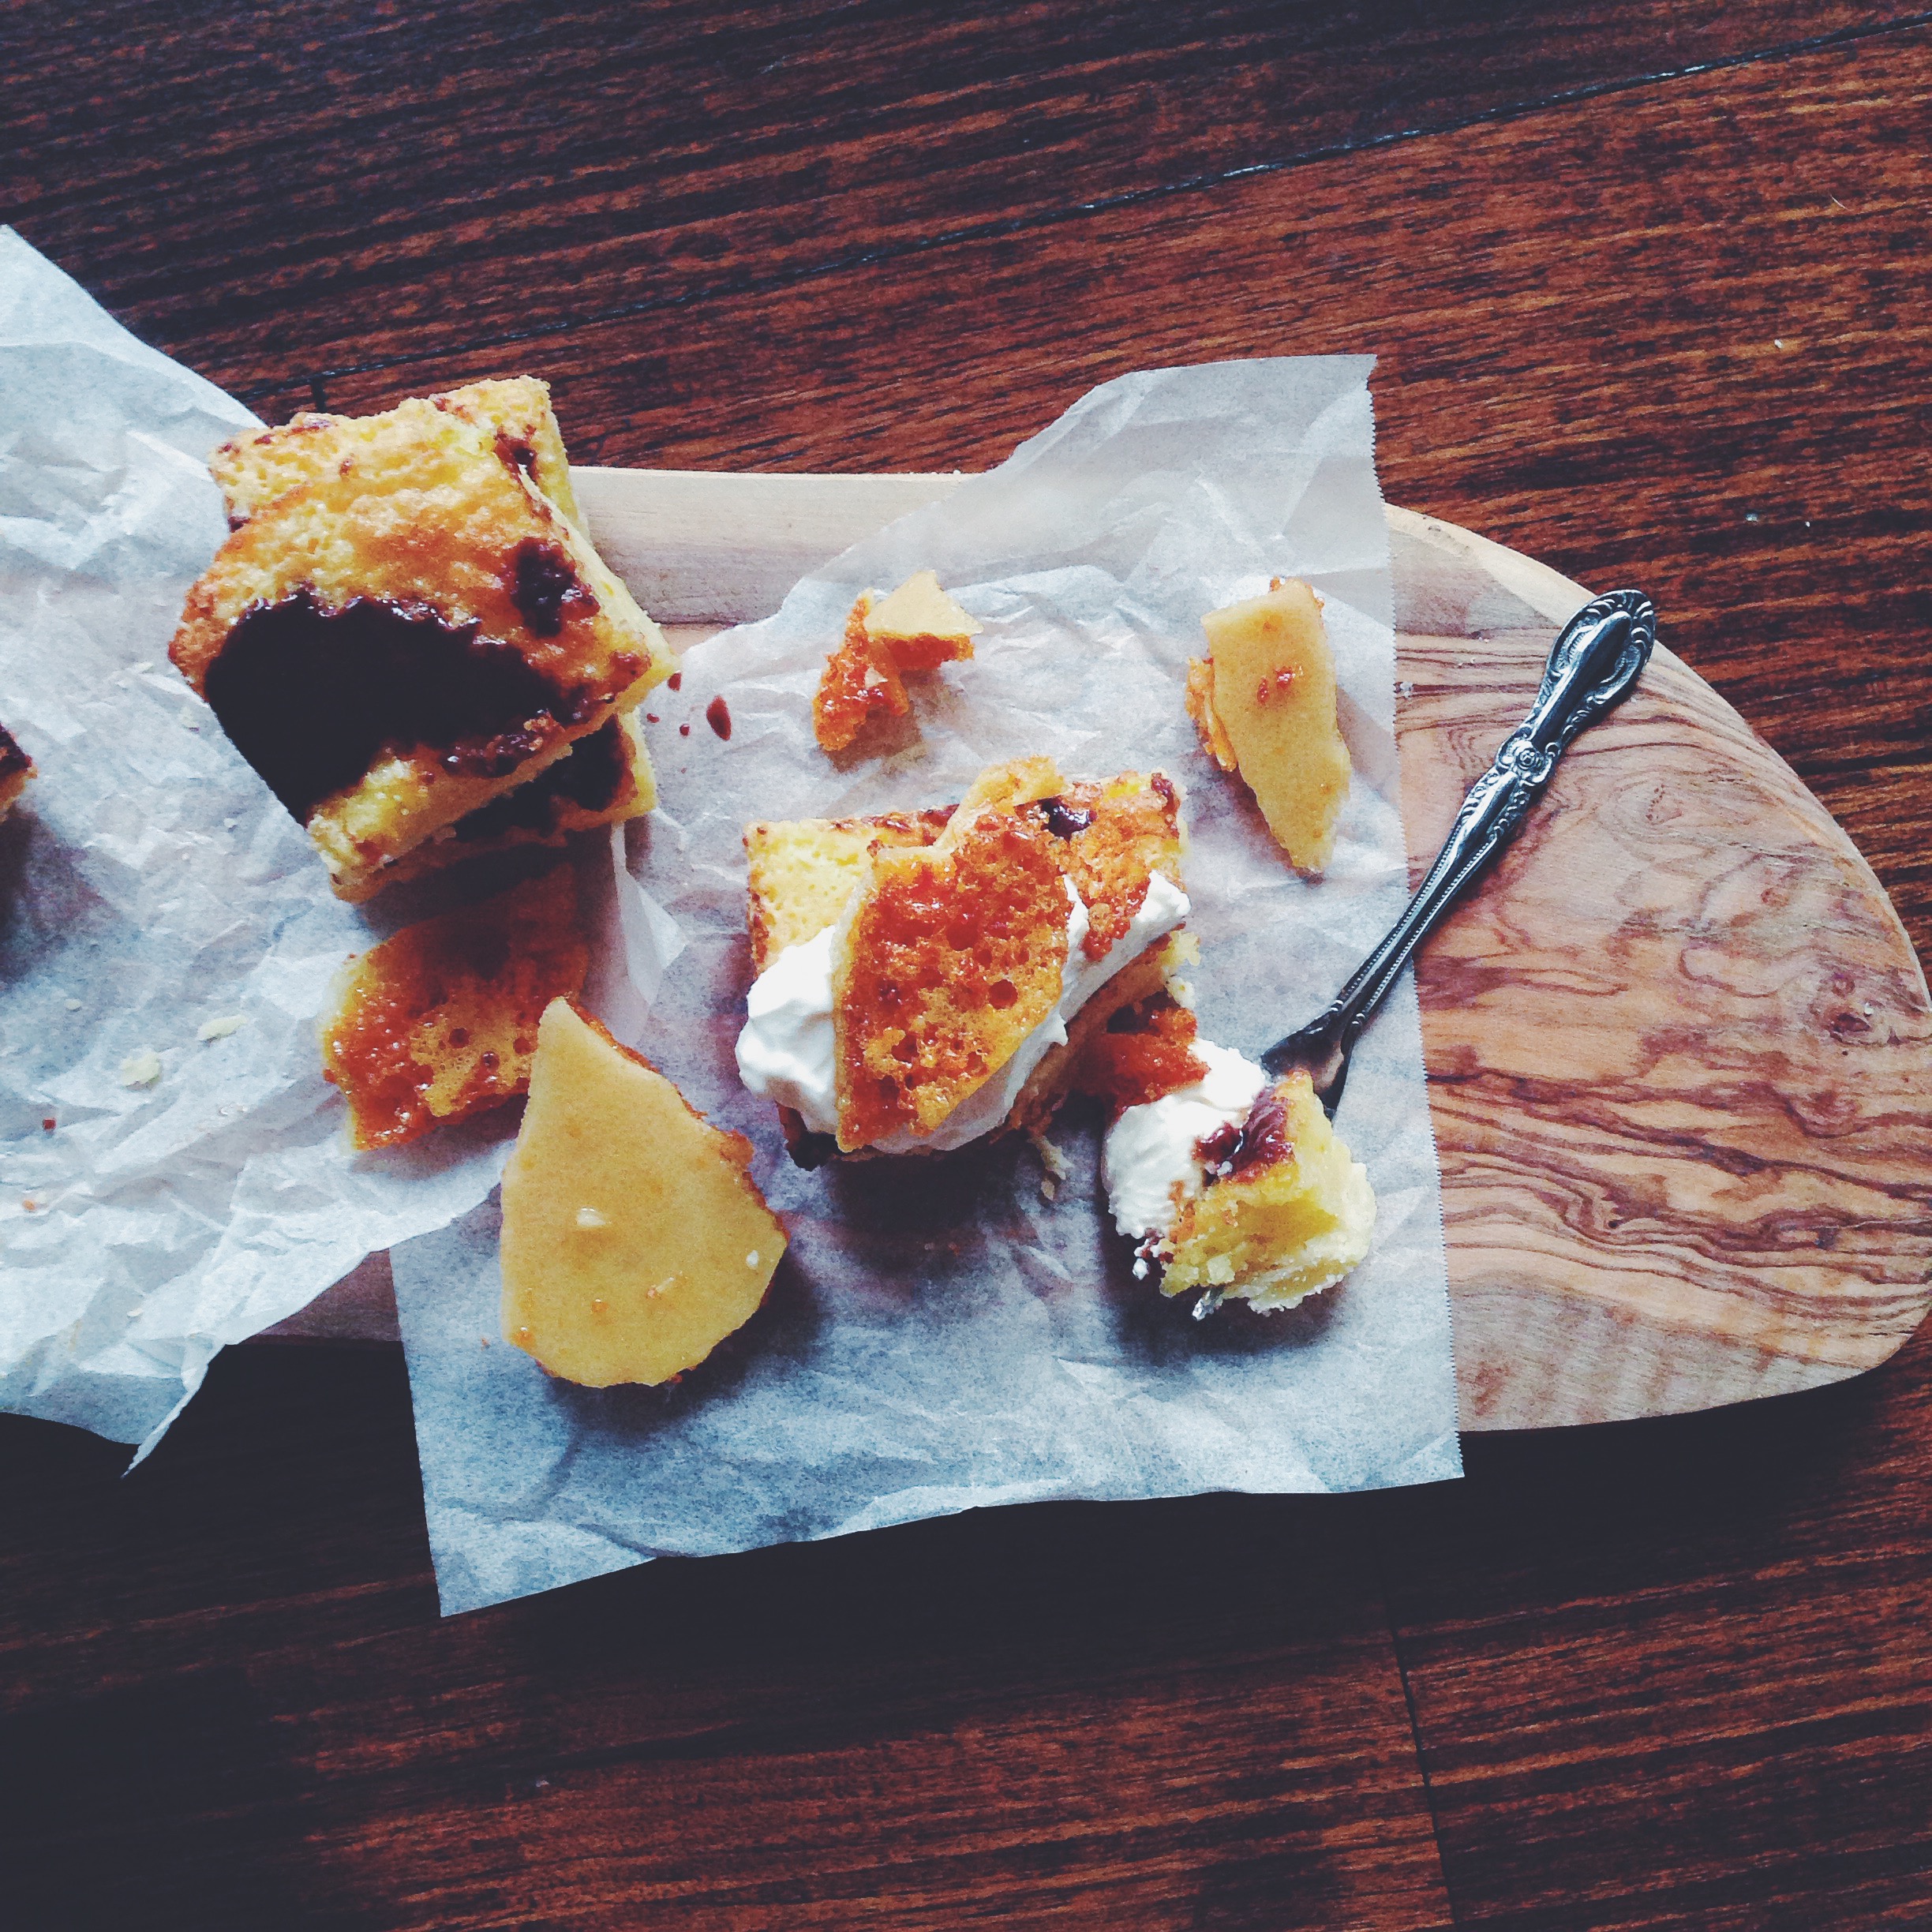
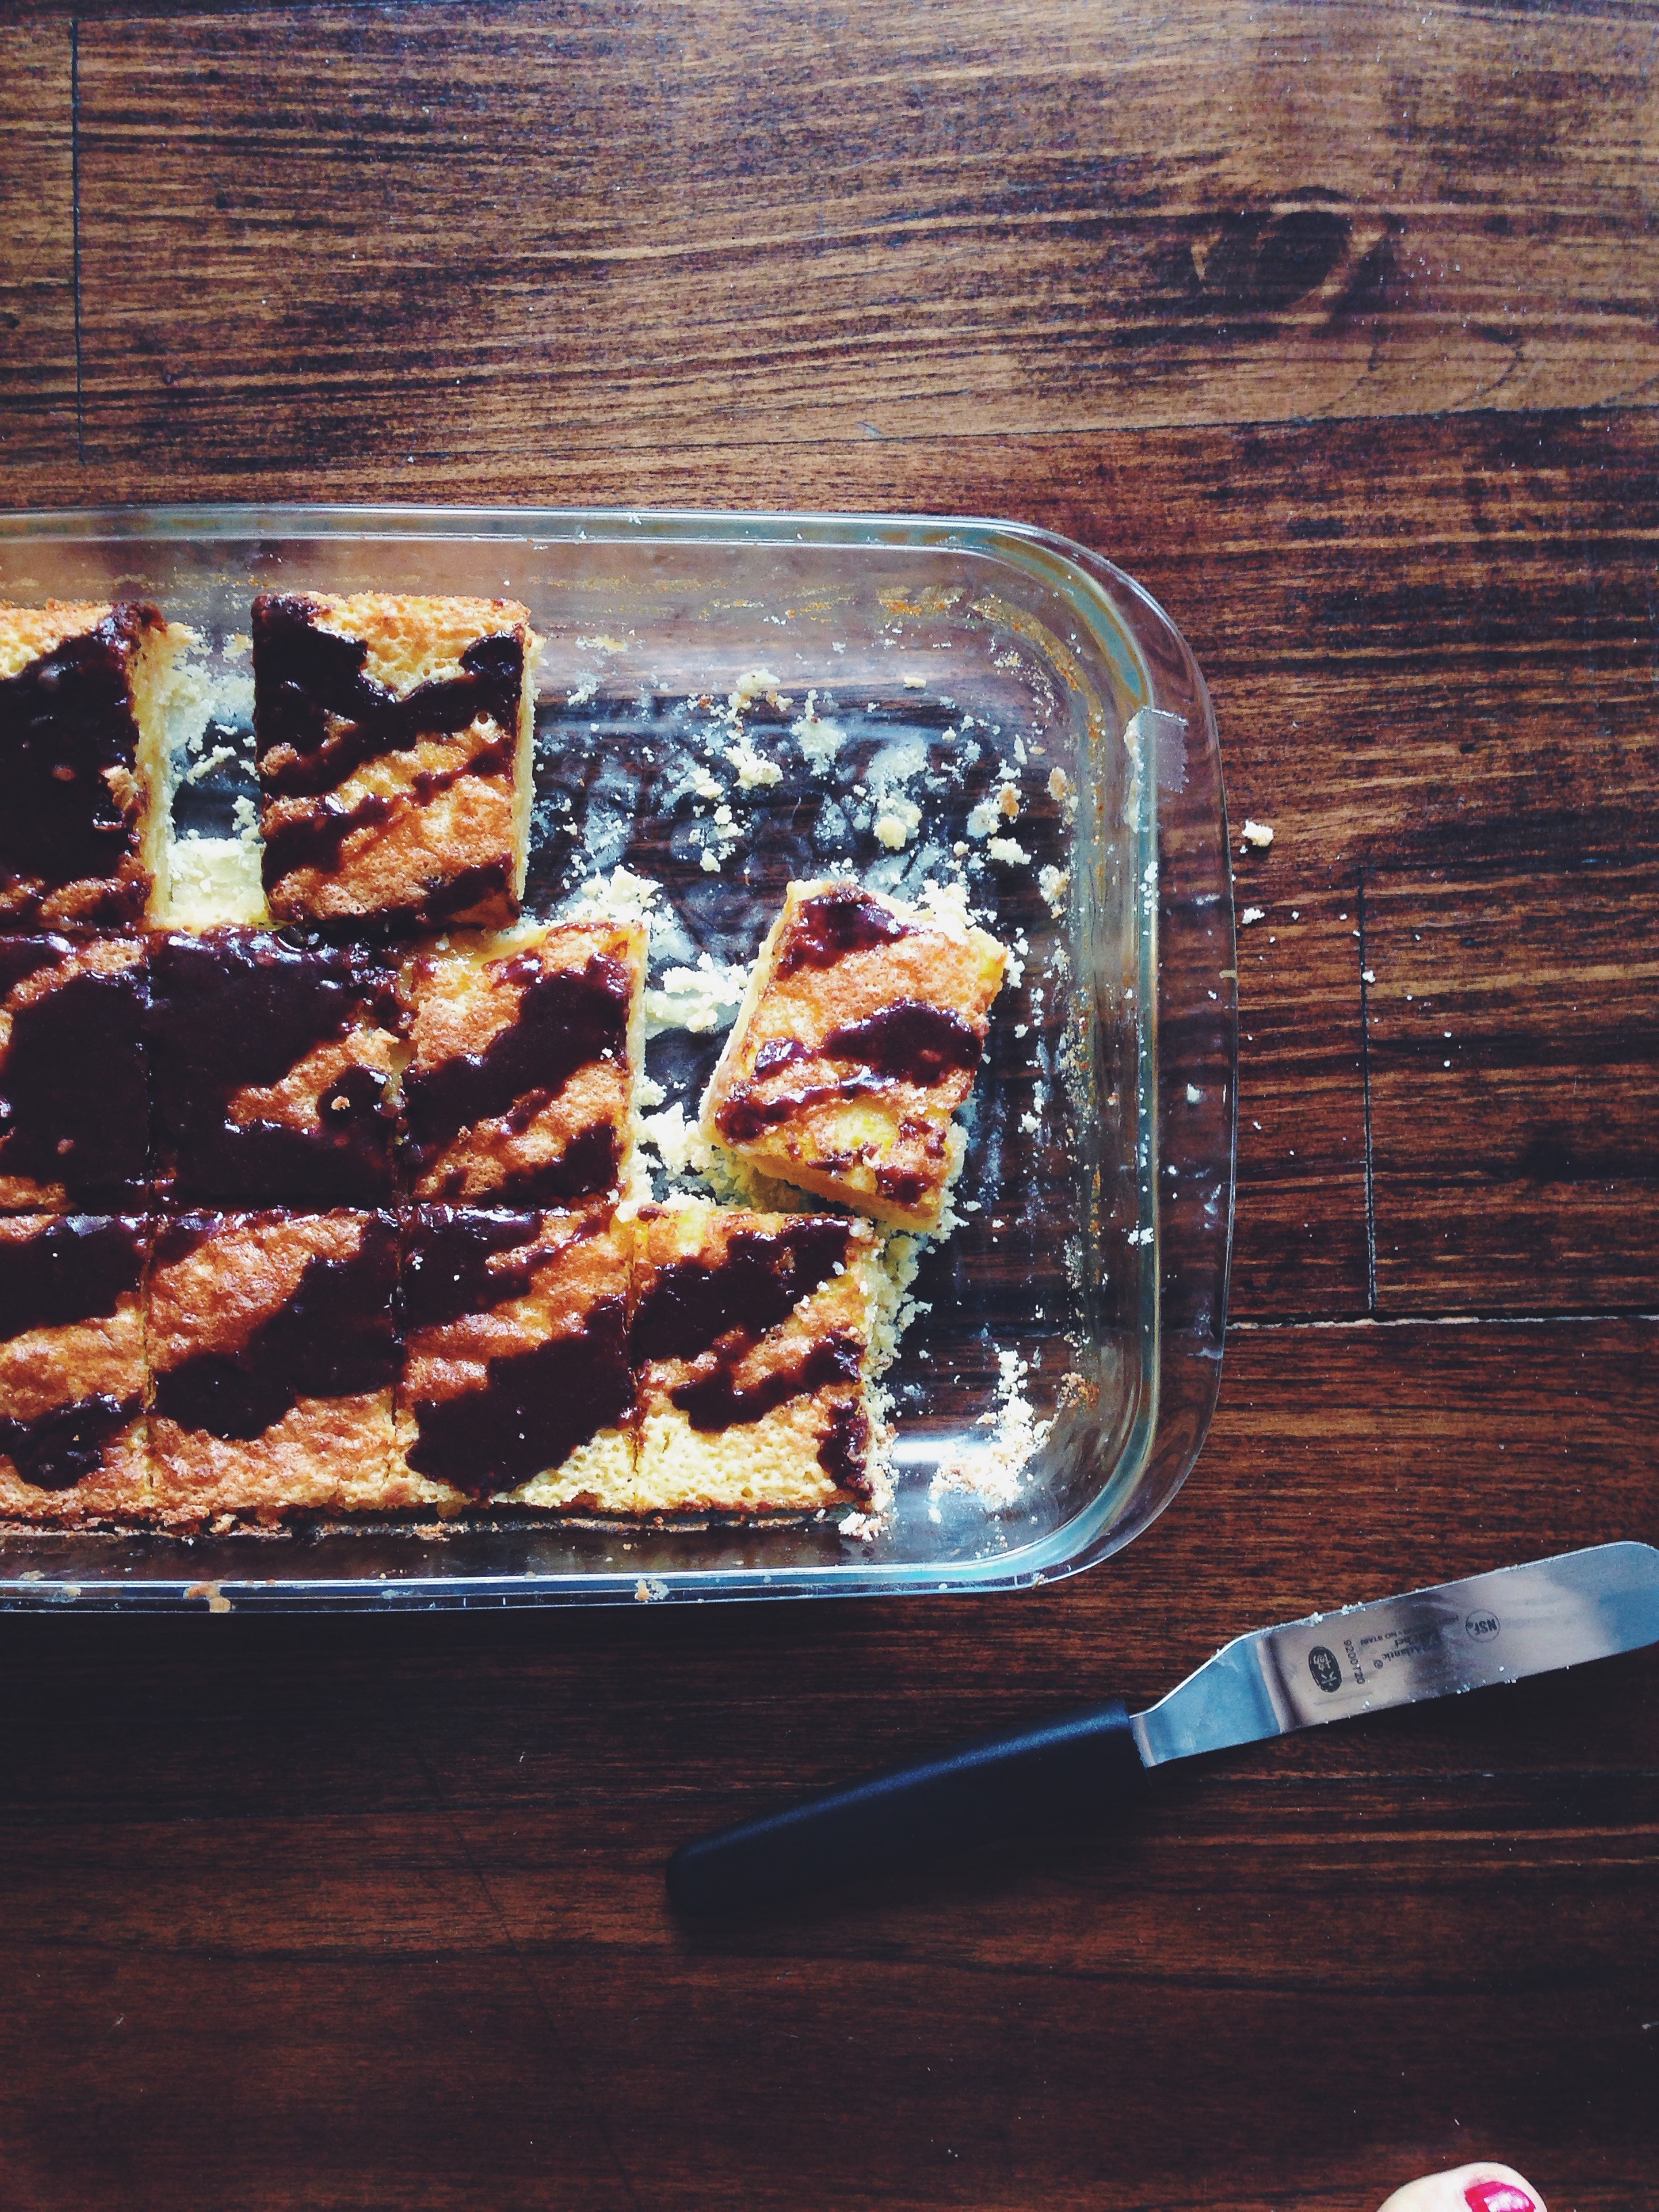
I want to call them tiger bars because that’s exactly what they ended up looking like, with the stripes and all. A most desirable marriage of chocolate and orange. As you can tell from the picture below, I was a bit too excited to cut everything up and slather stuff on, hence the slipshod effect. By the way, this double butter crust is bloody good. But bad. And messy. Either way it’s all good.

Processed with VSCOcam with f2 preset

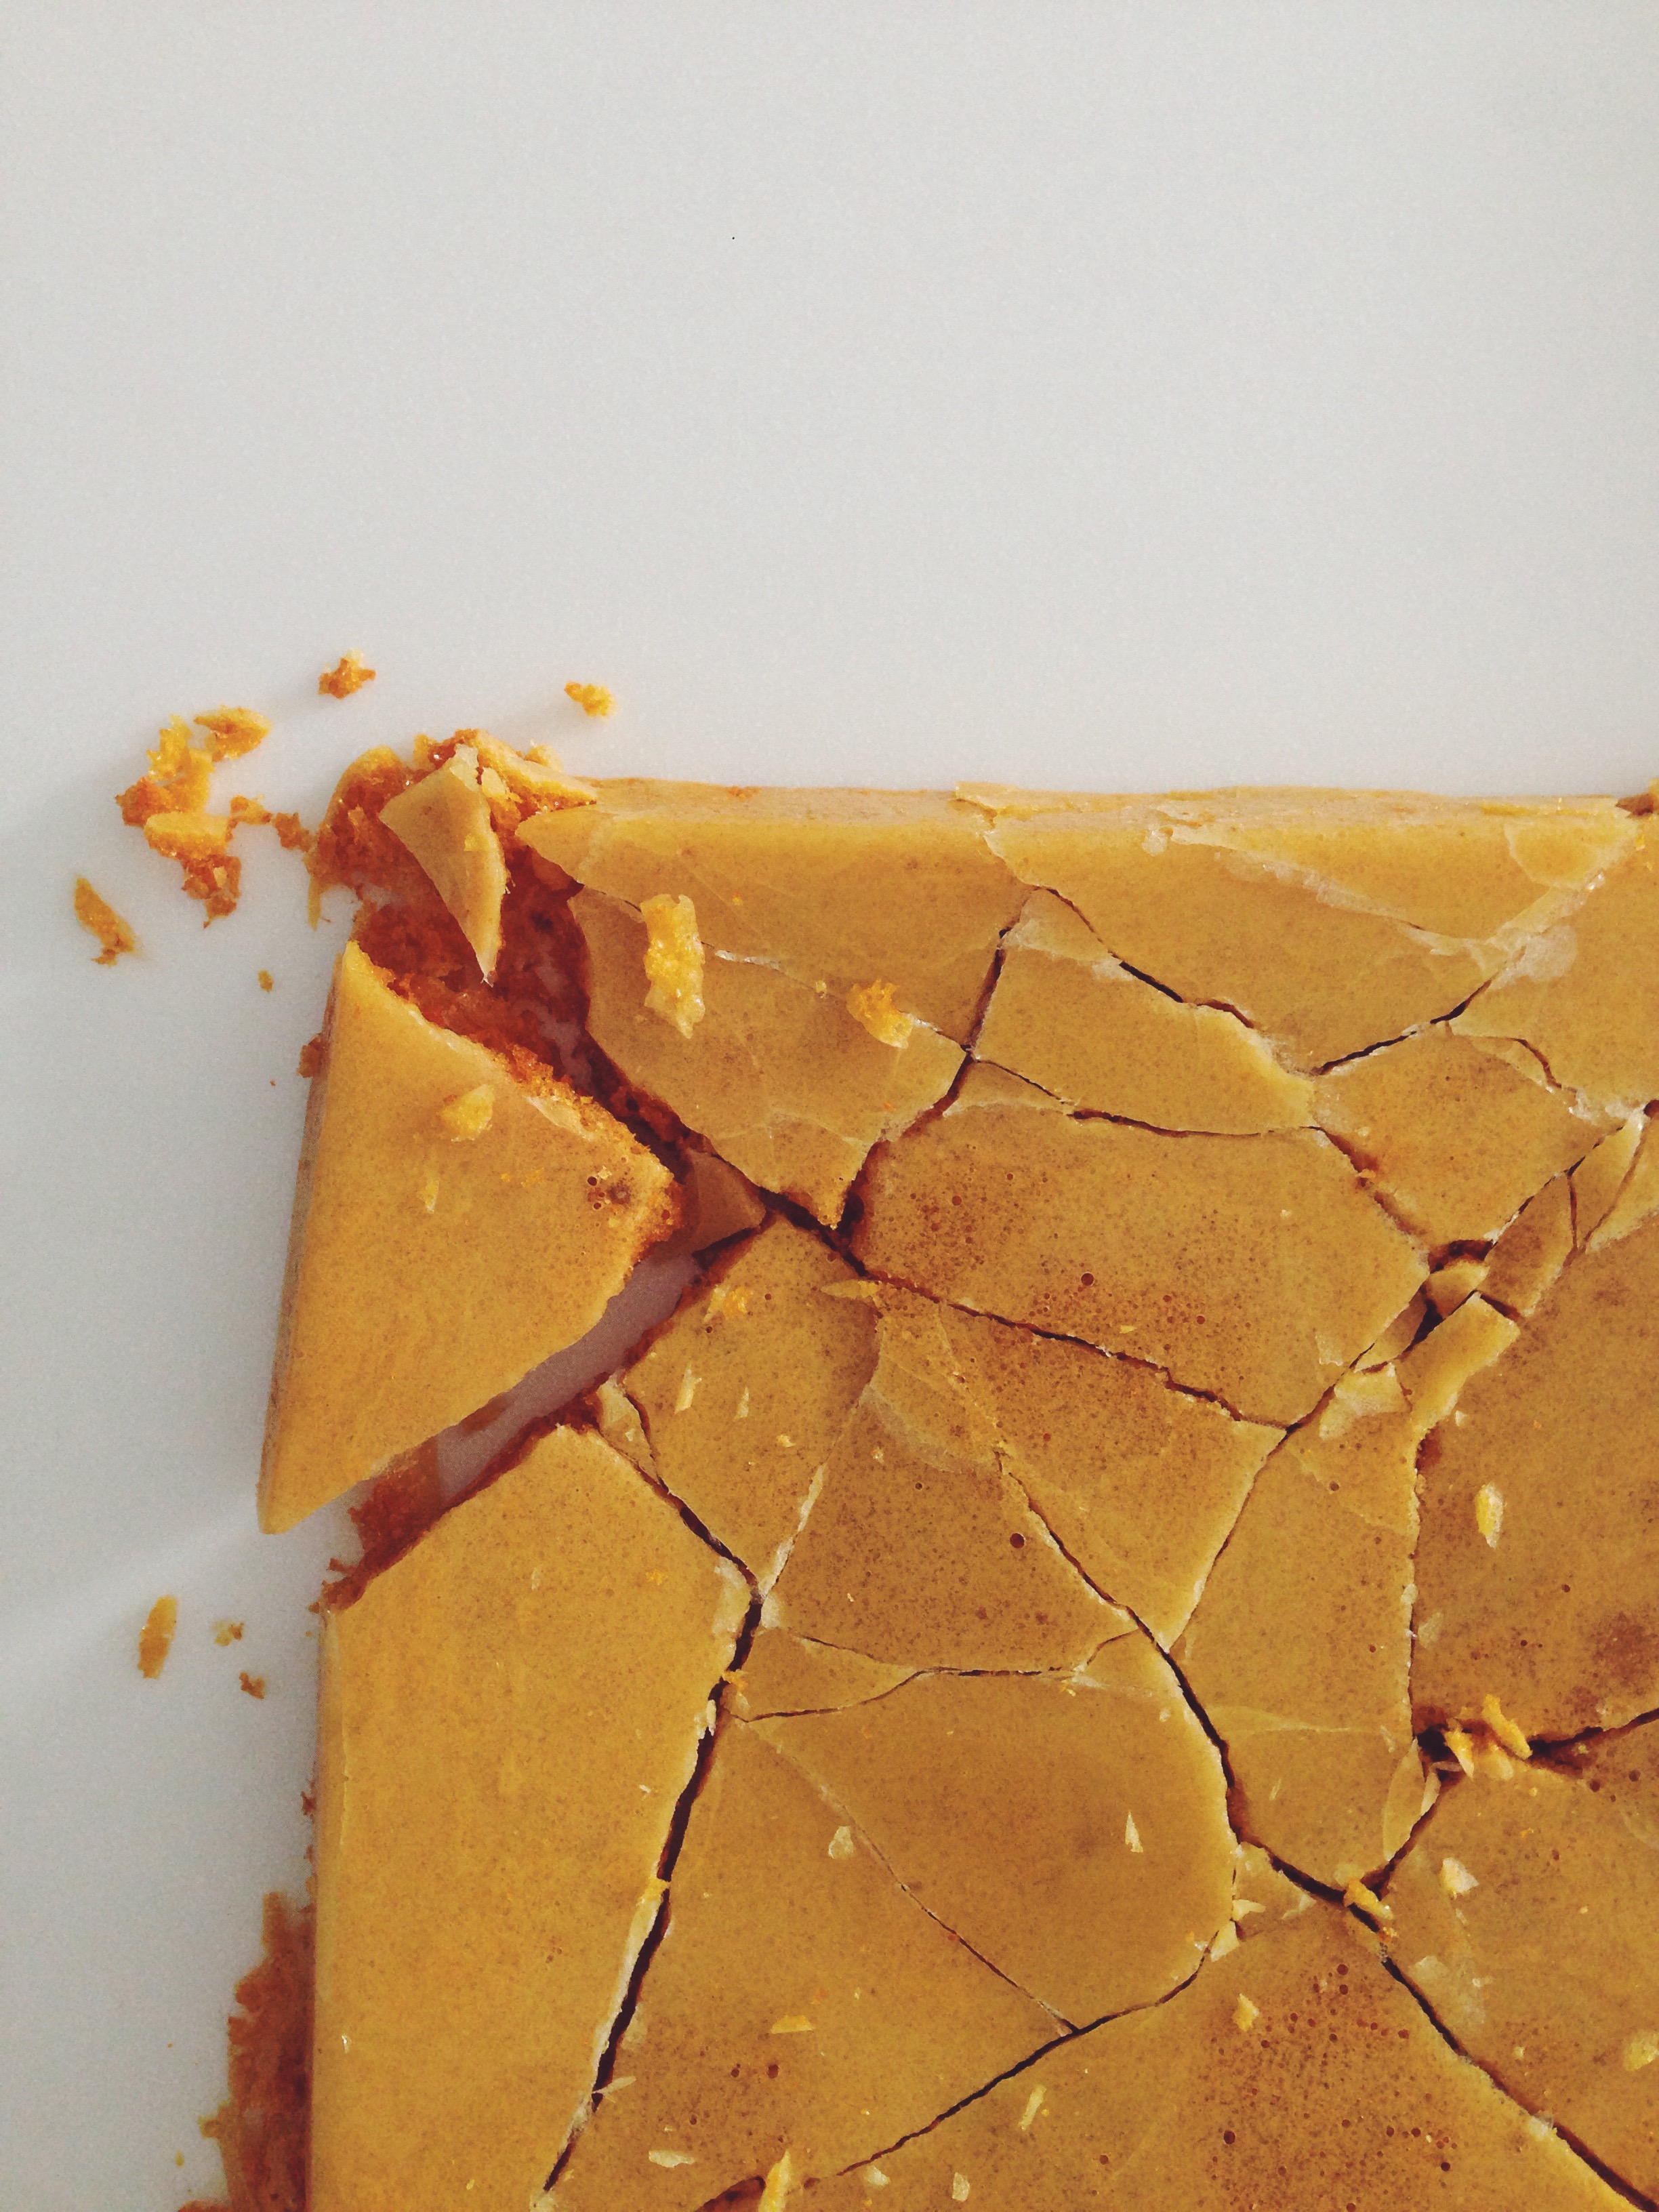
Sweet on sweet on sweet, right? Well, not totally. The flavours here all meld into one another in a manner more sophisticated than what I expected, but I do think the mascarpone is necessary to soften excess cloy. This was my first time making honeycomb, and this batch turned out desirably sweet, light and crisp, like the chewier end bits of the inside of a Crunchie bar. Hopefully with time, I will master the art of thicker, ‘holier’ honeycomb. Slightly less deep in colour, less chew, more whimsical and airy-fairy. The golden shards offer a brighter mien to the whole dessert get-up. A sort of ‘ooh, what was that? YES’ kind of crunch. With the layers of texture and flavour established, the final addition of mascarpone cheese on top ties all the components together, like the ribbon on a present. A blander, but necessary note, a complementary creaminess.

Orange Chocolate Bars with Mascarpone and Honeycomb (makes 12 bars)

Ingredients

For the crust:

160g unsalted butter, cold and cut into small half-inch cubes

210g all-purpose flour (around 1 1/3 cups)

pinch salt

50g icing sugar, sifted (slightly less than a half cup)

For the orange filling:

zest and juice of 1.5 large oranges (120ml or half a cup of freshly squeezed orange juice)

juice of half a small lemon

230g (1 cup) white sugar

large pinch salt

50g all-purpose flour

1 tsp baking powder

4 eggs

For the chocolate glaze:

1 tbsp water

15g unsalted butter

1 tbsp unsweetened cocoa

1 tbsp milk

50g (or more, this is according to taste) of sifted icing sugar

For the honeycomb (adapted from BBC good food’s traditional take):

180g white caster sugar

5 tbsp golden syrup

2 tsp baking soda

Directions

Preheat your oven to 177C (350F). In a large bowl, whisk together the flour, pinch of salt and icing sugar. Rub the cold, cubed butter into this mix until you get coarse crumbs, and they are able to stick together in clumps when you squeeze the mix in your palm. Press this mixture into the bottom of a greased 9×13-inch pan, and then place into the preheated oven and bake for 11-13 minutes (I took mine out at 12).

Next, make the filling, which is the easiest bit!! In a large bowl, whisk together the juice of the oranges and one lemon, zest of the oranges, sugar and eggs. In a smaller bowl, whisk together the flour, baking powder and pinch of salt. Add this flour mix to the wet mix and mix well to combine. You will probably find little clumps of flour post-mixing, but they will go after whisking for a while. You should have a smooth, slightly viscous, wet mass of orange. Once the crust is done baking, remove from the oven and let cool for 5 minutes on the cooling tray. Pour the orange filling batter into the pan, then carefully (because the batter is predominantly liquid) place the pan back into the oven. Bake for 17-20 minutes, or until you can see the top go a medium brown in colour. I took out my pan at 19 minutes, when there was a visible dark brown rim around the edges, and the surface was mottled with bits of brown. When you take out the pan, the inside will still be mostly wet, or moist at most. Leave to cool for 15 minutes, before placing in the fridge to allow it to fully set.

Make the chocolate glaze. Again, easy peasy stuff. In a medium microwave-safe bowl (I always use my handy Chinese porcelain dinner bowls, so convenient), add the butter (it can still be cold from the fridge), water and cocoa powder. Microwave this on high until you get a smooth chocolate mix, at least 30 seconds or so. At this point, at a tablespoon of milk, and then add 50g of sifted icing sugar. You might add more if you want a slightly sweeter chocolate glaze; 50g yields a deeper overall chocolate flavour. Drizzle this chocolate glaze all over the orange bars.

Time for the honeycomb. The recipe I used here is classically British, incorporating the use of golden syrup instead of light corn syrup. You can find a myriad different honeycomb recipes online, and though this is a nice, safe one to start with, don’t be afraid to try others out. I’m eyeing Joy the Baker’s one next! Grease a 9×9-inch baking pan and set aside near your stove and saucepan. In a medium saucepan, add the sugar and golden syrup. Melt everything together on a low heat, mixing briefly with a wooden spoon in the beginning, and wait until the sugar crystals have visibly dissolved. Don’t touch or stir it at this point. Try not to let the mixture boil because this will change the structure of the crystals before you have a chance to aerate everything with the baking soda. Once the sugar has dissolved, turn up the heat just a little and let simmer for 2-4 minutes, or until you can see that the mixture has turned slightly deeper in colour, a light amber shade. At this point, add the baking soda and quickly whisk it into the mixture. It will go thick, slightly paler and foamy (it’s beautiful), but slightly darker again once you whisk. Immediately pour the mix into the pan you greased, and then set your pan under cold running water in your sink to dissolve any caramel that might’ve stuck to the sides.

The mix will set after around an hour. Since it’s always so bloody hot here, I left mine at room temperature for half an hour, before placing in the fridge for another half hour. At this point, take out your pan and overturn it onto your counter. Hit the pan hard with your hand or a large spoon to release the honeycomb onto the counter, and this will simultaneously break it into large chunks. You may then proceed to break it up further into shards of whatever size you wish.

Assembly: Cut the orange bars into 12 with a sharp knife, cleaning the knife with a paper towel after each slice. Top with mascarpone and homemade honeycomb, and send yourself to heaven.

Chocolate and Banana Mug Cake

It’s a big one, literally and metaphorically.

Above you may observe chocolate in one of its natural habitats (for it has many, obviously), with a cashew butter topping and chocolate shavings.

A moist, fudgy-in-the-centre mug cake, with mashed banana in the centre for optimal gooeyness. A little firmer on the surface, but easy to break into to reveal a tender, soft belly. I don’t think there’s anything much that beats a piping hot, warm, fudgy chocolate treat first thing in the morning, especially if the whole mixing and microwaving process is this easy. Maybe I should spill the beans upfront– I’ve never made a mug cake before. I always felt as if doing so is a total, embarrassing cop-out; why microwave (does that word chill you to the bone and bring to mind grease-framed images of ready-made meals or bad takeout?) when you can put to good use your lovely and probably very expensive oven?

Although I appreciate and prefer a traditional fudge cake made in the oven, all 50’s aprons and 30-minute labours, this sort of recipe is perfect for one those mornings when you want to feel indulgent, but just… Don’t want to spend all that long being a princess.

Chocolate and Banana Mug Cake (serves 1 very hungry person)

Ingredients

25g all-purpose flour

2 tbsp cocoa or cacao powder

2 tbsp white sugar (I used coconut date sugar)

1 egg

3 tbsp milk (any sort; I used almond here)

2 tbsp veg or coconut oil, or melted butter

small handful of mini chocolate chips

half a banana, mashed

Directions

In a bowl (not the mug you’re making the cake in), whisk together the flour, sugar and cocoa/cacao powder. Take a tablespoon of this dry mix and toss it with the chocolate chips in a separate saucer, just so they’re coated with the flour mix. Mix in the rest of the ingredients except for the mashed banana (egg, milk and oil, then the chocolate chip and flour mix).

Grease your mug and pour in half of the chocolatey mix. Put the mashed banana on top, then add the rest of the chocolate mix. Microwave this on high for a minute, or check the doneness with a spoon at the 45-second mark. Poke and prod to see if it’s done to your liking; take it out a little earlier if you like that little extra fudge! Keep in mind that you must watch it like a hawk because this cake does rise a little, and if you’re not careful, it might collapse or overflow, especially if your microwave is on a particularly high heat setting.

Top with whipped cream, or nut butter, and enjoy with iced coffee or a glass of cold milk. Alternatively, douse the entire thing in cold milk and enjoy as a sort of bread pudding! It’s perfect for breakfast. Or have some as a small snack and keep the rest for later, for some things are never too late to microwave.

Tahini Oat Pillow Pancakes

Time has unleashed a spawn of ideas and fresh inspiration.

Though I’m happy to finally get back into the groove of food photography and recipe development, the past couple of weeks were much needed respite. The days fuelled anticipation for Fall in London, and although I know I won’t ever be able to bake or create anything much after that time, I feel as if this blog has really grown to become a part of me, a part I can’t and never will forsake. It’s shed new meaning upon my life; I don’t feel more alive or myself when in the kitchen, fiddling with and tweaking jottings in my notebook. I have my other passions, but this will always be an inherent part of me, like a child I must help grow and nurture. Therefore, I have keenly decided that I will continue updates here, though of course much less frequently!

The plan now will be to post once or twice a week, and the focus will be shifted to creating more breakfast-type recipes. I’ve always had an inappropriate obsession with breakfast culture, and adore that combination of simple, sweet and healthy. No, my recipes are not always the healthiest, but that’s only because I don’t believe in any modern fad. Go gluten-free if you have coeliac disease, by all means, or maybe even just for fun, but don’t impose the juicing monster (which is, literally, quite green) on anyone who doesn’t feel as if tip-top wellness is a necessary factor for emotional, spiritual or intellectual growth. Or for life in general, for that matter. I recently read this article which I readily relate to and agree with, discussing the modern health obsession and its ironic correspondence with young ‘health foodies’ found everywhere online and on social media (go on, read it!). The mixing of health and science must be monitored, and diet cannot be wholly dictated by a few paragraphs you may read online written by a young pretty lady in a sports bra. Let’s just be real. One will not die eating pancakes every Sunday, and some choose not to, which is totally ok. We all know we need ‘balance’, but the point of middle ground is different for everyone, is it not?

Anyways. Despite my passion for eating and making French pastry, some varieties of which I have yet to attempt (but shall do so in due time!), I know that doing so isn’t feasible in the near future. Sometimes, practicality is sacrifice, but it’s also a means for exposure and pushing creative boundaries.

I don’t know about you, but I think it’s pancake time.

A few days ago in London, I came across the most charming café in Islington, and my good friend (hey Celeste!) and I simply couldn’t resist strolling in even after our heavy brunch (now that I recall, we had pancakes, which is so de rigueur… Then again, when is it not?). Nut butters, pre-made sandwiches and bottles of tahini lined the shelves, alongside other bits and bobs of artisan produce. I felt it a bit of a sin if I didn’t walk out with something, so tahini it was, and tahini I’m glad. A short aside here–we also enjoyed delicious coffee, tea, and the best lemon pistachio cake slice ever. I’m thinking of it now, and the thinking is pain.

Having never properly experimented with the mildly salty sesame paste before, I decided to incorporate it into my favourite base pancake recipe, which yields the fluffiest, moreish, pillow-like texture ever. Thick and fluffy aside, a soft and tender surface may be easily broken with a fork to reveal a pale interior studded with oats. The mildly salty tahini lends perfect contrast to the sweet batter, and it also means no additional salt is needed in the recipe. Ladies and gentlemen, enjoy.

With tahini, maple syrup and chunks of homemade banana bread

Tahini Oat Pancakes (makes 8 3-inch pancakes)

Ingredients

125g (1 cup) all-purpose flour, or half whole wheat and half all-purpose

40g (1/2 cup) whole rolled oats

3/4 cup milk of choice (I played with soy this time round)

10g unsalted butter, melted

1 tsp baking powder

1 tsp baking soda

2 tbsp tahini

1 tsp honey

2 tbsp white sugar

1 egg

splash vanilla extract

Directions

Preheat a medium saucepan on low-medium heat, and ready some butter. In a medium bowl, whisk together the dry ingredients– flour, two leavening agents and sugar. In a separate, smaller bowl, whisk together the egg, milk, honey, tahini, melted butter and vanilla extract. Pour most of the ingredients into the dry mix; I say most because you may not need all the liquid. I used all of mine and yielded a nice, thick batter, but just exercise a teensy bit of caution. You want it to be thick and slightly lumpy after mixing briefly with a wooden spoon or spatula.

Butter the preheated pan. There should be a sizzle when you flick a bit of water onto the pan. Using a tablespoon measurement (for 3-inch pancakes), ladle the batter into the pan. Once you see a few bubbles spread throughout the surface, go ahead and flip to cook the other side. Serve a couple warm on a plate, topped with more tahini, maple syrup, and whatever else your heart desires.

Strawberry, Chocolate and Marzipan Hand Pies

On the spur of the moment, I pie-d my way through yesterday. I have a knack for fishing out completely random things from the pantry and thrusting them all together in some wacky ingredient spin-off (or should I say dance-off in the oven), but this one isn’t all too unorthodox, and well heck it yielded something far more pleasurable than what I envisioned during the process.

So that was this morning’s breakfast.

An incredibly flaky pastry, my new favourite recipe after modifying a wonderful one I found on Saveur (details later), drizzled with chocolate and almond glaze and topped with fresh vanilla bean ice cream, encasing the baked and glorious juices of roasted strawberry, melting chocolate, and what turned out to be the highlight for me– marzipan.

I used to hate the stuff, believe it or not. Marzipan, I mean. When I was a kid and invited to a party with cakes neatly dressed in marzipan, I would feel all too inclined to turn away an otherwise perfect plate of cake. The smell of ground almonds pressed with sugar somehow made me feel sick to the stomach. Now, I can’t see how this could be half as special without the addition of sweet, fudgy marzipan. Coarse, yet chewy, the density upping the indulgence that much more.

Yes, this was all before a little bit of the filling overflowed. I liked that quite a lot, actually; picking all the crusty bits from the parchment paper, simultaneously enforcing neatness and deriving gross pleasure from picking up the dejected trails the oven always leaves in its wake. Other things I liked about making this beautiful delicious mess was rubbing lots of butter into flour and stirring the strawberries as they cooked and bubbled in the pan. Sauce thickened, excitement grew.

Cut into one, and you get a jammy, fudgy mess. The hot, crusty, flaky-as-ever pastry works too well with a nice scoop of cold vanilla bean ice cream or cold cream. The almond and chocolate glazes up the ante with their showgirl effect, reflecting the filling’s personality. The strong hint of almond essence in the former may be left out if one isn’t too keen on that flavour. I haven’t been this excited about a recipe in a long while. I’d say 11/10.

Strawberry, Chocolate and Marzipan Hand Pies with Almond and Chocolate Glaze (makes 6-7 3×4-inch hand pies)

Ingredients 

For the pastry dough, lightly adapted from here:

252g (around 2 cups) all-purpose flour, plus more for dusting your counter later on

1 tbsp white sugar

large pinch of salt

226g (2 sticks) unsalted butter, cut into cubes and chilled for 5 minutes in the freezer before using

1 egg, beaten in a bowl

1 egg for brushing the pastry edges later on

For the filling:

10g unsalted butter

400g strawberries, hulled and chopped into small pieces

1 tbsp white sugar

1 tbsp white vinegar (any white is good; I used a local brand of diluted cane vinegar)

1/2 teaspoon black pepper

40g ready-roll marzipan (which can be easily broken up into pea-sized chunks with your fingers)

half cup chopped chocolate or chocolate chips

For the almond glaze:

100g icing sugar

1/2 tsp almond essence (very strong, so I shall leave this to your own discretion)

4-5 tsp whole milk

For the chocolate glaze:

40g baking coverture chocolate (or any regular brand of chopped chocolate or chocolate chips), melted in 30-second increments in the microwave

Directions:

Make the dough. Ready some cling film. You can put all the ingredients in a food processor but I personally think rubbing butter into flour is ludicrously therapeutic, so I do that instead. In a large bowl, whisk together the flour, sugar and salt. Rub the butter into the flour until you get pea-size crumbles and maybe a few larger bits of butter. The dough will briefly hold together if you squeeze some of the mix together in your palm. At this point, mix in half the beaten egg. If the mix does not hold together well upon squeezing at this point, then add a little more egg, bit by bit. Flour your hands, flatten the dough into a shallow disc, wrap with cling film and let the dough chill in the fridge for at least 45 minutes (that’s how long I waited for mine, though the original recipe states at least an hour for good measure).

Make the filling. In a medium-sized saucepan and with a wooden spoon, mix together the strawberries, butter, sugar and vinegar. Cook for 5-6 minutes or until very soft, and the juices have leaked but thickened a little. Mix in the black pepper, then taste. If it’s not as tangy as you would like, add a splash more of vinegar. Using the edge of your wooden spoon, mash a few chunks of strawberry against the side of the bowl. This will help thicken the cooked mass of ingredients and yield a more jam-like texture at the end. Let the mix cool on the counter for half an hour before using.

After the pastry has chilled, it can be rolled out and then filled. Preheat your oven to 200C (400F). Lightly flour your counter and rolling pin, then roll out your dough till it’s approximately 1/3 of an inch thick. Cut the dough into 3×4-inch rectangles, then place on a baking sheet lined with parchment paper. Roll up the dough scraps, roll out again with the rolling pin, then do the same. On one rectangle, place a teaspoon of strawberry filling in the centre, then add a few chocolate chips and a few mini chunks of marzipan (you can break it up yourself). Use the other beaten egg to brush the edges of all the pastry rectangles, then fold one edge of dough onto the other half. Use a small fork to crimp the edges. Prick the tops using the same fork, then brush the tops with any remaining egg. bake for 20-22 minutes (mine took 20). Leave to cool for 10 minutes on the counter before drizzling with the glazes.

Double Chocolate Banana Pillow Pancakes

I do like chocolate. And in the parlance unique to all chocolate lovers… um… What about double chocolate? Yesterday morning, there was a lapse in self-control. These pancakes aren’t exactly the healthiest, but they sure are the most Sunday morning-esque, and that’s the most important thing, because a certain rainy day and time on your hands demands a lush, thick stack. Sometimes I’m partial to the whole almond-milk-and-oats sort of thing, but this particular lapse in the system of fairytale strength made me put whole milk, whole eggs, and good, rich chocolate on the counter at 6am in the morning.

Didn’t look back. Can’t look back. I keep swooning over my favouritest thick, fluffy buttermilk pillow pancakesand ever since I can’t bear to experiment with any other pancake recipe. I can’t bring myself to attempt anything off-standard. They’re magical and fluffy and pillowy; the best ones you will attempt in your lifetime. And life is so incredibly short. These are a double chocolate and banana version, with cocoa in the dry ingredients, banana in the wet, and stuffed with dark chocolate chips (use chunks if you will for full-on pleasure). The picture above shows a sweet little stack of 4 crowned with glorious, gooey, sticky cashew butter, maple syrup, and topped with a king-sized piece of dark chocolate, which melts along with the cashew butter and makes the whole bloody breakfast a fudgy and delectable brown-and-white mess. Any sort of nut butter is highly recommended, for its rich stickiness clings to the tender surface of each pancake and ups the goo-and-fudge factor considerably. Mmmm. Rich yet soft, sporadically studded with pockets of melting chocolate. Mandatory maple syrup. Double Chocolate Banana Pancakes (makes around 10 medium, or 8 large pancakes)

Ingredients

175g (slightly less than 1 1/2 cups) all-purpose flour

30g (1/4 cup) cocoa powder

3 tbsp white sugar

pinch salt

1 tsp baking powder

1 tsp baking soda

240ml (1 cup) milk of choice (I used whole)

1 egg

1 tsp vanilla extract

1 banana, mashed

50g unsalted butter, melted in the microwave (in 30-second increments), and a little more for the pan

large handful of chocolate chips or chunks (to your own discretion)

Directions

Sift the flour, cocoa, salt, sugar and both leavening agents into a large bowl. Whisk everything together well to ensure proper dispersion. In a smaller bowl, whisk together the egg, milk, vanilla extract, mashed banana, honey and melted buttter. Pour the wet mix into the dry and slowly mix together until just combined. The mix will be thick and lumpy.

Heat your pan or griddle on medium heat. It’s hot enough when you add a little butter and it sizzles audibly. Using a tablespoon measurement or a light hand with a quarter-cup measurement, pour circles of batter into the pan. Make sure there’s at least an inch of space between each dollop, because these enlarge significantly after flipping. Sprinkle chocolate chips evenly on the surface of each pancake (my own pan can only take 2 pancakes at a go), then take your spoon again and spoon more batter on top. The thickness of the batter means the bubbles won’t show up as quickly, so after 2 minutes check the bottom doneness with a spatula, and if it can slide easily underneath, give the pancakes a flip. The second side takes hardly any time at all, so wait less than a minute before removing and placing on a towel (to absorb condensation). Serve with nut butter, maple syrup and fruit, or whipped cream and maple syrup, or whatever the hell you want, really.

You can make all 8-10 pancakes before everyone is up for breakfast, just make sure to microwave them or place them in a warm oven for a while before serving. Place uneaten pancakes in a ziploc bag and into the fridge. They reheat beautifully, and are there whenever you want.