Dark Chocolate Jam Tart with a Black Sesame Crust

There are two reasons why I’m so excited to talk about this recipe.

1. So I scoured the corners of the internet, modified a few recipes to incorporate black sesame into a beautiful, flaky pastry crust, and failed. The second time, after readjusting the proportions and carrying on headstrong, it worked. Although I had some leftover dough, I figured one can always make a few more tarts if you have molds on hand, or simply freeze for later usage.. or eat on its own. Whatever floats your boat these days. This crust took this tongue by surprise, and I’m loving it.

2. Combinations occasionally take on surprising and welcoming turns. This is one of them. Chocolate and jam. I’ve done it on toast, and there are those bars you find lying in the dusty corners of the gourmet aisles, once glinting, too pretty to touch. We are sometimes a reluctant, frugal people, I know. This tart requires neither heartache nor skill. It’s a proper seeded attempt at something less predictable than your average dark chocolate tart (albeit some sea salt variations here and there, which once again requires no effort, if you really think about_. It’s a cut in the norm. A most welcome tart. In its glorious entirety, think rich, dark and slightly bitter chocolate sitting atop the epitome of a flaky, milky sweet, butter-breathed crust.

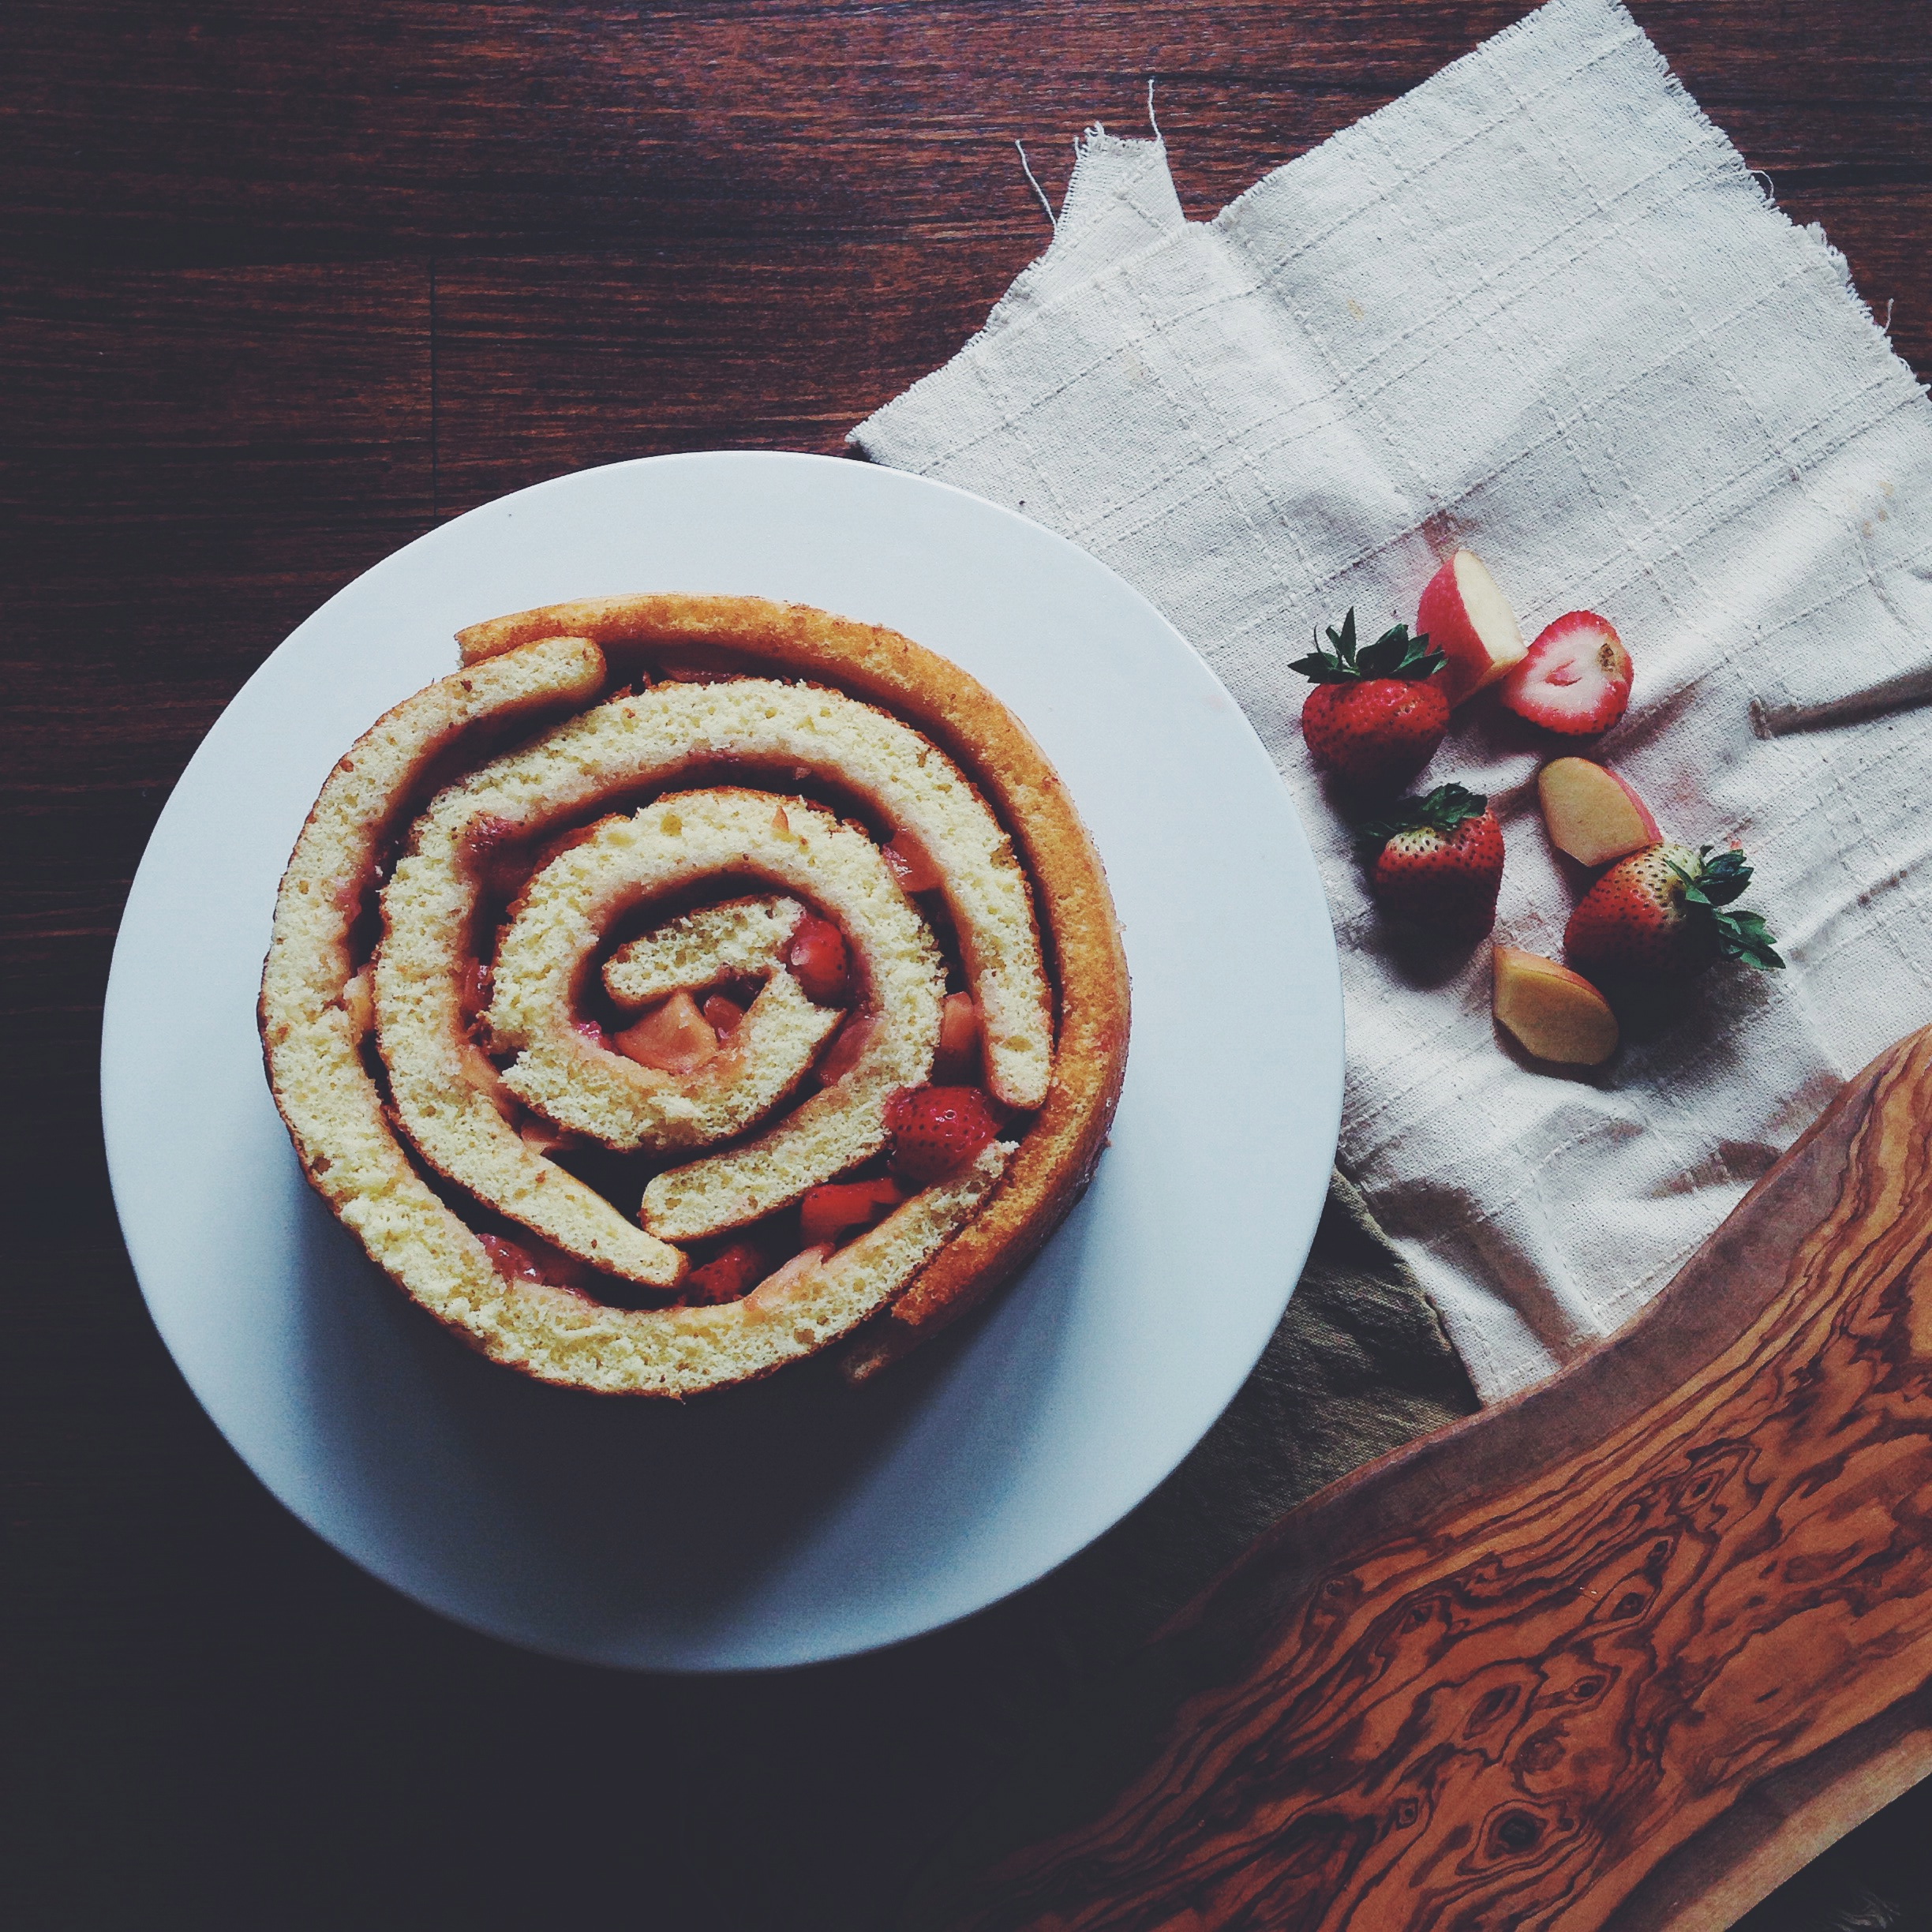
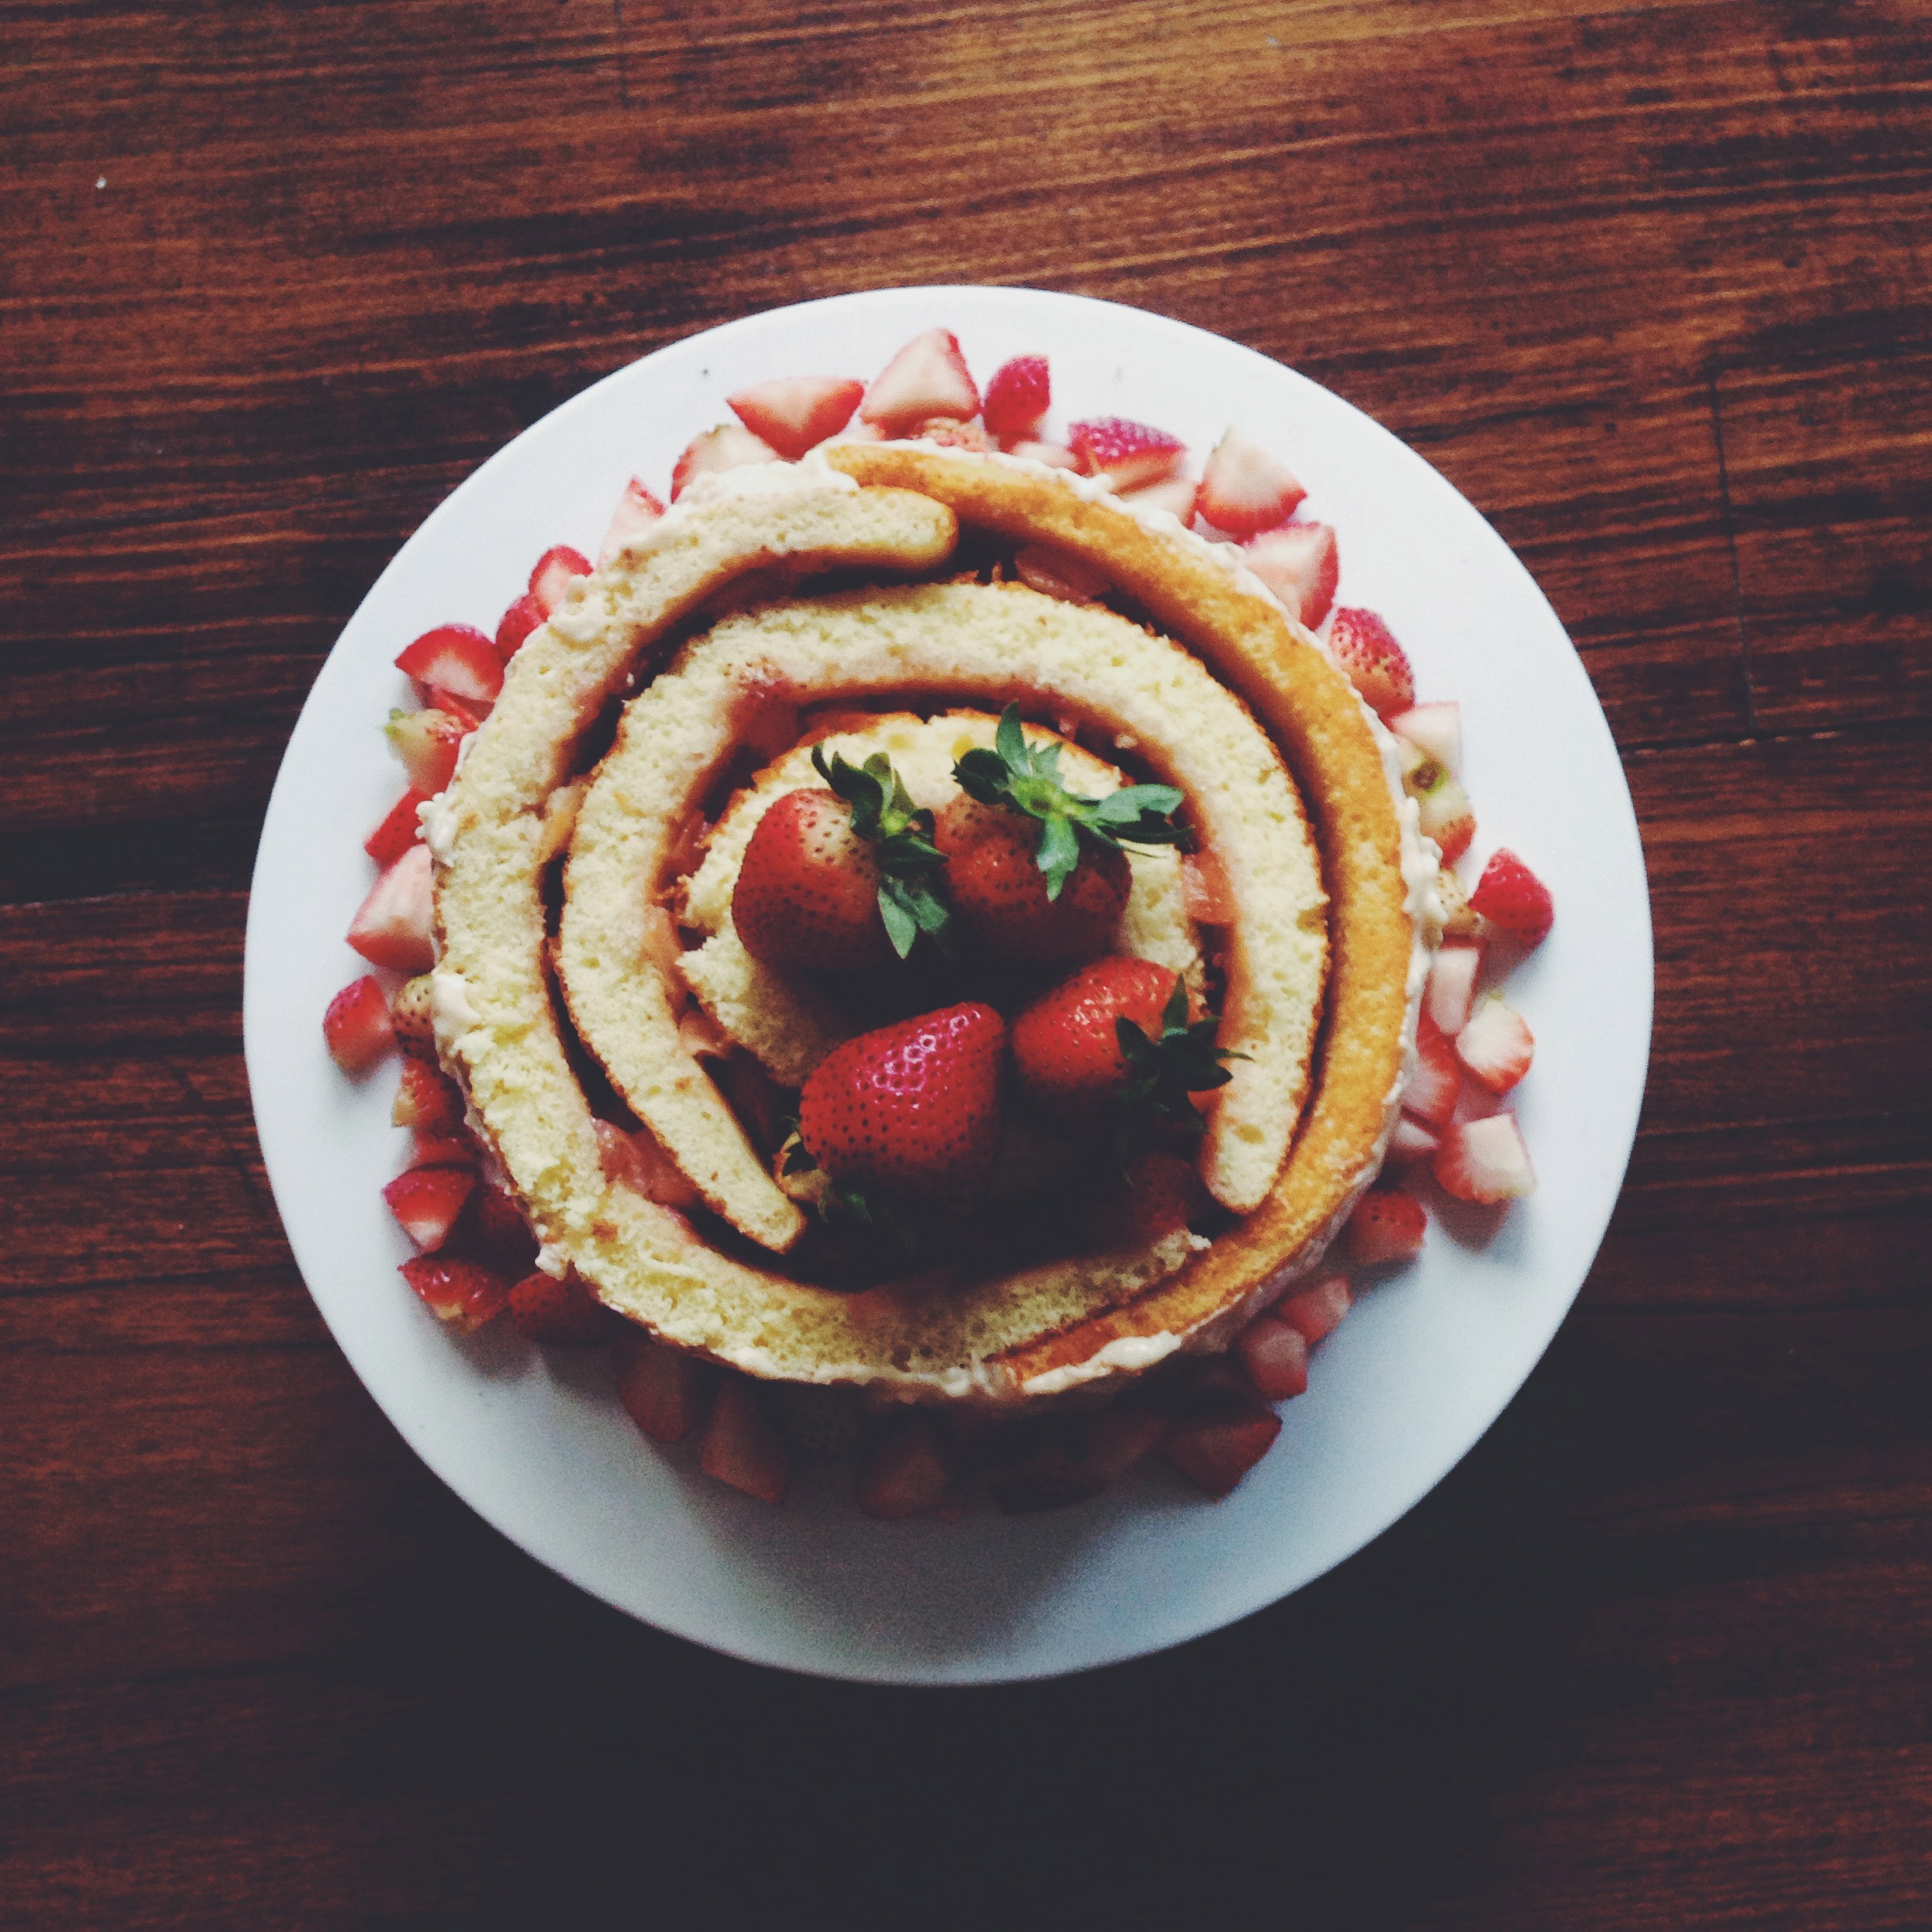
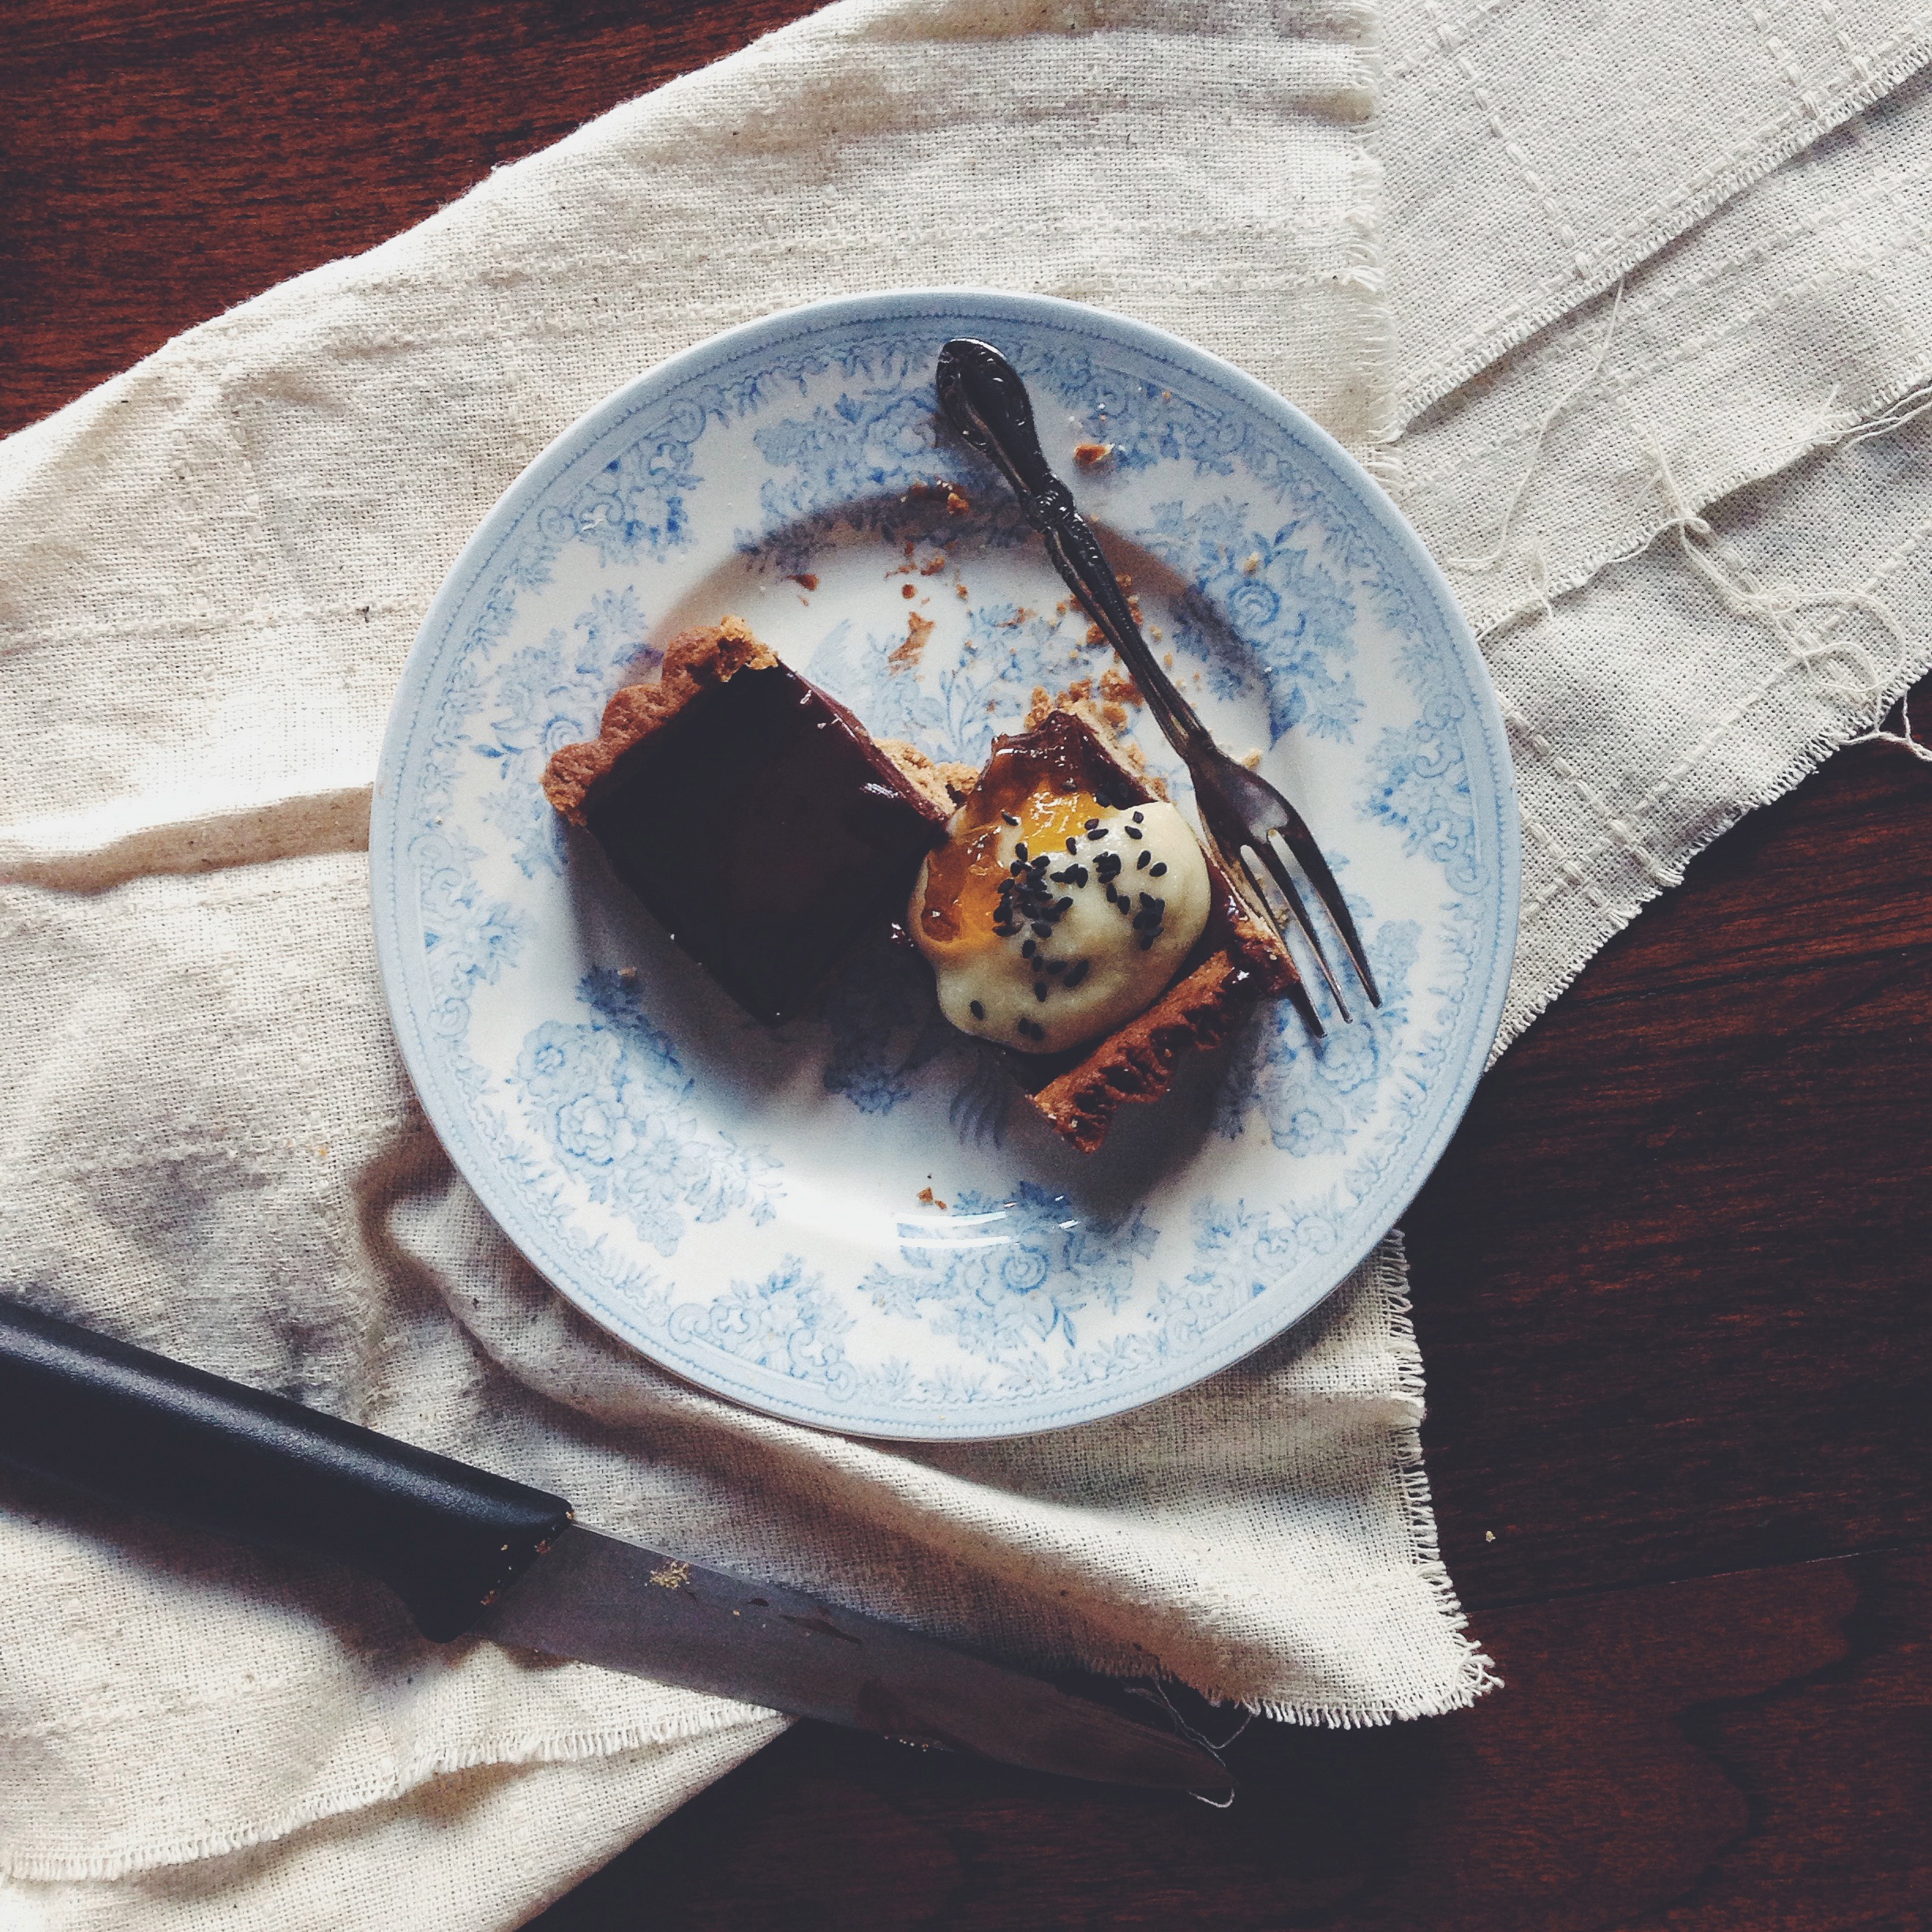
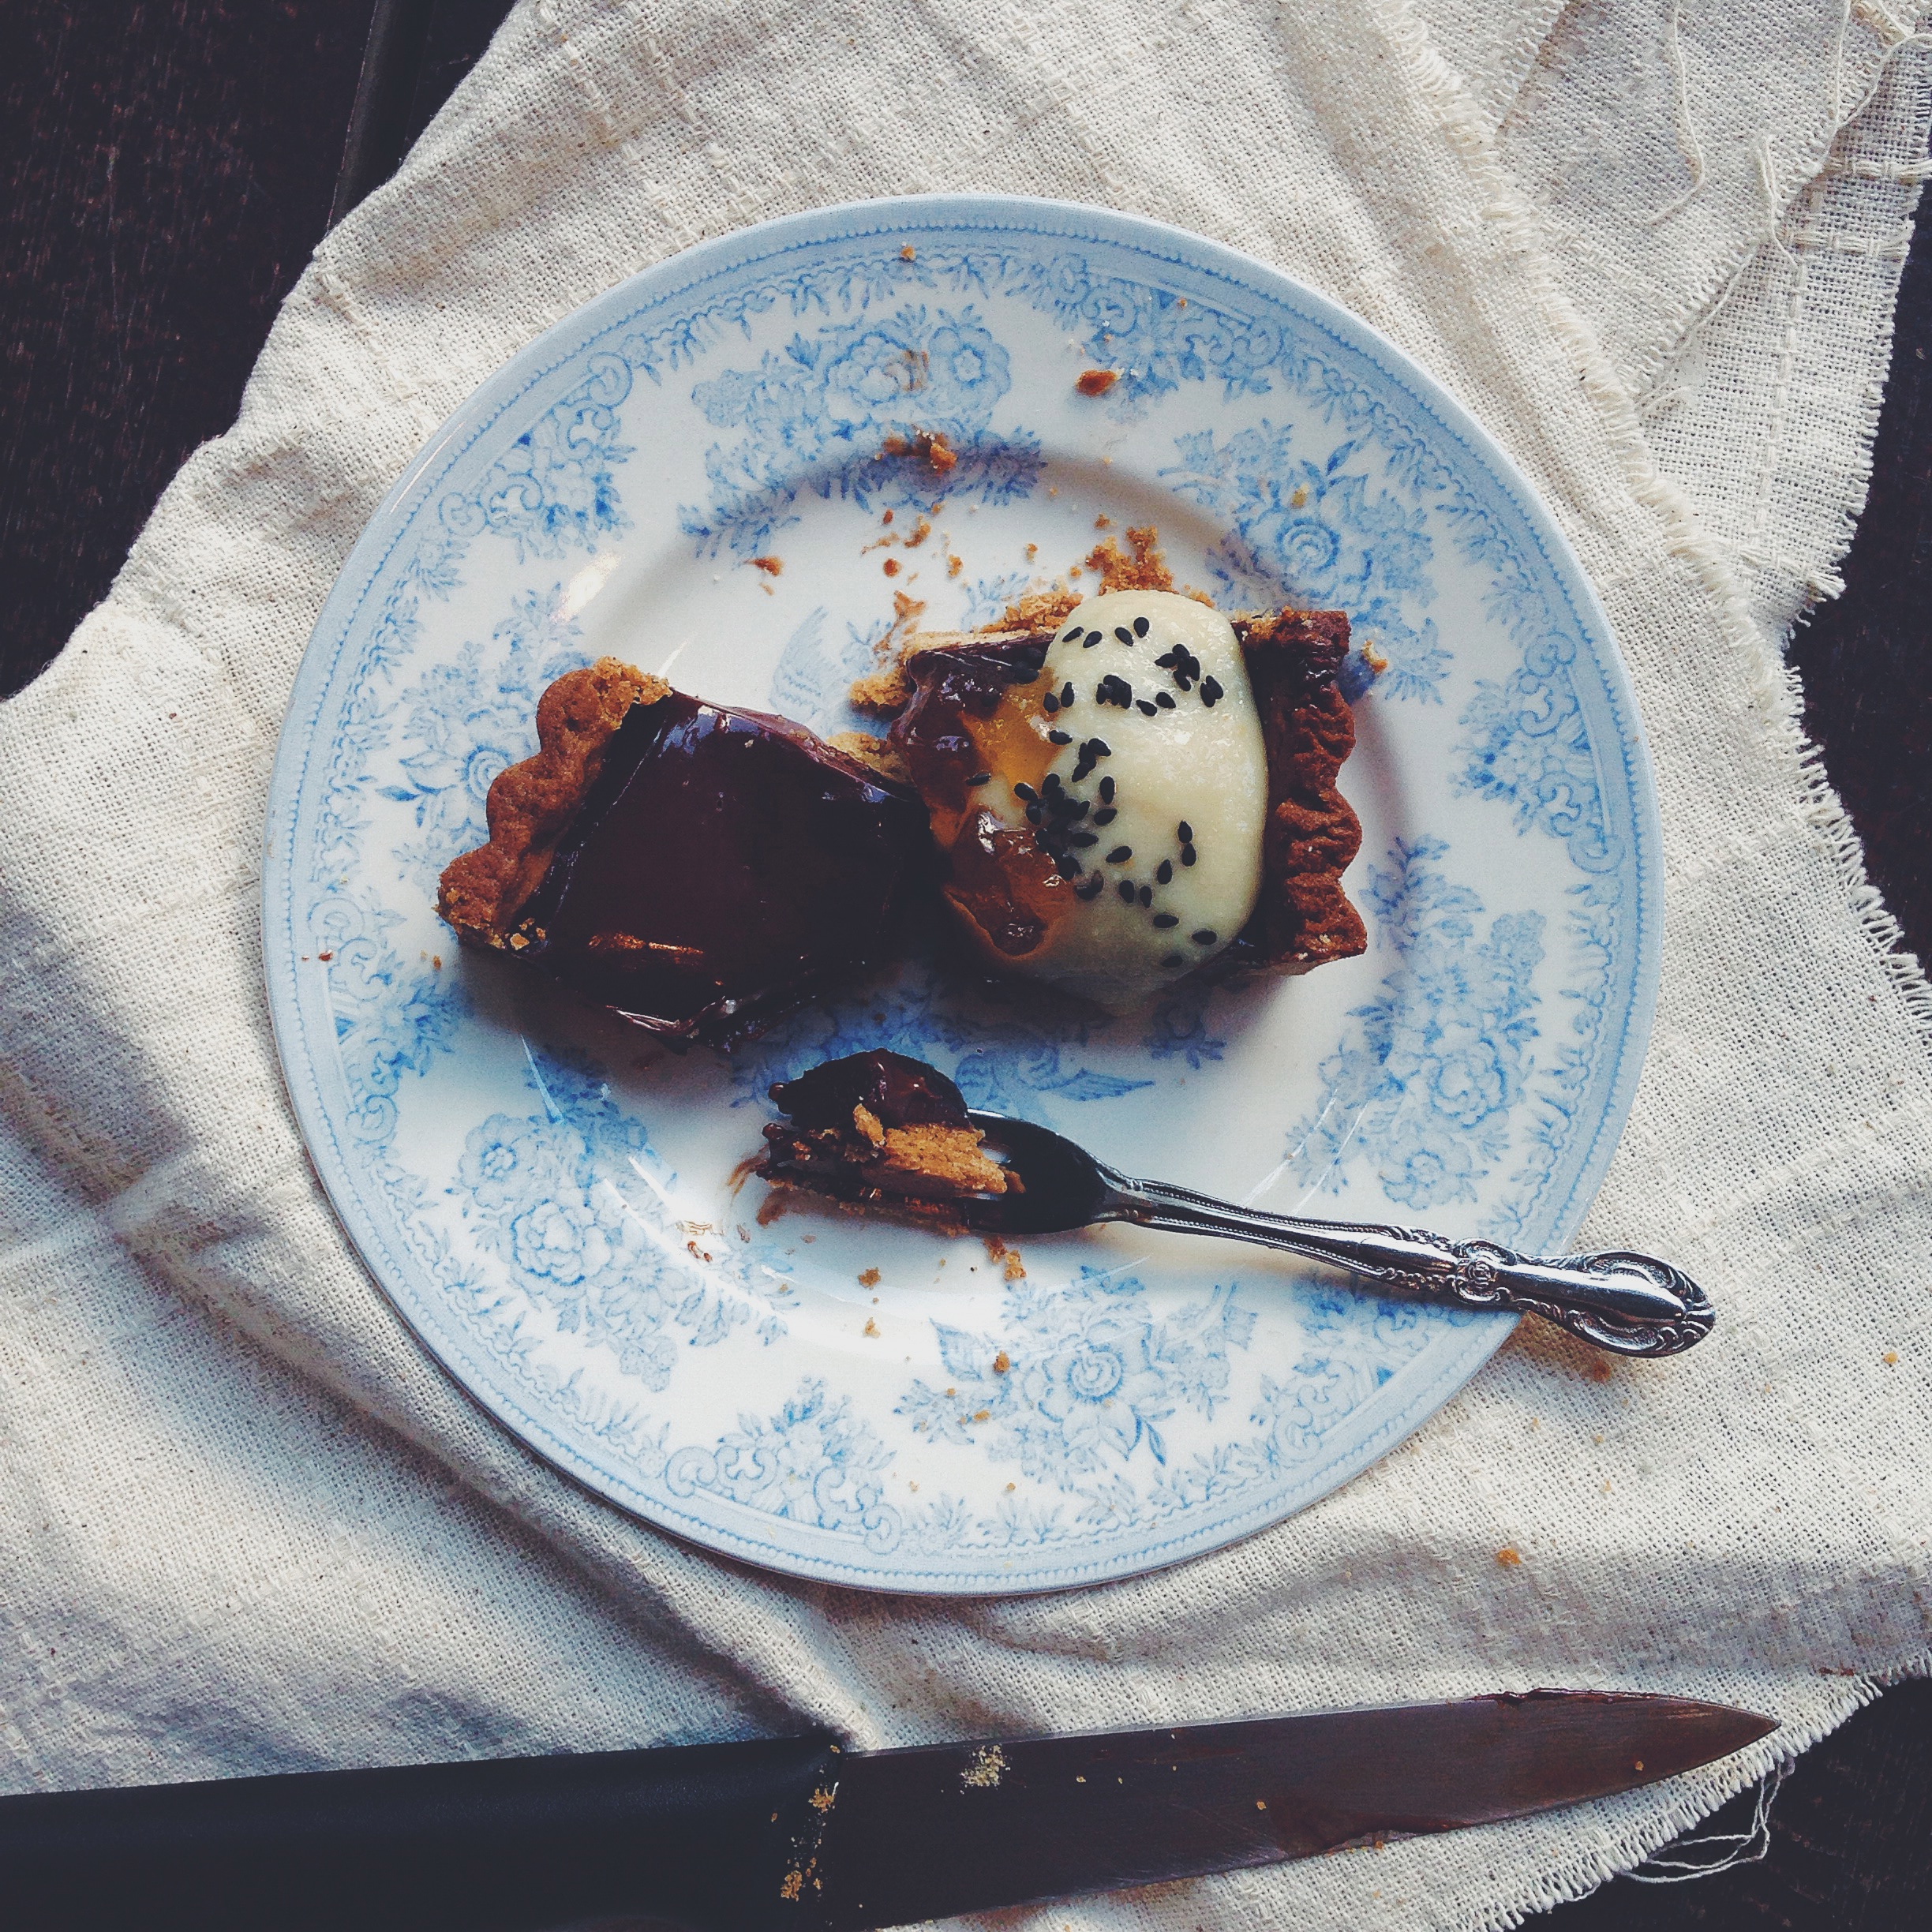
The pictures above display my own toppings; a sudden, spontaneous headspin– macadamia butter and more jam. In this case, I used apricot, but strawberry or orange would also work fine in this recipe. Feel free to use whatever flavour you have on hand. Whipped cream and fresh fruit on top would also serve to complement the suppressed tart notes in the tart alongside the (almost) overwhelming richness of a thick chocolate ganache, and that crusty, sweet, buttery base.

Dark Chocolate Jam Tart with a Black Sesame Crust (makes 6-7 tartlets or one long 10/11-inch rectangular tart)

Ingredients for the crust:

215g (around 1 3/4 cups, but weigh for accuracy) all-purpose flour

113 (one stick or a half a cup) cold, unsalted butter

80g (slightly less than 2/3 cup) icing sugar

1 egg yolk

large pinch salt

1 1/2 tbsp heavy cream or buttermilk (I used the latter just because I had it)

20g sesame powder (weighed after sifting), or 3 tbsp ground sesame seeds

1/2 tsp vanilla extract

Ingredients for the filling:

1 cup good quality dark overture chocolate, bar or chips (at least 60% cocoa)

240ml (1 cup) heavy cream

2 tbsp apricot (or any flavoured) jam

Cut the butter into half-inch cubes and put on a shallow plate or dish. Place the dish into the freezer to ensure the butter is at its coldest when you use it. In a small bowl, whisk together the egg yolk, heavy cream/buttermilk, salt and vanilla extract. In another larger bowl or into a food processor, sift together the flour, icing sugar and black sesame. Take the cubed butter from the freezer and plop the lot into the large bowl containing the dry mix. Using your hands (or using the processor settings), rub the butter into the flour mix. This will take a while, but try and work the butter into the flour fast because body heat causes the butter to melt much faster. Rub the butter in until it resembles a course and fine meal. Pour in the wet cream mix and lightly work into the dry mix until a dough just comes together. Shape this into a disc, wrap with cling film and then place into the fridge for an hour, or overnight if making a day ahead.

Grease your tartlet pans or rectangular pan. Take the dough out from the fridge, unwrap and place into the pan. Press the dough, which should still be pretty malleable and of a light greyish colour, into the bottom and sides of the pan. Take your time here, you want to make sure that there is a pretty thick and even layer of dough all around and up the sides. The thick padding ensures enough support during and after baking. Trim the top using a butter knife to get a clean edge. You may have some dough leftover like me, and that’s fine. Place the tart back into the fridge to stiffen a little more for 15-20 minutes.

Preheat the oven to 190C (375F). Cover the tart with aluminium foil and fill with pie weights. Bake for 22-25 minutes (I stopped at the 24-minute mark), rotating the tart halfway.

Whilst the shell is baking, make the filling. Put all the ingredients into a large bowl and microwave on high for 30-40 seconds. Remove from the microwave, then take a large spoon and stir everything together. Taste and add more jam or chocolate if necessary. Set the bowl aside for later.

After the blind bake, remove weights and foil, then bake for another 5 minutes (I only needed to bake mine for an extra 4). Just watch that the tart doesn’t look too dark around the edges whilst baking. Keep an eye on it. After baking, remove from the oven and let cool completely. Fill the tart with the ganache, then allow to set in the fridge for at least an hour before cutting and serving. Store in the fridge, otherwise the ganache will leak everywhere. It keeps well there for a week, but I doubt it will last that long…

‘Broken-up’ Roll Cake with Strawberry-Apple Compote

Yesterday marked my mother’s birthday. That officially makes her 26 years older than me, the cumulative years brimming with untold betterness, wisdom, coolness. My solid, grounded, pretty momma, whose self-efficiency and absurd organisational skills combined with favourable wit and wackiness make her the paragon of cool. She probably cries at night over why I haven’t reached that particular degree of coolness.

Unsurprisingly, I made cake. Cake is just a little dot in the field of foodstuffs she likes, the carb fiend that she is. She’s the sort who can sit back, legs propped on the counter, cradling a baguette stuffed with salted butter and marmalade. Lunch=sorted. She’s of solid character with an even more solid appetite. Cake to her is either meh or MMPH; she knows exactly when something is good or not. Thankfully, this sufficed, and accompanied the night’s celebration perfectly. Tip#1: I imagine that this particular cake, what with all its strawberry and apple and light-heartedness, would go superbly with a tall, thin glass of champagne!

It’s funny to look at these pictures now. I didn’t intend to wax lyrical over anything, I never meant for it to work, this was supposed to be a fingers-crossed-I-hope-it’s-alright-and-thank-god-mummy-wont-give-a-damn sort of experiment. This broken-up roll cake, as I have termed it, is indeed meant to be broken up. I figured that if it resembled a monster slice of swiss roll from the top, it would be all too easy for the whole thing to unravel from a single, exposed ends. So the mind was made up; I decided to make a simple sponge, cut it into vertical strips, and roll each around one another. The best part is that if any breakage occurs (spot the slight one in the middle coil), you can slot in some cut strawberries to add to the theme, the whimsical grandeur. Rusticity doesn’t deserve any bashing.

Alone, it resembles a maze in action, but really is so easy to put together. The cake itself takes a mere 5 minutes, though the strawberry-apple compote of course takes a little while longer. Make the compote a day ahead if you wish, to ensure that it’s fully cool before using on the cake. The sponge is light, sweet, but with enough body to withstand the mild rolling, and I love how the compote moistens the tall sides, making everything ever so slightly tart.

‘Broken-up’ Roll Cake with Strawberry-Apple Compote and Strawberry Cream Cheese Buttercream (makes one 9-inch wide cake)

Ingredients for the cake:

120g (3/4 cup+ 1tbsp) all-purpose flour

1 tsp baking powder

pinch of salt

3 eggs

145g (2/3 cup) white sugar, and set aside 2 tablespoons of extra sugar in a small bowl

1/2 tbsp water

Ingredients for strawberry-apple compote:

220g apple, chopped into small pieces

120g strawberries, chopped into small pieces, and reserve a few whole strawberries for garnish.

100g (half cup) white caster sugar

1 tsp vanilla extract

2 tsp cornstarch mixed with a tablespoon of water in a small bowl.

Ingredients for strawberry cream cheese buttercream:

50g soft, unsalted butter

100g icing sugar

75g cream cheese, at room temperature (or just microwave on high for half a minute if cold from the fridge)

30g pureed strawberries (or take same mass of strawberries, microwave on high for a few minutes and then mash with a fork)

First, make the strawberry-apple compote. Put all the chopped fruit, vanilla extract and sugar in a a medium saucepan and place the pan on medium-high heat. Stir with a wooden spoon until you can see that the sugar has dissolved(no more visible crystals/lumps of the stuff). At this point, the juices from the strawberries will have started to leak. Reduce the heat to medium-low and let the mixture cook for 15-20 minutes, stirring occasionally so the heat is spread out throughout the mass of fruit and sugar. Just before taking off the heat, pour in the cornstarch-water mixture and mix in thoroughly. The mixture will thicken and lighten slightly. Take off the heat and let cool completely by placing it in the fridge. If you’re making this a day ahead, cover with cling film and let rest in the fridge overnight.

Now for the roll cake. Preheat your oven to 250C (480F) (I tried my hand at the same method used for Linda L’s vertical roll cake!). Grease and line a large baking sheet with parchment paper. In a medium bowl, whisk together the flour, baking powder and salt, and set aside. In another larger bowl and with an electrical whisk or beater, beat together the eggs and sugar until the mixture doubles in volume and is incredibly pale and fluffy. This will take around 7-10 minutes, depending on the temperature of where you live and how powerful your beaters are. The beating is done when you lift your beaters and the mixture is visibly more ‘sticky’ than how it first appeared, and leaves a ribbon-like trail before quickly dissolving into the rest of the mixture again. Once you reach this stage, tip in (or sift, if you’re anal like me) the dry mixture, add the water, and gently fold everything together using a rubber spatula. Make sure all the dry mix is evenly incorporated and you end up with a smooth, aerated, pale batter. Pour this onto your greased and lined pan and bake for 5 minutes, no more and no less, in the oven.

For the frosting, beat together the butter and half of the powdered sugar in a large bowl. then, beat in the cream cheese and pureed strawberries. The mixture will look too liquidy to handle. At this point, beat in the rest of the icing sugar, making sure to scrape down the sides with a spatula, combining everything nicely and evenly. Pop the bowl in the fridge for later usage.

Once the cake is finished, remove it from the oven and let the pan cool on a wire rack. Sprinkle the top with the 2 tablespoons of sugar you reserved at the start, and then sprinkle your counter with a little extra sugar. Once the cake is fully cool, carefully tip it onto your counter, so that the top is facing down. Remove the pan (it helps to tap the pan with a knife first) and the parchment paper. The underside of the cake should look slightly blotchy; pale and brown here and there. Spread the cooled strawberry-apple compote on the cake, using your fingers to place all the small bits of fruit evenly if you wish. Make sure all the juices soak into the cake’s entire surface. With a sharp knife, cut the cake into four strips, starting from the short side. Take one strip and start rolling normally from the top. Then, take the next strip and place one of its ends near the end of the first strip, as you can see from the picture above. Wrap it around the first strip. Repeat with the 3rd and 4th strips. Once you’re done with the last strip, wrap the sides of the cake with cling film and place in the fridge for at least an hour, or overnight if making a day ahead.

Once ready to serve, take an offset spatula and spread the strawberry cream cheese buttercream along the sides of the cake. This buttercream is softer and less malleable than your usual buttercream thanks to the puree and cream cheese, so it must be stored in the fridge (on your cake stand) right up until serving. Place a few fresh strawberries on top for extra garnish, if you wish.

Almond Butter Cookies

A. B. C. Should I continue with D, E, and F?

Dense, Easy, Flourless. WOW that went down well. I swore that would take longer than expected.

I never meant to do it– promise. This Almond Butter Cookie action (hopefully the acronym stuck the first time you read it) pounced on me instead of the other way round. People have things for things, and my thing yesterday morning was almond butter. I eased a dribble down a side of toast, drizzled on some honey, then some course sea salt. It’s easy to contemplate life over breakfast. Almond butter honey toast is magical. Why not turn your jar into a batch of bloody easy cookies?

Processed with VSCOcam with f2 preset

The very next morning, I decided to have one for myself with some newly bought macadamia butter (yes! It’s real!), raspberry jam, and more chopped almonds. Exquisite. Sometimes simplicity is key, but the lavish combination didn’t hurt this aching almond affinity.

I’ll give you just a line: Dense, chewy, buttery (in the most nourishing sense). These cookies are slightly crumbly due to the natural texture of raw almond butter, hence putting it just a rung up on the fragility ladder, but the lovely squidgy interior of slight under-doneness, packed with lush, nutty almond flavour, makes this one bowl affair way worth it. Alright. A couple of notes on this jazzed up loveliness:

– once the cookies are baked, leave them! For a half hour or so before touching. They are soft and rather fragile once out of the oven, so you don’t want to fiddle with them too much.

– use raw, natural almond butter, and make sure that all the natural oil (which usually rests on top of the more solid mass of almond butter in the jar) is thoroughly mixed in, using a knife or spoon.

– you may add whatever you like after getting the base recipe straight, be it chocolate chips and almonds (as in my case), or perhaps crushed biscuits (?) and sea salt. The versatility of a cookie is something to herald and marvel at. It’s pretty impossible to exhaust all possibilities and combinations..

Almond Butter Cookies (flourless, makes around 16 medium cookies)

Ingredients

1 cup almond butter

1 teaspoon fine salt

75g white caster sugar

65g soft, light brown sugar

1 tsp baking soda

1 egg

Optional: half a cup of chocolate chips/ nuts/ crushed biscuits

Preheat your oven to 177C (350F), and line and grease 2 cookie sheets. In a bowl, mix together all the ingredients listed above (yes, in that order, if you wish). Using 2 tablespoons, spoon a tablespoonful of mixture onto the cookie sheet(s), each circle of batter placed at least an inch apart from each other. There is no need to flatten the cookies as they will spread out on their own during the baking process; they should be slightly flattened balls of almond buttery goodness on the baking sheet. Bake in the preheated oven for 9-11 minutes. Mine were done by 9 minutes. Leave to cool on a wire rack for at least a half hour before touching, and then serve with glee.

Black Sesame Cakelets with Cream Cheese Frosting

Processed with VSCOcam with f2 preset

A good friend once told me that if I were an ice cream flavour, it would be black sesame.

‘What’s that supposed to imply?’

I still don’t know. Nevertheless, I love attempts to associate people with things, endeavouring to understand or replicate nature, auras, psyches. The memory was jolted alive last week, when I was prancing around the supermarket aisles, sometimes stopping to peruse labels, flipping through half-hearted ideas in my head. I was ready to take on something tame for today’s post, working with ingredients I already had at home. But (there’s always a but). When I passed by the gourmet Japanese section, the urge to experiment with black sesame was so profound I felt like it would be a cardinal sin not to leave without a loot. It almost came as a shock because firstly, I’ve never done so before, and secondly, I’ve always been enamoured by its sweet, oil-rich, nutty flavour. What’s taken me so long?

Even if you decide, as part of a little intellectual exercise, that you are going to sit around and do nothing because you have concluded that you have no free will, you are eventually going to get up and make yourself a sandwich.“–Greene and Cohen, from a book I’m reading right now on the brain.

I love that. You see, sometimes, you just have to do something and stop wrestling internal needs or expectations. To sustain yourself and this life. Satisfying that urge was worth it.

So I’ll say it: I wasn’t expecting the results of this experiment to turn out so well. Somehow, the oven works its magic the first time. All worries were alleviated when my first batch of black sesame cakelets emerged (almost) perfectly round, just slightly risen and browned along the edges, from the hot-house. Working with the black sesame powder I found along that aisle was pure joy. The powder by itself is mildly sweet, carrying all the aromas and flavours of the seed. It is imperative that you sieve the powder first into the dry mix, to yield the finest and smoothest texture possible. If you can’t find the stuff in the grocery store, try your hand at black sesame seeds, and grind them up at home, in a food processor or with a mortar and pestle. You will get a paste instead of a smoother powder, but I expect it will work just as well. Gosh, I’m excited for you! Soft, moist (I actually like this word for all the grief it gets, poor thing), slightly cakey with an incredibly tender crumb. The nuttiness and mild sweetness formed the perfect backdrop for the ever-familiar cream cheese frosting on top. The two together are sublime if sinful.

I topped these with oreo crumbs, sprinkles and chopped bits of dark chocolate. Go crazy here. It’s the perfect cross between a pikelet, an adorable mini pancake, and the top of a cupcake. Can you imagine? I hope you can. If making these means having to go to the grocery store to buy some black sesame powder (or seeds), then I guess you have no choice.

Processed with VSCOcam with f2 preset

Black Sesame Cakelets with Cream Cheese Frosting (makes around 8 3-inch wide cakelets)

Ingredients

For the cakelets:

105g plain flour

25g (around 2 1/2 tbsp) black sesame powder, or the same amount of black sesame seeds ground into a paste using a food processor or mortar and pestle

1/2 tsp baking powder

pinch of salt

57g (4 tbsp) softened, unsalted butter

1 tsp vanilla extract

110g (half a cup) white sugar

1 egg

30ml (2 tbsp) whole milk mixed with 1/2 tbsp white wine vinegar, left to rest for 5 minutes before using. Alternatively, use the same amount of buttermilk or yoghurt

For the frosting:

40g softened unsalted butter

75g cream cheese, at room temperature (take out and leave on the counter for a while before using, or microwave for half a minute if cold from the fridge)

1/2 tsp vanilla extract

75g powdered sugar

Toppings:

crushed oreos/ sprinkles/ dark chocolate/ whatever you want!

Preheat the oven to 177C (350F) and line and grease 2 cookie sheets. In a medium bowl, sieve (yes, a sieve is necessary here!) the flour, baking powder, salt and black sesame powder.  In another medium bowl and with a whisk or handheld electrical whisk, cream together the butter and sugar until pale and fluffy. Whisk in the vanilla extract, egg and milk mixture. Pour this wet mix into the dry mix and stir with a tablespoon or wooden spoon until just combined and the batter has a nice dropping consistency, and is not too wet or thick. With 2 tablespoons or an ice cream scoop, dollop the batter into little circles onto the cookie sheet, spaced at least an inch from each other. Pop into the oven and bake for 7-10 minutes. Mine took 8 minutes exactly. Whilst they bake, make the frosting. Beat together the butter and cream cheese until smooth, then add the vanilla extract and powdered sugar. Beat until all is nicely incorporated.

Once the cakelets are done, a toothpick inserted into the centre of one should come out clean. Leave to cool on a wire rack, which will take around 10 minutes. Frost the tops with cream cheese frosting using a knife, then top with whatever toppings you desire. These cakelets surprised me and gave me feels. They will do the same to you.

Review: Tolido’s Espresso Nook

A long black please ($5.50), oh and that stack of devilish banana buttermilk pancakes. $9, you say? Aw, that’s not too bad at all. I mean, I can make my own buttermilk pancakes, but sometimes I need a step out of the humble abode, a new perspective, fresh insight into a worn classic. I forgot how good it feels to be at a café, alone with my thoughts, senses honed in on words, aromas, textures, flavour.

My penchant for anything sweet with nourishing kicks (think oatmeal with almond butter and honey, or this divine cheesecake) is let down a little once a week, when I hop around in search for something, anything, impressive on this tiny island, be it a sinful plate of crisp, endearing waffles or crazy lush French toast. Yolks oozing, crusts squealing at the first prick of my fork. Letting go can feel good. Almost necessary.

Tuesday’s situation. Ploughing through science writings, a double (upon request; they typically do three but I personally can’t stomach that) stack of RIDICULOUSLY thick and soft buttermilk pancakes topped with torched caramelised bananas, whipped cream and caramel, at the one café I’ve been meaning to visit for the longest while yet. I would’ve come sooner if it weren’t for my mistaken impression of this ‘nook’, something about the mounds of whipped cream I saw on Instagram and chimerical flavour titles on gaudy menus put me on edge; although it all sounded so whimsical and somewhat enticing, an air of off-the-beaten-and-maybe-slightly-greasy-track offset the appeal. I repeat: mistaken impression. One enters the wooden cove and is immediately bathed in a warm glow, some unuttered warmth. Smiling, tall baristas. The large sofa on my left had ‘come hither’ written all over, draped with a tassled beige cloth, resting against a wall filled with mini framed portraits. All the tables were elongated, wooden hexagons. The whole scene was akin to a teen clique’s secret hip hideout, complete with rough indie hits and large, flat spaces for ‘studying’. The nook lives up to its name. IMG_1056 IMG_1059

Delight.

Of course, the de rigueur sips of harsh black coffee. It’s always this or a capp for me whenever I’m in that pretentious assessing mood; the iced blacks typically mask bean quality, not that I’m anywhere near professional, and the smoothest latte (milk in Italian) still may not reveal much. Opted for the stuff straight-up, piping hot in a full 5-ouncer. They have a ‘sea salt caramel latte’ here too, and although I have an unrelenting sweet tooth, I dare not be lured into the lurid albeit enticing half-gimmicks. That being said, I shall allow my penchant for that classic sweet-salty combo to take the driver’s seat if ever I come back, and will be sure to give it a shot (maybe with an extra shot for good measure).

IMG_1060

Pillows. I loathe these for the carnal pleasure they bestowed.

A full centimetre high, impeccably well-risen, so much so that if I were to cut into one horizontally I would get 2 thin carpets of hole-studded pale batter, cooked to perfect doneness. Kid-soft. Ridged, air-punctured edges, just a tad firmer than the middles. At least 4 inches wide in diameter, good God. So perfectly reminiscent of typical American-diner-style pancakes. It’s a standard now, the desired standard for the experienced New Yorker. There were even little bits of banana in the batter. Crack into the elegant banana boats on top and you get a heart-stopping crème brûlée effect. Deep crackle, the break of glass, then the soft grunt of caramelised, almost burnt sugar top giving way to the creamy, ripe banana body. Pause– relish that detail.

Every chew got a little gummier as I went along, mouthfuls of white, sweet stodge. The stocky pancake was quickly reduced to sludge, but that’s alright. I just want everyone to try this. Is that too much to ask?

Rating: 4.5/5

Tolido’s Espresso Nook

462 Crawford Lane

6648 0178

Closed on Mondays

Tues-Thurs: 0930-1900

Friday-Sat: 0930-2200

Sun: 0900-1830