This cinnamon tahini fondue is very everything. When I woke up that morning, there was a funny pain at the base of my stomach, and that’s never a good thing, but I still knew my weekly french toast get-up was much needed, for better or for worse. There are times during the day, usually alone, with a bit of quiet, or during deep conversation with someone who’s on the same page as you, that one can calmly address all negative emotions, accept them, then pass them to the air.
Feeling wild writing this, yet calm. It’s my last day of being 19, and who knew a year could’ve changed me so much in all facets. Just a year ago I was on a boat with other freshmen pondering the excitement of living near Hyde Park, and now here I am, still alive, still a student, still eating the same plates of french toast. I am truly grateful for the close friends who stuck by me and who I can always count on, my family, and stuff to learn and discover every day. Now I find I need so much less to be happy– dining in the dark with an old friend, a fresh bath and timely wake, fresh roasted vegetables, the hug of tea in the cold, brisk air, working alone. Nope, nothing more.
Of course there was no more appropriate way to spend the morning than with my favourite breakfast. Opened the pantry and of course there was no bread. But. Found a fair bit of Lebanese flat bread given so kindly to me by a friend (Lavash I should think?), so I made do with that, and goodness was that good. Though it had gone a bit stale as I intended to make each pillowy bit of fragrance last as long as possible, dipping it in my pumpkin french toast batter and then frying it gave it a renewed warmth, tenderness, life.
I came up with the idea for this cinnamon tahini fondue whilst trying to think of something other than good old coconut almond butter for my porridge topping, and I know nothing comes quite as close as the stuff, but with a new pot of tahini, something had to be done, and tahini naked wouldn’t have been embracing that morning creative jolt It’s an uncomplicated mix of tahini, cinnamon, applesauce and yoghurt, along with some of the pumpkin french toast batter. The weirdness of that mix overshadows its majesty.
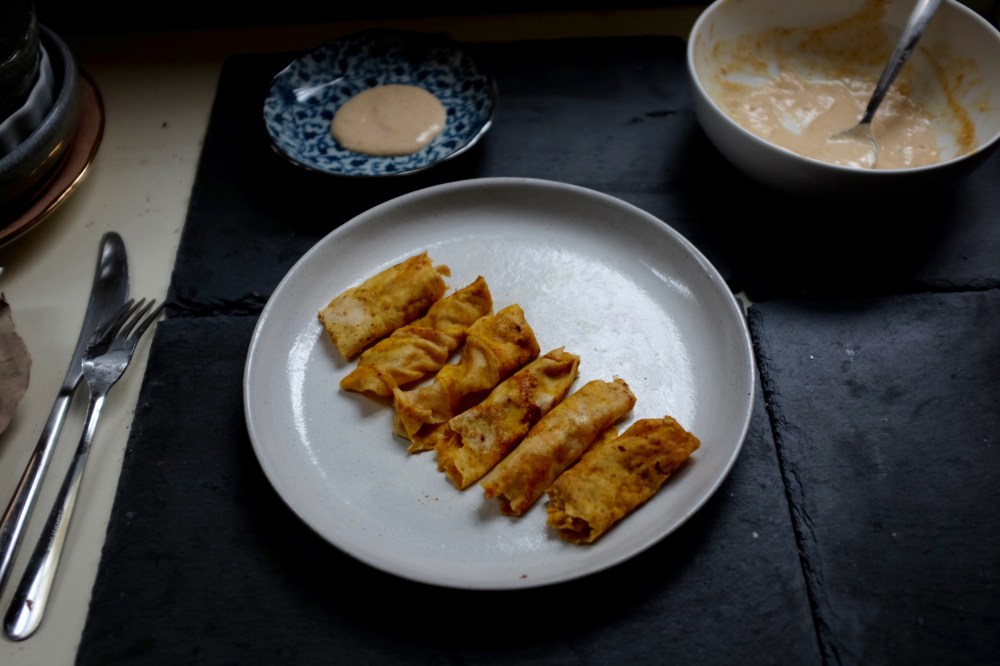
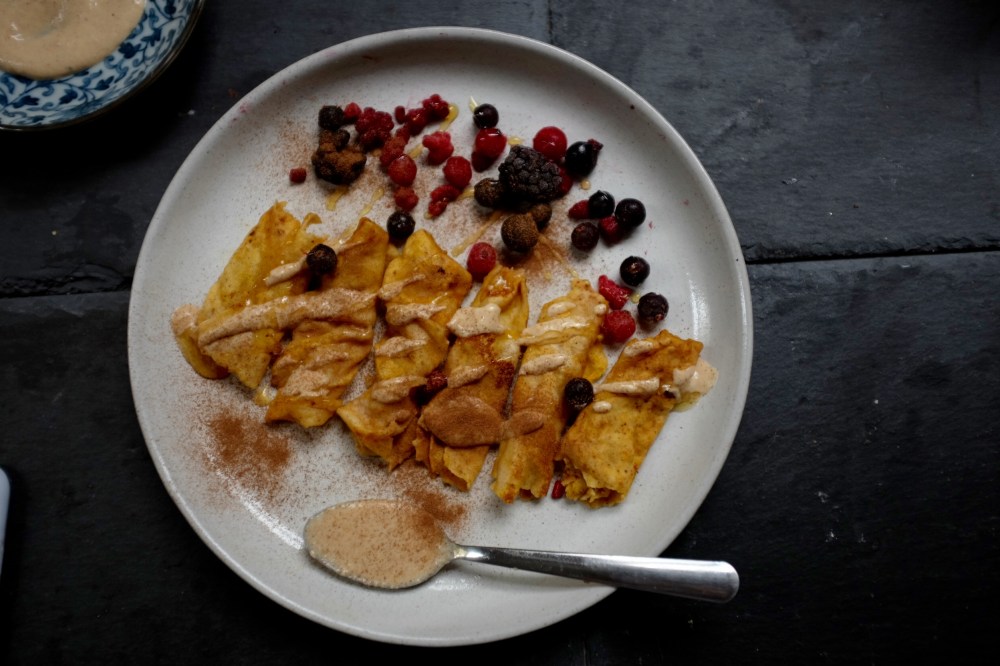
Pumpkin Ginger-Spiced French Toast Roll-ups with Cinnamon Tahini Fondue
Ingredients
1 large flatbread (lavash), tortilla or crepe (alternatively, use normal bread slices)
For the pumpkin french toast batter:
2 heaping tbsp pumpkin purée
50ml milk of choice (I always use almond)
1 tsp fresh grated ginger (or ground)
1 tbsp sweetener of choice (agave syrup/date syrup/honey/blackstrap molasses)
pinch of salt
pat of vegan butter (or normal butter) for the pan
For the cinnamon tahini fondue:
1 tsp pumpkin purée
3 tbsp tahini
a heavy hand (around 1 tsp) of ground cinnamon
1 tsp sweetener of choice (refer to choices above)
Directions
If using flatbread, tear so that the pillow punctured and you get two thin ‘slices’ per bit of bread. You can use any other bread, but for the rollup effect, make sure to roll them out pretty tin and flat so you can squish them into the rolled shape you want afterwards.
Whisk together the ingredients for the pumpkin french toast batter and heat your pan on medium heat. Add a pat of butter to the pan and wait to hear a sizzle. Once hot, dip your slices into the pumpkin batter for 5-6 seconds on each side (you don’t need much time if you’re using a crepe or flat bread because they are so thin), then place gently in pan. Wait 20 seconds or so to cook, then flip and wait another 10-15 seconds.
Mix together the ingredients for the cinnamon tahini fondue, and serve the hot french toast rollups with that, together with some berries, perhaps some whipped (vegan) cream and more sweetener of your choice.