Fudge Brownie Waffles

3244539 Processed with VSCO with f2 preset

I had the pleasure of being interviewed earlier on in the week by the lovely Rachel Loh, the name behind lifestyle blog Willow. Working on the theme of disconnection, it boasts a bevy of detail I would not typically reveal online, even in my instagram posts or elsewhere. It was so much fun answering and I would love for you to check it out here.


So last Saturday I came back from a rather disappointing visit to a relatively new café, and needed a fresh pick-me-up in the sweltering heat. But the heat also means light, and I’ve found great solace in my mornings alone journalling, the light yellowing the pages, coming and leaving of its own accord.

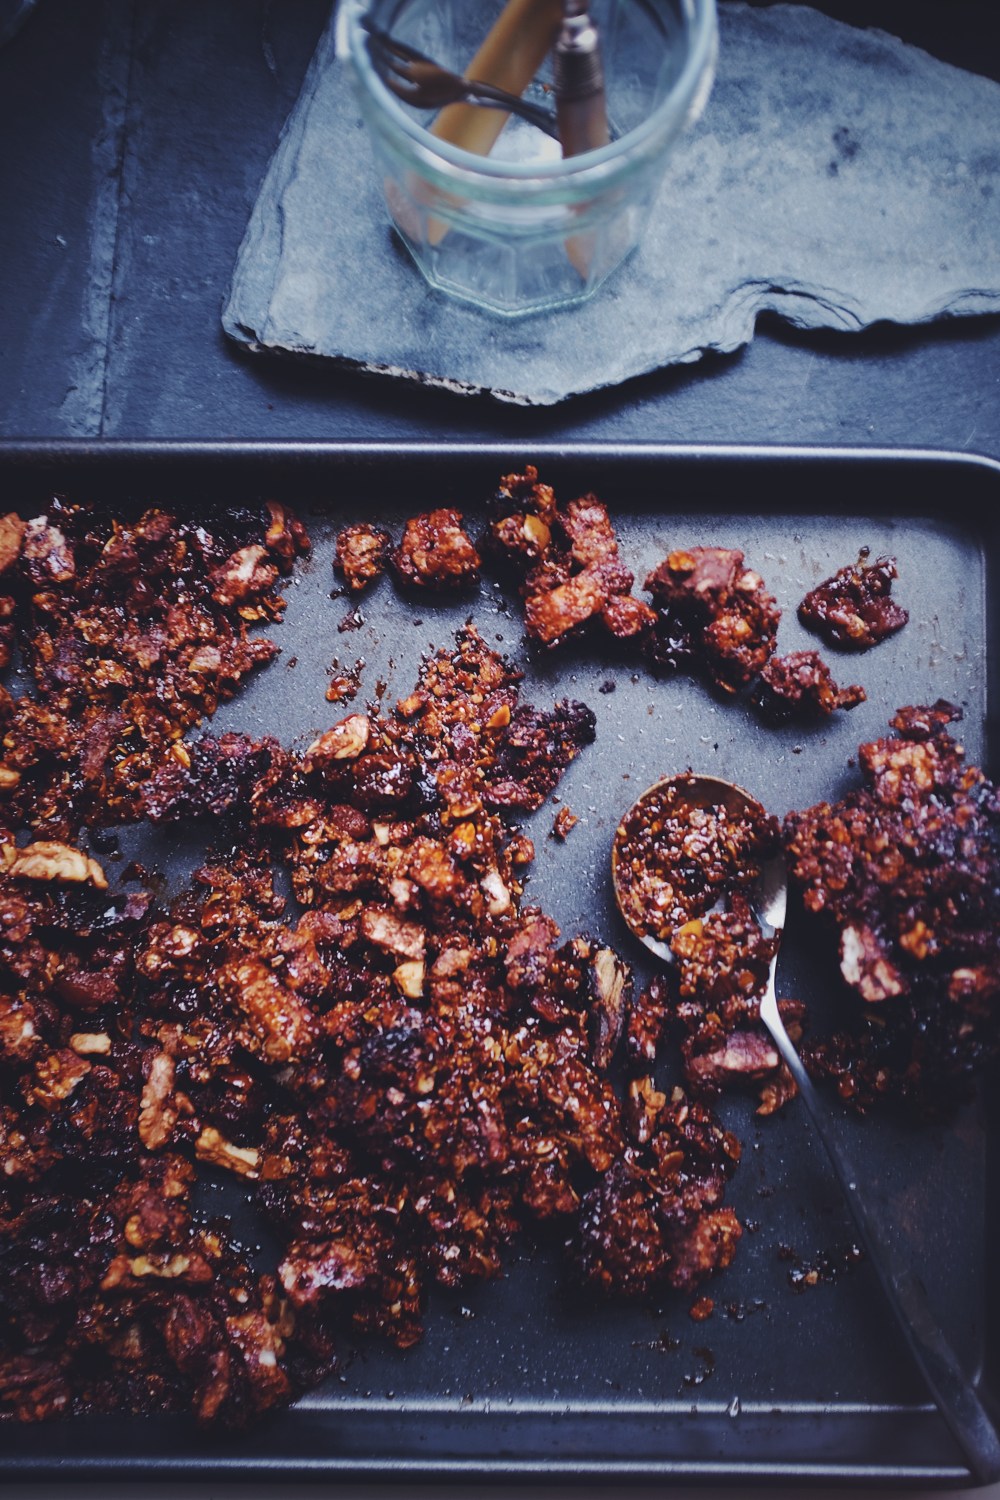
As it appears, flowers still grow in the dessert. This recipe was borne out of angry determination; I oft find myself thinking about veganism and how it should be made approachable or the norm to more people around me, and figured introducing classic favourites is the way to go. Who in their right mind would refuse a good, gooey brownie? Forget about it being ethical or healthy or whatnot, it tastes good, right? Food opinions are volatile, changed by taste alone. The line between veganism and sin-like lusciousness and satisfaction must be blurred. I never wanted to go vegan for the longest time because my idea of vegan food was worms and cardboard. That’s what some vegan cakes really taste like, anyway. But this is never always the case. Surprise yourself, and surprise others.


4294905 Processed with VSCO with f2 preset Processed with VSCO with f2 preset

Simply put, the highlight of anyone’s day.

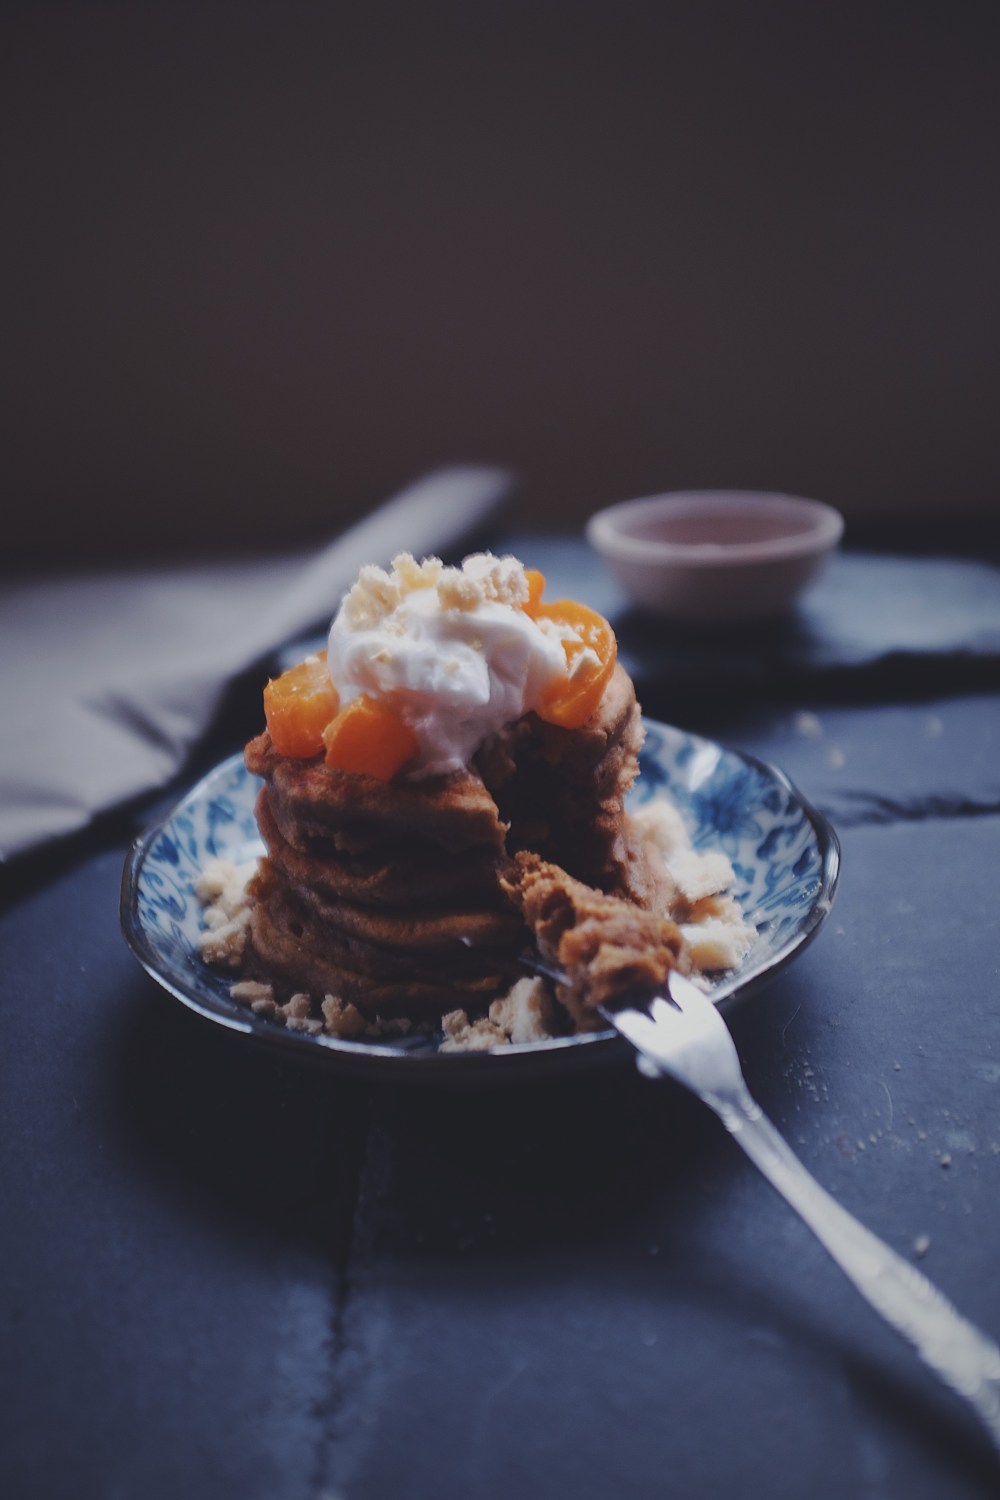
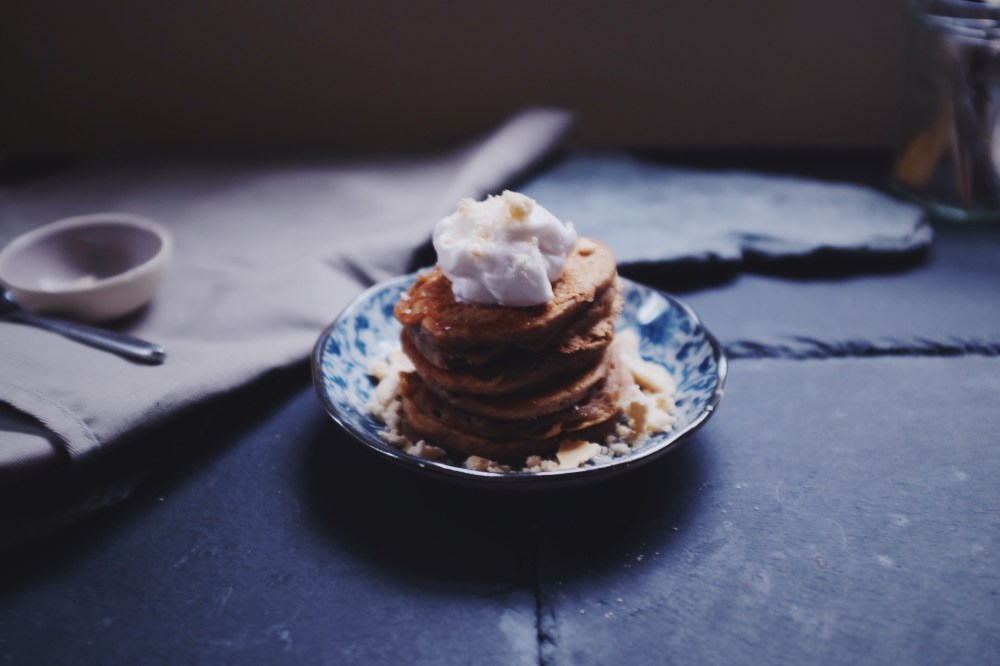
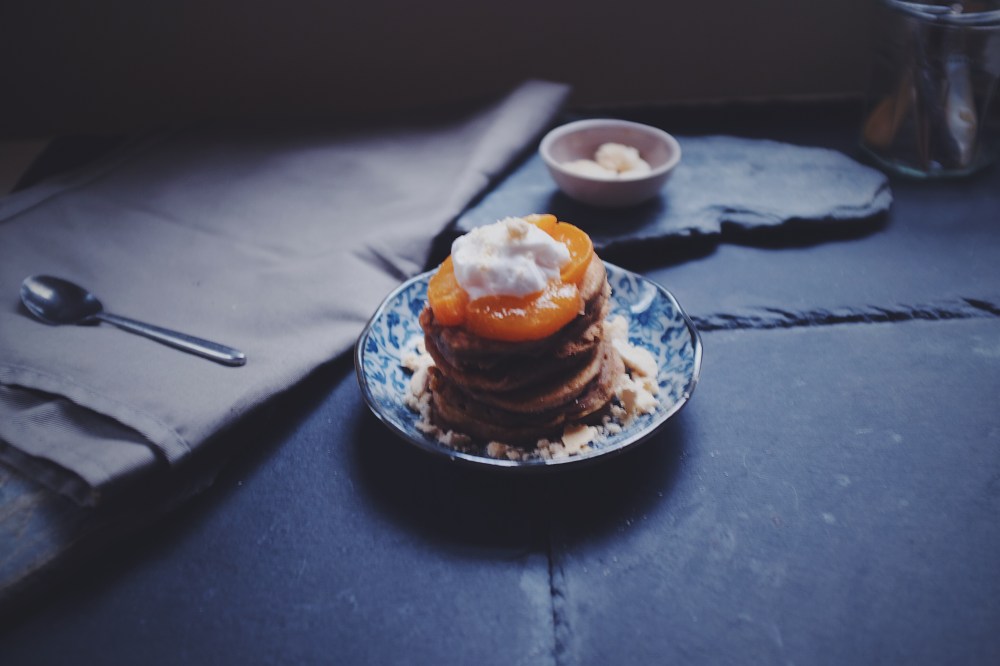
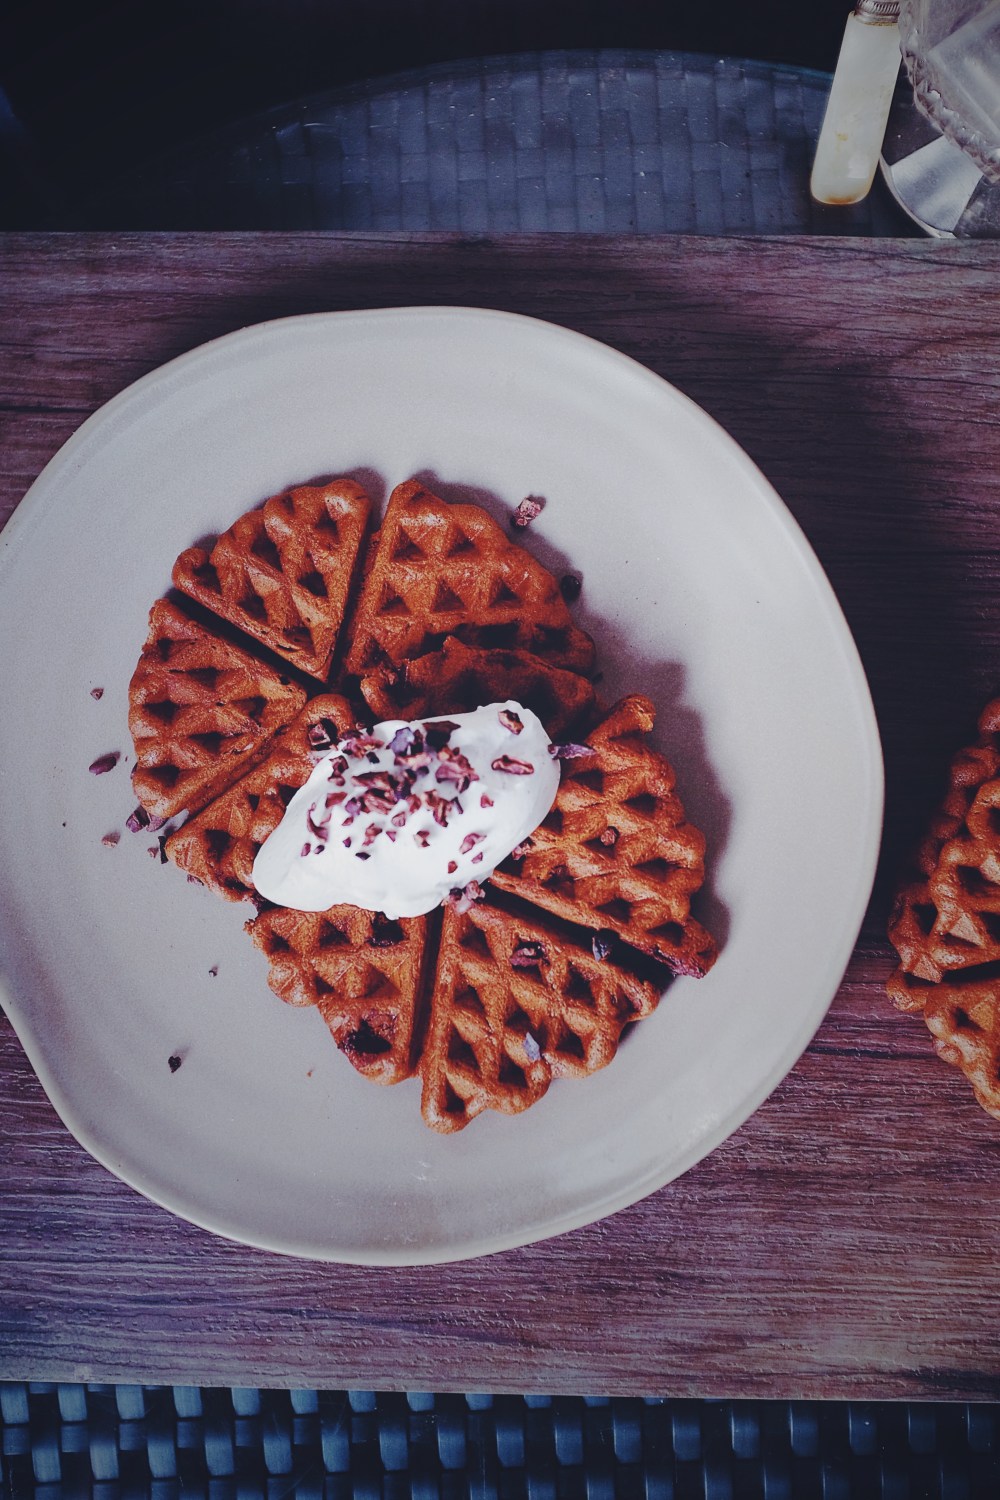
The theme is approachability, guys. This is the sin everyone is looking for in an acceptable form. Double chocolate brownie waffles studded with chocolate, crisp-edged with a tender, gooey middle.

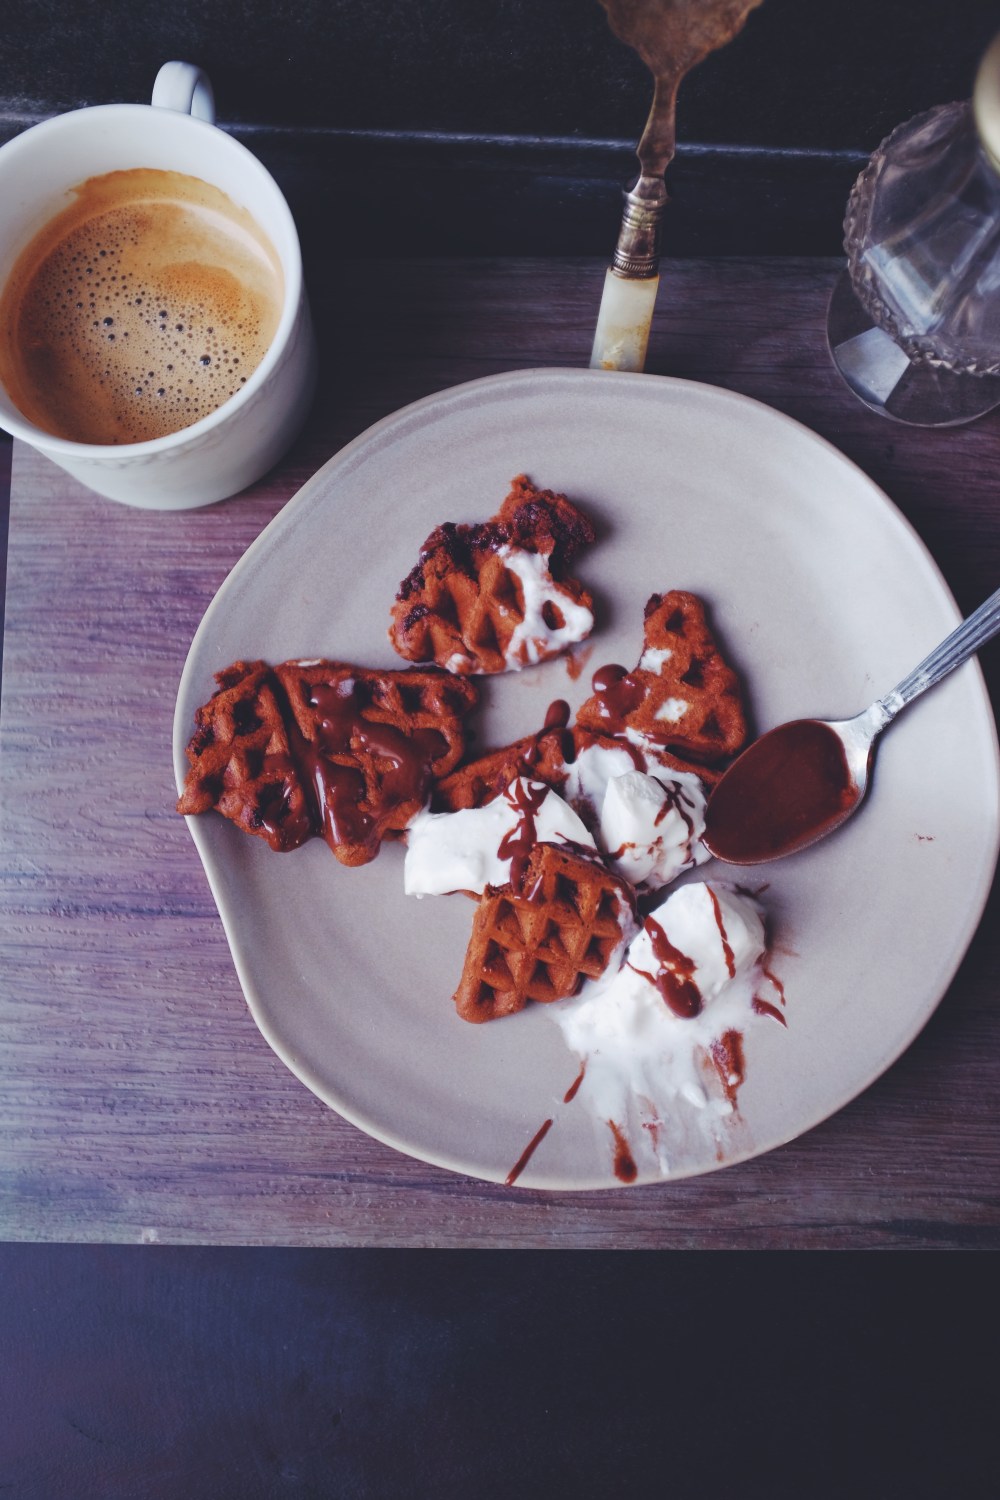
It’s not just a one-bowl wonder, it’s a time-saving wonder. If you’re like me and typically have to rush off to work by 8.30am in the morning, simply make the batter in less than 5 minutes the night before, let rest in the fridge overnight and scoop out batter for the waffle-maker the next morning. You could even just bake these for fudge brownie cookies in a 180C oven for 10 minutes. I say that like I actually did it, but do tell me if they work, because I can’t be the only one to have fun while making some (necessary) mistakes, right? The batter is like unexpected cash, you can do way more with it than you might initially think. For example, I made a fudge brownie waffle sundae by sandwiching two waffle bits with coconut ice cream (I love Luna and Larry’s!) and drizzling it with some chocolate sauce, which I made just by mixing some cocoa powder, icing sugar and almond milk together. How wonderful is experimentation. How life-giving and meditative.

3314541 Processed with VSCO with f2 preset4270594 Processed with VSCO with f2 preset

Ingredients (makes 6-7 medium-sized waffles)

125g all-purpose (plain flour)

1 1/2 tsp baking powder

pinch of salt

30g cacao/cocoa powder

1 large mashed banana (125g), or two small mashed ones. Alternatively, you could use the same weight of applesauce.

40g (a large handful) of vegan chocolate chips, I used these

40g white/coconut/maple sugar


Directions

Simply put all ingredients in a bowl and mix until everything comes together. Turn your waffle-maker on and let it heat up according to its instruction manual. Grease it well! Take a heaped tablespoonful of the chocolate batter and put it in the centre of your waffle maker and let cook on a medium-high heat for at least 5 minutes. This is important in making sure your waffles turn out as crisp as possible, You can check after 3 minutes– if the waffles still feel soft to touch then leave it for another few minutes.

Separate your waffles with paper towels to absorb any condensation. You can freeze these waffles for future consumption or leave at room temperature in an airtight container for 1-2 days. If eating the next day and the waffles are left out on the counter, toast them for those crisp edges once more; they would’ve softened within the day.

And now for some fun!

If you’re making a waffle sundae (as pictured above), simply sandwich two waffles or waffle halves with some dairy-free ice cream and drizzle with some chocolate sauce. I did this by mixing a heaped teaspoon of cocoa powder, 3 heaped tablespoons of icing sugar and a couple teaspoons of almond milk. Play around until you get a relatively thick, dribbling consistency.


Rice Cake Molasses Granola

The kitchen seems to have closed upon the death of last week’s get-up. But the smell lingers. It’s rich, dark, carnal. I sit here now recalling the life-giving things of everyday. After making this last Saturday, I hopped over to a new cafe which I implore all of you to check out for some downright good, authentic Danish bakes, then to Piccadilly’s Waterstones for a good 5 hours just to read my heart out, the perfect excuse for not doing work I was meant to be doing. How sad it is to find joy in the unruly, yet how perfectly OK with it I am once or twice a week. It’s true that meaning and mental enlightenment can arise from nothing when given work to do, yet there’s a wild freedom only found in self-direction, reading and exploring things one would only find outside of a lecture theatre, as exciting a lecture may be.

With granola-making on the agenda last Saturday, I shook off the morning grog and effortlessly persuaded myself to Waitrose. Right opposite, to get some oats and rice puffs for a little bit of fancy. I came across a most moreish-looking granola recipe in Honey&Co’s cookbook just earlier in the week, overcome with fiery instinct. Rice puffs are something I always took for granted. Child’s play, too light to be in anything except standard mass-produced granola or cereal bars. This, however, seemed to take granola to something of a new level, choked with Mediterranean spices and a sultry undertone of rarity. Just as I was about to leave the house, my peripheral vision caught sight of these chocolate rice cakes I brought back from Germany just the previous week, and I knew something had to be done with those babies. A mini brainwave hit– why not crush those and chuck them in the granola instead? So I chucked off my shoes and got to work. It was going to be fun.

Starts off all sticky after everything is incorporated, and even seems a bit ‘leaky’ once taken out of the oven, but success is trust. Cooling will let the clusters form, and that’s where all the fun’s at, right? Each huge, outrageously crisp cluster is a thing of dreams. A heavy hand with the molasses will do the caramelisation process, and you, too much good. And of course, like all granola recipes, this is so easily customised. Raisins, nuts, chocolate, add and subtract as you will. How to granola: douse in milk, languish, enjoy.

5255318 Processed with VSCO with f2 preset

Rice Cake Molasses Granola (makes one large batch)

Note: all bracketed substitutions are vegan

Ingredients

80g unsalted butter (sub: vegan butter)

120g blackstrap molasses (sub: a rich, dark honey)

110g light brown, soft sugar

100g chocolate-covered rice cakes, chopped into thick chunks (sub: 70g plain rice cakes and 30g chopped chocolate)

70g oats or muesli

150g nuts of choice , chopped (I used walnuts)

100g dried fruit of choice (I used torn dates and raisins, though if you abhor either like many a friend of mine, then feel free to substitute with whatever else you would like, and this recipe works well even without any dried fruit!)

1 tsp cinnamon

optional: 1 tsp ground ginger


Directions

Preheat your oven to 190C (375F) and line a large baking tray with parchment. Combine the butter, molasses and sugar in a saucepan and bring to a boil. Take off heat, then pour in the rest of the ingredients.

Transfer to the pan and flatten a little so everything will cook more evenly in the oven. Bake for 10-12 minutes, then take out and let cool for another 10. You will notice a bit of molasses leakage, almost like a liquidy mess at the size. Not to worry, for this is expected. Leaving the pan to cool will rest everything and harden it all up nicely. Use a spoon to break everything up a little, but not too much– leave the large clusters! Store in an airtight container for up to 2 weeks. Enjoy with liberal drizzles of milk, topped with fresh/frozen fruit for a good adjacent tang.

Coffee Meringue Pillow Pancakes

4192490 Processed with VSCO with f2 preset

In other words, a twist on the main star of CRUMBS, hoho. Time and time again, at least once every week or every other week, this is the baby that holds its name straight, waving the ‘pillow’ flag high. So high and bright. Receiving a little social media tag from someone who’s tried and loved the recipe I fiddled till perfection almost 2 years ago still tugs at my heart, pulling its strings and sending me into a fuzzy daze for a full 5 seconds. Saturday usually demands an experimental flair, but the past one was in need of a tried and true favourite, albeit with a little twist and flick.

2821139 Processed with VSCO with f2 preset

There’s something so seductive about a mile-high pillow pancake.

3794694 Processed with VSCO with f2 preset3916388 Processed with VSCO with f2 preset

Had some leftover meringue from my previous recipe (do check it out, just scroll a little) and decided none shall go to waste, and permeated my reliable pillow pancakes with that, and some espresso because I was in dire need of coffee and this was another excuse to get another jolt here.

Although the batter resides with the same format as the original, ratios and all, the addition of meringue gently folded in and the dash of coffee makes each pancake belly a little more moist and slightly chewy. I did end up with a slightly more liquid batter, though the retaining of some lumps is still quite crucial for the same extra-high result. The week has been speckled with more dire Trump news and lambasting and Crazy, so settling down to my pan and butter, batter at hand, was all it took to calm a couple rattled nerves.

Processed with VSCO with f2 preset

Coffee Meringue Pillow Pancakes (makes around 10-11 medium pancakes)

Ingredients (vegan subs included)

190g all-purpose flour

3 tbsp white sugar

generous pinch of salt

1 tsp baking powder

1 tsp baking soda

1 egg (sub: 60g vegan egg replacement, or one banana, or make a flax egg by mixing 1 tbsp flax with 2 tbsp water and letting sit for 5 minutes on the counter)

40g unsalted butter (sub: vegan butter such as Earth Balance)

1 tsp vanilla extract

240ml (1 cup) whole milk/ buttermilk; use store-bought or make your own by mixing 230ml whole milk with 1 tbsp white vinegar, and let the mixture sit for 5 minutes before using (sub: almond milk or any other plant milk of choice)

1 tbsp coffee extract or shot of espresso

50g meringue, briefly crushed with a spoon or your hands (find the recipe here near the bottom; you won’t need all of it but hey the more the merrier)

Directions

In a large bowl, whisk together the dry ingredients (flour, sugar, salt, crushed meringue and leavening agents). In a small microwave-safe bowl, melt the butter in a microwave and set it aside, letting it cool. In another medium bowl, whisk together the egg, buttermilk, vanilla (or insides of a vanilla bean), coffee extract/espresso shot and melted butter. Pour the wet mix into the dry mix and mix briefly with a wooden spoon or a normal dinner spoon. Continue to mix until everything is just combined, which means there will still be a few lumps, but no more streaks of flour.

Preheat your pan on medium heat and ready some butter. You know the pan is hot enough when you flick a little water onto its surface and there’s a clear sizzle. At that point, generously butter the pan and ladle tablespoonfuls of batter. I didn’t have to wait for bubbles to pop before flipping; the batter is thicker than usual and there’s no need to wait. Flip the pancakes when you notice the edges stiffening a little, or when you can slide your spatula whole underneath the bottom of the pancake. It will rise a little upon flipping, as if that action gives it life, and hence, breath. The surface should have a brown mosaic thanks to the hot butter. Once the second side is done (will take no more than 20 seconds), let cool on a paper towel. As mentioned above, these freeze wonderfully, so you can make a whole batch, have a small stack and stash the rest in a ziploc bag in the freezer.

Serve with butter and maple syrup, or whatever you want. I particularly like them with banana, its moist sweetness adjoining arms with the maple. What a Sunday.


Chinese Walnut Cookies on Meringue Nests

Processed with VSCO with f2 preset

The early morning light is my bolthole before the day’s heartbeat ramps up. Right now I hold a small morsel of chocolate shortcake from my school library’s café, ashamed it’s not exactly what’s featured in today’s post, but its texture is reminiscent of just that.

Chinese New Year is still in the works, but its official advent last week was all the prick I needed to get myself busy in the kitchen, playing and toying with random festive ideas to half fool myself into thinking, as the only Chinese in the house, that pineapple tarts, oranges, ang baos (red money-filled packets) and all sorts of goodies were right there with me, emanating a pink blossom-hued energy, a light.

Processed with VSCO with f2 presetProcessed with VSCO with f2 preset

These walnut cookies are little gems. Based off your traditional Chinese walnut cookies, which are very literally melt-in-your-mouth, the dough bursting with fresh chopped walnuts, brushed with an egg glaze and topped with raw walnut halves.

Their characteristic crumbly, buttery state got me thinking: this could pair more than well with a slightly unforeseen texture. My penchant for anything chew and goo may not be known far and wide but that’s precisely what I thought would tie it all together, and the answer, I knew, lay in the all-exclusive meringue. It did take a few tries before the right meringue consistency was achieved– too hard a meringue nest would fail to complement the more robust nature of the cookie, and the whole thing would corrode and disintegrate easily.

Processed with VSCO with f2 preset

This was a perfect surprise, for myself and a few family members. You bite into what’s almost like a paradox of taste. the buttery, femininity cookies are maturely ground, hard-bred, by the earthy and almost indelicate walnuts. Teeth sink a little further and are welcomed by the soft crackle of just-hardened meringue nest, still filled with white chewy goo in their hollows. Perfect by themselves, or with teeth-cleaning mandarins.

Chinese Walnut Cookies on Meringue Nests (makes 6 cookies, scale up as needed)

Ingredients

For the cookies:

125g plain flour

1/4 tsp each of baking powder and baking soda

pinch salt

40g butter, unsalted and at room temperature (sub: vegan butter)

40g sugar

1/2 a beaten egg, about 30g (sub: half a flax egg made by mixing 1 tbsp flax with 2 tbsp water, of which you can save half for later in the process, or 30g vegan egg replacement)

30g finely chopped walnuts (do this yourself or buy ready-made chopped walnuts)

6 walnut halves


For the meringue:

100g white caster sugar

2 egg whites (sub: vegan egg whites, and I have heard you can use chickpea water for this!)


Directions:

Preheat your oven to 180C (350F). In a medium bowl, whisk together the flour, salt and both baking powder and baking soda. In a separate bowl, cream together the butter and sugar. I just used a spoon for this; it’s easy when your butter is at room temperature. Tip this into the flour mix, alongside the chopped walnuts and half the beaten egg. The mix should be very dry and only just come together when you mix this by hand. I suggest using your hands here as it’s easy and you can feel when the dough just comes together.

Prep cookies on pan– grease a baking tray and take 42-43.3g of dough for each cookie. Roll each bit of dough into a ball, place on the tray, then press a fresh walnut half onto the top. You should get 6 cookies from this batch. Brush the cookies with the remaining egg, then bake in your preheated oven for 20 minutes. Once the cookies are done, leave to cool on the counter and turn the temperature down to 100C (212F).

Make the meringue. In a clean bowl and with a clean electrical hand whisk, beat the egg whites until they go frothy. Add the sugar a tablespoon at a time until you get a glossy, opaque white meringue. Spoon tablespoons of this onto a silicone or non-stick baking tray and flatten slightly so you get 6 discs out of the volumes stated above. Bake the discs for 1.5 hours (90 minutes), and check that they haven’t burnt or anything, for sometimes ovens really do stupid things, at the 1-hour mark. The surface should be a pale pink-brown colour, cracking into one should have little effort and the middle should still be white and gooey.

Press each cookie into the tops of the meringues. These are best eaten immediately for optimum enjoyment of the texture interplay, though they can be stored for a few days in an airtight container.


Kaya Avocado Nut Butter Cakes

Processed with VSCO with f2 preset Processed with VSCO with f2 preset

A homemade gift goes far. In Tuesday’s case, it was my Grandma’s homemade kaya, or coconut jam, lugged all the way from Singapore when my mum came to visit just a few weeks earlier. It was the exact same recipe for the green batch of love I played around with for my kaya maple loaf cake, the recipe for which you can find on Amazon as I speak!! Whew, rush rush rush. Anyways, a throwback was in demand as I held the tubs of curdled emerald goodness. Once again, an odd combination formed the scaffold of more funny kitchen business.

I occasionally find myself refusing to go against instinct for the fast and funny. As a student, the will to carve out day-long space is for something in total artistic favour is admittedly a little impractical with coursework and intense lecture review. There is indeed worth in all that labour, and I look forward to when I can do so without a penny of guilt eating away at the back of my head. It is true creative catharsis.

So you whisk together the dry and wet, fill half your cake molds with the final batter, add a teaspoon of nut butter of choice, then continue filling, then bake. The combination of kaya and avocado was approved by my skeptical flatmate. The best bit, I personally think, is the crusty sugar outside of the whole cake. Mmmmm. Kaya is sweet and, depending on the way you make it or the brand you buy, very coconutty, as green as the pandan leaves used to flavour the homely concoction of coconut milk, eggs and sugar. Avocado pretty much substituted most of the butter in this case, so the final texture of the cake was incredibly tender but not reminiscent of your typical cupcake, which might leave a buttery crumb. Pressing this will leave your fingers dry (and beautifully scented), yet the mouthfeel is airy and moist.

As I’ve touched on before, I do enjoy eating and making vegan meals and desserts, especially after all those silencing documentaries and Youtube lectures I’ve watched on the veggie movement. Though I am not full vegan for personal and family reasons, I will now officially include vegan or at gluten-free versions for all my recipes. I only want this blog to cater to all types of dietary needs, so if any of you feel like something is amiss, please feel free to email or DM me.

Processed with VSCO with f2 preset Processed with VSCO with f2 preset

Kaya Avocado Nut Butter Cakes (makes 6-7 cakes)

Ingredients

*= vegan substitute

190g plain flour (*same weight of gluten-free flour)

a generous pinch of salt

1 1/2 tsp ground cinnamon

1  1/2 tsp baking soda

300g kaya (*recipe for vegan kaya below, using 1 sweet potato, 1 tsp pandan extract, 80ml coconut milk and 3 tbsp coconut or maple sugar)

1 tsp vanilla extract

1 egg (*1 mashed banana)

120g white caster sugar (*same weight of coconut sugar)

1 mashed avocado

3 tbsp olive oil

optional: nut butter of choice


Directions

*to make vegan kaya: Roast one large sweet potato (about 200g) at 200C for half an hour or until soft and mashable. Using a fork or blender (you pick the easy way out, ha ha), mix with the rest of the stated ingredients. And there you have vegan kaya! You should be able to use all the kaya you make, but weigh out 300g to be sure.

Firstly, preheat your oven to 180C and grease a 8 of your muffin tins. In a large bowl, whisk together the dry ingredients: flour, salt, cinnamon, baking soda and sugar. Add the rest of the ingredients excluding the nut butter and mix well. You should have a thick, green batter of easy dropping consistency. If it’s too thick, add a drop of milk/nut milk until you get the desired consistency.

Fill your cake molds halfway up, then add a teaspoon of  nut butter to the centre, then continue to fill with the batter until the mold is 3/4 full. Bake in the preheated oven for 20 minutes. Serve with more nut butter, yoghurt, honey and frozen berries (trust me on this one).