Baked Sweet Potato Doughnuts (vegan) + Book Launch

dscf9013

It has happened!!

It would be very hard to condense a bunch of profound emotions and thought trails into a single blogpost, and it doesn’t exactly help that even I haven’t properly digested the fact that something I wrote has been published and is available online for the whole world to see and buy. Yeah. CRUMBS, the book I’ve spent a substantial chunk of summer intensely working on, is now available on Amazon and Barnes &Noble! This is madness. This is redunkulous. You know it’s big when I use exclamation marks in blogposts, ha.

From my heart to your heart, from my kitchen to your table, from my oven to your oven. This is madness. There are over 40 pages of recipes, with multiple variations and detailed descriptions. Most have been modified from various sources, trimmed and personalised over more than 2 years of playing around with iPhone in hand, flour on my face, hopping about like a lunatic from oven to study desk just to check to check on a loaf of banana bread. All kept me going. Putting the book together has elucidated the nurturing, enlightening nature of solo fun in the kitchen, and I give a more personal account of my intentions and motivation regarding the writing process and recipe themes in the book itself. I am so grateful; none of this could ever have happened without a few key people who pushed me to do so regardless of what I thought. No, I always said. But the will emerged on top, and Crumbs was born. Watch out for a few more posts highlighting some book features and sneak-peeks. I mean, this blog itself is already a huge sneak peek, but there are some recipes in there that have been heavily revised and boosted for the book, for all of you.

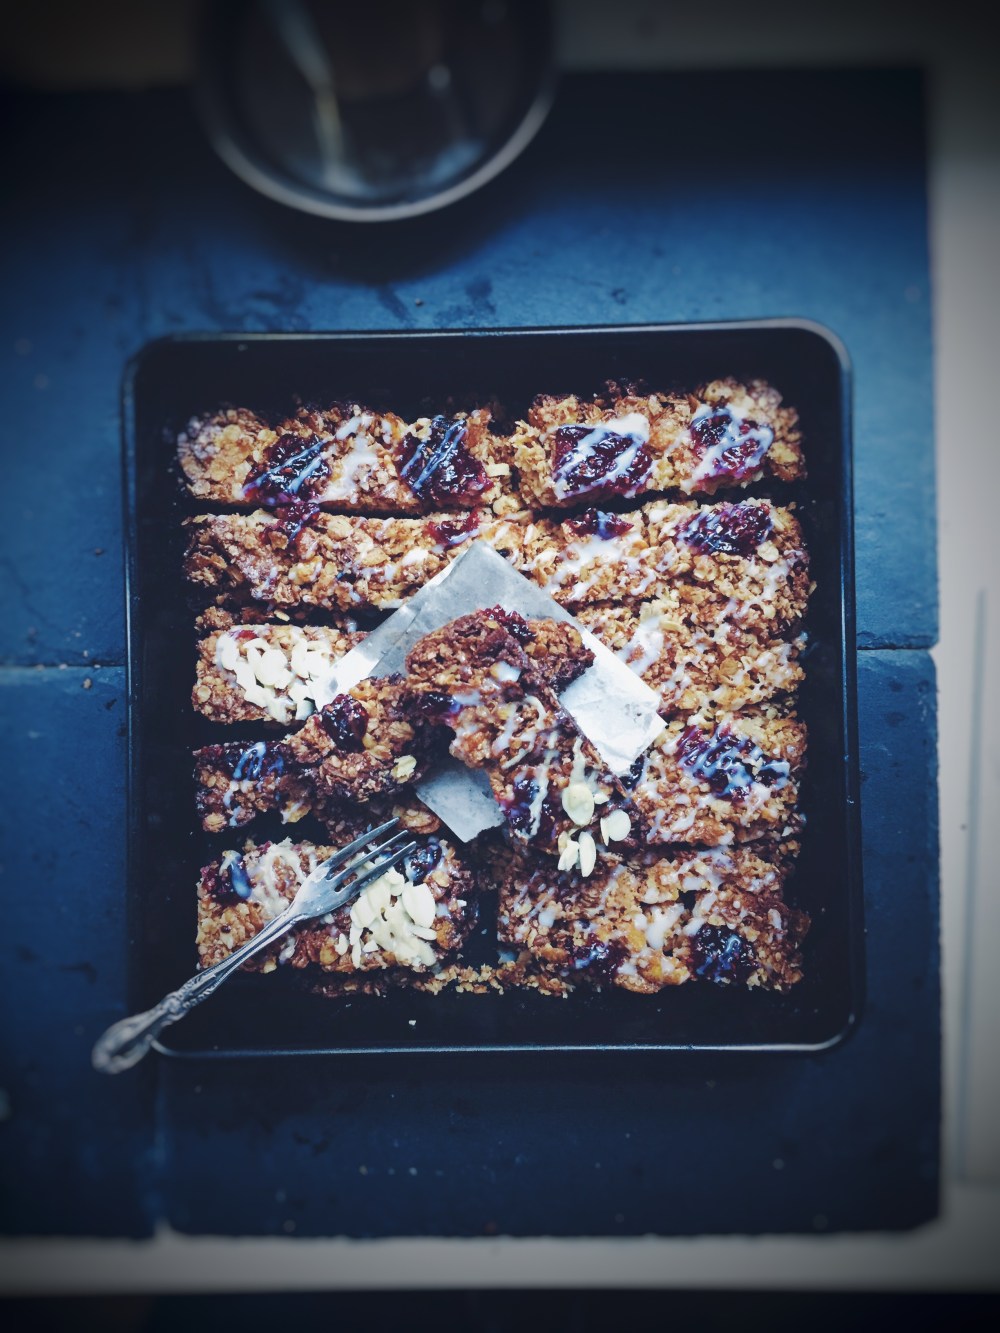
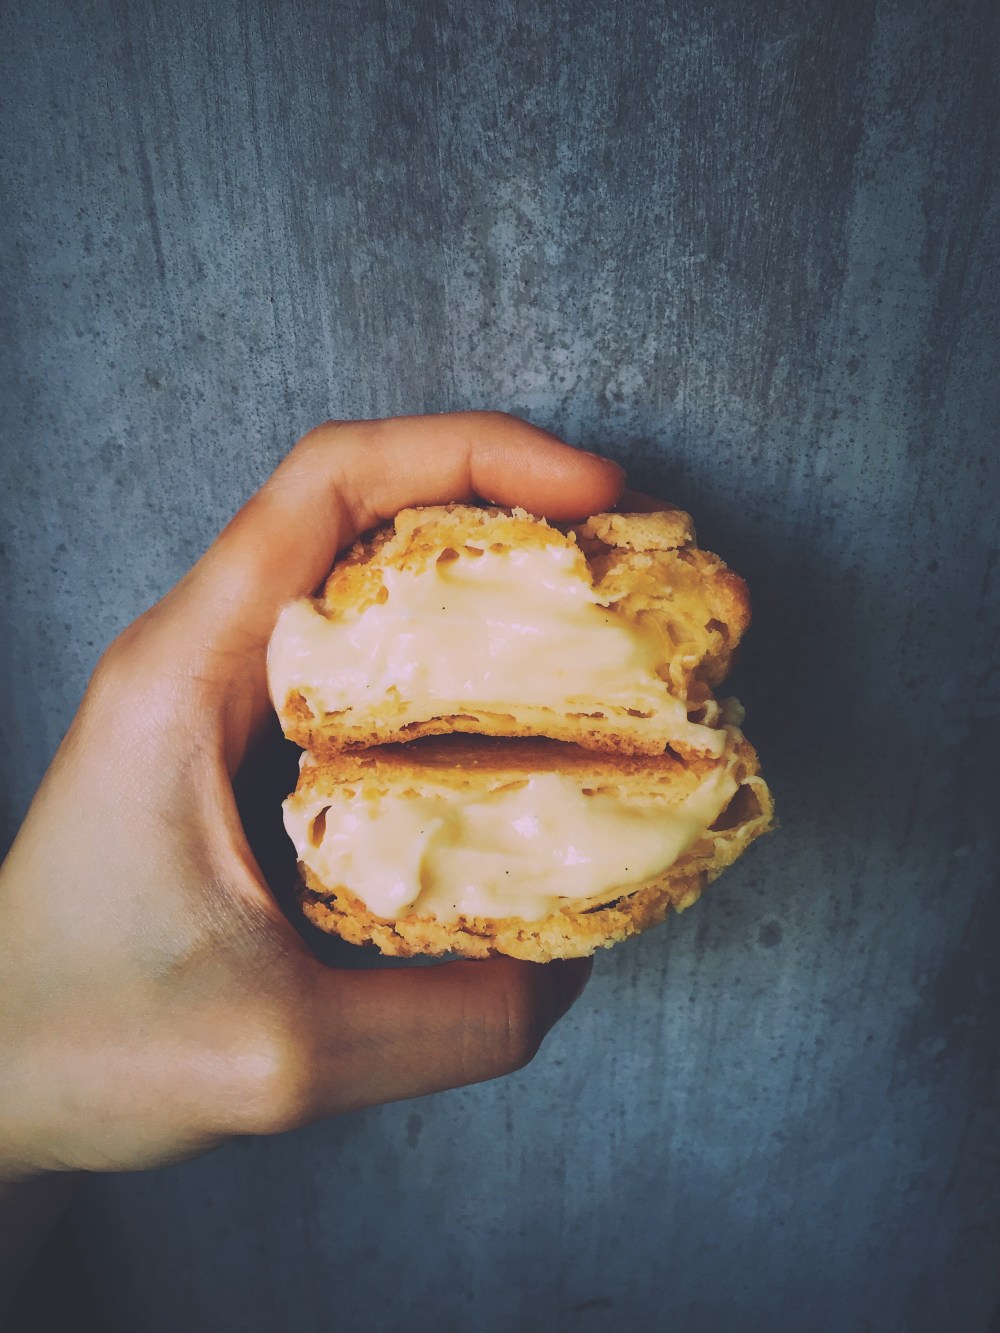
A little present today, that’s by no means in Crumbs, but one so easy it deserves a place in the archives and not hurriedly scribbled in my notebook, inevitably forgotten and totally left behind.

img_4787

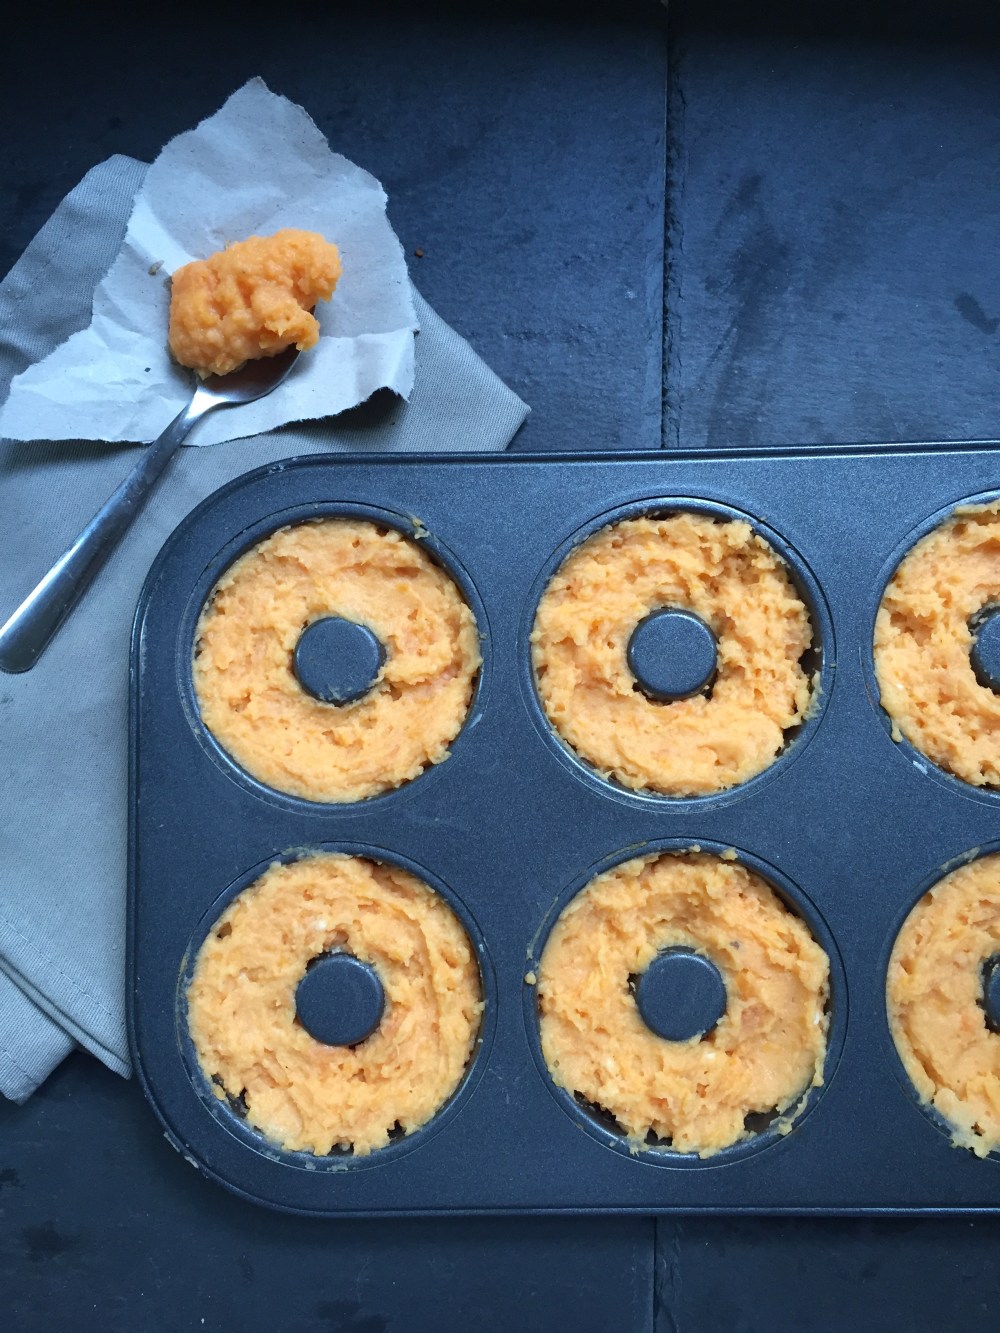
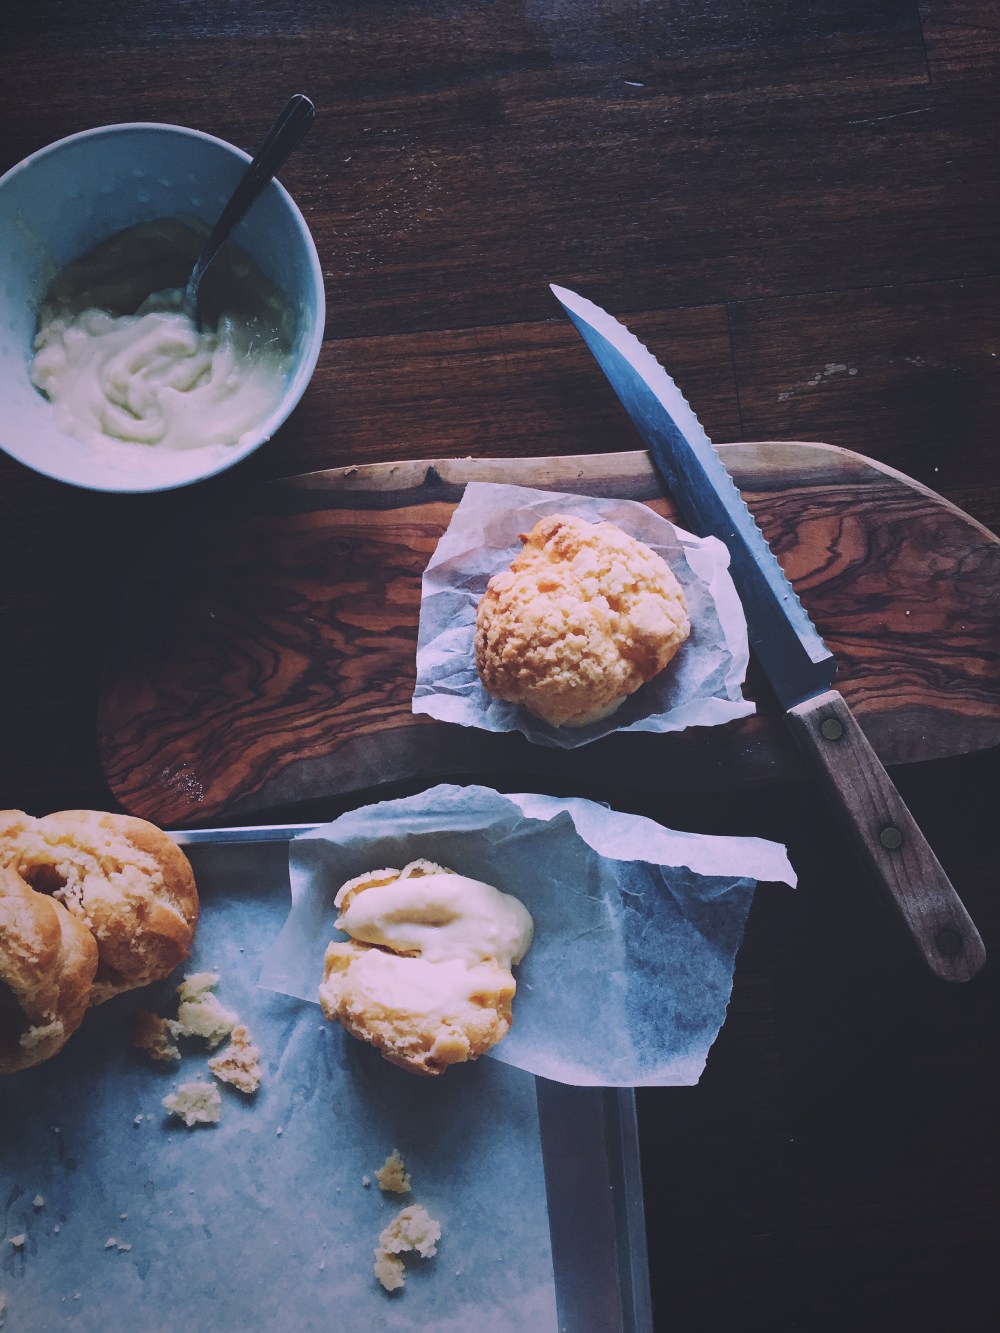
Vegan sweet potato doughnuts. I laugh at the thought of me a few years ago, cursing the word ‘vegan’ and anything to do with that category, always of the opinion that ‘such’ self-imposed, rigid health standards did no one good, oblivious to the ethical and moral reasons behind the movement. After watching too many a documentary and educating myself only years later, I now admire the tenacity in word-spreading and lifestyle change, not talk alone. There is indeed justified meaning behind all this buckwheat, sweet potato, corn and quinoa. Not only is all of it delicious, it’s also good for us, the planet and, heck, the future. There will always be so much controversy in this field, but that’s human nature for you, and where’s the harm in contributing that little bit for generations to come?

Alright, the condensed milk icing on top obviously isn’t vegan, though you can always leave that little bit, and mix some nut milk and icing sugar together for a similar effect. As always, super easy to put together– literally a matter of plopping wet with dry, mix mix mix, spoon into doughnut pan (something I think you all should invest in if you haven’t already, for the luxury of quick doughnuts without the guilt of pouring litres of oil into a huge vat just to fry some for a few guests, though of course that’s also perfectly acceptable and I should indeed get round to listening to my own advice once in a while.)

Processed with VSCO with f2 preset Processed with VSCO with f2 presetProcessed with VSCO with f2 preset Processed with VSCO with f2 preset

Definitely not your typical cakey baked doughnut, but just as delicious, especially if you’re into the whole chewy-gooey groove. Chewy-edged, tender and sweet in the middle. Imagine biting into a chewy date bar, but this time you get the characteristic sweet potato flavour, caramelised and starchy. Yessss.

Vegan Sweet Potato Doughnuts (with a not-so-vegan glaze if you wish)

Ingredients

1 medium sweet potato  (a Japanese yam works well too, you will simply get a different colour result)

125g flour (I used a mix of plain and gluten-free, though you could use either or)

2 tsp baking powder

1/4 tsp baking soda

pinch of salt

50g coconut sugar (or use plain white/brown)

100ml coconut, nut (almond, cashew) or rice milk

2 tbsp coconut oil


Directions

Preheat your oven to 200C and roast your sweet potato until tender, around half an hour. Leave the oven on but turn the temperature down to 177C after the sweet potato is done. Place the sweet potato in a bowl and mash it with the milk, salt and coconut oil. In a separate bowl, whisk together the flour, baking powder, baking soda, salt, sugar. Tip the wet mix into the dry and mix until you get a fairly thick but moist consistency, Add drops of milk until you get to this stage if your mixture is too dry.

Bake for 12 minutes. There will be no obvious browning because there’s no typical Maillard reaction going on– the milk and sugars used in this vegan recipe don’t produce the same effect, and the colour of the sweet potato is rather overpowering. Leave to cool for two minutes before icing; as said before you can use a mix of nut milk and icing sugar before topping with flaked almonds (I like the texture variation with that shy crunch), or make like me and dip in condensed milk before the nut splatter.

Condensed milk Tahini Flapjacks

img_4609

The past weekend was one of the best that could’ve possibly been. The late Saturday afternoon welcomed a trip to Borough Market, undoubtedly one of my favourite places in one of my favourite cities. It’s here that I came across ‘flaxjacks’ by Flax Farm, a specialty flapjack store that uses cold-pressed linseed (flax) and linseed oil to add more bang for your buck. As I savoured their bestseller (apricot, orange and pumpkin seed), I realised not once have I tried making this classic, stereotypically English treat. With a new stock of ingredients haphazardly put together, the task had to be completed.

Processed with VSCO with f2 preset Processed with VSCO with f2 preset

Just a week into school has gifted the worth of baking once more; each bout of newness allowing ingress of a more meditative mode. All very complementary. Though I’m not used to making or eating flapjacks, I adore its solemn simplicity, both in character and assembly. It’s all just a matter of mixing together the traditional group of ingredients: rolled oats, golden syrup, butter and brown sugar. I changed the ingredients and proportion of this make-up, replacing most of the glucose bits with condensed milk, tahini, and, yes, golden syrup for good measure. Jam is then blobbed on top, which melts a little into the jacks and prove a firm, jammy consistency after baking.

Gooey tops slathered in the familiar milky sweetness of condensed milk, hard, well-cooked bottoms. I like the crunch of an edge and a little bit of snap when it comes to anything oat bar-y, and this recipe really did the trick with that. If you’re into less hard bars, simply bake them for a little while less.

img_4610

Condensed milk Tahini Flapjacks (makes 16 rectangular bars)

Ingredients

200g butter

pinch of salt

90g condensed milk

20g golden syrup

5 tbsp brown sugar

200g porridge/rolled oats

120g cereal of choice (I used cornflakes, crushed briefly before addition)

4 tbsp tahini

7-9 tbsp raspberry jam


Directions

Preheat your oven to 180c and briefly butter a 8×8 or 9×9-inch pan. Line your pan with some parchment, if you wish. Melt the butter in a saucepan over medium heat. Add the salt, sugar, condensed milk and stir over the heat for a couple of minutes. Take the pan off the heat and mix in the oats, cereal and tahini with a wooden spoon. Press this mix into your pan to form an even layer. Dollop the jam however which way you want on your flapjacks; I did it in a 3×3 fashion. Bake the bars in your preheated oven for 35 minutes. Check them at the half-hour mark– if they are golden-brown on top, take them out. The bars may be soft to touch, but will harden as you let them cool on the counter. After letting them cool for 10 minutes, drizzle with more condensed milk and tahini, add some sliced almonds (optional, I added them for textural variety), and cut into bars. These are best eaten the same day, but can be stored at room temperature or the fridge for up to a week.


Linzer Torte

img_4256

After Linz, in Austria, and said to be the oldest cake in the world. I love how a new recipe lets in some learning. It’s so easy to forget how something so ubiquitous so brims with history. Imagining this torte being caressed by a medieval stranger in 1696 and then being made by someone in the current century is mystical, almost haunting.

Have finally settled into the new house before the advent of a new term, routine is taking form once more; something I’m so grateful for and excited about after a deleterious flight which messes up the mind and shakes up calm. Excitement must be the shorthand term for what I felt once reunited with some favourite people after what seemed to be forever. It only seemed natural to bake something to celebrate. Something incredibly simple but so satisfying.

The crust is traditionally laced with ground almonds and made with egg yolks. It’s also typically decorated with flaked almonds, but  I made do with just a simple lattice and sugar to top before the oven-throw. The filling is probably the easiest in the world. I made do with raspberry jam, which you can make yourself or simply use store-bought. Once baked, the interior becomes thick, glistening and gooey, perfectly holding form for clean cuts and gooey bellies.

Processed with VSCO with f2 preset Processed with VSCO with f2 preset

Linzer Torte (makes one 9-inch tart)

Ingredients

165g plain flour, plus more for the counter

100g ground almonds

155g caster sugar

150g cold butter, cut into cubes

1 tsp ground cinnamon

1/2 tsp salt

1 egg, beaten

250g good quality raspberry jam


Directions

Grease your tart tin and preheat your oven to 190C. In a bowl, whisk together the flour, sugar, cinnamon, ground almonds and salt. Rub in the cubes of butter into the flour mix until the mixture resembles coarse breadcrumbs. Add the egg and mix until you get a moist dough. Since this dough is quite sticky, I found it helpful to lightly flour the tin and my hands for easy molding. Remove about a quarter of the dough and set aside, this will be for the lattice top. Take the bulk of the dough and press neatly into the bottom and up the shallow sides of the tart tin. Press the dough into the ridges of the sides of the tin, and use a sharp knife to trim off excess around the rim.

Fill the tart with the raspberry jam and spread it around evenly. Flour your work surface and put the remaining quarter of dough you set aside on the surface. Roll into a rectangular slab that’s 3mm thick and just long enough to stretch the diameter of your tin. Cut into 6 strips. Lay three on your tart horizontally, and then the next three vertically.

Sprinkle the top of the tart with caster sugar, then bake for 25 minutes. Check at the 20-minute mark. It should be golden-brown on top, and some jam may be seeping in between the lattice hold. That’s ok, nice and rustic. Cool in the tart tin for at least 10 minutes before removing, slicing and serving.

Salted Vanilla Crispy Custard Puffs

Processed with VSCO with f2 preset Processed with VSCO with f2 preset

Though I hate to be picky, I guess I still can be. Almost every week, my mother buys bolo buns, or ‘pineapple buns’, for my sisters. These are sweet buns filled with sticky red char siu (sweet barbecued meat) filling, covered in a yellow tortoiseshell of crackly sugary goodness. It’s those charming cracks, glistening coats of crisp comprising pull-apart little tiles on each little bun, that get to me, more so than any other part. As I picked childishly at the top once, I was reminded of my first try of choux au craquelin, or crispy cream puffs with a similar sort of topping. Remembering I had some leftover custard that I used to make salted custard lava french toast earlier on in the week, the idea of custard puffs ossified.

Processed with VSCO with f2 preset Processed with VSCO with f2 presetProcessed with VSCO with f2 preset Processed with VSCO with f2 preset

Cutting into a crispy, sugary coat to be greeted by voluptuous spillage of vanilla-speckled, slightly salty custard is one of the most lascivious but gratifying actions one can do. Hear the crackle, wade deep. The salt plays up the sweet, giving the drag of thick and cream a bit of angle, an edge. The craquelin itself may have been enough to satisfy me, but it’s a bite that makes the experience whole.

The last time I played with choux was probably more than a year ago, and a repeat this time reminded me of the requisite care in perfecting the robust dough which is easy to let fall apart if you overlook the temperature and timing of each ingredient addition.

Processed with VSCO with f2 preset Processed with VSCO with f2 preset

Salted Vanilla Crispy Custard Puffs (makes 6-7 medium puffs)

Ingredients

For the choux buns:

75g plain flour

50g butter

2 eggs, beaten

120ml water

1/2 tsp salt


For the craquelin (crispy top):

85g butter, softened

100g white caster sugar

100g plain flour


For the salted vanilla custard:

110g white sugar

3 tbsp cornstarch

1 tsp salt

4 egg yolks

beans of one vanilla pod or 1 tbsp vanilla bean paste

30g butter

720ml milk


Directions

First, make the custard. In a large saucepan over medium heat, bring the sugar, cornstarch, salt, egg yolks and milk to a boil. Add the vanilla, then let the mixture continue to boil for 15-18 minutes. Use a wooden spoon to stir the mixture occasionally. Take off the heat when you see that the custard has thickened and readily coats the back of your spoon. Add in the butter and stir to mix. Pour the custard into a bowl, cover with cling film and let this rest in the fridge while you make the remaining components.

Preheat your oven to 177C (350F) and prepare a baking tray lined with parchment paper for the choux buns. Make the craquelin: in a bowl, mix the ingredients for the craquelin together until you get a buttery dough. Roll the dough into a ball and put into  a plastic ziploc bag, sealing it. Use a rolling pin to roll the dough out till it’s 2-3mm thick in the bag. Put this in the freezer.

Next, make the choux buns. In a saucepan over medium heat, bring the butter, water and salt to a boil. Once you see that the butter has all melted, add the flour. Use a wooden spoon or whisk to incorporate until you get a dry-looking dough. Take off the heat and let the mixture rest for 2 minutes. Then, slowly whisk or beat in the eggs. It’s the eggs that provide the lift to the batter, readying it for the perfect little pocket in the middle. I like to do this in 3 additions. It’s important to keep whisking here and to do this slowly, as sudden contact between the hot dough and eggs and cause the eggs to scramble. The dough should be stiff enough to hold a peak when you lift up your spoon or whisk. Put the choux bun paste into a piping bag and pipe circles that are 3cm in diameter onto the baking tray, doing a little swirl at the top. Wet your finger with a little water and press down ever so slightly on top, so you get a more aesthetically pleasing puff.

Take your craquelin out of the freezer and cut out circles 3cm in diameter from the frozen, buttery block. Despite freezing, the slab is still relatively easy to break. You can use a metal cutter or knife to cut out the circles. Place the circles on the choux paste, and then bake in your preheated oven for 20 minutes.

After baking, let the buns cool for 15 minutes on the tray. Take your cooled custard out of the fridge and put into a piping bag. Poke the tip of the piping nozzle into the bottom of a puff, and pipe until you feel some resistance at the point of contact between nozzle and puff. There is quite a bit of weight difference. Repeat for the other puffs. These buns can be stored in the fridge for 2 days or frozen for longer storage. If they have gone all soft after a while, you can re-crisp them in an oven, just bake them at 160C for 5 minutes.


Hotcake For One

Processed with VSCO with f2 preset

As like every Saturday, I took a route less travelled. That morning was colour and fairytale light and a whimsical plate. The perfect respite welcomed me at Paddy Hills, one of my favourite local hideaways for moreish brunch fare, ambience (and not going to lie, the lighting is always perfect for photographs). The light. Almost as if the window behind me had the slightest blue filter. Why is it that I remember these things and not actual important things like the bus routes back home?

Every time I venture out alone in search of a particular foodthing or breakfast dish (for I’m the sort who wakes up way too early to wait for brunch, though that’s always welcome on the social agenda), I savour every little component that arrives at the table. Food is meditation. Every sit-down is an analysis, a reconnection with the humble plate. A cup of coffee is a bit of serendipity, its acidity meaning more than just caffeine. It precedes the awakening of senses; always a bit of displeasure before every reward. Just like my laboratory internship that started in July– each new theory or paper encountered is an adventure for the senses. Every moment is to be savoured, every experiment a full-on thrusting into the meat of the mind.

Having tried many a hotcake before, I didn’t have particularly high hopes for the one at Paddy Hills, but it’s by far the best one I’ve tried. Golden, crisp edges encased a cake-like, fluffy interior, leaning towards pound cake on the density spectrum. Its perfect texture was proven by the soft drag of my fork’s prongs along the edge, followed by the total lack of resistance as they sank into the domed surface. It was then that I decided I just had to recreate something similar at home, and that’s exactly what the following morning demanded. With the mother’s new stash of gluten-free coconut flour at home, I have also included a gluten-free version for any of you who swing that way for personal health reasons. It took a couple of tries to get as close as possible as I could to what I enjoyed. The original recipe I followed online included the unusual addition of Japanese mayonnaise, which apparently is what the Jap folk use in their sky-high, souffle-like pancakes. Unlike American mayonnaise, the Japanese version is typically made with apple or rice vinegar instead of distilled vinegar, and uses egg yolks instead of whole eggs. Perhaps its the chemical structure of the soy vegetable oil they use or the underlying sweetness that lends a hand to the delish result. It did turn out with a desirab;e ratio of texture and flavour, though next time I shall try it without the mayo and look out for the slightest of differences.

It must be taken into account that the size of your pan (mine is about 4.5 inches wide), as well as how close your pan is to the kiss of heat, affect the final result. There’s nothing more gratifying than a big, fat hotcake on your plate.

It was a Sunday morning and the café came to me instead. Here goes.

Processed with VSCO with f2 preset

Hotcake For One (adapted from this lovely lady)

Ingredients

1/4 cup cake flour

1/4 cup all-purpose flour (substitute with coconut flour for the gluten-free version, but take away 2 tbsp)

1 tsp baking powder

pinch of salt

4 tbsp white sugar

2 tsp Japanese mayonnaise (substitute with American/homemade mayo if you have that on hand)

1 egg white

1/2 cup (180ml) milk or buttermilk

2 tbsp melted butter

splash of vanilla extract

whatever toppings you desire; I chose berries for a berry garden, mascarpone cheese, cashew butter and maple syrup


Directions

Preheat your pan on low heat and ready some butter for cooking. Make sure to have at least a healthy knob of butter for each hotcake you make, for this ensures the crispiest golden edges and ease in removing the cake from the pan. In a bowl, whisk together all the dry ingredients. In a smaller bowl, whisk the egg white until it becomes white and frothy. Add the milk, vanilla extract, mayonnaise and melted butter. Pour the wet into the dry ingredients and mix until everything is just combined. Tip the mix, which should have a thick dropping consistency, into your preheated pan and let cook for 15 minutes. After 15 minutes or when you can see that the edges have hardened and there are small bubbles around the same area, flip the hotcake (carefully) and cook for another 15 minutes. Remove the hotcake and serve with whatever you wish.