Peanut Butter Stuffed Salted Brownie Cookies

Processed with VSCOcam with f2 preset

Cancelled morning lectures obviously means whining here about it being the last week of term and waxing lyrical about all things chocolate (once more). A bit on that later. If I start on chocolate now, I’ll probably forget to add other mundane details about my life, and who would want that right? The ‘first day of the last term’ is a funny thing to say; it really didn’t feel all that long ago when I was panicking to my mother about basic things I might or might not be able to do, like laundry, bedsheets and having enough Asian fare in uni to keep me sane, because the impulsive decision to buy Tesco meal deals doesn’t quite cut it most of the time. It’s all just whizzed by much too fast. The Friday flight home is both an ecstatic and nauseating thought to me.

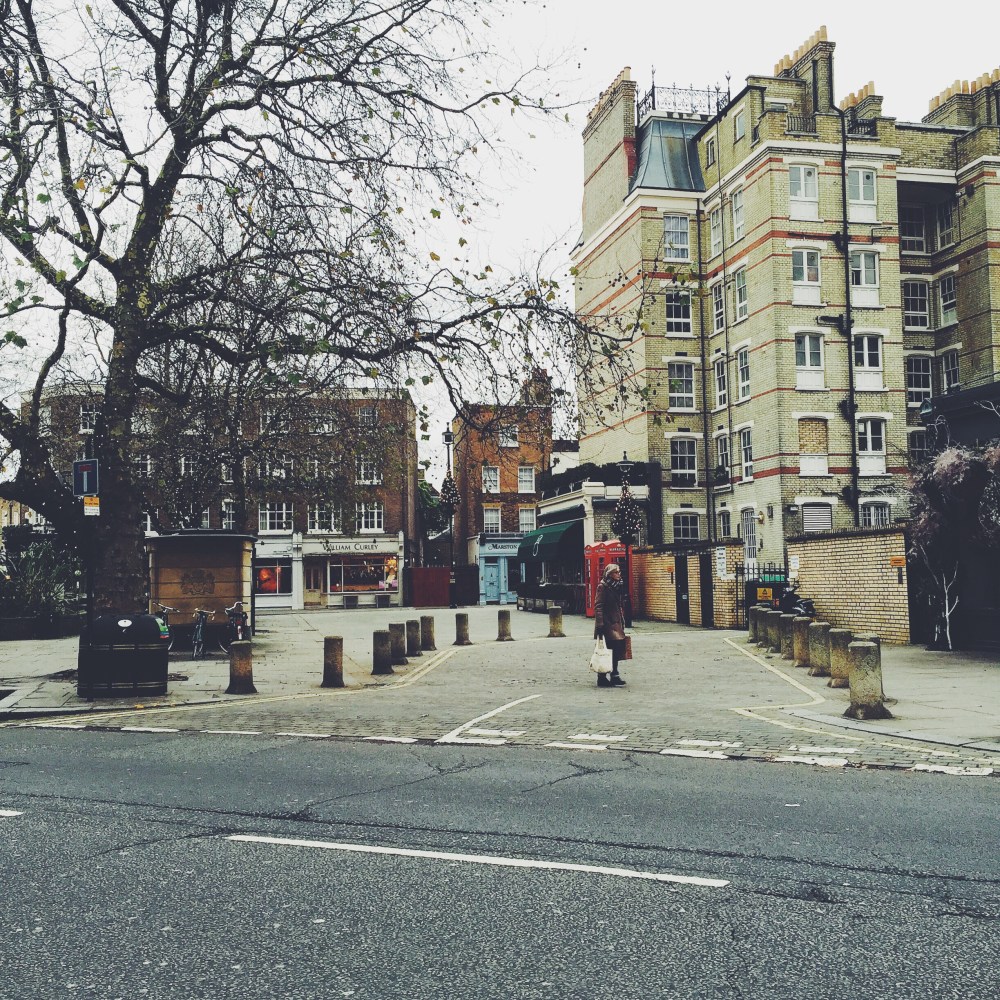
Despite my pension for café fare, I’m embarrassed to say that not once have I had my favourite alone-time at any one café, though I’ve definitely had the chance to visit some must-see places on my list. I should do a write-up about one of them soon, before I forget and the tides of life push me far ahead, me in blissful oblivion, once more.

Processed with VSCOcam with f2 preset Processed with VSCOcam with f2 presetProcessed with VSCOcam with f2 presetProcessed with VSCOcam with f2 preset Processed with VSCOcam with f2 preset

The other day I bought the loveliest little tub of peanut-speckles cashew butter, and just knew I had to use it another mind get-up. It’s practically peanut butter because of all those peanut bits, and since not everyone likes cashew butter and peanut butter is easier to find in stores, I decided to put peanut butter in the recipe title instead of what it really is. It’s not even the processed sort, which some recipes insist on for better results, but really you get a perfect peanut-buttery flavour upon first bite even with the natural unprocessed stuff.

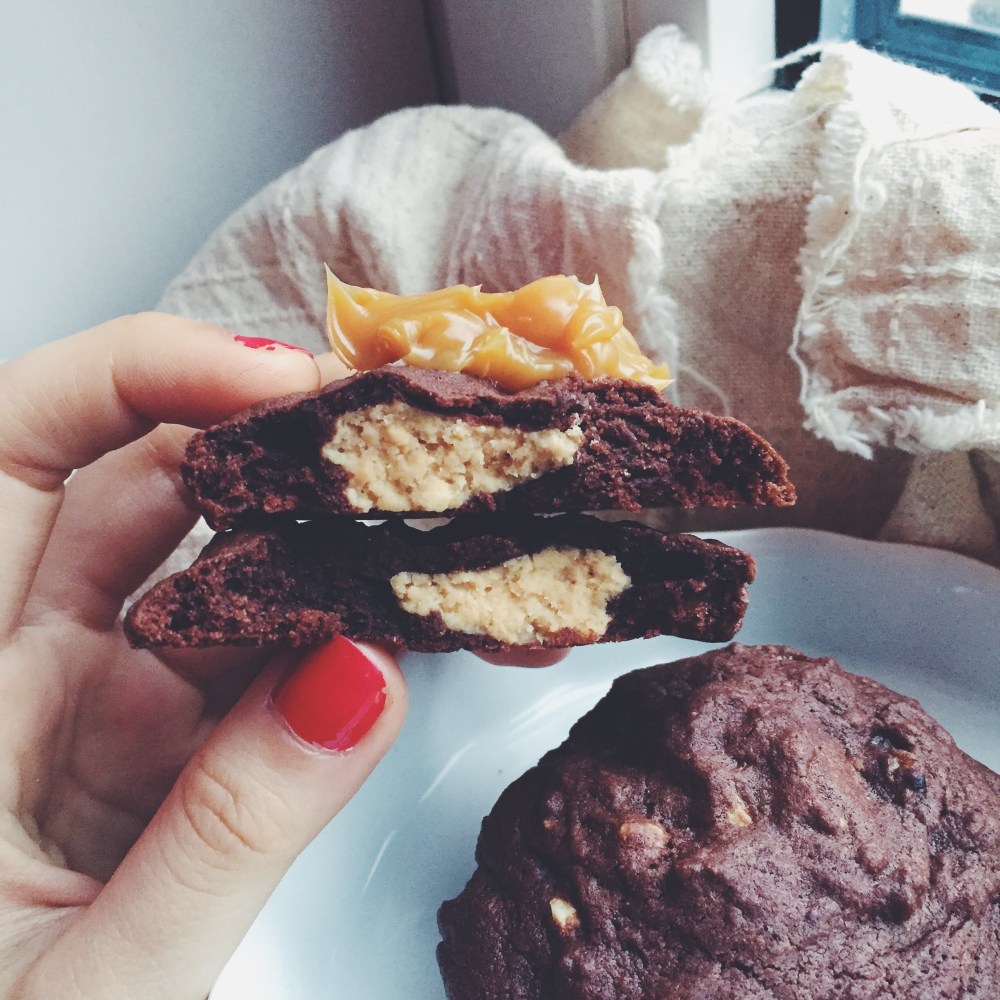
The densest, fudgiest brownie cookie with white chocolate and dark chocolate bits, filled with peanut butter (and in this case, for the sake of aesthetic and flavourful pleasure, salted caramel spread on top). 

I like food hybrids like cruffins and cronuts and whathaveyous. Brownie cookies are on the list. The shape and form resembles that of a cookie, but the texture is all of what you want in a good fudgy brownie– this is not quite the chewy sort, but more dense and fudge-like. Definitely more than what you would guess the texture is akin to in the first picture above. The middle is soft, the edges still squishable. Best part? Adjacency of salt and sweet. Nothing beats it. Yes, my description vocabulary needs a bit of a boost, but squishable is still a word. And an accurate one here, at that.

Processed with VSCOcam with f2 presetProcessed with VSCOcam with f2 presetProcessed with VSCOcam with f2 preset Processed with VSCOcam with f2 preset

Peanut Butter Stuffed Salted Brownie Cookies (makes 18-20 medium-sized cookies)

Ingredients

125g (half cup) creamy/chunky peanut butter (natural or processed; either works fine)

30g (1/4 cup) powdered sugar (doesn’t need sifting)

large pinch salt

1/2 tsp vanilla extract

210g (slightly less than 1 3/4 cups) all-purpose flour

35g (1/2 cup+couple of tablespoons) cocoa powder, doesn’t need sifting (I suggest Green and Black’s here)

1/2 tsp baking powder

1/2 tsp salt

115g (1/2 cup or 1 stick) salted butter (unsalted works too, but flavour is enhanced with salted)

230g (1 packed cup) dark brown sugar

60g (a heaping 1/3 cup white sugar

2 eggs

1/2 tsp vanilla extract

110g (one heaping half cup) of dark chocolate chips or chopped chocolate

*optional: an extra handful of white chocolate chunks/chips (30g) and one heaping tablespoon of salted caramel sauce


Directions

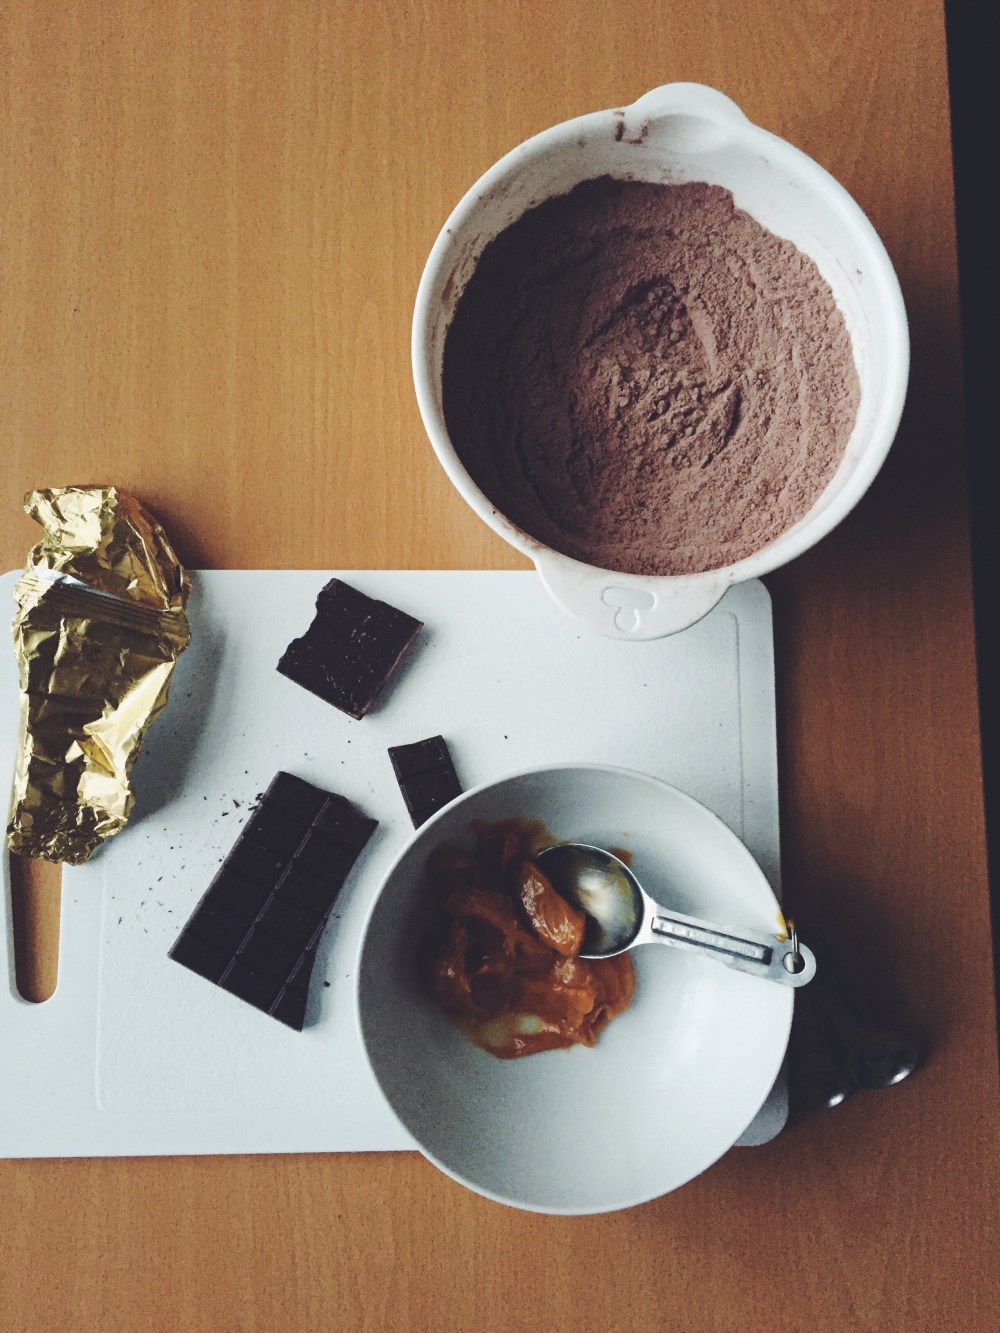
Preheat your oven to 180C (350F) and grease (line if you want) 2 baking trays. In a medium bowl, mix together the first 4 ingredients to make the peanut butter filling. Roll into small balls; you should have around 20 balls, if not more or less. Place the balls on a small baking tray and place in the freezer while you work on the brownie cookies.

In another bowl, whisk together the flour, cocoa powder, baking powder, chopped chocolate (both white and dark) and salt. In a large bowl, whisk together the butter, eggs, two sugars and vanilla extract (add the heaping tablespoon of salted caramel here, if you wish!). Pour the dry mix into the wet mix and mix until just combined. Take out the frozen balls of filling from the freezer. Scoop a heaped teaspoon of dough onto a baking tray, then place one ball of filling in the centre, press down a little, then take another teaspoonful of dough and place on top, smushing around the sides of the filling ball so it’s nicely covered. Repeat until the balls are all enclosed within the gooey chocolatey dough you made.

Bake in the preheated oven for 10 minutes– resist baking for longer even though the cookies look and feel weak to the touch after such a short baking time. If you happen to have made very large cookies, then bake for 11-12 minutes, but nothing more than 12. Leave to cool for at least half an hour before eating. These cookies will keep in an airtight container for up to 5 days, but they’re best eaten within 2 days, during which they retain the ultimate taste and texture. Eat with coarse salt sprinkled on top or more salted caramel sauce.

Lemon Yoghurt Bars (classic, fast, easy)

Processed with VSCOcam with f2 preset

Sweet, tangy, gooey lemon yogurt bars with a dense and buttery base. 

I’ve said it before and I’ll say it again– nothing gets me like a good lemon dessert. Lemon bars in particular are my absolute favourite. I’d say lemon meringue pie too, but that does require the extra meringue component, and if you so wish for some lemony satisfaction at any point of time during the week, these do the trick in a wink without requiring you to whip out any fancy kitchen gadget.

Processed with VSCOcam with f2 preset

Adapted from The Hummingbird Bakery’s cookbook, so kindly purchased by my friend as a birthday present, I couldn’t resist trying these guys out. The recipe looked much to easy to pass up, and there’s never a time I’m not in the mood for lemon bars. With too much yoghurt on hand, I decided no harm would be done if a minor twist was made. Worth it, to say the least. The yoghurt adds a mild creaminess to the body of the lemon bars without subtracting any tang or sharpness.

Crust? Easy. Forget blind-baking and the works.

Filling? 2 minutes max, after weighing some 200g of sugar and squeezing a lemon, I guess. Zilch effort.

Term is winding down, coming to an end. There’s always so much to do here, and see, and enjoy. Friday night shenanigans balance all work-related stress and unrelenting fear of missing out or not knowing enough content. Despite the roller coaster, I must say that there are always the constants that get me through. Morning routines, cup of black in my hand, the oven hum, people with the brightest and most interesting personalities, House of Cards (which I just started and can’t get enough of)…. Missing home is a secondary emotion. Christmas and family and home are calling, but this already feels somewhat like home.

Processed with VSCOcam with f2 preset

Lemon Yoghurt Bars (makes 16-20 evenly-sized rectangular bars, adapted from The Hummingbird Bakery cookbook)

Ingredients

For the base: 

290g all-purpose plain flour

70g icing sugar

large pinch salt

220g unsalted butter, melted


For the filling:

200g white caster sugar

3 eggs

4 heaped tablespoons plain yoghurt (greek works fine too)

120ml (slightly less than half a cup) freshly squeezed lemon juice

half teaspoon vanilla extract


Directions

Preheat your oven to 170C (325F) and grease a 9×9-inch square pan.

Mix all ingredients for the base in a large bowl and press into the bottom of the pan– take your time here for it’s a bit sticky, but it gets easier after all the gloop actually unsticks from between your fingers. Bake for 20 minutes. In another bowl, whisk together the ingredients for the filling. Pour into the half-baked crust and bake another 15 minutes (at the same temperature, leave the oven on when you’re pouring in the filling). Once baked, leave to cool completely. You may place in the fridge to cool faster, but the bars will set up fine after an hour or so even at room temperature.

Cut into even bars and serve!

Chocolate Caramel Nougat Tart

Processed with VSCOcam with f2 preset Processed with VSCOcam with f2 preset

Sweet shortcrust pastry filled with dark and milk chocolate, melted chocolate nut bars, caramel, topped with chopped pecans and peanuts

There’s little space for mistake(s) when it comes to food pairings made for each other. Rich, dark chocolate filling, chewy bits of nougat, the occasional crunch, smooth caramel. Contemplating the meaning of life earlier on this week whilst scavenging my brain for some coherent essay material, I knew I needed to make something sweet, and good, soon. The brain needs glucose, after all.

Magic results lie in the temperature of your butter (cold cold cold, please), and the speediness of all the hand work involved. It all seems a bit of a hassle at first, but I encountered nothing more therapeutic the past week. The movement of my hands in a bowl, rubbing butter into flour and salt and the works is like a welcome slowing down of all the motions you’re forced to go through in life. If you just take an hour out for yourself, make something, have a cup of coffee, or even just think about nothing, everything around you, everything you experience, becomes brighter and more beautiful. I’d hate to sound too much of a yogi because I’m no more the wiser, but the truth only came with experience.

Also, you’re probably wondering why there’s one picture in this entire blog post. Now I know as a blogger one is obligated, expected to take a million photos of the entire process, for the reader’s pleasure and benefit. It’s true, I know, but having hall-mates all around means the lifespan of anything baked (especially with chocolate) is circa half an hour, if not just a little less.

It was too delicious for too many shots. The waiting had to wait. I’ll leave it at that, and hopefully the next time I won’t disappoint.


Chocolate caramel tart (makes one 9-inch tart)

Ingredients

For the crust: ingredients may be found here, minus the black sesame powder

70g dark chocolate, broken up into large chunks

60g milk chocolate, broken into large chunks

one large chocolate nut candy nougat bar (Snickers works well), or substitute with 10g more milk chocolate and a handful of chopped peanuts  (though you won’t get the bits of sticky nougat this way)

14g (1 tbsp) unsalted butter

50g (around 1/3 cup) chopped pecans and peanuts (optional)

For the salted caramel: ingredients and procedure may be found here. You will need 80ml (1/3 cup) of the stuff.


Directions

Prepare pie crust as stated in aforementioned recipe. At the bit where it says ‘preheat the oven and cover with aluminium foil’ preceding the blind bake, don’t! Just bake it normally, then remove once done and let cool, during which time you can prepare the other components. Prepare salted caramel and let cool for a half hour, so it solidifies just a little.

In a medium microwave-safe bowl, melt together both types of chocolate, butter and the chocolate bar in 30-second intervals, until everything has nicely melted together. There will be a few sticky bits if you’re using a Snickers bar  thanks to the nougat, but that’s what makes it all the more pleasurable. Into the cooled tart crust, pour in the salted caramel and spread into an even layer. Then pour in the chocolate mixture, and sprinkle chopped pecans and peanuts around the edges (optional). This tart need not set in the fridge, but leave to set and stiffen more at room temperature for at least half an hour. Cut using a sharp knife, wiping with a wet towel between each slice.

Serve on its own or with whipped cream and more chopped nuts.

Blackberry Pillow Pancakes

Processed with VSCOcam with f2 preset Processed with VSCOcam with f2 preset

And if you thought I would stop with the pillows, I’m sorry to let you down (not really).

It’s been more than half a year since I discovered what I think is the best base pancake recipe, and goodness have I made so many flat, soggy things in my bleak past. This is merely a twist on a classic favourite buttermilk version, only this time I didn’t even use buttermilk, since I didn’t have any on hand and I had no white vinegar to make any of my own. Still, the results were beyond moreish. One must make do with present circumstance, no matter how dire. The results may be surprising, and even pleasant.

Processed with VSCOcam with f2 presetProcessed with VSCOcam with f2 preset

Even without maple syrup, yoghurt and brownie bits (as may be observed above), the pancake alone holds a mildly sweet flavour, with plentiful air pockets, rise (each is at least an inch in height), and all sorts of loveliness. Tart blackberries offset the plain flavour a tad, each bite dripping with tenderness and bits of melted fruit. I paired a small stack with yoghurt to further enhance this tartness, and the syrup made all the components sing in perfect harmony.

This fluff is unreal. Perfect wake-up call.

Processed with VSCOcam with f2 presetProcessed with VSCOcam with f2 preset Processed with VSCOcam with f2 presetProcessed with VSCOcam with f2 preset

Blackberry Pillow Pancakes (makes 10-12 medium-sized blackberry darlings)

Ingredients and Directions

Place a large handful of fresh or frozen blackberries (around 7-8 whole blackberries) into a microwave-safe bowl. Microwave on high for 2 minutes, or until they are easy to mash and the juices seep out.

Follow the directions on how to make my favourite sky-high pancakes here. Before cooking the pancakes, swirl the microwaved berries into the batter. The batter will become darker, with bits of blackberry strewn throughout. Cook the pancakes as usual, on medium heat and flipping before bubbles are fully formed on the surface of the pancake. Place cooked pancakes on a paper towel, and any left over can be frozen. Serve with more berries, chocolate, yoghurt and maple syrup. Or whatever floats your boat. Enjoy, and make again soon.


10-minute Chocolate Brownies with Chocolate Peanut Butter Caramel Frosting

Processed with VSCOcam with f2 preset

Look down at my boots. The wind gets through even those. Tights? Never thick enough. But thank God for Barbours. It’s getting colder… And colder. Despite the bitter air and occasional drizzle that somehow makes the situation 5 times worse, I’m embracing the sudden transition into proper fall here in the UK. Couldn’t believe it when a friend posted a video of soft snow right outside her window, here in South Kensington. It’s happening!

Processed with VSCOcam with f2 presetProcessed with VSCOcam with f2 preset

The cold means more warm chocolate somethings, topped with chocolate caramel peanut butter frosting. Chocolate anythings. Some days just demand brownies, and only brownies. The first time I made this and followed the initial recipe, the whole 20 minutes made it much too dry for my liking, so I adjusted proportions and timing. Lo and behold, everything was gooey and beautiful in less than 10. The excitement was too much. Too much.

You need that rich goo. A dark, deep, intense pleasure. If I want a good, fudgy brownie that’s chewy around the edges, my go-to recipe is right here, so I implore you to check that out as well; it’s just as simple and almost as quick. This is more a mix between a gooey mud pie and dense cake, but the change is welcome and delicious. Topped with caramel peanut buttery goodness, it really doesn’t get much better than this. What do I love so much about this recipe?

  1. It takes 10 minutes. And in my case, just 7, because sometimes miracles happen.
  2. You can use either natural or processed peanut butter (crunchy, if you may) without any disastrous consequence.
  3. You won’t stop licking and picking.


Chocolate Brownies with Chocolate Peanut Butter Caramel Frosting (adapted from Sorted Food’s Swedish Chocolate Brownie recipe- serves 9-12)

Ingredients

For the brownies:

110g (half cup) salted, melted butter (or use unsalted, and add a pinch of salt into wet ingredients later)

200g white caster sugar

2 eggs

130g plain, all-purpose flour

1 tsp vanilla extract

55g cocoa powder

40g dark chocolate, melted in a microwave in 30-second bursts


For the frosting:

90g ( slightly more than 1/4 cup) chunky/smooth peanut butter; natural peanut butter works perfectly here as well, just make sure it’s properly mixed through

50 dark chocolate chunks, melted in a microwave

75ml (1/4 cup) caramel sauce, store-bought or homemade


Directions

Preheat your oven to 180C (350F) and grease a square/round 23cm baking pan. In a bowl and with a whisk, mix together the melted butter, sugar, melted dark chocolate and vanilla extract. Add the salt here if you used unsalted butter. Whisk in the eggs and cocoa powder, and continue whisking until the mixture is visibly and texturally stickier and glossier. At this point, add the flour and mix until everything is just combined. Pop the pan into the oven and bake for 7-10 minutes. Whilst it’s baking, mix together the frosting ingredients. You need a fork and self-trust (that you won’t finish the whole bowl before the brownies are even out).

Check the brownies at 7 minutes- there should still be a slight wobble in the middle. Remove from the oven and let cool for a half hour before frosting. Cut into as many squares as you want, then eat and be happy.