Pumpkin Berry Cinnamon Cake with a Cinnamon Frosting and ‘Cream Cheese’ Glaze

dscf9074The day before the big 20, it was the 16th of the 16th. That’s nice. American Psycho (by Bret Easton Ellis) kept me up well, and Ellis knows how to write with exhilarating speed and menace. He zooms and I go with him. The night was full of speed slowed down. Memories of 19, last year in my small little dorm room, faces everywhere showering me with ‘whoa, 19’, and now fast forward just a little, and all a 20 year old can do to console him or herself is to chuck in the reminder that it’s really the beginning, not the end of, a decade.

How do I feel? Still alive, still an inexperienced student, still a hopelessly romantic dreamer, still tremendously excited about making cakes like this. I was honestly worried about constructing something that was vegan and still appeal to everyone, because everyone still has this idea that anything without eggs or dairy will ultimately taste like crap, but no I was so determined, and this pumpkin berry cake which I adapted from one of my all-time favourite blogs turned out to be beyond my dreams, and I’m pretty sure I dreamt up something similar on the night of the 16th.

‘Holy shit, this is vegan? Ummmm… No. No.’

‘Wait, but it really isn’t, I mean it doesn’t taste like it’s those vegan raw things I’ve tried at those cafés, so are you sure?’

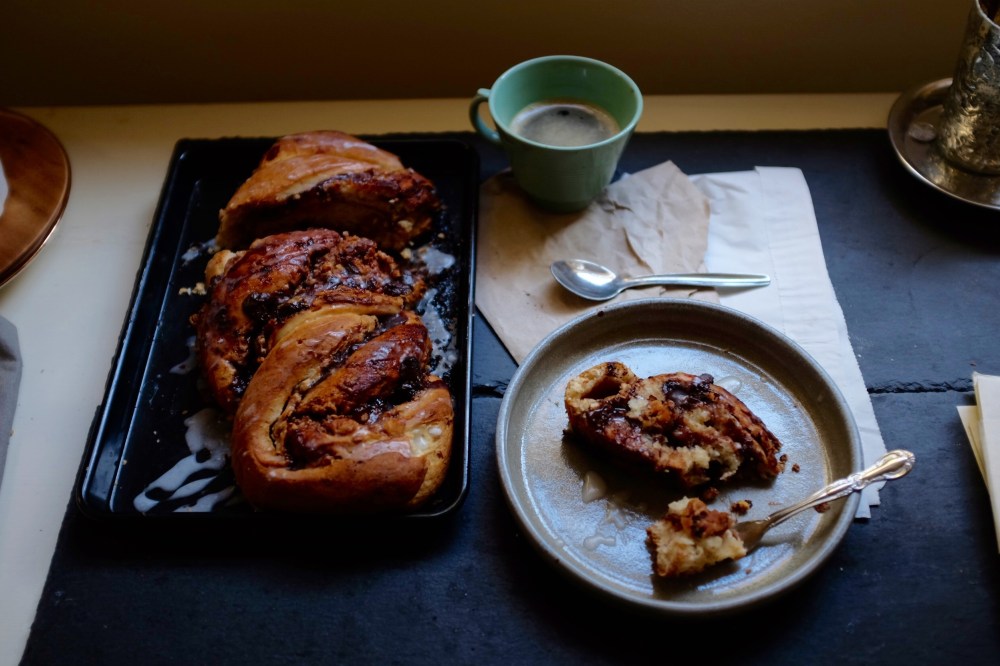
During a little picnic that Thursday night, I sprinkled everyone with a bit of surprise.

Yes it is all vegan (not raw though), and of course you can completely unveganise it with the substitutions I put in the recipe below, however this cake was more fluff and fire than drab and dense.

dscf9053dscf9055dscf9060dscf9065

I made this cake as I rebelliously ignored all the Facebook notifications. Putting it together, I could feel my heart hardening. The year of 20 is no mistake. Old to some, young to most. Whisk, plonk, poof. So much expectation, so much trying-to-prove. But you come home to the easy comfort of good-hearted people and the dim light which holds the promise of new things to learn and love the next day, and you sigh and realise life is so full and promising. Cake calls, too. Slice it, savour it. With this one, you make an easy pumpkiny berry-y (?) batter for two cakes, sandwich them with this divine cream ‘cheese’ frosting, then smear the sides with the stuff to make a naked frosting, the first layer weighing down on the second making this bit easier than you might initially envision.

dscf9068dscf9070dscf9073dscf9074

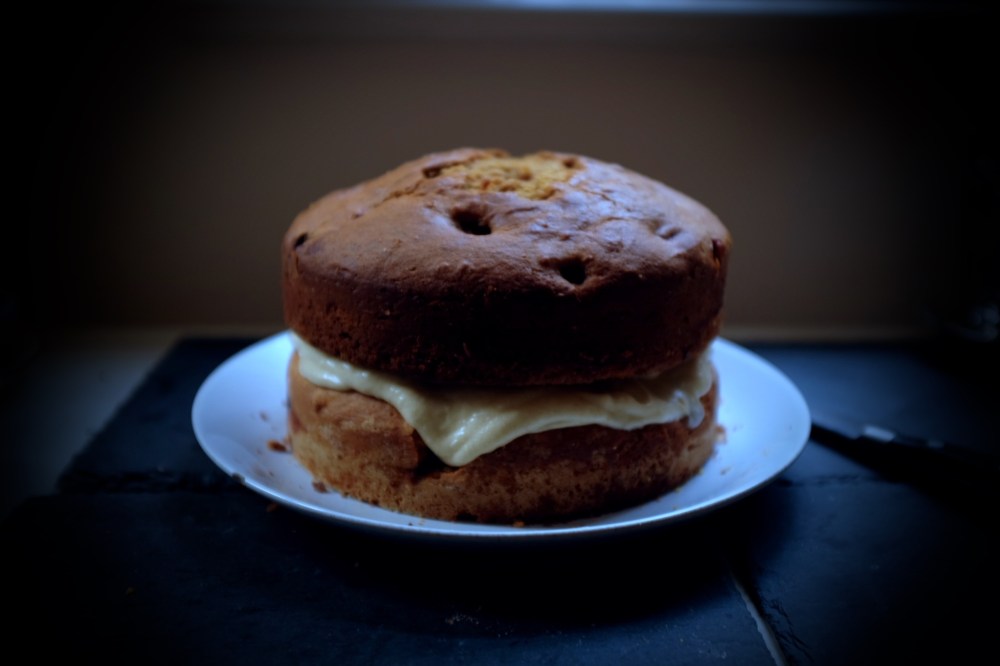
Assembly. Treasures lie in the smallest details and the cake breathes love. Karen Carpenter knows how I feel when she bellows such a feeling’s comin’ over me…

Now I sit here typing, already 20 but heaving with the juvenile stains of life. Soon the sun will properly be up, and I’ll heat up some pancakes I saved from Sunday, which I shared with someone I love. I will top them with whatever I fancy, because 20 allows that. Other thoughts? Well, I can’t find my lunch box cover, which is deeply disconcerting, and I realised damp hair shouldn’t be put in a bun too soon else the curl effect will quickly vanish the following morning. Important things.

dscf9079dscf9082

Pumpkin Berry Cake with a Cinnamon Frosting and ‘Cream Cheese’ Glaze (makes one large 8-inch double-layer cake, though you can halve the ingredients for a single cake! Adapted from this beautiful Cinnamon Bun Cake)

Ingredients

For the cake:

600g all-purpose flour (subs: gluten-free/ half white and half whole wheat)

4 tsp baking powder

540g sugar, half white and half brown

2 tbsp ground cinnamon

large pinch salt

260g pumpkin purée

200g vegan butter (sub: normal butter), softened at room temperature

2 flax eggs made by mixing 2 tbsp flax with 10 tbsp water and letting sit for 10 minutes before using (sub: normal eggs)

2 tsp vanilla extract

200g fresh or frozen berries of choice


For the frosting:

150g butter

1 tbsp cinnamon

50g vegan cream cheese (subs: regular cream cheese/ sour cream)

170g icing sugar


For the ‘cream cheese’ glaze:

120g vegan cream cheese (sub: regular cream cheese/ sour cream, as before)

130g icing sugar, sifted

pinch salt

1 tsp almond milk (sub: any milk of choice)

1 tbsp cinnamon


Directions

Preheat your oven to 177C (350F) and grease 2 8-inch cake pans, then sprinkle the bottoms and sides with a mix of granulated sugar and breadcrumbs (or just sugar if you don’t have the breadcrumbs). This will give the cake a nice sweet crust once baked. Tap the pans so that the mix is evenly spread.

In a medium bowl, whisk together the flour, cinnamon and baking powder. In another bowl, beat together, either using sole arm strength and a whisk or an electrical beater, the sugar, butter, flax eggs, pumpkin purée, vanilla extract and salt. Add the dry to the wet mix and mix until everything is just combined. Put roughly a quarter of the mix into one of the pans, then sprinkle half of the berries all over. Dollop another quarter (so now you have half of the batter left for the second cake) on top. Do the same in the second pan. Bake the cakes for 50-60 minutes (mine took 60 minutes exactly).

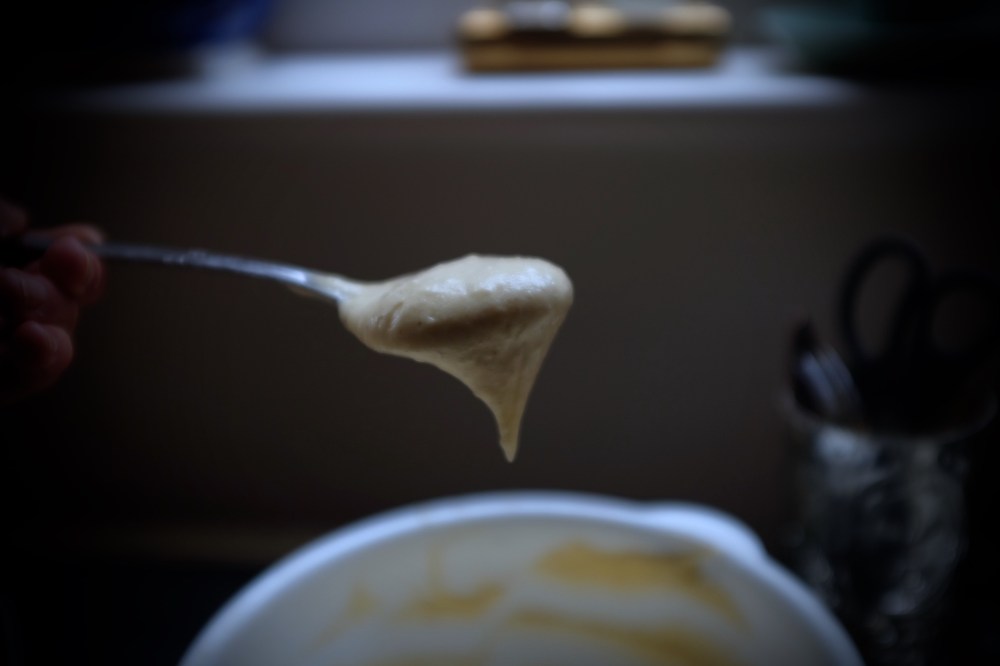
While they are baking, make the cinnamon butter frosting and cream cheese glaze. Beat together the ingredients for the frosting in a bowl using an electrical beater, then place in fridge to set a little. In another bowl, whisk together the ingredients for the cream cheese glaze and set aside.

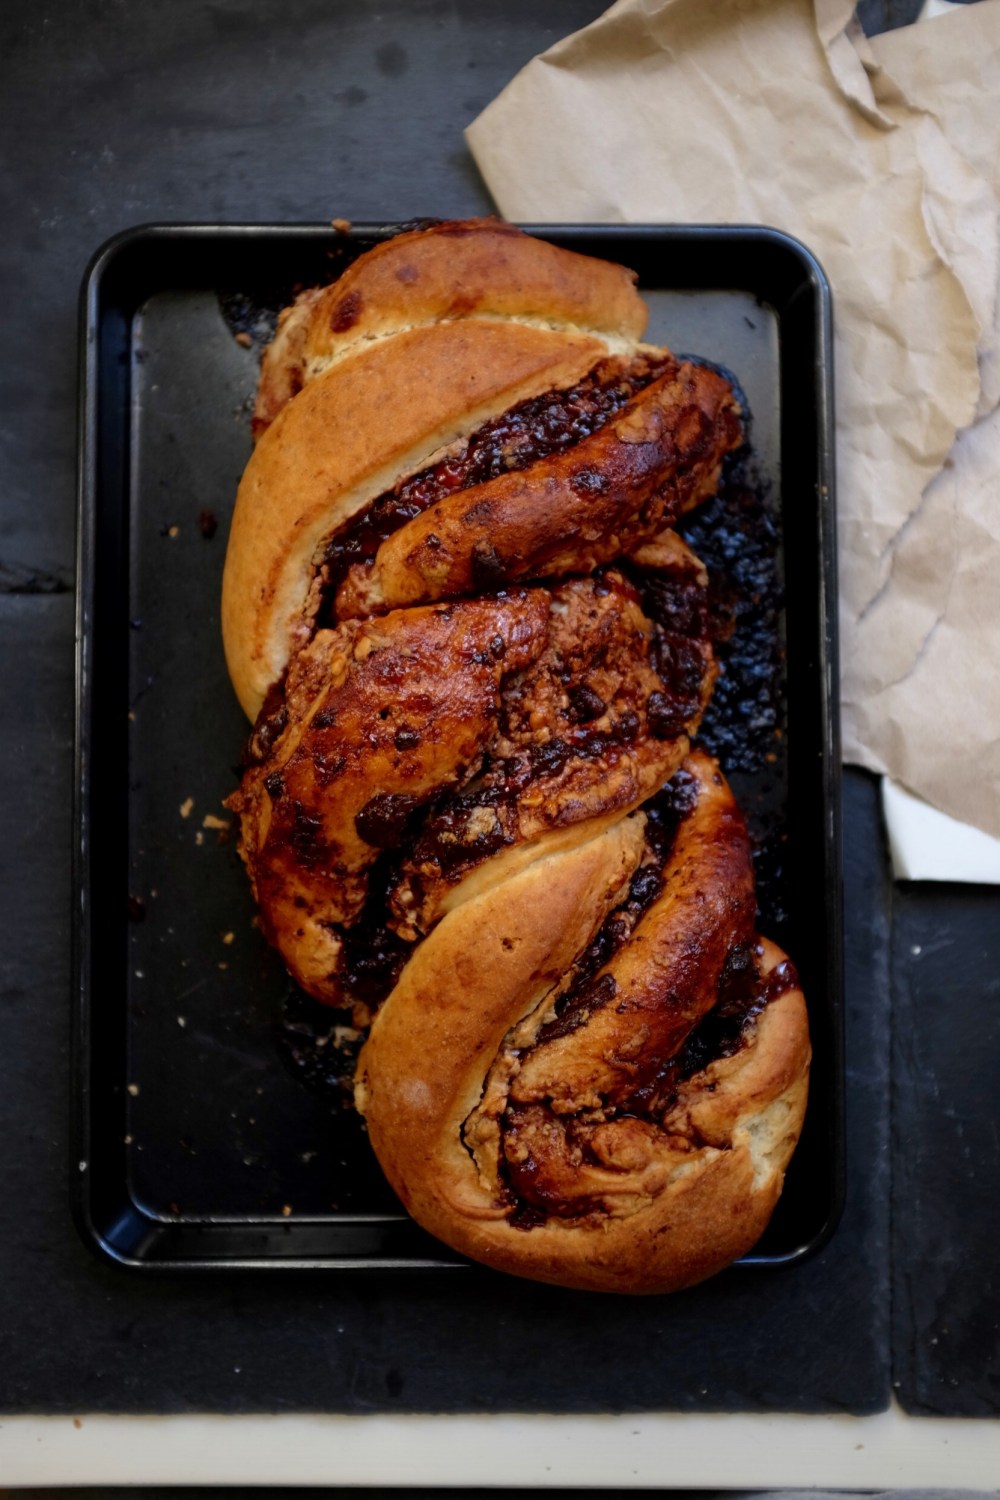
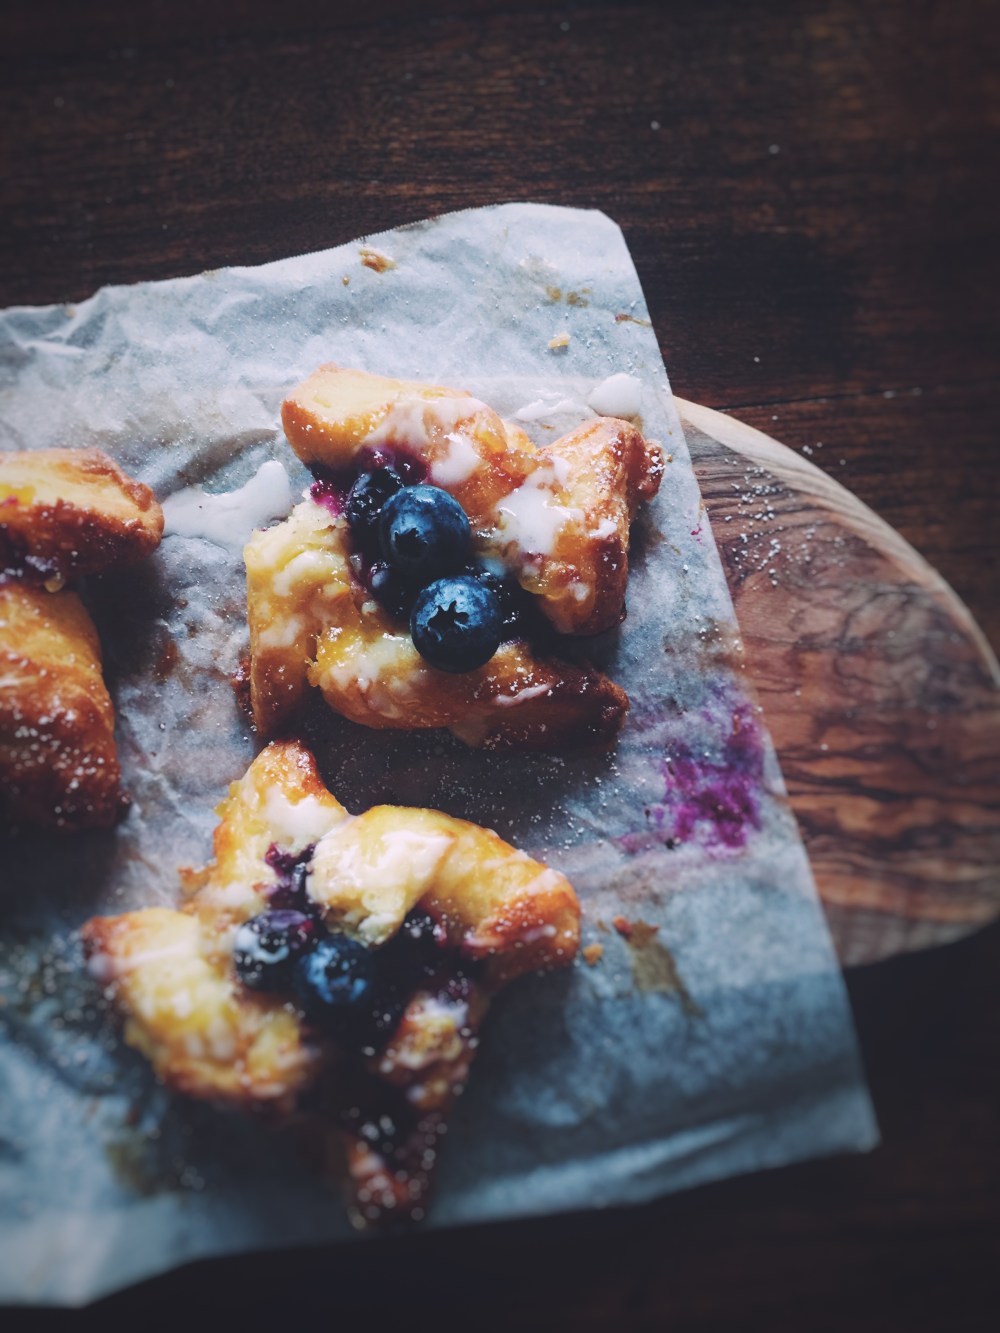
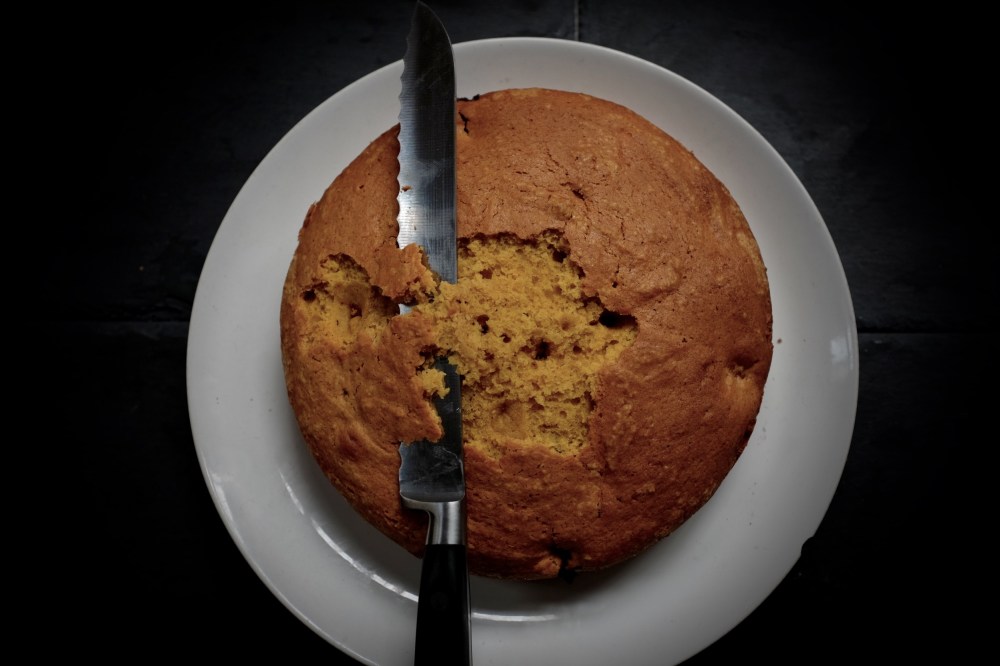
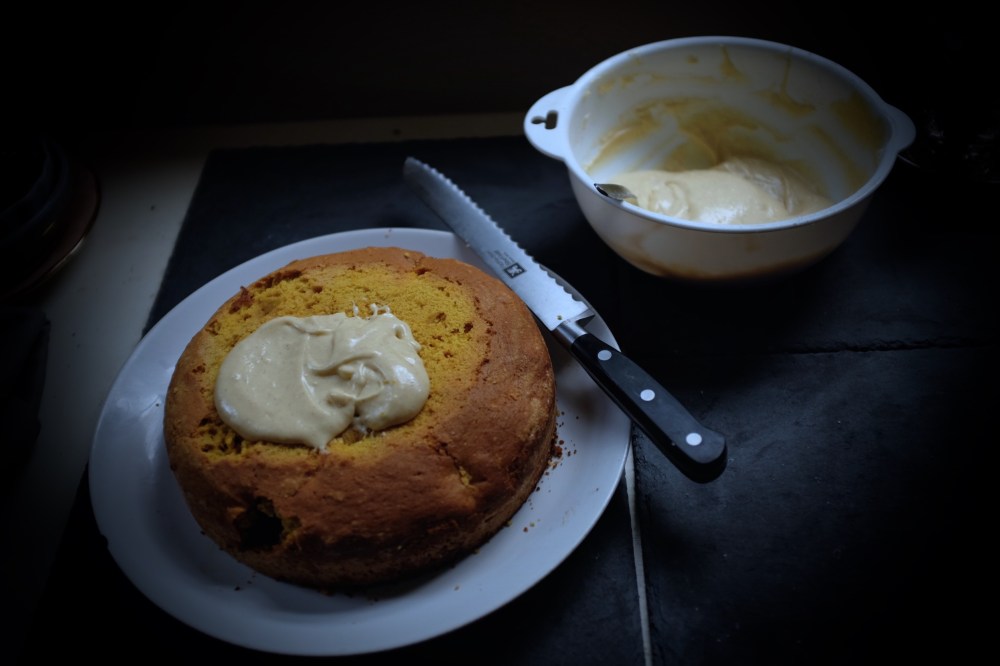
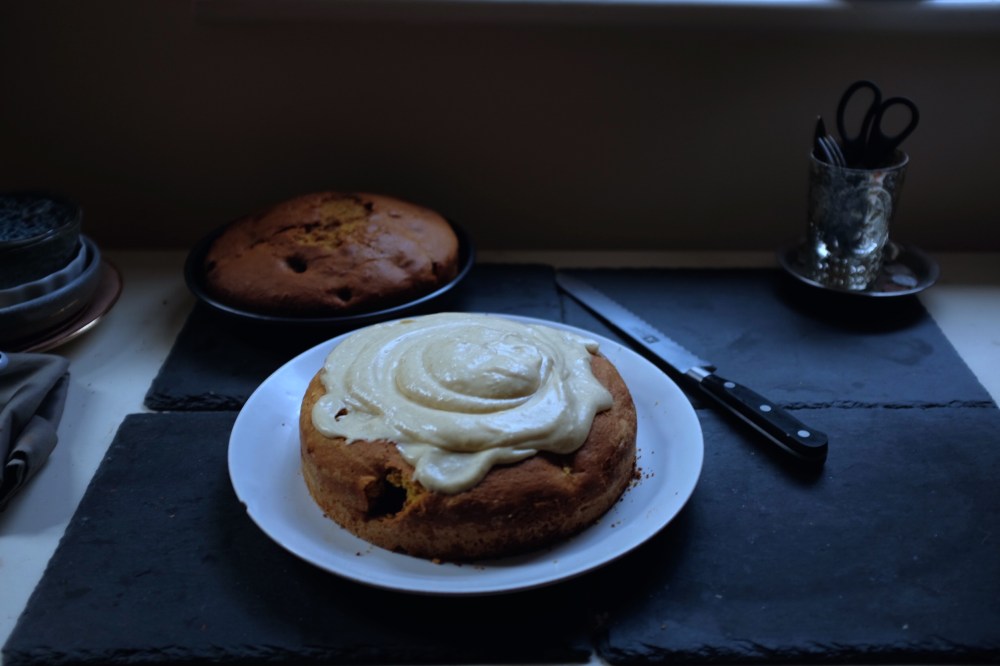
Once the cakes are done, leave to cool in the pans for a half hour before over turning and putting on a cooling rack. Using a serrated knife, level one of the cakes to prep it for the frosting that will sandwich the two cakes together. Put the frosting in the middle of the cake, then put the second cake on top, letting its weight spread the frosting out to the sides. There might be some frosting that spills a little too much onto the sides of the bottom layer, but that’s ok; you need this bit of extra frosting for the naked frosting effect. Using a palette knife, spread the excess hanging bits of frosting along the sides of the whole cake, so you get the effect seen in that third last picture. Dollop the cream cheese glaze on the top layer, and sprinkle the top with chopped chocolate, more fresh berries if you like, and cinnamon. The dashes of cinnamon give a beautiful, rustic yet polished final effect.

Slice, serve, enjoy. This cake can be kept at room temperature for 2-3 days.

Overnight Vegan PB&J Chocolate Coconut Babka

dscf9046

In the wake of weird, let’s bake. Let’s have some sweet to go round, softening the edges of confusion. Though I am no savvy politician, I simply can’t see why decisions have solidified as such. The morning throbbed with trepidation. But it’s up to us to look up, look ahead.

dscf9029dscf9031dscf9033

Babka has been on my mind for a long time! There is so much about it to love. A tender fluffy crumb, the endless combinations of swirl and filling (chocolate and nuts is the traditional fave–a bulging filling at that), a possible icing, knowing full well it pairs perfectly with any steaming holiday-themed beverage…

So you make the dough, let it rest because you have stuff to do for the night, put it all together first thing in the morning, or perhaps 2 days later because you’re off for work at 7 the next morning and can’t be arsed to dress up some bread (and that’s ok!), then bake it, all the while smiling at the fact that the whole put-babka-together-and-roll dance occupied the time it would take to make any other meal, or maybe less.  The whole weekend I was seriously craving some peanut butter and jam action, and because I tend to like chocolate with anything too, and coconut because live life on the edge, I decided to throw in some chocolate coconut action into the game as well.

A soft, tender, sweet yeasted babka filled with peanut butter, jam, chopped chocolate, chocolate coconut spread, topped with a coconut milk glaze. 

dscf9040dscf9041dscf9044

Swell morning.

I did mention veganising most, if not all my recipes from now on in my previous post, because accommodation isn’t illegal, and it’s actually really darn fun; not having eggs or dairy by mistake doesn’t mean it’s the end of humanity as we know it. You’re cutting down on ingredients, and replacing the necessaries with other cheap, easily-found ingredients. With my recent vegan endeavours, most of my meat-eating fanatics simply can’t tell the difference, unsuspecting of zilch gram of egg or meat or butter in there. Sometimes they beat the originals. It’s an enthralling process. Of course, this need not be completely vegan, so feel free to use butter instead of Earth Balance etc.

This. Babka. Sweet, buttery bread cradles nuts from your chunky breakfast spread, darkened selectively in places oozing with textured chocolate, hardened by the oven but molten in the centre. The coconut milk glaze glides over every crevice, letting the coconut-flavoured lashings of chocolate smushed on the inside sing.

dscf9045dscf9046

Take a bite, then sip your coffee. Saccharine bliss. This post is dedicated to my first #VirtualCoffeeParty, as well as to my dear friend Ella, who’s birthday is today.

Overnight PB&J Vegan Chocolate Coconut Babka (makes one loaf, or 6 thick slices)

Ingredients

For the dough:

250g flour

1 tbsp instant yeast

pinch of salt

45g applesauce

50g Earth Balance (or butter, or any vegan butter)

40g sugar (coconut sugar here would be great)

90ml plant or nut milk of choice (or plain milk)

For the chocolate coconut sauce:

100g chopped dark chocolate

1 tsp coconut essence

*alternatively, use a ready-made chocolate coconut sauce, like Sweet Freedom’s Choc Shot (mmmmmmmm)

For the filling:

110g chunky peanut butter

6-7 tbsp strawberry or raspberry jam

100g chopped dark chocolate

For the glaze:

100g icing sugar

3 tbsp coconut milk


Directions

In a microwave-safe bowl, melt together the butter/Earth Balance and milk of choice.

In a separate large bowl, add the flour, yeast, applesauce, sugar and pinch of salt. Mix together briefly, then add the milk-butter mixture and knead for a few minutes on a lightly floured surface. Shape into a ball, put the dough back in the bowl and leave in the fridge overnight or up to 48 hours.

The next morning, spray a pan and heat your oven to 200C. Make the chocolate coconut sauce– simply microwave together the ingredients and set aside for the timebeing. Roll the dough out onto a floured surface, into a rectangle slightly longer than the pan itself. Spread the peanut butter on the dough leaving a one-inch margin all round, then the jam, then the chocolate and chocolate coconut sauce. Roll the dough along its length so you get a long cylinder, then cut a slit down the middle lengthwise. Twist the dough, sort of like in a braiding fashion, then put onto your pan. Let it sit for 10 minutes, then bake for 25-30 minutes in your preheated oven.

While it’s in the oven, whisk together the coconut milk and icing sugar. Once baked, let it sit for 10 minutes before drizzling on the glaze, cutting and serving. Y-U-M.

Kaya Avocado Nut Butter Cakes

Processed with VSCO with f2 preset Processed with VSCO with f2 preset

A homemade gift goes far. In Tuesday’s case, it was my Grandma’s homemade kaya, or coconut jam, lugged all the way from Singapore when my mum came to visit just a few weeks earlier. It was the exact same recipe for the green batch of love I played around with for my kaya maple loaf cake, the recipe for which you can find on Amazon as I speak!! Whew, rush rush rush. Anyways, a throwback was in demand as I held the tubs of curdled emerald goodness. Once again, an odd combination formed the scaffold of more funny kitchen business.

I occasionally find myself refusing to go against instinct for the fast and funny. As a student, the will to carve out day-long space is for something in total artistic favour is admittedly a little impractical with coursework and intense lecture review. There is indeed worth in all that labour, and I look forward to when I can do so without a penny of guilt eating away at the back of my head. It is true creative catharsis.

So you whisk together the dry and wet, fill half your cake molds with the final batter, add a teaspoon of nut butter of choice, then continue filling, then bake. The combination of kaya and avocado was approved by my skeptical flatmate. The best bit, I personally think, is the crusty sugar outside of the whole cake. Mmmmm. Kaya is sweet and, depending on the way you make it or the brand you buy, very coconutty, as green as the pandan leaves used to flavour the homely concoction of coconut milk, eggs and sugar. Avocado pretty much substituted most of the butter in this case, so the final texture of the cake was incredibly tender but not reminiscent of your typical cupcake, which might leave a buttery crumb. Pressing this will leave your fingers dry (and beautifully scented), yet the mouthfeel is airy and moist.

As I’ve touched on before, I do enjoy eating and making vegan meals and desserts, especially after all those silencing documentaries and Youtube lectures I’ve watched on the veggie movement. Though I am not full vegan for personal and family reasons, I will now officially include vegan or at gluten-free versions for all my recipes. I only want this blog to cater to all types of dietary needs, so if any of you feel like something is amiss, please feel free to email or DM me.

Processed with VSCO with f2 preset Processed with VSCO with f2 preset

Kaya Avocado Nut Butter Cakes (makes 6-7 cakes)

Ingredients

*= vegan substitute

190g plain flour (*same weight of gluten-free flour)

a generous pinch of salt

1 1/2 tsp ground cinnamon

1  1/2 tsp baking soda

300g kaya (*recipe for vegan kaya below, using 1 sweet potato, 1 tsp pandan extract, 80ml coconut milk and 3 tbsp coconut or maple sugar)

1 tsp vanilla extract

1 egg (*1 mashed banana)

120g white caster sugar (*same weight of coconut sugar)

1 mashed avocado

3 tbsp olive oil

optional: nut butter of choice


Directions

*to make vegan kaya: Roast one large sweet potato (about 200g) at 200C for half an hour or until soft and mashable. Using a fork or blender (you pick the easy way out, ha ha), mix with the rest of the stated ingredients. And there you have vegan kaya! You should be able to use all the kaya you make, but weigh out 300g to be sure.

Firstly, preheat your oven to 180C and grease a 8 of your muffin tins. In a large bowl, whisk together the dry ingredients: flour, salt, cinnamon, baking soda and sugar. Add the rest of the ingredients excluding the nut butter and mix well. You should have a thick, green batter of easy dropping consistency. If it’s too thick, add a drop of milk/nut milk until you get the desired consistency.

Fill your cake molds halfway up, then add a teaspoon of  nut butter to the centre, then continue to fill with the batter until the mold is 3/4 full. Bake in the preheated oven for 20 minutes. Serve with more nut butter, yoghurt, honey and frozen berries (trust me on this one).

Blueberry Danish+ exciting news

Processed with VSCO with f2 preset

New season of the Great British Bakeoff? Yeah, almost started sweating. Just so happened that the dawn of another exciting slew of episodes coincided with my mum’s genius decision to buy the ever-charismatic Paul Hollywood’s How to Bake cookbook. So there I was, eagerly thumbing through, and I finally settled on his recipe for raspberry danishes. Having never experimented with proper danish pastry before, I figured it only wise to follow his method step by step, in true apprentice fashion. Tweaked it a little to use the ripe, slightly tart blueberries I had instead, and dressed it up with homemade frangipane and a salted caramel glaze instead of the stated recipe’s citrus-based one. I now fully understand why people labour over laminated dough; all those hours folding, pressing and refrigerating are truly worth it in the end. The result proved to be gold– flaky, golden pastry, buttery and beautiful. Not much sugar needed, just let the dough do the talking. Anyone who’s keen on trying laminated dough, be it this/ croissants/ pain au chocolat etc, should definitely try this take (this is easier if you live in a cold country, but if not, please make sure that air-con is on full blast!)

Before I get on with the details and modifications, I want to share something pretty exciting with you. Ever since kindergarten I’ve always wanted to write a book, be it on something big or small, short or long, personal or informative. There’s something about holding a book– reading, absorbing, loving it, that beats few other physical and mental experiences. Having finished a recent research internship that served well to enhance this innate lust for creative and relatable matter, I was immediately compelled to start. Though I shan’t disclose any details, I do plan to include a few new surprise recipes in this personal project!

Processed with VSCO with f2 preset

Blueberry Danish with a Salted Caramel drizzle (makes about 25 pastries)

Ingredients

For the dough: 

one batch of Paul Hollywood’s Danish pastry dough 


For the frangipane (adapted from Martha Stewart’s ‘Bostock’ recipe):

50g (2/3 cup) whole, raw almonds

100g (1/2 cup) granulated white sugar

85g (6 tbsp) softened, unsalted butter

1 egg

2 tablespoons all-purpose flour

1 tablespoon vanilla

3/4 teaspoon salt


For the salted caramel drizzle:

50g (around a half cup) white sugar

47g salted (!!) butter

1 1/2 tsp fine salt

120ml (1/2 cup) heavy whipping cream (either single or double is fine)


Extras:

a punnet of fresh blueberries, to be used before and after baking.

4 heaping tbsp of marmalade


Directions

Make the dough according to Paul’s instructions (so perfect for beginner’s and what a wonderful result you’ll yield!). Top tip: make sure you’re in a cool environment, to prevent any of all that butter from melting. Preserve the future of your unbaked dough.

Modifications:

During the last fridge prove, preheat your oven to 200C and start on the frangipane and salted caramel for the drizzle. For the frangipane, process the almonds and sugar  together in a food processor until you get a texture close to coarse meal. Add the rest of the frangipane ingredients and blend until smooth.

For the salted caramel, heat sugar in a medium saucepan over medium heat, stirring occasionally with wooden spoon. Continue to do so until all the sugar melts into a pool of dark, glossy amber liquid. Once this stage is reached, add the salted butter. It’s a pretty vigorous reaction, this one. Stir with spoon to help the melting process. Once all the butter has melted, slowly add in heavy whipping cream. This part is even more vigorous that the previous one; it will spit and rise as it starts to boil. Let the mixture boil like this for another minute before taking the pan off the heat. Let cool for another couple minutes before stirring in the salt. For the icing, mix with enough icing sugar so you get a thin drizzling consistency.

Once the dough has finished proving in the fridge, ready around 3 baking pans and cut out some parchment paper to fit each. Remove the dough from the fridge, lightly flour your work surface and roll out the dough till it’s about 7-8mm thick. With the help of a ruler, cut out squares measuring 7x7cm. At each corner, use a sharp knife to cut diagonally towards the centre, about 3cm in. You should get what looks like a box with 4 straight scores running from each of the 4 corners, without any of the lines overlapping since you don’t cross the middle. Take one corner and fold it towards the middle, then alternate with the remaining 7 corners, so you end up with a 4-segmented parcel. Put a teaspoon of frangipane on each pastry, then plop 2-3 fresh blueberries on top. Beat an egg and brush the exposed pastry with the egg wash.

Bake in the preheated oven for 15-20 minutes. Once out, brush with warmed marmalade (simply warm the marmalade in the microwave for 20 seconds), then drizzle on the salted caramel icing. Add more fresh blueberries, and devour immediately or soon. These can be kept in the fridge for a couple of days, just remember to toast before consuming.


Kaya Mochi

A few of you have asked me previously about my diet, and why I blog about breakfast and dessert specifically. I must say, I have recently made a minor, albeit profound change. To sum it up, I adopt a mostly plant-based, whole foods diet. The main reasons for this are:

Eating Animals

Forks over Knives

The China Study

Why the deprivation? Meat tastes the best!! I modified my About and FAQ’ page to cover a few points, but the above links are what induced a fixated curiosity on our warped nutritional conventions in the 21st century. So go ahead, click click click. On all the links.

Despite everything I say on adopting this diet, part of me feels a little sad because I do still eat a little meat, rendering my conviction less extreme, less concrete. It’s cultural convention to eat meat prepared for you, say, by your genius cook of a grandmother. This is why I still eat meat, albeit much less, replacing most of it with more starch and vegetables. And you know what? I haven’t felt better. Since the difficulty is justified, for reasons both ethical and environmental, ‘plant-based’ no longer carries the weight of ‘deprivation’ anymore. It really doesn’t. And I’ve finally come to realise that this is the right thing to do. If any of you have a similar experience with this, I’d love for you to share.

The second bit on why I choose to blog about breakfast and dessert specifically is also in the FAQ. I mean, my sweet tooth obviously deserves a bit of criticism. So check out the page for all that jazz as well.

Ok. Let’s talk about mochi!

Actually, I don’t know why that elicited an exclamation, because truth be told, I never was the biggest fan of mochi. I honestly just felt like trying something a little different. Increased exposure and this experiment indeed reversed my dislike.

Mochi is a delicate Japanese dessert, its name being derived from the type of flour used to make it– mochiko (rice) flour. Plus points for anyone who would potentially benefit: rice flour is gluten-free, with a substantial amount of niacin and B6. Amazing how it still yields such a chewy texture after being combined with the other ingredients. Typically stuffed with this divine, sticky red bean paste, but I changed it up just a little, deciding instead to fill it with homemade kaya (pandan spread). Weaved nostalgic taste into a minor innovative tweak. Each bite was sticky, slightly chewy, and bursting with the earthy, coconutty goodness of kaya.

Processed with VSCO with f2 presetProcessed with VSCO with f2 presetProcessed with VSCO with f2 preset

Kaya Mochi (makes around 10 depending on how big you like them, mochi dough recipe)

Ingredients

160g mochiko (rice) flour

180g icing sugar

300ml (1.25 cups) water

cornstarch for dusting

8-12 tsp kaya

Directions

Ready a large bowl full of cornstarch for dusting your hands and the mochi.

In a saucepan, whisk together the flour and water. Turn the stove heat to medium, add the sugar, and use a wooden spoon to continue stirring. Cook the mixture until it starts to look almost gelatinous, around 7-10 minutes. You will see the mixture thicken, and look slightly glassy on top. Leave to cool for another 10 minutes before touching and fiddling. Dust your hands with cornstarch, then scoop a bit of the mixture with a teaspoon. This bit onwards is a slightly sticky ride, but it’ll be worth it! Roll between your palms until you get a smooth, white ball. Use your fingers to flatten it a little, and place a tiny dollop of kaya in the middle. Gently pull the sides over the ball, and gently roll the mochi again to get an even sphere.

Dust with a mix of cornstarch and icing sugar before eating. Store in the refrigerator for up to a couple of days.