Apple Galette

Processed with VSCOcam with f2 preset

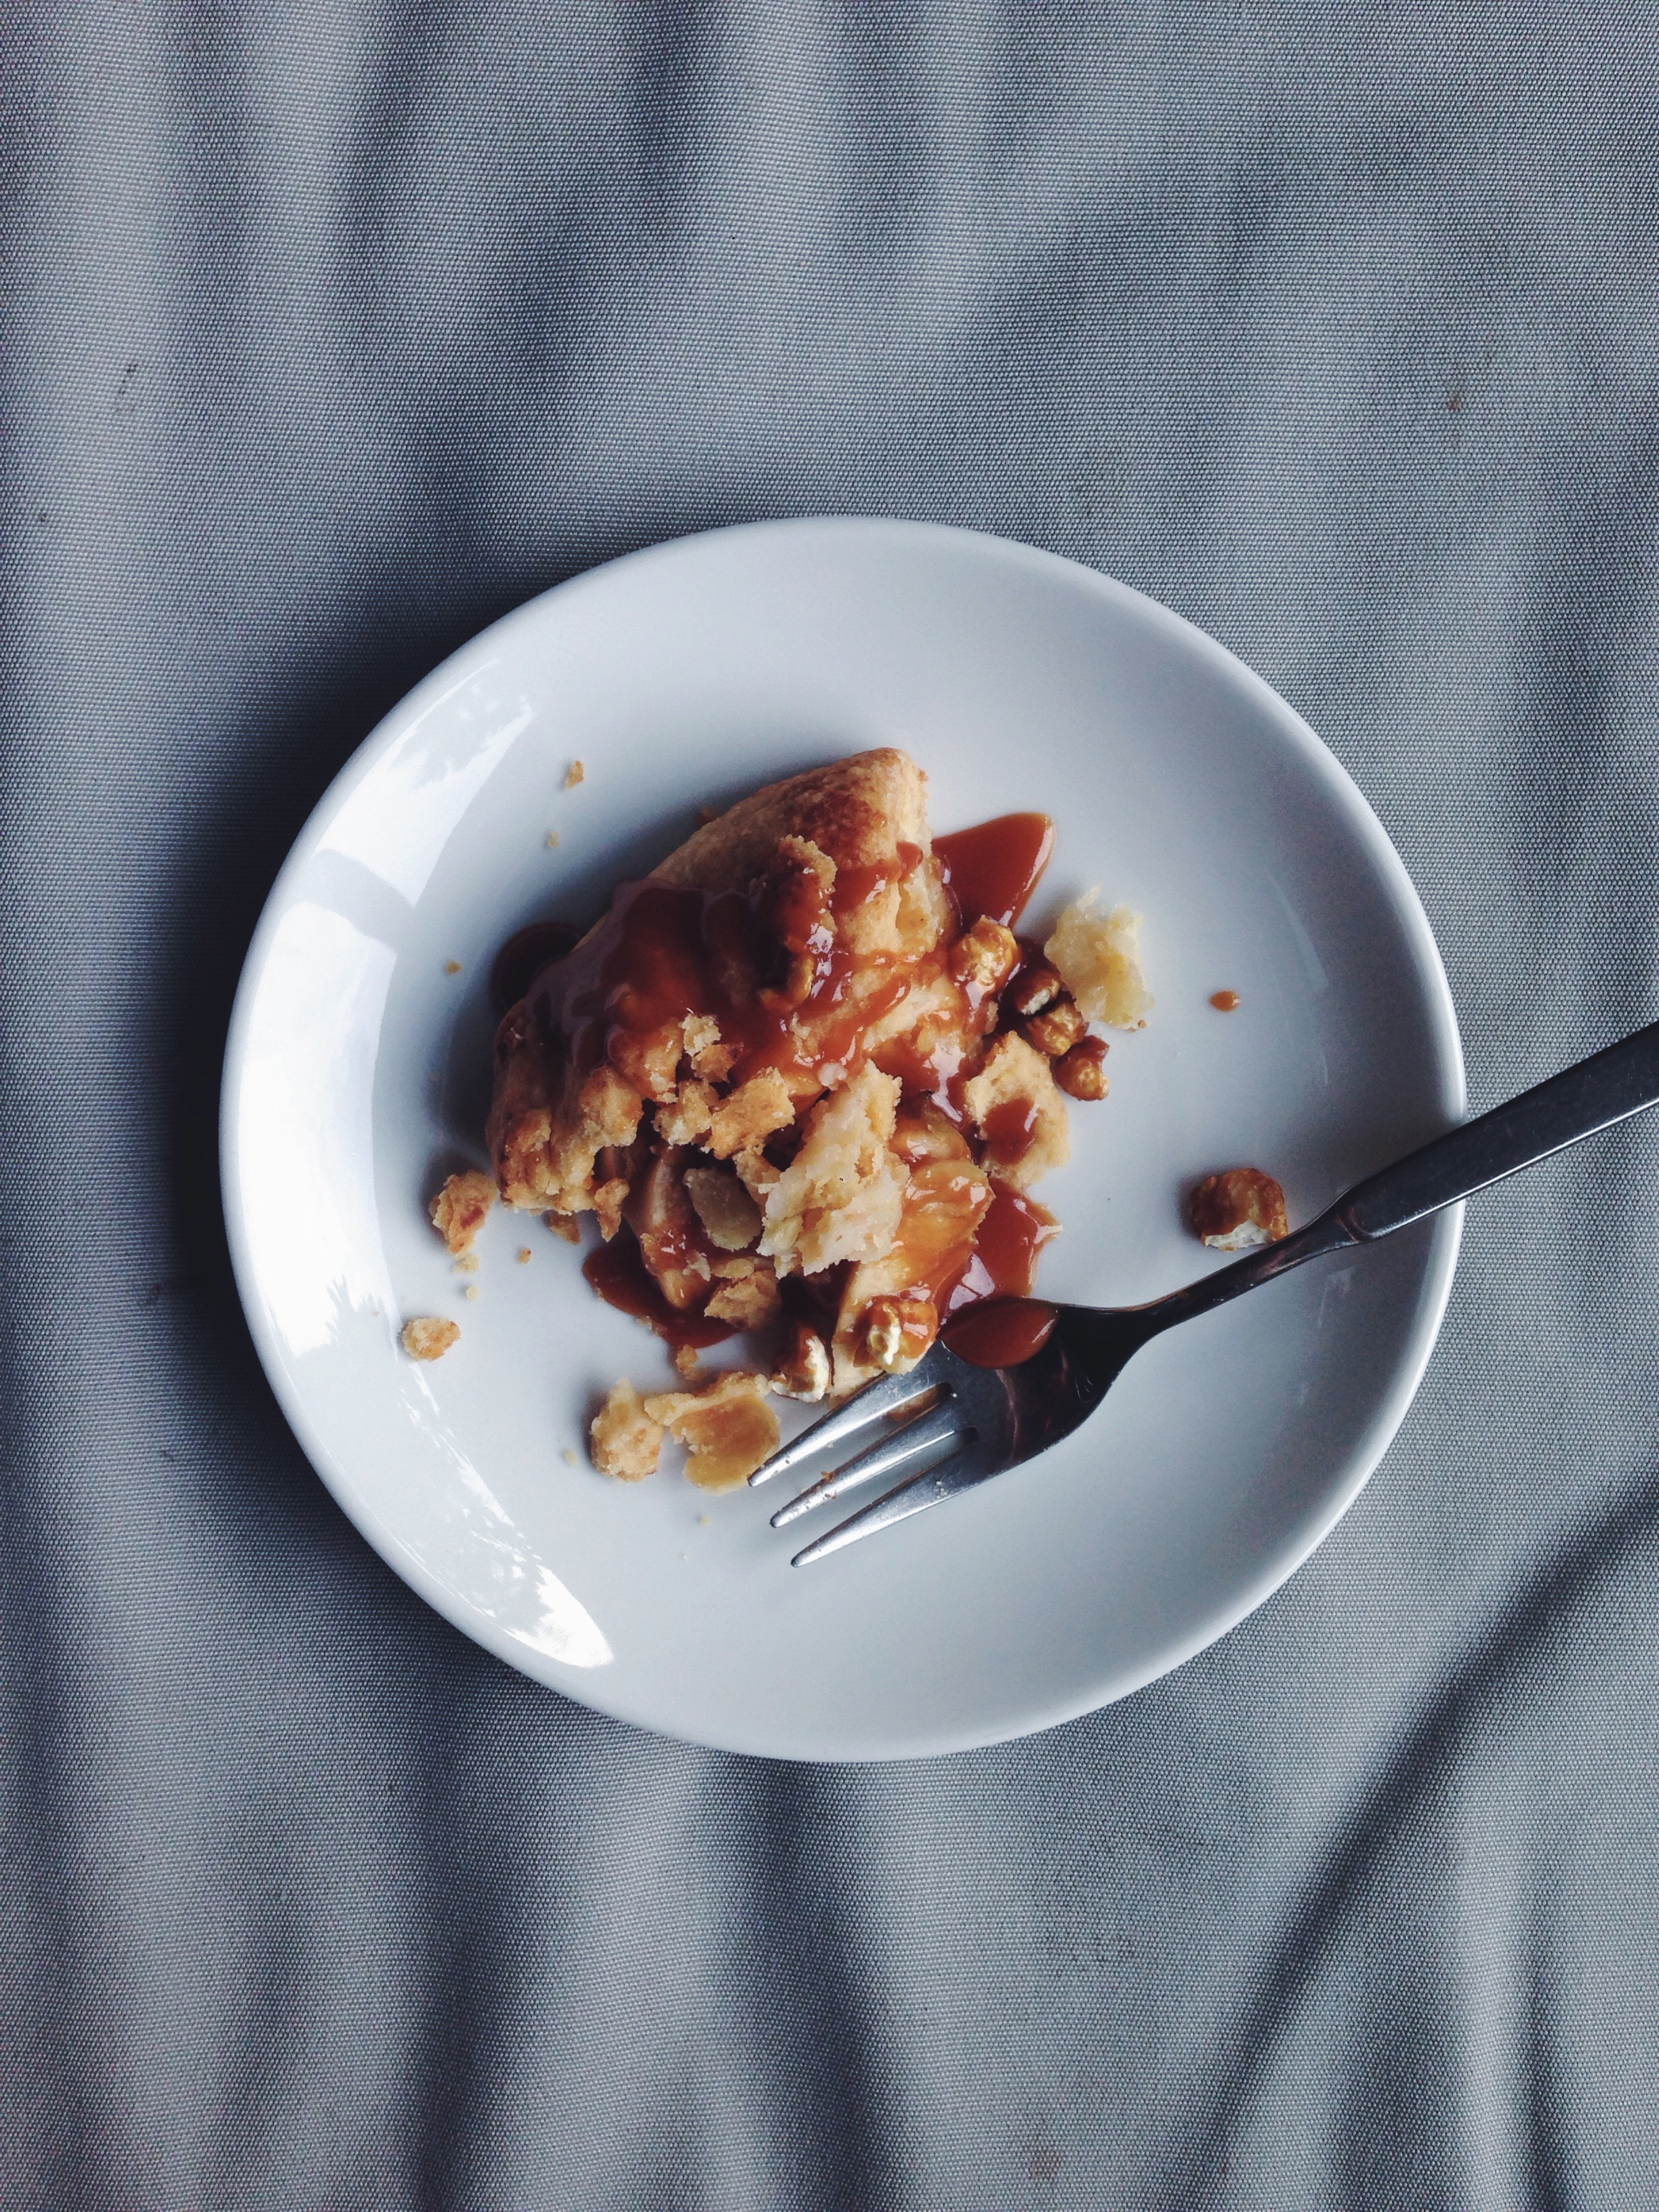
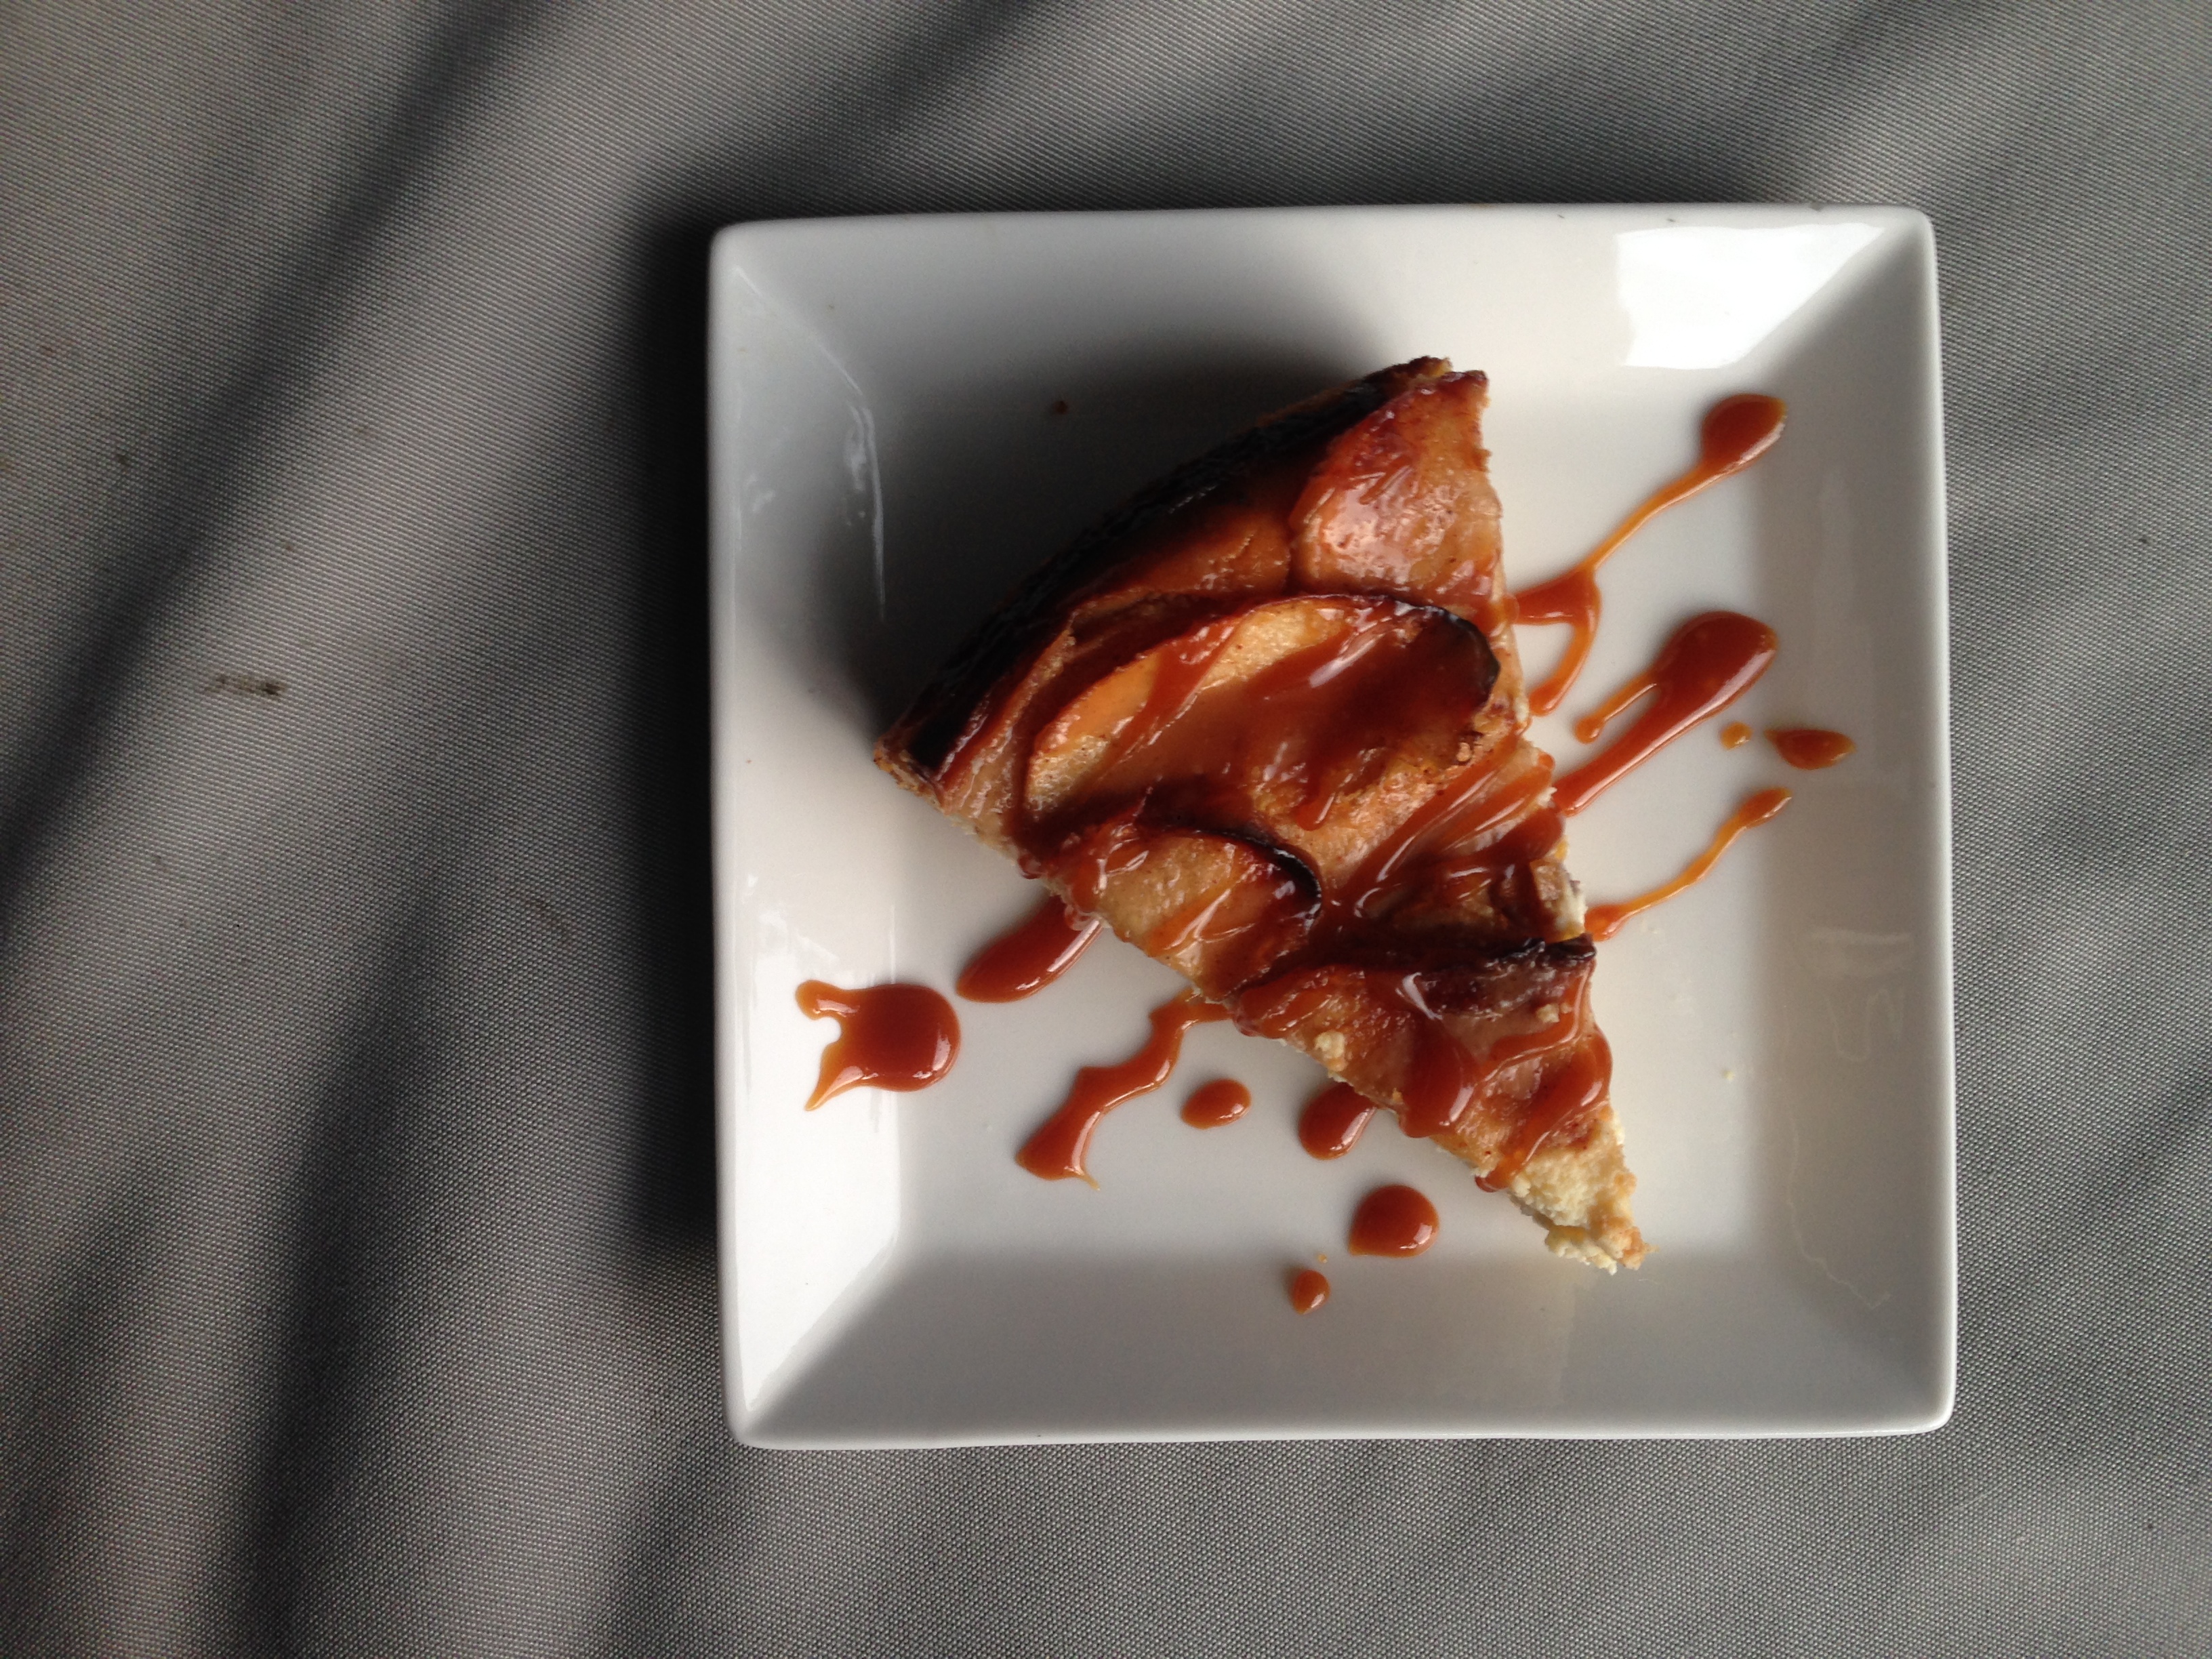
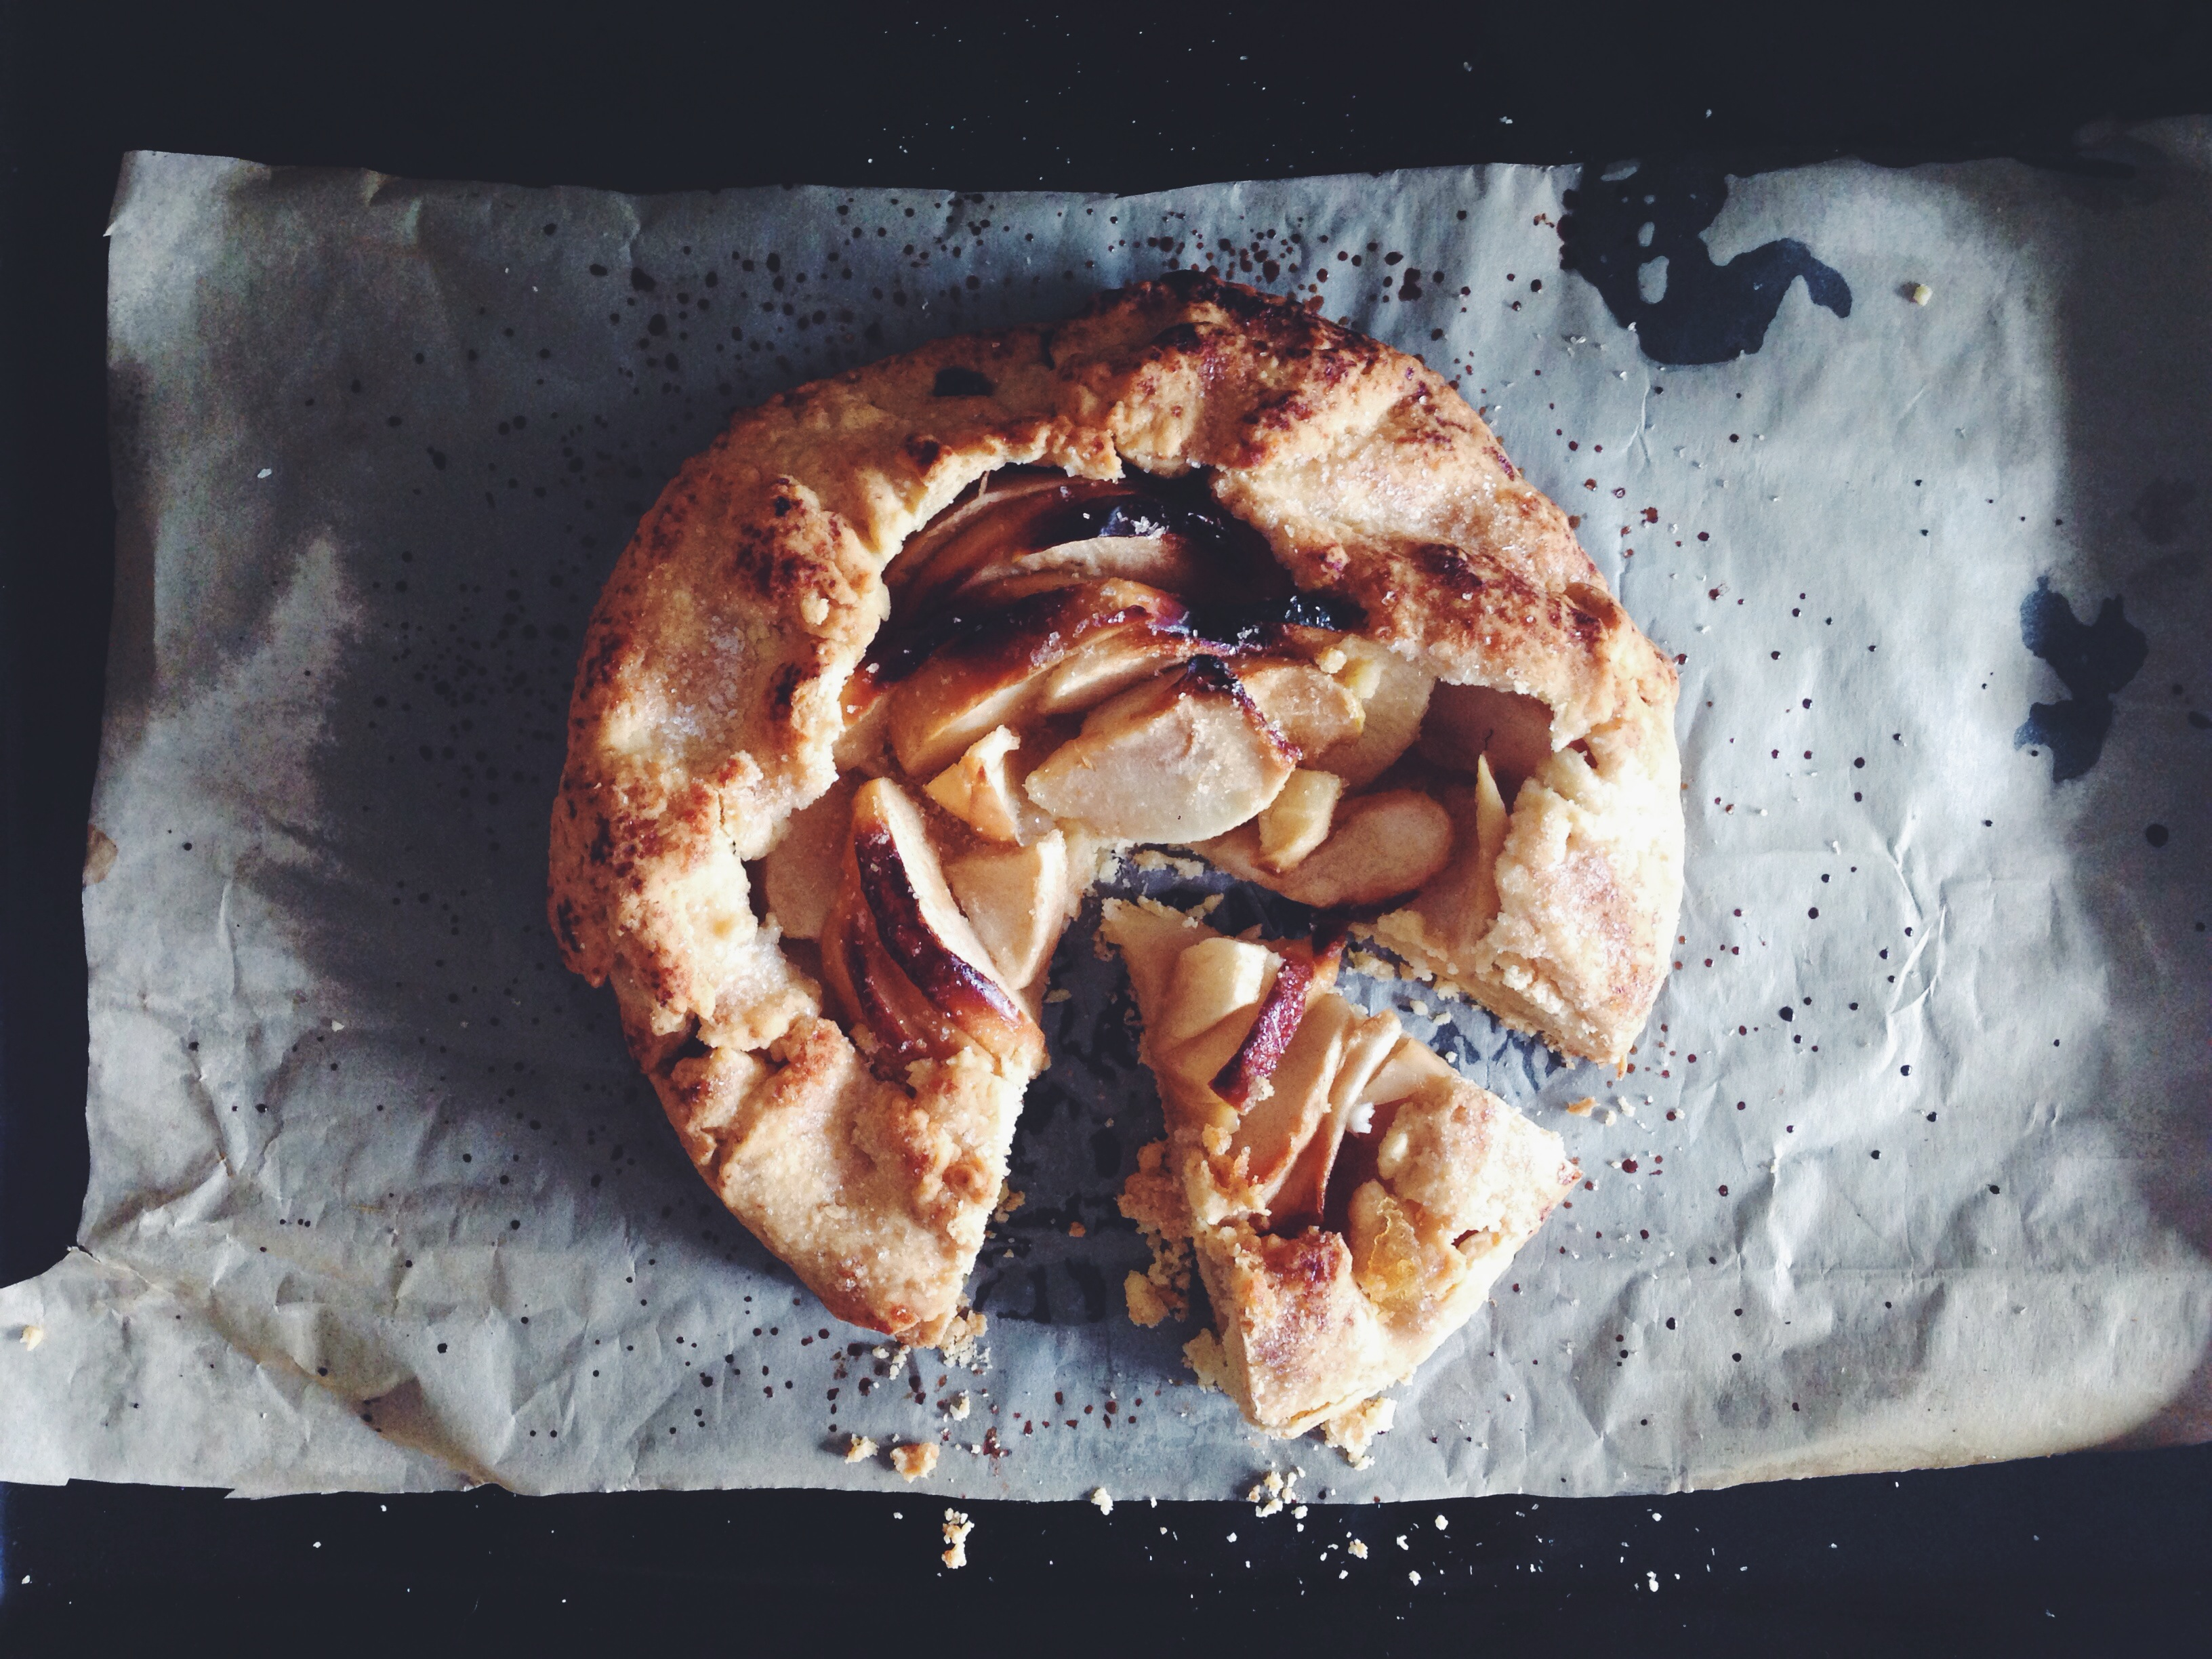
I had been meaning to make an apple galette for quite a while now. I must be this specific– apple galette. Nothing else would have done it for me. Just… Nothing. I had to, and the urge was running wild; coursing hot through my blood. I had looked at quite a few recipes, and surprisingly most required the dough to be set in the fridge for at least an hour or so (understandably), and for the apples to go through a caramelising or some other cook-through method beforehand. Not that I would have minded so terribly… But sadly I am a creature of convenience. Stark laziness, even, sometimes. I’ll be honest. I was really pleased with how this turned out, even after making the radical adaptations. I like those burnt edges. Kill me if you wish. I do. The buttery, caramelised apples with a tender bottom crust go wonderfully with a generous scoop of vanilla ice cream. I paired a slice with some leftover salted caramel sauce, because I didn’t have any ice cream lying around and yes, that was enough to break my heart. The flavours are simple, wonderful, joyful.

As a student, I don’t have hours and hours to play around with recipes; words like ‘proving’ and ‘resting in the damn fridge for 40 hours’ just don’t cut it most of the time. I came across smittenkitchen’s recipe for the ‘simplest apple tart’, and thought it just perfect to play with. My own adjustments were pretty radical, so I’m going to re-type everything I changed. I swear, dough making in this bloody Singapore heat is a right pain, so I suggest only using things like butter and cold water right when you need it, and straight out of the fridge. Blast the air con and get to work!

Processed with VSCOcam with f2 preset Processed with VSCOcam with f2 preset

Ingredients:

For galette dough:

  • 1 cup all-purpose flour
  • 1 and a half tablespoons sugar
  • pinch of salt
  • 80g cold unsalted butter, cut into small cubes (I used half salted, half unsalted, just because I love a little extra)
  • 2 tablespoons cold water

For apple filling:

  • 3-4 small apples, sliced into thin slivers
  • 30g melted butter
  • 3 tablespoons brown sugar (preferably dark muscovado, if you have that sort of thing lying around)
  • 1 tablespoon cinnamon
  • half teaspoon nutmeg

For glaze:

  • a quarter cup of your favourite jam (I used marmalade), warmed for a couple minutes in the microwave


Method:

Slice the apples and mix with the sugar, cinnamon and nutmeg in a large bowl. Set aside. Preheat your oven to 200 degrees C.

In a food processor, blend the flour, sugar, salt and butter. Pulse until the biggest pieces resemble medium-sized peas. Slowly add in the cold water, continuing to pulse at a moderate speed. I only needed around 2 tablespoons. Grab a handful of dough and squeeze to see if it holds together. If it does, then it’s fine. Tip the dough out onto a lightly floured surface and gather into a round and slightly flattened ball. Wrap in cling film and refrigerate for 10 minutes (Yes! 10. Praise the Lord).

Take the dough out from fridge and using a floured rolling pin on lightly floured surface, roll out until it’s approximately 11 inches wide. Place dough onto a greased, large baking dish lined with parchment (VERY IMPORTANT STEP HERE. DO NOT be like me and do this only after painstakingly placing the apples on top. Please. Learn from my mistakes. Or I will cry for you.)

Take your beautiful cinnamon and sugar-crusted apples and layer them, one by one in a ring spiral, with the outer edges 1.5-2 inches away from the edge of the dough. Continue layering in a ring, working your way to the centre of the circle. Once you reach the centre, you can bend a few slices to fit the very middle, like a rose. If you have extra slices, place them in random nooks around the ring, so they all fit nicely.

Now, this is my favourite bit: Take the outside edges of dough and fold them over, in sections around the ring of apples. Let it be loose and rustic and messy. Enough with the neat crimping. That’s for the uppity. Now brush the melted butter over the edges you folded over and the exposed apple slices. Yum yum. Sprinkle the sugar over the whole thing. Free and easy. Footloose and fancy-free. The joy, the joy, I tell you.

Bake in preheated oven on middle rack for 40 minutes. Leave it in the oven to cool before taking out.

Warm your favourite jam in the microwave for a few minutes, and using a pastry brush, brush all over that beautiful little rustic thing. Galette. The word makes me swoon. The gazelle of all tarts. The almighty apple galette.

Processed with VSCOcam with f2 preset

The Bravery

Processed with VSCOcam with f2 preset

Shabby chic.

I don’t know about you, but I’m quite liking the old industrial theme of some places. Including this one. There was massive self-conflict this morning, when I was debating between hopping off to a more convenient spot, or deliberately trudging along unknown sidewalks in the heat to arrive at this signless, but rather enticing spot in the Lavender Street area. Neon red and black, almost translucent windows, stark, straightforward pale wooden furniture, the exclusive hidden feel. It felt as if there was a children’s party right before I walked in and they forgot to take home some decorations. Child VS sophisticate. I liked it.

Lavender Latte–$5.50

‘Weird’, I can already hear some of you say. Ok, no. If you’re planning to come for the coffee, you can’t, just can’t leave without trying this. Exquisitely smooth, creamy, mildly sweet and tickled with the fine infusion of lavender. Understated, milky elegance. This is a latte after all. Skip if you’re not a fan of floral-infused drinks. My mother would empathise.

IMG_0276
Crostini– $6.50 Aubergine, chickpeas, mint, feta and onion atop sourdough toast

IMG_0277 IMG_0278


They are famous for their banana triple-stack pancakes, but for some ridiculous reason I was craving something a little more on the savoury side, and so I ordered this hulk of a brunch dish. Mushy, plump pieces of aubergine, translucent onions, fading mint. The chickpeas were tainted with the juices of the dark and stubborn vegetable they were cooked with. Looks quite a mess up there, but my fork told otherwise. There could have been more feta (sprinkles don’t cut it) to enliven the dish a little more, adding a better kick of flavour. Perhaps a bit more spice or pepper, but on the whole this was pretty darn delicious. I started to enjoy the dish even more as time went by, since the toppings melded so nicely with one another as they cooled down, allowing the flavours to emerge properly on my palate. The sourdough yielded a wonderful flavour and was properly oiled and toasted.

Processed with VSCOcam with f2 preset
Cappuccino– $4.50

Processed with VSCOcam with f2 preset


‘It’s on the house’, he said. Kind, kind barista!

Stumped and stunned. But hell, free coffee only makes one a better person, right? I’m really quite impressed by the service here; I got to talk to most of the staff at the counter, and the lady told me I was free to stay for as long as I wanted to, unless it got too crowded. So there I sat, working at my computer, and the hours went by in the best way possible. The tables are perfect for work, and the music isn’t too loud either. What immense pleasure.

Smooth, sophisticated, but a little too milky and not enough punch than what I’m used to. It was a dream to sip, but a more acidic edge would have been preferable. That being said, I wouldn’t mind ordering this again, for the sake of sentiment and that creamy consistency.

Other menu options include eggs poached or fried on artisan bread, the pancakes I mentioned earlier, Mediterranean-inspired eggs, avocado and bacon, smoked salmon sandwiches and a small selection of sweet treats at the display counter. They also serve iced coffee with shots of mocha, espresso or soy, as well as Gryphon (ooh, how aristocratic) tea. In all honesty, I didn’t feel too bad paying for the quality of what I got.


Rating: 4.5/5

The Bravery Cafe

66 Horne Road

8:00am – 8:00pm daily, closed on Tuesdays

Carpenter and Cook

Processed with VSCOcam with f2 preset
Passionfruit Meringue Tart– $6.50

Processed with VSCOcam with f2 preset


Brain dead. Slow, lethargic. We trudged uphill. And lo and behold, we found the quaintest little hideout at Upper Bukit Timah. Felt like the queens of the hill, and frankly, all energy was restored soon after. Walking at least a mile in that heat was pretty worth it.

Did I say quaint? I said quaintest. The plates, the decor, the everything. I had been meaning to visit this place for at least a year and half, and finally I can announce I have been, and have eaten. Eaten what, exactly? Why, only some of the best tarts I have tried in the country. Starting off with this passionfruit meringue babe, one in their ‘The Queen of Hearts Tarts’ series. Yeah that’s right, they boast six different sorts of tarts to please the senses. One walks in and marvels at the Alice in Wonderland clocks and cutlery, but marvels even more at the quality of double-baked (yes!!) crusts. And I don’t mind double-baked crusts. Frankly, I prefer it. This tart sings with the zesty tang of passionfruit without letting it dampen the filling. Cutting into it was admittedly a little tough, with my fork splaying everywhere, but the surprise lay in the filling, which in contrast to the stout and hardy crust, was very moist and more runny than other fillings I have encountered. Silky, rich, topped with the prettiest dollops of sweet meringue.

And goodness, the lemonade. Fizzy, sweet, gorgeous, refreshing.

Processed with VSCOcam with f2 preset
chocolate sea salt caramel and lemon cream tarts– $6.50, lemon drizzle ‘Eat Me’ mini loaf– $5.00

IMG_0250


I couldn’t not try more babies. Saying it like that is horribly sadistic, but I really can’t find any other appropriate way to describe them. They are such… babies. Mini, petite, pretty, delicate. Too much so to be touched by even the most delicate of forks. And I am extremely, eternally grateful to my friend Liz’s mum for helping me buy them. I still feel a little embarrassed!

The lemon cream tart was my queen. Probably the best lemon tart I have tried so far.

Lemon anything is God-sent. I personally don’t know what would happen to me if I was deprived of this angel of a fruit. And I certainly felt like a queen eating it for breakfast this morning. Equals. The filling, contrary to popular belief, is not too sour at all, and perfectly complements the extraordinarily buttery and only mildly sweet crust. The sourness wasn’t let down by a dribbly consistency, but instead was spread evenly throughout a bright-hued, sacred pale yellow. Vivid and creamy. It’s hard to stop yabbering on about both shell and filling. It’s calling me.

Most everything about it was faultless, from the smooth and silky chocolate top and gooey, almost smoky caramel insides. Cut like butter with a mini fork. Ravishing. A little more salt and perhaps a more sophisticated grade of chocolate would be preferable, but overall, my, my.

The lemon drizzle cake is part of their ‘Eat Me’ loaf cake series, and other options include banana, pear almond and apple cobbler. As I have mentioned time and time again, lemon anything is irresistible. I couldn’t.. not. I was heavily impressed by this one in particular; the cake was of the right tart to sweet ratio, the inside was dense enough to pack in the perfect amount of flavour, light enough to hold the title of a posh fairy cake.  The icing was an uplifting experience, I swear.

The downside to all of this was the price. Let’s be real. I was extremely hesitant to pay more than 6 bucks for one minuscule tart, which might not have lived up to expectations. Considering this place was rather off-the-beaten track, and required quite a trek to get to, the prices incited a moderate degree of annoyance. Then again, they do make everything themselves and the quality is pretty unbeatable. They obviously take great pride in their work and efforts, although the service available could have been a tad more professional. I overheard one at the counter asking, in a rather audible tone, if some strange liquid in a cup ‘smelt like shit’. I could’ve said it, anyone could have said it. But right when I was eating a passionfruit meringue tart…?

If anything, go for their lemon-themes tarts or cakes. Those are certainly worth every bead of sweat. They also sell savoury dishes such as quiches, savoury brioche buns and make their own jams. I highly, highly recommend at least one visit!


Carpenter and Cook

19 Lorong Kilat (Upper Bukit Timah area)

6463 3648

Tues-Sat: 10am–10pm

Sun: 10am–7pm

Closed Mondays

Dark chocolate and sea salt on toast

No, this does not need a recipe. I’d just like to revel in the glory of two of my favourite things in the world– dark chocolate and toast. Just.

Processed with VSCOcam with f2 preset Processed with VSCOcam with f2 preset

I don’t think it’s right not to have this at least once in your life.

I bought a new loaf of campagne yuzu bread yesterday on impulse, because that thing looked too good to pass up. It just sat there, lonely, cold, at the display counter. How could I not?

Here is what you need:

  • your favourite bread, whatever that might be. Grab a white bloomer if that satisfies you!
  • couple squares good quality dark chocolate (70% is ideal)
  • sprinkle of coarse salt (I used pink Himalayan)
  • a toaster
  • I’ll stop here
  • too simple

I always have dark chocolate around. Somewhere. Anything less than 70% might just be child’s play, but nothing against that.

Literally take the chocolate, pop it on your favourite slice, slide into the toaster or broiler for 3 minutes until crusty and darkened. Sprinkle on pinch of coarse sea salt, before doing your business.

That’s all I have to say (!)


Salted Caramel Apple Cheesecake

IMG_9963 IMG_9989

Because I actually cannot believe this is a (mostly) improvised, pseudo-original recipe. Honestly, it’s pretty glorious. Ok fine, if that’s a little too much undeserved self-praise, I guess I’ll just say that darn, I’m one enlightened cake-maker. A mixing of some fine ingredients, a thrusting of good pink ladies on the top, a sudden decision to say…

YES, I really do think salted caramel will go nicely with that.

Off the whim, all too sudden. Yesterday was the due date for the IB’s Extended Essay, so I feel it very fitting to celebrate with this recipe. It was a short return to my childhood of tree-climbing and grazed knees, after which I’d come home to find a well-sized slice of cheesecake my mother or grandmother bought from some gourmet store, which I enjoyed anyway because… cheesecake. I never found the rich tang displeasing as a kid; it was one of the few sorts of cakes I didn’t mind having at birthday parties. The flimsy, airy stuff never fascinated me. I lusted after half-cloying goop. I admit that this batch actually could have used twice as much salt in the caramel topping to counter the lemony, apple-y sweetness of the cheesecake, so I’ll put the better amount in for your benefit.

And with that, let’s go.


Ingredients

For the base:

  • 1 cup flour
  • 1 egg yolk
  • 1/4 cup light brown sugar
  • 1 teaspoon salt
  • 1/2 cup (113g) softened, unsalted butter. Good butter, please.

For the filling and apple top:

  • 2 packages Philadelphia cream cheese, left to soften at room temperature (this would take at least a good half hour)
  • 1/2 cup white castor sugar
  • 1/4 cup freshly squeezed lemon juice
  • 1/4 cup sour cream (or Greek yoghurt, which was what I used since I didn’t have sour cream on hand)
  • 1 1/2 tablespoons vanilla extract
  • 3 eggs

For apple topping:

  • 2 small pink lady apples, or any sort which you enjoy eating on its own. Grab a green one if that’s all you have; doesn’t change the final product a whole lot. It actually depends how much of a flamboyant apple character you want your cake to have– the more the merrier, though I find thin layers atop the filling work well to even out the caramelisation process during baking.
  • 1/3 cup white sugar
  • one teaspoon ground cinnamon

For the divine gift of God that is salted caramel (makes a medium batch so it may be used in the future):

  • 1 cup white sugar
  • 95g salted (!!) butter
  • 3 teaspoons fine salt
  • 1/2 cup heavy whipping cream (either single or double is fine)


Procedure

Before I start, I just want to say that I’ve recently become more inclined to writing method in prose, mostly due to how I had to do so for my extended essay, and I enjoy the more personal feel it establishes. But yes, cheesecake.

Start of by preheating your oven to 200 degrees C (400 degrees F), and grease a 9-inch round cake tin.Thinly slice your apples and toss them in a medium-sized bowl with the sugar and cinnamon. Set aside for now.

Make the base: With a wooden spoon, or if you’re 80% Neanderthal like me, your hands, mix the five ingredients together well in another medium bowl. Press into base of your cake tin and half an inch up the sides. Make sure the bottom is even. If you live in a supremely hot climate like I do, put the base in the fridge to prevent the butter from melting and causing the pressed-up sides to sink and go limp.

Make the filling: Using a whisk (not the electrical sort, just the single whisks), cream the cream cheese and sugar together till no more sugar lumps are present in mixture. Add in the eggs one by one and whisk well between each addition. Then, add in the fresh lemon juice, sour cream/greek yoghurt and vanilla. Use a wooden spoon to mix the last few ingredients in order to incorporate as little air as possible. I found this really helped with the final texture of the cheesecake.

Assemble and bake: Take tin out of fridge and pour filling on top. No pre-baking of crust, no nothing. Just pour and plop in the oven. Oh, after you scatter those moreish, cinnamon-y apples on top, of course. Please don’t forget that bit. As I said earlier, I find that thin layers arranged in rings starting from the edges serve to kick the look factor up 10 notches. Just so… Pretty. I could’ve been neater, but I was too excited embarking on this exciting baking expedition. Literally an expedition too, because I was running around grabbing ingredients and whatnot. I need to organise myself. Anyways, once the layers are done (I just did one nice layer), put the cheesecake into the preheated oven and bake it for 15 minutes. Once 15 minutes is up, turn down the temperature to 190 degrees C (375 degrees F) and bake for another 30-35 minutes. I took mine out after 33 minutes, because that’s the way I did it the first time I baked a cheesecake this method, and there were no cracks whatsoever. Works a dream.

Make the salted caramel (adapted from Sally’s Baking Addiction): Heat sugar in a medium saucepan over medium heat, stirring occasionally with wooden spoon. Continue to do so until all the sugar melts into a pool of dark, glossy amber liquid. Once this stage is reached, add the salted butter. It’s a pretty vigorous reaction, this one. Stir with spoon to help the melting process. Once all the butter has melted, slowly add in heavy whipping cream. This part is even more vigorous that the previous one; it will spit and rise as it starts to boil. Let the mixture boil like this for another minute before taking the pan off the heat. Let cool for another couple minutes before stirring in the salt. Store in an airtight container for future use, and reserve a half cup for later.

Once cheesecake is done in the oven, carefully take out. It should still be a little wobbly and tender in the middle. Leave to cool in the same pan on a cooling rack for 15 minutes. After 15 minutes, microwave half of the reserved caramel (it would have gone a little thicker and less liquidy) for a few seconds and liberally drizzle all over top of the cheesecake. Place the cake inside the fridge and leave for at least 4 hours or overnight. It’s good to make this kind of thing the day before. No sweat.

After at least 4 hours (or overnight), take cake out of fridge. Microwave the remainder of the reserved caramel and drizzle it over the top, however you like, however much you want. You’ll probably have some caramel left.

Bam. Double salted caramel whammy.

I’m thinking grape and crisp rice cheesecake next time, just because.