Eggless Honey Chocolate Oat Cookies

I could drone on about the wonders of a cookie and the definite importance of all the components needed to make it, well, wonderful. But to sum this entire post up: Holy shite, little did I know that miracles are within reach without the use of an imperative baking ingredient– eggs.

It was hard not to panic, because the cookie craving was kicking strong. An impatient unborn child raging in my abdomen. I just wanted a cookie, and no, I didn’t want to walk all the way to Sainsbury’s just to buy more basic life needs. That’s for Saturdays, and I don’t mind waiting.

Took my chances.

I was even lacking on the sugar side, and that’s where the honey stepped in. Oh, the honey. Without much sugar left, this was the main sweetener, and surprisingly the biggest flavourer. I didn’t think the flavour would be so profound in the final result, but the first thing that popped into my head when I took a bite was, heck, this is a honey cookie. Which is why the word honey comes before chocolate in the title, and that’s highly, highly unusual. It’s right there, it says everything. It’s fact.

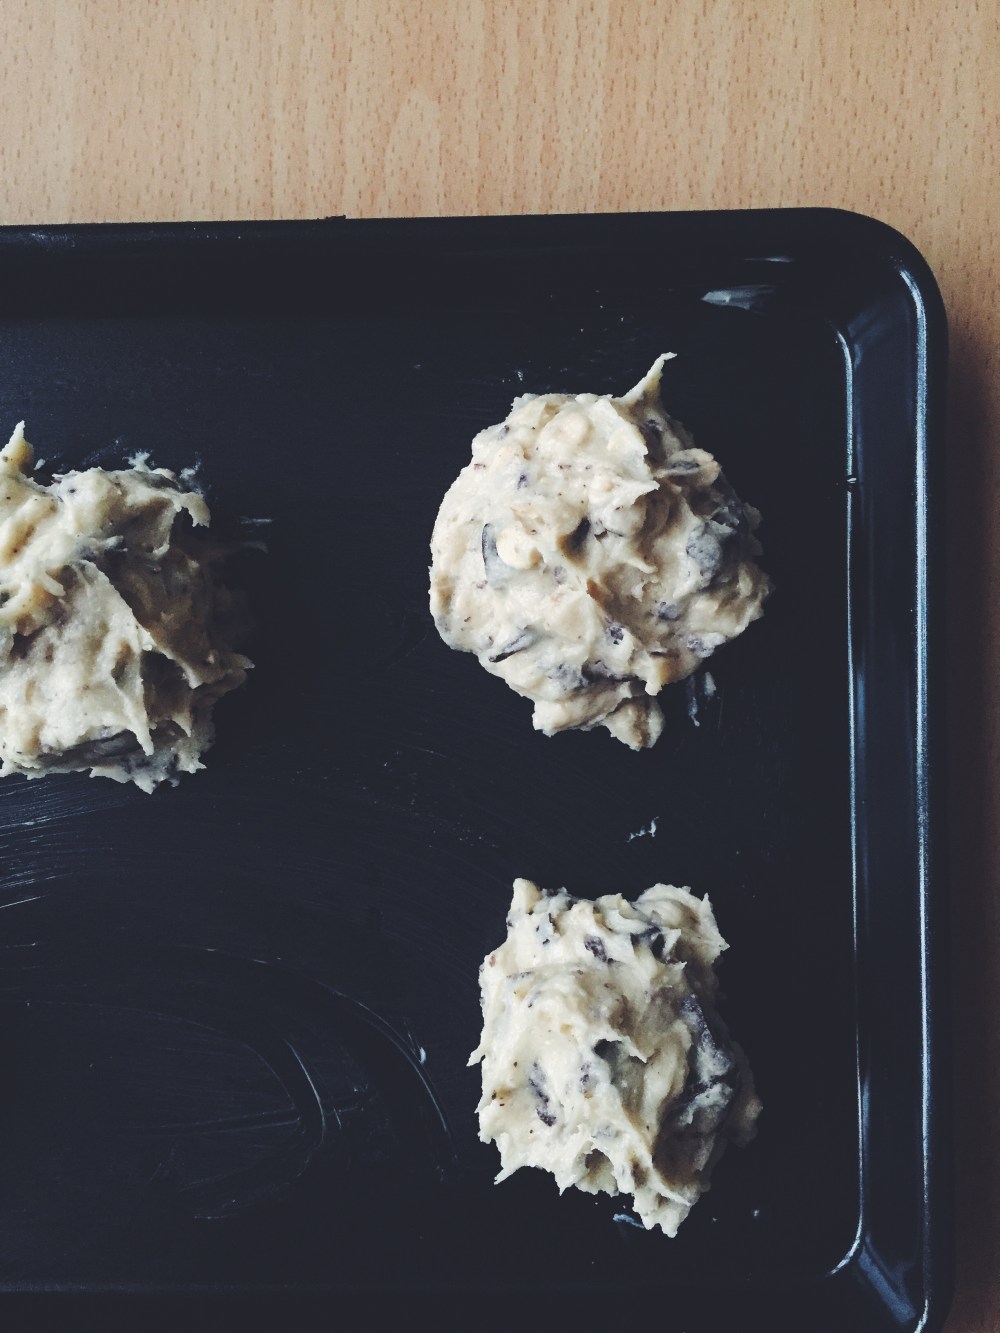
The first batch was not a total failure, but I didn’t quite get what I was looking for. The flavours were all there, but everything was an absolute mess. The overly spread out cookies ranked 10 on the edibility scale but about a 2 for aesthetics. After tweaking the baking temperature and proportion of flour, things were looking up. It’s a little messy, and you end up needing to wait a little longer than usual for a proper set in the middle before tucking into a thin, soft stomach of chewy batter. I thank all that honey and zero egg. It’s grossly divine when you get a bit of chocolate and a bit of oaty chew. Yes, chewy is a key descriptive word here.

Happy mistakes.

Eggless Honey Chocolate Oat Cookies (makes 10-12 medium cookies)

Ingredients

130g (around 1 cup) all-purpose flour

23g (1/4 cup) whole rolled oats

40g (slightly less than a half cup) white sugar

100g (3/4) cup chopped chocolate

1 tsp vanilla extract

113g (1/2 cup) butter, softened at room temperature

8-ml (1/3 cup) honey

1 tsp baking soda

pinch of coarse salt

Directions

Preheat your oven to 350F (177C) and grease 2 large baking sheets. In a medium bowl, whisk together the dry ingredients– flour, oats, baking soda and chopped chocolate (not the salt!). In a large bowl, whisk together the room temperature butter, white sugar, honey, vanilla and salt. Pour the dry mix into this large bowl and stir together with a spatula or wooden spoon, just until everything comes together. Dollop tablespoonfuls of the mixture on the baking sheets, leaving at least 2 inches in between the cookies. Bake for 15-18 minutes in the preheated oven. Once done, leave to cool for at least half an hour.

Chocolate Banana Mascarpone Sandwich

Sundays can be more magical than you ever think them to be.

A quickie, because I want you to make it now, or at least soon, before the magic of what you see above dissipates. Chocolate and banana is a sworn classic, at least to me anyways, and this sandwich has all the goods and more. I wouldn’t call it ‘chocolate and cheese’, because that juxtaposition looks and sounds sacrilegious, because I might as well say ‘chocolate and cheddar’ and make you all gag.

Saturday night made me too pink from the drink. With a late start on Sunday, something easy but lush was much needed. Thrown together in haste, but well astonished afterward. I must thank the gooey, perfect, sinful result of melting chocolate, mascarpone and gooey ripe banana mashed between commercial brioche.

Easy sin.

Chocolate Banana Mascarpone Sandwich (serves 1)

Directions

Heat a pan on medium high heat and ready a generous knob of butter. On one slice of brioche, spread a thick layer of chocolate spread (nutella/chocolate peanut butter/chocolate spread) and layer on slices of banana. On the other slice, spread a thick layer of mascarpone, and then layer on either one big square of dark chocolate or many small chunks of chocolate. Sandwich the slices together. Place butter in preheated pan, spread around a little, then place one side of the sandwich on the hot pan. Leave for 2 minutes, then flip to cook the other side. The surface should be a golden-brown.

Slice on the diagonal (it’s a rule), admire the oozing chocolate and then bite right into the middle while still hot and moist.

Pumpkin Pecan Chocolate Chip Muffins

This is a special dedication to the one and only Emily Olivia Tapp, AKA the girl I’ve been meaning to see for more than a year…? Or a sister-like figure who’s finally on the same continent as me. Blessings are real.

As we sat in Mildred’s in Soho consuming all sorts of outrageously delicious vegan fare (cue sweet potato fries, roasted cauliflower!!, colourful salads and a pretty memorable apple crumble), it suddenly occurred to me just how long it’s been since I’ve seen her, or since I’ve written her a letter, for that matter.  But next to Em, it felt as if not much time has passed between us. In the middle of a million lectures, lab reports and walking everywhere all the time, Tuesday night was peace. Peace and Happy.

So, pumpkin. With chocolate, granola, and pecans. Everything lovingly encased in a golden batter, speckles of everything in each bite. Not a particularly daring experiment, but armed with a new baking pan, cupcake liners and instinct, I did my best. The rooty, earthy pumpkin marries well with the chocolate, and who doesn’t love gooey hot chocolate pockets in the middle of a warm, fluffy muffin?

Pumpkin Pecan Chocolate Chip Muffins (makes 6 muffins)

Ingredients

95g (3/4 cup) (95g) plain all-purpose flour

100g (1/2 cup) white sugar

120g (1/2 cup) pumpkin puree

1 tsp baking powder

1/4 tsp baking soda

pinch salt

1 tbsp ground cinnamon

1/2 tsp vanilla extract

30ml (1/8 cup) vegetable oil

1 egg

1 tbsp whole milk

1/4 cup granola or rolled oats

45g (around 1/3 cup) chopped chocolate

30g (around 1/4 cup) chopped pecans

Directions

Preheat your oven to 180C. In a medium bowl, mix together all the dry ingredients, except for the last 3 (chocolate, pecans and oats/granola). In a larger bowl, mix together all the wet ingredients– egg, oil, pumpkin, milk and vanilla. Mix in the dry ingredients, and just before everything is incorporated, mix in the remaining 3 ingredients. You really only need 2 clean bowls and a wooden spoon for this entire process!

Divide the batter amongst 6 cupcake liners (double the recipe of you want of course), then bake for 25-27 minutes (mine took 25) in the preheated oven. Let cool once finished baking and tuck in. Any uneaten ones can be stored at room temperature for a couple of days, or in the freezer for however long you want.

White Chocolate Caramel Banana Bread

Because we all know banana bread is actually cake.

Side note: I’m back!!

An apology is necessary and expected. The past few weeks have been an absolute blast, busy busy busy, what with moving to London to embark on a very science-y and exciting adventure. Early lectures, lots of note-taking, and the constant fear that I’ve done nothing to deserve a place in this wonderful university. The people are amazing, the work intriguing, and nothing beats the nighttime kitchen adventures, midnight study sessions and later-night parties. Nothing I say here could ever fully justify the experiences that have been thrown at me as well as those which I have yet to encounter. It’s still incredibly surreal; like a dream come true, yet somehow better.

IMG_0719

A modification on one of my previous banana bread recipes, this one has a gallant twist with the incorporation of white chocolate and caramel. If ever I do this again, I’ll be sure to add in a nuttier texture or more earthy flavour component to up the ante of everything else going on in the picture. It’s the sweetest pick-me-up, and a one-bowl wonder. Don’t you love the easy stuff? Remember: I’m all about simple. Sometimes. Ok, most of the time. With college matters whirling around my head, this loaf was a nice and easy break, which took no time at all to put together and bake. Feels good to get into mixing, picking ingredients and experimenting again in the kitchen. Made it with one of the sweetest people I’ve met here, and everyone loved (and then attacked) it. Crowd-pleaser. Bananas. White chocolate. Caramel. Good play.

Now, it feels like home.

White Chocolate Caramel Banana Bread (makes 1 loaf)

Ingredients

3 ripe bananas, mashed

1 1/2 cups (190g) plain white flour

2 1/2 tsp baking powder

1/2 tsp ground cinnamon

1/2 tsp salt

1 egg

1 tsp vanilla extract

1/3 cup (76g) melted unsalted butter

2 tbsp milk

2 heaping tbsp caramel sauce

1/3 cup (68g) white sugar

3/4 cup white chocolate chips (I cut up a good bar)

Directions

Preheat your oven to 180C (350F). In a large bowl, mix together the mashed bananas, milk, sugar, melted butter, egg, salt and vanilla. Then add in the flour, baking powder, cinnamon, milk, caramel sauce. Finally, gently stir in the white chocolate chips. Pour into a greased loaf and bake for 50-55 minutes. This one was ready by 53 minutes.

To serve, slice up and serve with more caramel, marmalade (a touch I personally adore) and more chopped chocolate. I’m guessing whipped cream or ice cream would sort out any lonely evening, too.

No-Bake Fridge Brownies with No-Churn Three-Ingredient Vanilla Ice Cream

Proud (me), happy (my stomach), sublime (everything about this).

If you’re in dire need of a some sin in your life, then I implore you to make these

no-bake, chocolatey, fudgy fridge brownies with no-churn vanilla bean ice cream.

AKA the epitome of i-am-lazy-and-my-oven-is-sometimes-incompetent type of baking. I have those days too.

When I’m all about easy, I mean it. This pairing of deep chocolate and smooth vanilla is irresistible. Classic. The best part is that you unload an inappropriate whopping of ice cream on a piece of brownie and nothing becomes goo for quite a while. I’m the sort who loves a beautiful melting mess, but the time delay prolongs the sensory pleasure of digging into the harmony of sweetness come together by the distinct separation of flavour. Then everything melds together, and the symphony is complete.

These brownies are fudgy, but still retain the texture of a brownie more so than plain old fudge. The addition of crushed biscuits gives it both sweetness and stability. An important point to note in this recipe is that the milk, cream and sugar should be boiled for at least 5 minutes so most of the water content has evaporated, before the other things are mixed in. This will yield the best fudgy texture after less time in the fridge. And the ice cream? It just couldn’t be more straightforward.

Ingredients

For the fridge brownies:

280g (1 1/4 cups) white sugar

120g unsalted butter

90g (less than 3/4 cup) plain flour

240ml evaporated milk/ whole milk/ light whipping cream/ coconut cream

1 cup crushed biscuits (I used Nice coocnut biscuits, but you can use anything you have in the pantry, such as crushed cereal or oreos!)

175g (1 cup) chocolate chips or chunks

pinch of salt

optional add-ins: more chopped nuts/ chocolate chips

For the no-churn ice cream:

600ml whipping cream

450ml (1 can) sweetened condensed milk

1 tbsp vanilla extract/ 1 tbsp vanilla bean paste/ the insides of one vanilla bean

Directions

Pour the milk, butter and sugar into a large saucepan and heat on medium heat until everything comes to a boil. The mixture will froth and seem to double in volume so it’s important to have a large, not small saucepan here. Let the mixture boil for 5 minutes, then take it off the heat and stir in the flour, salt, crushed biscuits and chocolate. The chocolate will melt and turn everything a rich brown colour. Pour this mixture into a greased 8×8 or 9×9-inch baking pan and place in the fridge to set for 3 hours, or overnight.

In a large bowl and with an electrical whisk, pour in the can of condensed milk, whipping cream and vanilla. Beat until you have soft peaks, then pour into a freezer-safe container (I just used a plastic tupperware box), cover and place in the freezer for at least 4-5 hours, or overnight.

And that’s it! Since these components are meant to be left in a cold environment, they last for ages in the freezer (or just leave the brownies in the fridge), and they can be taken out at any one point in time to enjoy together.