Ricotta Chocolate Chip Pillow Pancakes

I keep finding heaven on pancake mornings. I also keep finding heaven when I realise that certain ingredients are about to expire and whatever I expect to be slipshod turns out marvellous and beyond (you could’ve guessed it was ricotta in this case). From now on, I think every Monday shall be pancake Monday. There will be no regrets.

I didn’t want to stray far from these I wrote about quite a while ago, because they’re still my absolute favourite pancakes. I remember squandering my days trying to perfect them. But with university on my heels, there’s simply no time to faff around with proportions and measurements and whatnot. Yet, I needed a bloody good pancake, and a fluffy, well-risen, tender-stomached one at that. Monday would’ve gone quite badly otherwise. I suspect.

That’s where the ricotta comes in. And the chocolate, because 99% of my recipes are incomplete without chocolate. Chocolate crisping up at the edges, chocolate running down your bottom lip when you take a bite and the pocket bursts slowly, lovingly. The pairing of the mild cheese and dark chocolate chunks is not advanced, but necessary. Ricotta makes the batter creamy and mildly sweet, whilst the chocolate (dark, if I may) adds another lush dimension to the whole thing.

‘Twas a funny story, trying to get these right. My first time using the hob to cook pancakes was almost an ordeal. Burnt the first couple and had to chuck those, but the silver lining came when I found the perfect heating level (3) to allow for a nice golden-brown on both sides, without burning them and being left with uncooked centres. These pancakes seem to be more undercooked after the second sides are done, but that’s mostly because of the ricotta, which makes it denser without having to fully compromise on fluff and the slightest chew in the middle.

You deserve it.

Ricotta Chocolate Chip Pillow Pancakes (serves 2-4, makes 8 medium pancakes)

Ingredients

125g (1/2 cup) whole-milk ricotta (strain if watery)

135g (around 1 cup) all-purpose flour

1 tbsp baking powder

pinch of coarse salt

2 tbsp granulated sugar

1 tsp vanilla extract

1 egg

20g (slightly less than 2 tbsp) melted butter

240ml (1 cup) milk

60g (1/2 cup) chopped dark chocolate

Directions

Preheat your pan or griddle on medium heat, and ready some butter. In a large bowl, whisk together the dry ingredients– flour, sugar, baking powder, chopped chocolate and salt. In a smaller bowl, mix together the ricotta, melted butter, egg, milk and vanilla. Pour the wet into the dry mix and stir until just combined. The batter should be quite thick.

Butter your pan (it should sizzle, but not too strongly), then heap batter onto a tablespoon before laying on 2 or 3 in your pan (you can do more with a griddle of course). Flatten a little with the back of your spatula, then wait 2 minutes before flipping to cook the second side, which will take almost less than half the time it takes to cook the first side. Place cooked pancakes on a paper towel to absorb moisture from the bottom.

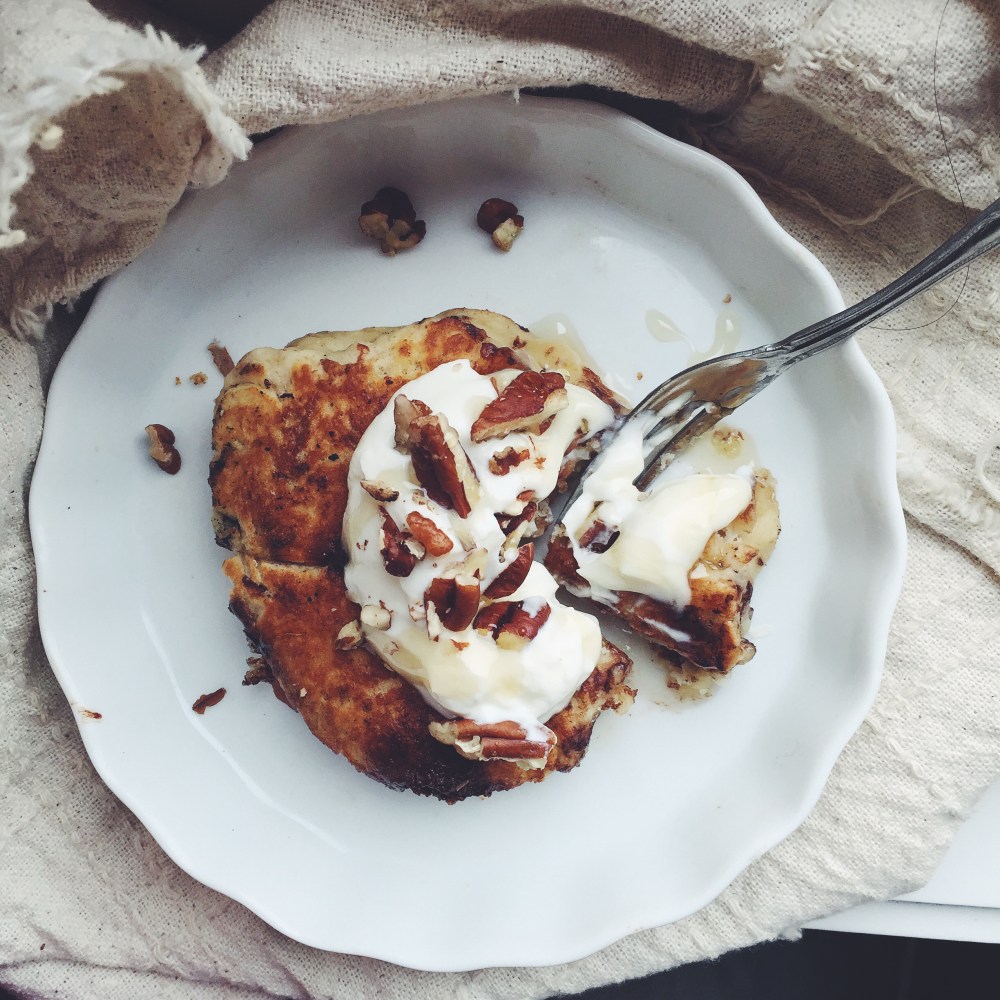
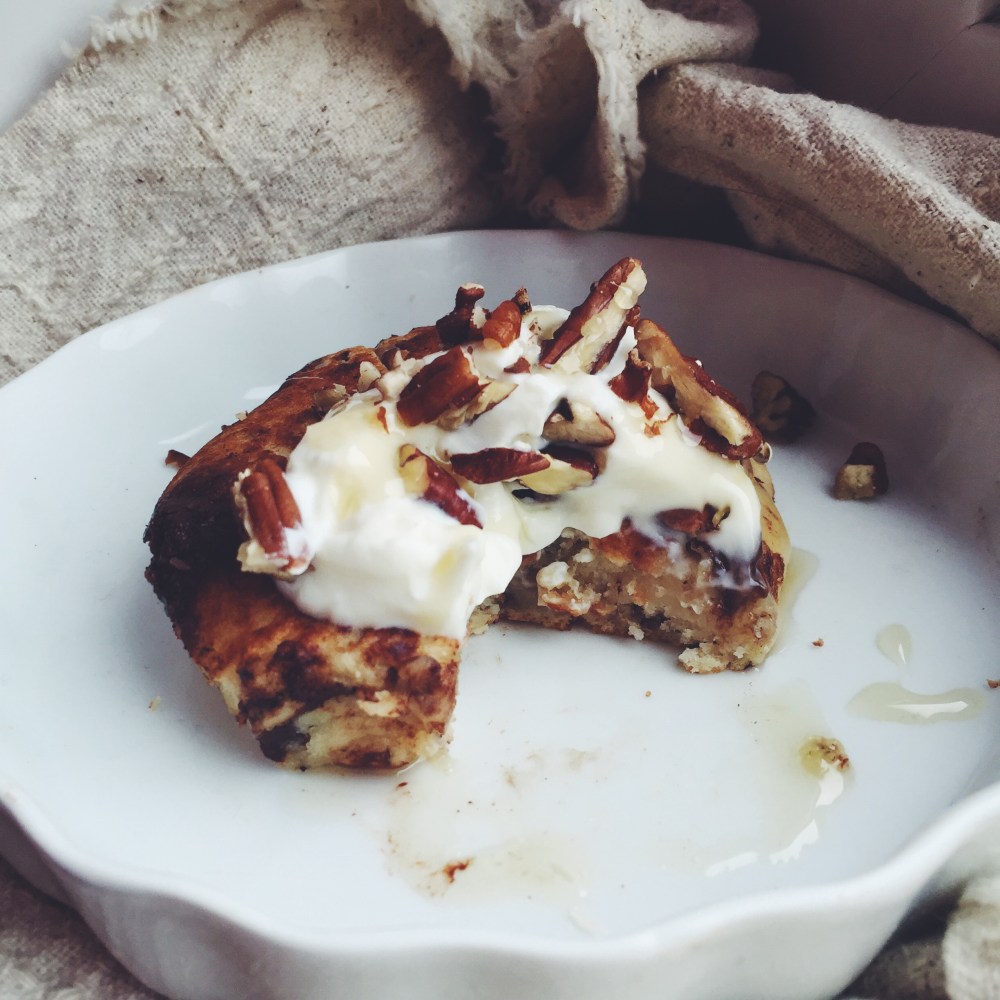
Serve with yoghurt, fruit or nuts, and honey or maple syrup.

Pumpkin Pecan Chocolate Chip Muffins

This is a special dedication to the one and only Emily Olivia Tapp, AKA the girl I’ve been meaning to see for more than a year…? Or a sister-like figure who’s finally on the same continent as me. Blessings are real.

As we sat in Mildred’s in Soho consuming all sorts of outrageously delicious vegan fare (cue sweet potato fries, roasted cauliflower!!, colourful salads and a pretty memorable apple crumble), it suddenly occurred to me just how long it’s been since I’ve seen her, or since I’ve written her a letter, for that matter.  But next to Em, it felt as if not much time has passed between us. In the middle of a million lectures, lab reports and walking everywhere all the time, Tuesday night was peace. Peace and Happy.

So, pumpkin. With chocolate, granola, and pecans. Everything lovingly encased in a golden batter, speckles of everything in each bite. Not a particularly daring experiment, but armed with a new baking pan, cupcake liners and instinct, I did my best. The rooty, earthy pumpkin marries well with the chocolate, and who doesn’t love gooey hot chocolate pockets in the middle of a warm, fluffy muffin?

Pumpkin Pecan Chocolate Chip Muffins (makes 6 muffins)

Ingredients

95g (3/4 cup) (95g) plain all-purpose flour

100g (1/2 cup) white sugar

120g (1/2 cup) pumpkin puree

1 tsp baking powder

1/4 tsp baking soda

pinch salt

1 tbsp ground cinnamon

1/2 tsp vanilla extract

30ml (1/8 cup) vegetable oil

1 egg

1 tbsp whole milk

1/4 cup granola or rolled oats

45g (around 1/3 cup) chopped chocolate

30g (around 1/4 cup) chopped pecans

Directions

Preheat your oven to 180C. In a medium bowl, mix together all the dry ingredients, except for the last 3 (chocolate, pecans and oats/granola). In a larger bowl, mix together all the wet ingredients– egg, oil, pumpkin, milk and vanilla. Mix in the dry ingredients, and just before everything is incorporated, mix in the remaining 3 ingredients. You really only need 2 clean bowls and a wooden spoon for this entire process!

Divide the batter amongst 6 cupcake liners (double the recipe of you want of course), then bake for 25-27 minutes (mine took 25) in the preheated oven. Let cool once finished baking and tuck in. Any uneaten ones can be stored at room temperature for a couple of days, or in the freezer for however long you want.

White Chocolate Caramel Banana Bread

Because we all know banana bread is actually cake.

Side note: I’m back!!

An apology is necessary and expected. The past few weeks have been an absolute blast, busy busy busy, what with moving to London to embark on a very science-y and exciting adventure. Early lectures, lots of note-taking, and the constant fear that I’ve done nothing to deserve a place in this wonderful university. The people are amazing, the work intriguing, and nothing beats the nighttime kitchen adventures, midnight study sessions and later-night parties. Nothing I say here could ever fully justify the experiences that have been thrown at me as well as those which I have yet to encounter. It’s still incredibly surreal; like a dream come true, yet somehow better.

IMG_0719

A modification on one of my previous banana bread recipes, this one has a gallant twist with the incorporation of white chocolate and caramel. If ever I do this again, I’ll be sure to add in a nuttier texture or more earthy flavour component to up the ante of everything else going on in the picture. It’s the sweetest pick-me-up, and a one-bowl wonder. Don’t you love the easy stuff? Remember: I’m all about simple. Sometimes. Ok, most of the time. With college matters whirling around my head, this loaf was a nice and easy break, which took no time at all to put together and bake. Feels good to get into mixing, picking ingredients and experimenting again in the kitchen. Made it with one of the sweetest people I’ve met here, and everyone loved (and then attacked) it. Crowd-pleaser. Bananas. White chocolate. Caramel. Good play.

Now, it feels like home.

White Chocolate Caramel Banana Bread (makes 1 loaf)

Ingredients

3 ripe bananas, mashed

1 1/2 cups (190g) plain white flour

2 1/2 tsp baking powder

1/2 tsp ground cinnamon

1/2 tsp salt

1 egg

1 tsp vanilla extract

1/3 cup (76g) melted unsalted butter

2 tbsp milk

2 heaping tbsp caramel sauce

1/3 cup (68g) white sugar

3/4 cup white chocolate chips (I cut up a good bar)

Directions

Preheat your oven to 180C (350F). In a large bowl, mix together the mashed bananas, milk, sugar, melted butter, egg, salt and vanilla. Then add in the flour, baking powder, cinnamon, milk, caramel sauce. Finally, gently stir in the white chocolate chips. Pour into a greased loaf and bake for 50-55 minutes. This one was ready by 53 minutes.

To serve, slice up and serve with more caramel, marmalade (a touch I personally adore) and more chopped chocolate. I’m guessing whipped cream or ice cream would sort out any lonely evening, too.

Lemon Curd Muffins

If there’s anything I’m a true sucker for, it’s lemon anything. No really. I love chocolate and a lot of other sweet things, but when it comes to citrus-based desserts, my salivary glands go haywire and my head fills with buttercups and sunshine.

Fluffy, white lemon muffins with a lemon curd belly, topped with a lemon curd-sugar coating

What do I like about these muffins? Well. You mix the wet ingredients together, you mix the dry ingredients together, pour one into the other and voila, you have perfect golden muffins in a matter of 15 minutes or less. I mean it’s really not any harder than perusing the morning paper or making a cup of coffee. If you can tie your shoelaces, these are a piece of cake (got that). Wake up, make your coffee, work, take a half-hour break, and maybe during that time you can make these without breaking a sweat. There is just no excuse now.

I had to satisfy the lemon fiend in me a couple of days ago, and did so well with these muffins. I had an incredibly hard time labelling this either a muffin or cupcake, because although this one ticks the boxes for all things which make a muffin, well, a muffin, the insides reminded me more of a cupcake than anything– light as air, pale, tender and not as dense as any muffin you might come across. It’s 80% muffin and 20% cupcake in technique, but 100% cupcake in texture. The crumb is neither robust or rigid, but holds up enough to provide the perfect amount of bite. Add this to the mix of half-molten lemon curd centre and sugar-crusted, sharp-tongued top and you’ve got yourself a winner.

Just for general info, muffins generally:

  • have a domed top (as is evident above)
  • a denser crumb
  • little if any frosting (usually a sugar coating such as this one)
  • require the wet and dry ingredients to be mixed separately before one is added to the other, instead of the typical creaming method utilised in the making of cupcakes.

Therefore, I present to you the cuffin.

Delight is a synonym for that wonderful lemon curd-sugar topping, which once again couldn’t be easier. Delight is also a synonym for the feeling you get when you bite into a soft, white, lemony bit of cake, rounded off with the sharp notes of homemade (or store-bought, that’s good too) lemon curd. Sharp on soft. White and black. It’s meant to be.

Lemon Curd Cupcakes (makes 10-12 cupcakes, adapted from here)

Ingredients

For the cupcakes:

200g self-raising flour

100g white castor sugar

pinch salt

1 egg

75ml vegetable oil (canola/sunflower is good here)

zest of one lemon

juice of half a lemon

120ml whole milk

60ml (1/4 cup) lemon curd, homemade or store-bought

For the lemon curd topping:

60ml (1/4 cup) lemon curd

70g white sugar (granulated/castor)

Directions

Preheat your oven to 190C (375F) and grease a cupcake or muffin tin. In a large bowl  whisk together the whole milk, egg, oil, lemon zest and lemon juice. In a medium bowl, briefly whisk together the self-raising flour, sugar and salt. Pour the dry into the wet mix and mix everything together until just combined with a wooden spoon. Using a tablespoon, half fill a mould in the tin with some batter, then use 2 teaspoons to put a small dollop of lemon curd in the centre, then fill to the 3/4-mark of the mould or case with more batter. Repeat for the rest of the cupcake moulds. Bake in the preheated oven for 12-15 minutes (mine took 13 minutes exactly). Check at the 12-minute mark; a wooden skewer inserted into the side (because the centre has lemon curd) of one should emerge clean. They should be nicely domed with a golden top, and no cracking on the surface.

Whilst these are baking, make the topping (YUM). In a small bowl, microwave the lemon curd until warm but not totally liquidy. Put the white sugar in a shallow dish and set these two aside until the cupcakes are done baking. Once they are fully baked, leave to cool for 5 minutes before rolling the tops in the lemon curd, then rolling again in sugar.

Devour, and know that life is good.

No-Bake Vanilla Bean Cheesecake For One with Black Sesame Brittle

Sweet, tangy vanilla cheesecake with a crumbly crust, topped with shards of black sesame brittle. 

So much goodness in a 4-inch tart pan. The addition of black sesame? Almost unprecedented, perfect.

A few days ago I had the pleasure of attacking a bought cheesecake in a jar, with a delightful crumbly crust, topped nicely with passionfruit. The first bite made me realise, and later lament, how much I adore cheesecake sometimes. It was my favourite sort of cake thing aged 5 upwards; hot, cold, plain or with something swirled in, I liked it all. The addiction pash waned a few years ago, but recent encounters with good, solid cheesecakes rekindled that familiar joy and pleasure.

Ah, speckles.

What I love about this is that it’s totally customisable, depending on the ingredients you have in stock. Save for the main component of cream cheese, of course. You see, the main base is cream cheese and icing sugar, but the ‘lightening’ components are needed for lift, volume and better distribution of flavours. Now these can be altered. I state whipped coconut cream as one component, but not many people have a can of coconut milk or cream lying around, so whipped cream (or whipped topping) would work just as well. A milder flavour suits the majority, too. And the vanilla bean? Well, life doesn’t end here. Vanilla extract would work as well, but if you’re the sort who doesn’t like to compromise on taste and scent, I strongly suggest going all out, and remember that these beans will always come in handy, for instance in your sugar and in a myriad desserts.

Vanilla bean and black sesame work like a dream together. The latter component is optional, but to spoon a bit of cheesecake onto a small shard of crisp, sweet brittle? Joie de vivre. The actual process of making the brittle isn’t half as hard as it sounds. I know, words like ‘brittle’ might as well be replaced with ‘croissant lamination’ or ‘flambée’. But the only hard thing about this is waiting, and perhaps spreading the brittle into a thin enough layer before it hardens completely. On a side note, things like sesame and flax have compounds called lignans which help to regulate metabolism and weight, and that’s always a plus, right?

No-Bake Cheesecake For One With Black Sesame Brittle

Ingredients

For the cheesecake:

25g biscuits (I used Nice biscuits, but you can use graham crackers/ oreo cookies/ anything you have on hand)

10g melted butter

70g cream cheese, at room temperature

20g icing sugar (no need to sift)

1 heaping tbsp nut butter such as peanut butter or almond butter/ tahini (I used tahini)

2 tbsp whipped coconut cream/ whipped cream

the insides of half a vanilla bean or 1/2 tsp vanilla extract

pinch of salt

For the black sesame brittle:

200g (1 cup) white sugar

60ml (1/4 cup) water

4 tbsp black sesame seeds

30g (2 tbsp) unsalted butter

pinch salt

Directions

If you’re using coconut cream in your cheesecake base, then start prep the night before. Take a can of coconut milk/coconut cream (the label can be either) and place in the fridge overnight. The next morning you should have a thick, firm white cream. If you’re using normal whipped cream, whip up a batch the night before and let set in the fridge so it’s more stiff the next morning when ready to use.

Place your biscuits in a small ziploc bag and zip the top tightly. Take a rolling pin and bash the biscuits until you get fine crumbs. Pour in the melted butter and incorporate well with your fingers (on the outside of the ziploc bag, of course). Pour into a small tart (should be 3-4 inches wide), or a small jar/cup, and press into an even layer with your fingers. In a medium bowl and with a metal whisk, whisk together all the ingredients listed above needed for the cheesecake.  The bowl needn’t be anything larger than medium since there’s not much volume to work with anyway (hoorah for a cheesecake all to yourself!!). Scrape the mix into your tart/jar/cup and place in the fridge to firm up. It’s ready for consumption in just 30 minutes, but you can eat it whenever.

Black sesame brittle? Easier than it sounds. I based the recipe off Joanne Chang’s Flour recipe for cacao nib brittle, and though I would have preferred a thinner, lacier texture, this still worked fine by me and the rest of my family. Grease and line a large baking sheet and set aside (the top of the baking sheet should be well greased too). In a medium saucepan, add the sugar and water. Place on high heat and let come to a hard boil. Let the mixture continue to boil for 5-8 minutes, or until you get a light brown colour. At this point, pour in the black sesame seeds and swirl pan in a circular motion to distribute, or do so gently with a wooden spoon. Let mixture continue to boil until the colour deepens to a deeper, richer amber-gold colour. Then, whisk in the butter and salt. Take off the heat and pour onto the baking sheet and spread into a thin layer with a spatula or wooden spoon. Work quickly because the mixture hardens with time. A couple of minutes later you can break the layer of black sesame brittle into shards, or pieces as big or small as you like.

Stick shards into the cheesecake and eat both components together. I like to spoon the cheesecake onto the sharp, sweet bits chockfull of black sesame seeds. YUM.