Black Sesame Cakelets with Cream Cheese Frosting

Processed with VSCOcam with f2 preset

A good friend once told me that if I were an ice cream flavour, it would be black sesame.

‘What’s that supposed to imply?’

I still don’t know. Nevertheless, I love attempts to associate people with things, endeavouring to understand or replicate nature, auras, psyches. The memory was jolted alive last week, when I was prancing around the supermarket aisles, sometimes stopping to peruse labels, flipping through half-hearted ideas in my head. I was ready to take on something tame for today’s post, working with ingredients I already had at home. But (there’s always a but). When I passed by the gourmet Japanese section, the urge to experiment with black sesame was so profound I felt like it would be a cardinal sin not to leave without a loot. It almost came as a shock because firstly, I’ve never done so before, and secondly, I’ve always been enamoured by its sweet, oil-rich, nutty flavour. What’s taken me so long?

Even if you decide, as part of a little intellectual exercise, that you are going to sit around and do nothing because you have concluded that you have no free will, you are eventually going to get up and make yourself a sandwich.“–Greene and Cohen, from a book I’m reading right now on the brain.

I love that. You see, sometimes, you just have to do something and stop wrestling internal needs or expectations. To sustain yourself and this life. Satisfying that urge was worth it.

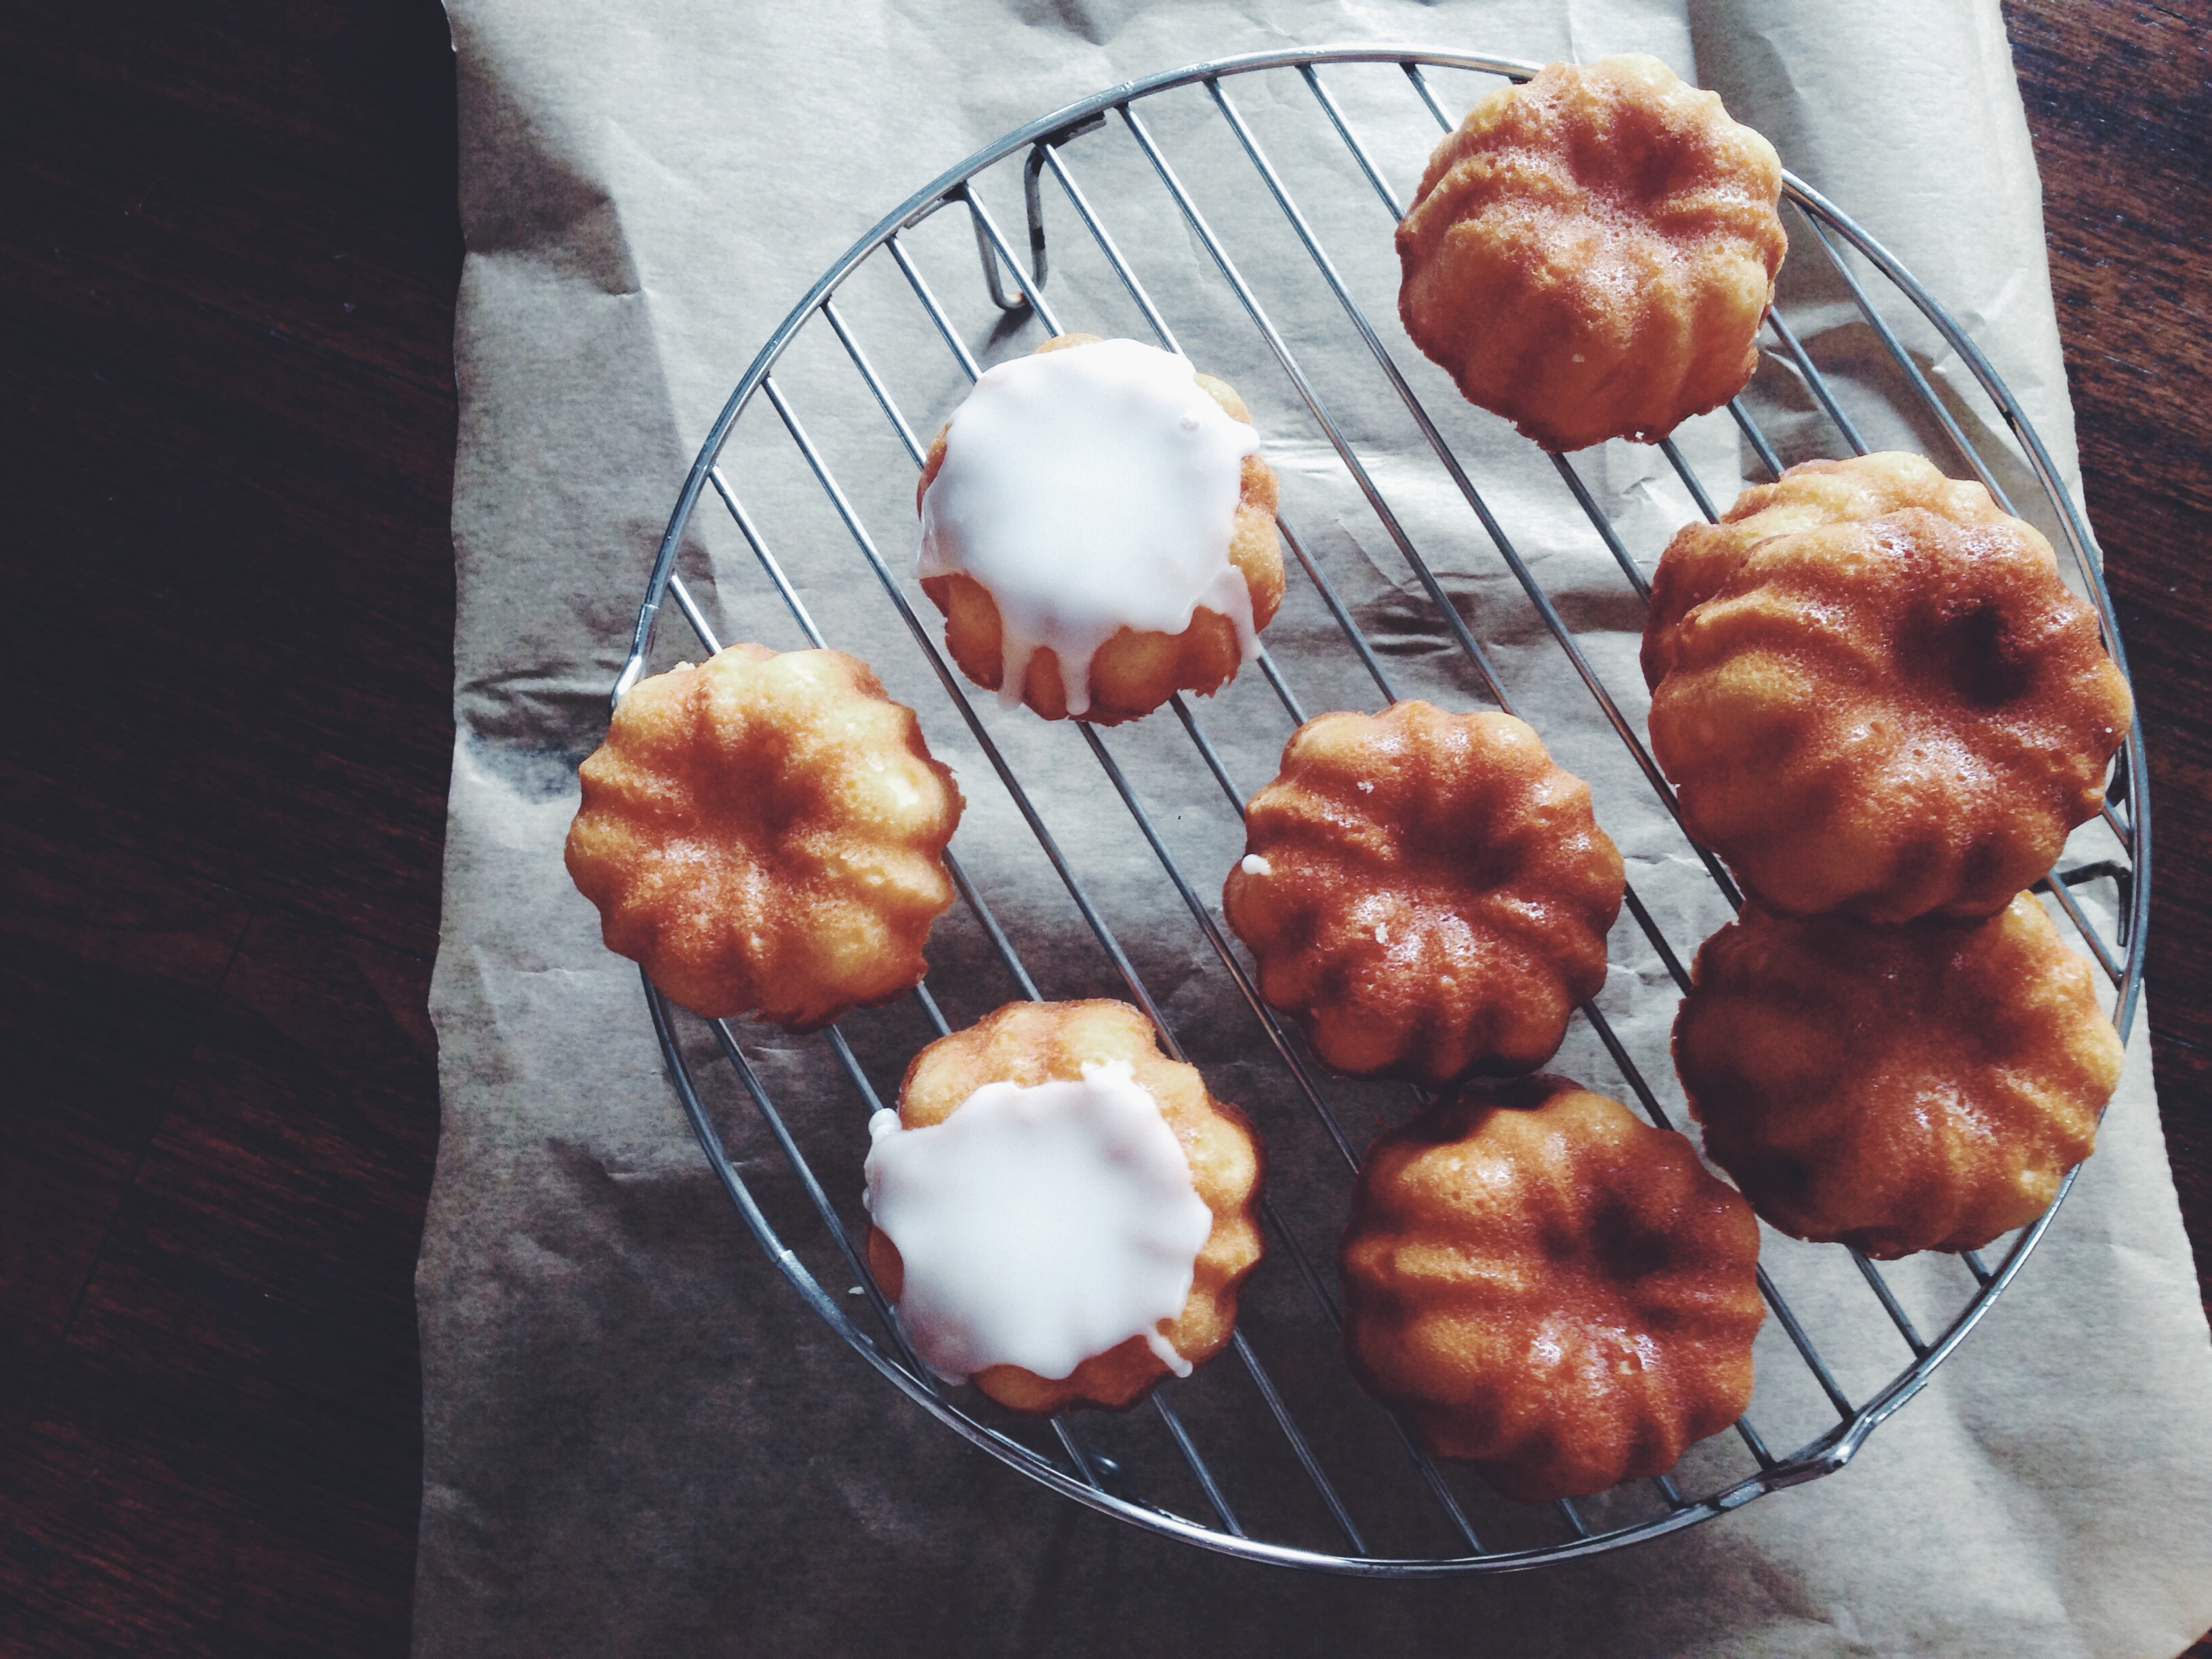
So I’ll say it: I wasn’t expecting the results of this experiment to turn out so well. Somehow, the oven works its magic the first time. All worries were alleviated when my first batch of black sesame cakelets emerged (almost) perfectly round, just slightly risen and browned along the edges, from the hot-house. Working with the black sesame powder I found along that aisle was pure joy. The powder by itself is mildly sweet, carrying all the aromas and flavours of the seed. It is imperative that you sieve the powder first into the dry mix, to yield the finest and smoothest texture possible. If you can’t find the stuff in the grocery store, try your hand at black sesame seeds, and grind them up at home, in a food processor or with a mortar and pestle. You will get a paste instead of a smoother powder, but I expect it will work just as well. Gosh, I’m excited for you! Soft, moist (I actually like this word for all the grief it gets, poor thing), slightly cakey with an incredibly tender crumb. The nuttiness and mild sweetness formed the perfect backdrop for the ever-familiar cream cheese frosting on top. The two together are sublime if sinful.

I topped these with oreo crumbs, sprinkles and chopped bits of dark chocolate. Go crazy here. It’s the perfect cross between a pikelet, an adorable mini pancake, and the top of a cupcake. Can you imagine? I hope you can. If making these means having to go to the grocery store to buy some black sesame powder (or seeds), then I guess you have no choice.

Processed with VSCOcam with f2 preset

Black Sesame Cakelets with Cream Cheese Frosting (makes around 8 3-inch wide cakelets)

Ingredients

For the cakelets:

105g plain flour

25g (around 2 1/2 tbsp) black sesame powder, or the same amount of black sesame seeds ground into a paste using a food processor or mortar and pestle

1/2 tsp baking powder

pinch of salt

57g (4 tbsp) softened, unsalted butter

1 tsp vanilla extract

110g (half a cup) white sugar

1 egg

30ml (2 tbsp) whole milk mixed with 1/2 tbsp white wine vinegar, left to rest for 5 minutes before using. Alternatively, use the same amount of buttermilk or yoghurt

For the frosting:

40g softened unsalted butter

75g cream cheese, at room temperature (take out and leave on the counter for a while before using, or microwave for half a minute if cold from the fridge)

1/2 tsp vanilla extract

75g powdered sugar

Toppings:

crushed oreos/ sprinkles/ dark chocolate/ whatever you want!

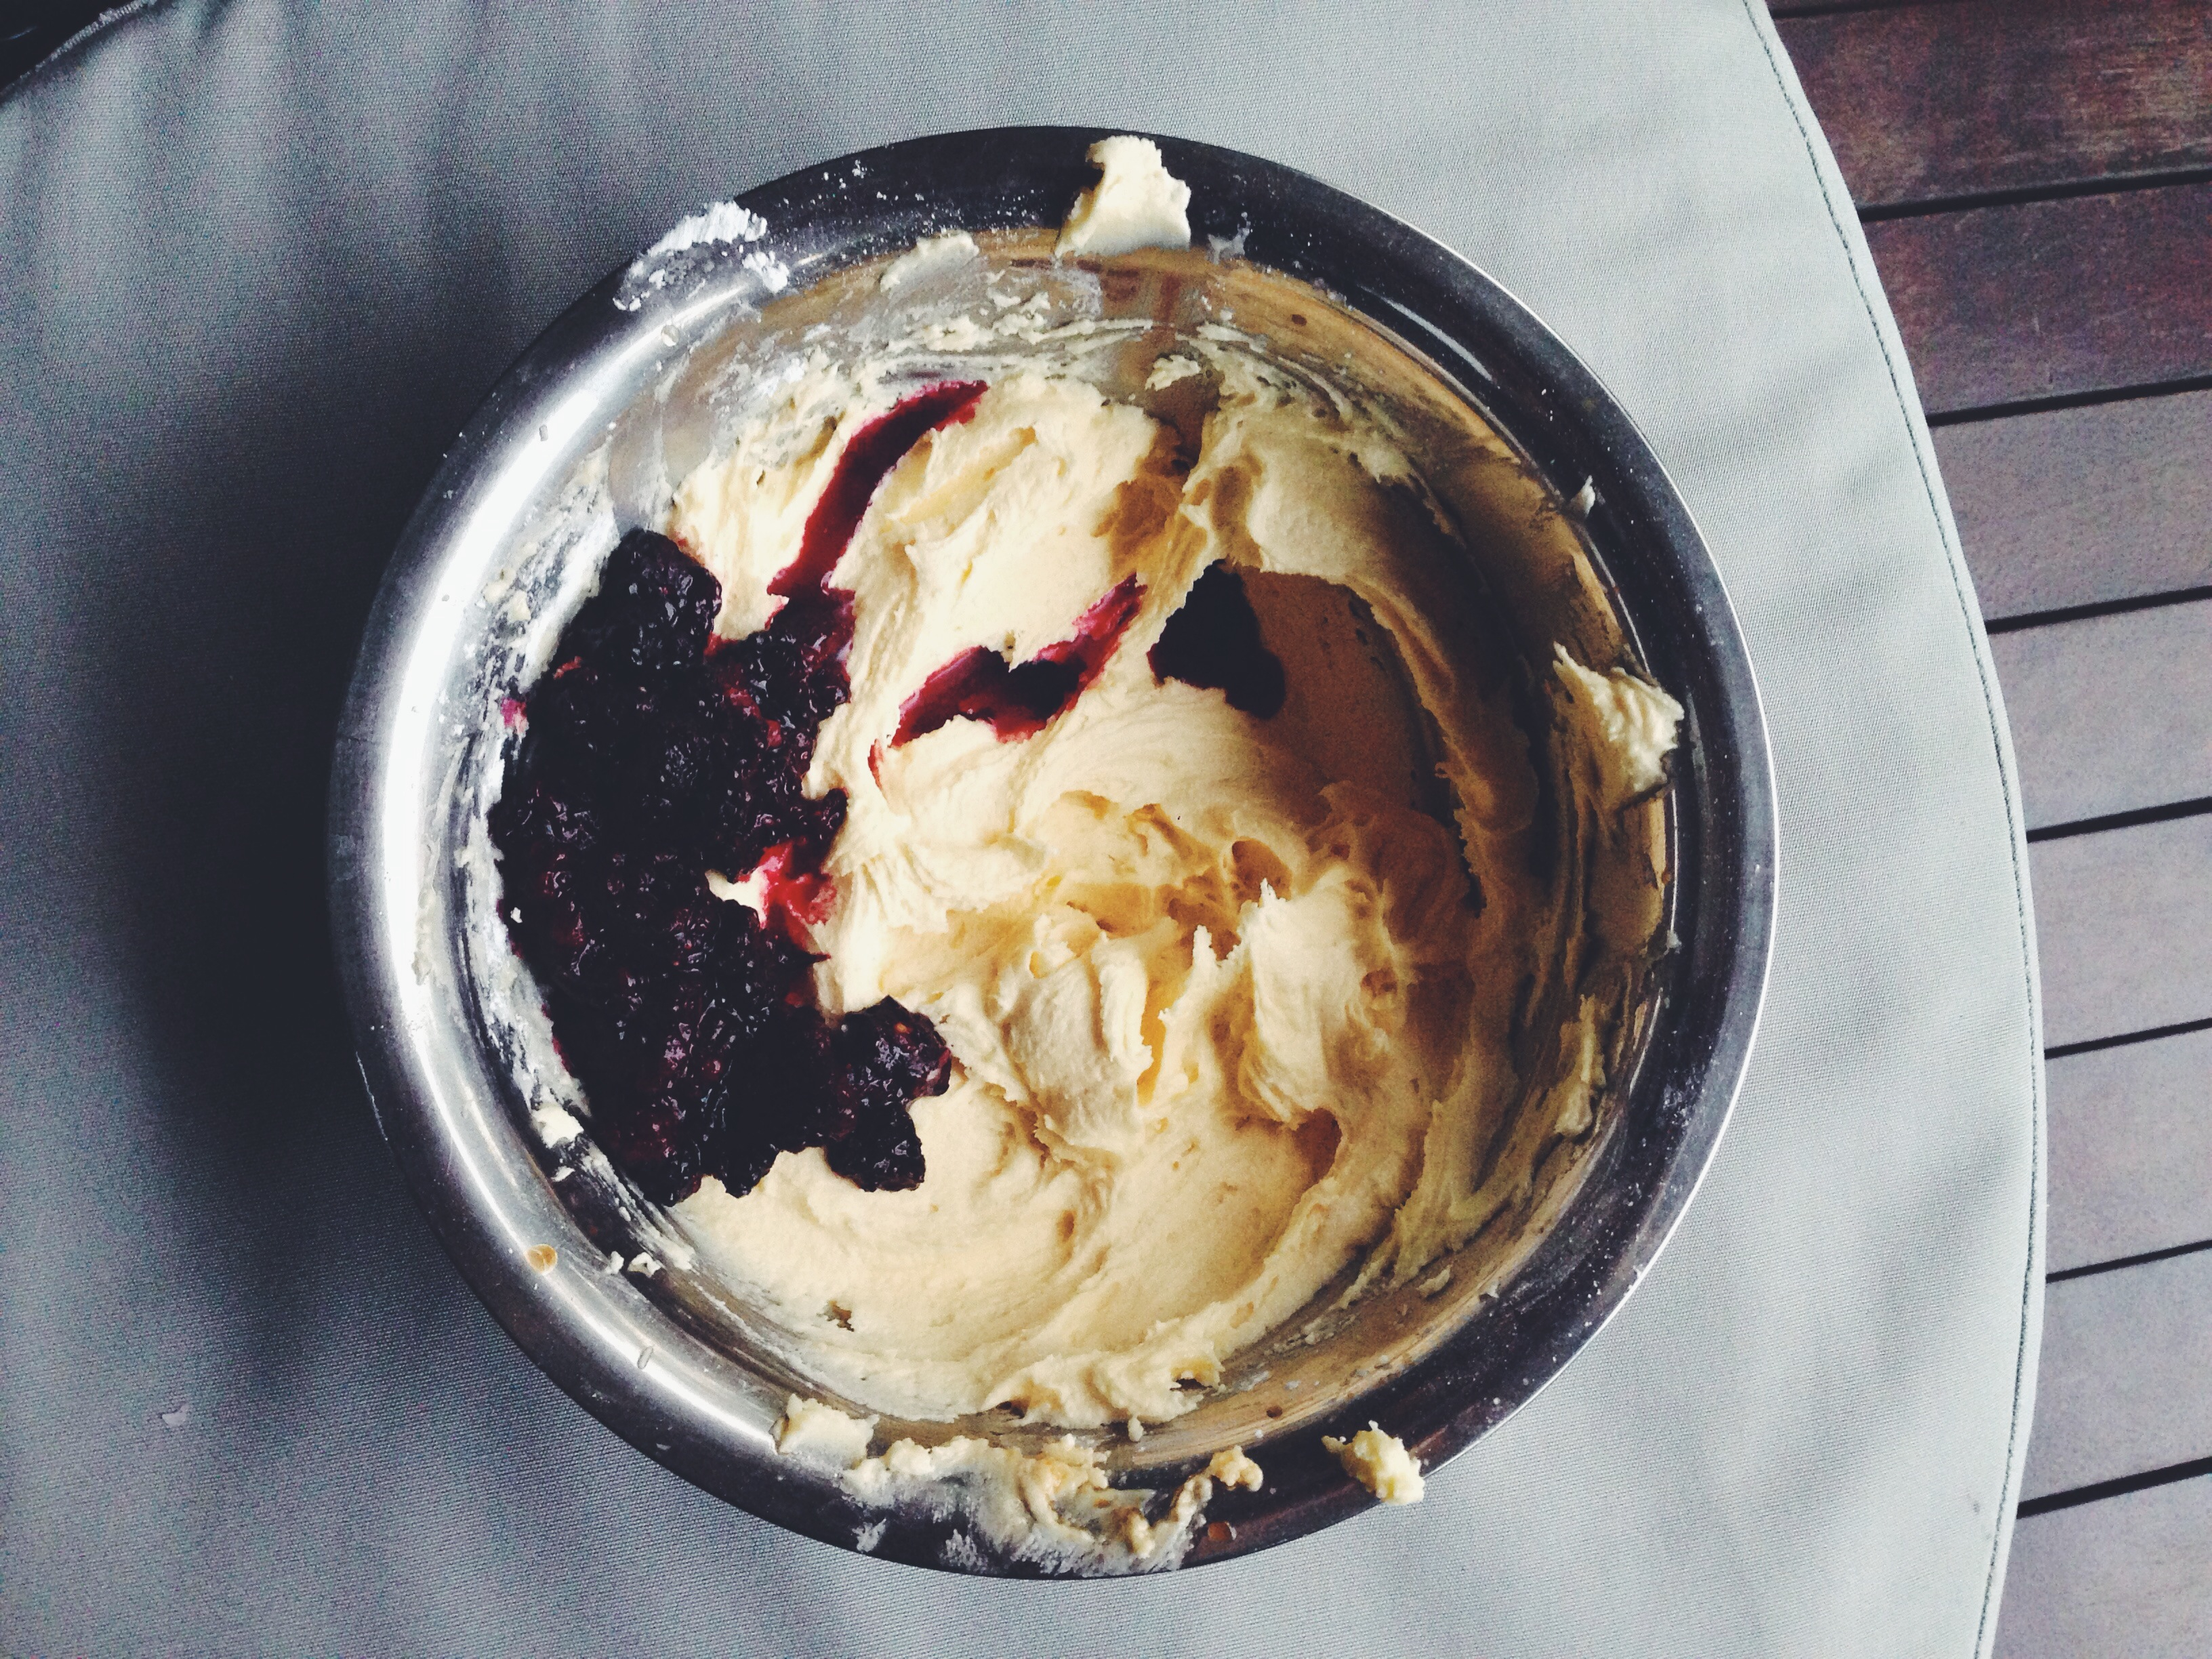
Preheat the oven to 177C (350F) and line and grease 2 cookie sheets. In a medium bowl, sieve (yes, a sieve is necessary here!) the flour, baking powder, salt and black sesame powder.  In another medium bowl and with a whisk or handheld electrical whisk, cream together the butter and sugar until pale and fluffy. Whisk in the vanilla extract, egg and milk mixture. Pour this wet mix into the dry mix and stir with a tablespoon or wooden spoon until just combined and the batter has a nice dropping consistency, and is not too wet or thick. With 2 tablespoons or an ice cream scoop, dollop the batter into little circles onto the cookie sheet, spaced at least an inch from each other. Pop into the oven and bake for 7-10 minutes. Mine took 8 minutes exactly. Whilst they bake, make the frosting. Beat together the butter and cream cheese until smooth, then add the vanilla extract and powdered sugar. Beat until all is nicely incorporated.

Once the cakelets are done, a toothpick inserted into the centre of one should come out clean. Leave to cool on a wire rack, which will take around 10 minutes. Frost the tops with cream cheese frosting using a knife, then top with whatever toppings you desire. These cakelets surprised me and gave me feels. They will do the same to you.

Naked Moist Chocolate Cake with Salted Caramel Creme Fraiche Frosting

Thunder now. I’m loving the endless precipitation in this otherwise stifling furnace. When trivialities seem to take hold of life, there are always certain important people to bring me back down to Earth, and there’s, well, cake. Hey, childhood fancies, it’s been a while. Processed with VSCOcam with f2 preset Processed with VSCOcam with f2 preset I think it only de rigueur to celebrate a special occasion with something a little more elaborate. ‘F’ and ‘L’ are the initials of someone pretty damn special in my life, and special people deserve something a little more elaborate, more celebratory, more.. regal if a little rustic. Chocolate and salted caramel has been done before, tried and tested, stamped with approval, signed off in girlish curlicues. But I daresay this endeavour is a bit more wild, and not quite so predictable in taste and texture with the addition of crushed meringue and lavish drizzles of homemade salted caramel. The waterfall effect of the buttercream frosting does a bit of justice to the ‘naked’ cake; I here term it as such because the ridges and painfully thin outer layer of frosting allow the bottom halves of each chocolate cake layer to be seen, for a subtle gradient effect, the salted caramel running slowly between the ridges, cutting through the purposeful flaw. Mimicking the movement of pale frosting. Godspeed. Processed with VSCOcam with f2 preset Processed with VSCOcam with f2 preset If you are wondering why the two pictures above look a mess, I’d gladly point the finger at that solo stack of plates. An unfinished crumb coat was almost completely wrecked when the stack of three layers, frosting in tact between each, toppled over and collided into the side of the stack. But this cake held its own, unflinching. Sometimes, failures or mishaps really do prove someone, or something’s worth. Despite the delicate moisture of the cake, its sweet and slightly bouncy crumb, the collision underscored a hidden robustness, making me hold this cake in the highest regard. It deserved to be treated right, after not letting me down. Processed with VSCOcam with f2 preset Processed with VSCOcam with f2 preset Processed with VSCOcam with f2 preset This amalgamation of flavours imparts subtle, simple decadence. The chocolate cake of our childhoods is wrapped with the familiar indulgence of sweet and salty caramel, with a bit of zip thanks to a squeeze of lemon and fresh Maldon. The first time I tried the cake with all its components, I did think the salted caramel crème fraîche frosting lacked oopmph, my tongue betraying the anticipation of a more sophisticated flavour profile. Hence, I did a mini batch of frosting after this cake was made, altering the salt and creme fraiche content to taste. In all honesty, a slice of this stuff is good warm or cold, and can be stored for at least a week in a fridge, or a couple of days at room temperature. And finally, I really don’t know what could possibly beat fresh, homemade salted caramel…? Moist Chocolate Cake With A Salted Caramel Creme Fraiche Frosting (makes a three-layer, 8-inch wide cake) For the cake: (cake recipe adapted from here) 300g (3 cups) cake flour, or all-purpose flour if you don’t have cake flour on hand 300g (3 cups) white caster sugar 150g (1 1/4 cups) cocoa powder 3 tsp baking soda half tsp of fine salt 1 1/2 teaspoons baking powder 380ml (around 1 1/2 cups) buttermilk 180ml vegetable oil 3 eggs at room temperature 2 tbsp vanilla extract 1 1/2 cups (370ml) freshly brewed coffee For the salted caramel frosting: 340g salted butter 4 tbsp créme fraiche 980g powdered sugar 180ml (slightly less than 3/4 of a cup) of salted caramel (ingredients for this down below) For the salted caramel (recipe adapted from personal trials): 1 tbsp light corn syrup 5 tbsp (75ml) water 1 tsp vanilla 125ml (around half a cup) of heavy cream 110g (1/2 cup) white sugar juice of half a lemon (approximately a teaspoon) 1 tsp fine sea salt Preheat the oven to 177C (350F) and line three 8-inch circular cake pans with parchment paper (trace around each pan with pencil on the parchment paper and then cut out neatly). Spray the bottoms of the pan before laying on each piece of parchment, and then spray lightly again. Set these pans aside. In the large bowl of an electric mixer fitted with a paddle attachment, sift in the dry ingredients– cocoa powder, flour, sugar, baking powder, baking soda and salt. Stir on low speed until combined. The same can be done with just a large bowl and a whisk if you don’t have an electric mixer. In a separate medium bowl, whisk together the buttermilk, oil, vanilla and eggs. Stir in the fresh coffee. With the mixer on low speed (or without a mixer), add the wet mixture into the dry. Use a spatula to scrape down the sides of your bowl and make sure everything is well combined. The batter should be sticky, dark, glossy and liquidy. In fact, the wetter, the better. If your bowl of batter looks too dry, or drops off the back of your spoon or paddle too slowly (it shouldn’t really ‘drop’ at all, really), add at least 2 tablespoons of milk. Drop each pan on your counter to knock out excess air bubbles. Use a weighing scale to ensure there’s an equal amount of batter in each pan. For this recipe, there was around 750g of lush chocolate batter in each pan, and each layer is rather thick. Place the pans in the oven (you can place 2 in first if your oven can’t fit three, which is usually the case, and then pop the last one in afterwards). Bake for 35-40 minutes, before removing from the oven and let cool on wire racks. Mine took 36 minutes, and a wooden skewer inserted into the centre of the pan should come out dry, with a few moist crumbs clinging to the very tip. While the cakes bake, make the salted caramel. Put the corn syrup, water and sugar in a saucepan and place over medium heat. Stir together with a wooden spoon and let the mixture come to boil. In a separate medium bowl, mix together the lemon juice (add less if you like your salted caramel less ‘lemony’), vanilla and cream. Once the mixture in the pan comes to a boil, stop stirring (to prevent crystallisation) and let boil for a while. This will take at least 5 minutes or so. If it looks like one part of the pan is turning darker faster than the other parts, then gently swirl the pan to distribute the heat and quicken the chemical reaction. Slowly, the sugars will all caramelise and the whole mixture will suddenly turn a dark amber. At this point, turn off the heat and add the cream mixture. Stir in the salt to taste. The mixture will bubble almost immediately, before lightening and turning a lighter caramel shade. If the mixture seizes, don’t fret!! Simply put the pan back on a low heat and stir until everything amalgamates nicely again, which will take 2-3 minutes. All is good, all is good. Make the buttercream. In an electrical or handheld mixer, beat the salted butter, which should be slightly cold but not too frigid, and the créme fraiche, until pale, creamy and fluffy. Sift in the icing sugar in thirds, and beat well to combine. Add half a cup of salted caramel (125ml, or slightly more, all to taste)  and beat briefly to distribute the caramel’s colour and flavour. The buttercream should be smooth and not too runny, so I suggest adding the salted caramel bit by bit to get the right consistency. Once the cakes are cool, assemble. Remove the circular pieces of parchment from the bottoms of the cooled cakes, and place one in the middle of a cake stand. Using a third-cup measurement, measure out a third of a cup of buttercream and spread onto the first layer. Place a little more on top if the layer of frosting doesn’t look thick enough. Place the second layer on the first, and do the same. Repeat with the third layer, but this time, spread more buttercream down along the breadth of the cake, creating a thin crumb coat to catch any excess crumbs. Let the whole cake set in the fridge with the crumb coat for at least a couple of hours, or overnight. After this period, use more buttercream to cover up any obvious bits of brown on the outside. Use the blunt edge of a butter knife to create the ridged, naked, waterfall effect, going from the bottom up. It’s much easier than how it might read here, I promise! In any case, the decoration is entirely up to you. Once you have run the butter knife up along the sides for the entire circumference of the cake, do the same for the top, but direct the butter knife movement towards the centre, so you get the ‘wheel’ effect, as can be seen in the third last photo above. Drizzle the top with leftover salted caramel and, if you wish, crumbled biscuits of meringue.

Mini Lemon Bundts

Processed with VSCOcam with f2 preset

Lemon’s taking up all the oxygen in the room. It’s a good thing. If you’re as obsessed with the ingredient as me, that is.

Processed with VSCOcam with f2 preset Processed with VSCOcam with f2 preset Processed with VSCOcam with f2 preset

FYI, I cut the tops off the guys before removing them from the pan just for the picture; it’s twice as efficient to remove them with their domes first (I may be dim but not toooo dim)!

There’s something so endearing about each mini bundt I popped out of the pan. This recipe yields exactly 12 light, springy, lemon-filled balls of sponge. Sponge of medium density, of average sophistication, of half-cake-half-gooey-sponge pleasure. The secret lies in the use of plain yoghurt, which made the little cakes moist but not doughy, and sufficiently dense but well-risen. I adapted the recipe from Nigella’s cookbook, and it’s my personal go-to for something simple, light, lemony, and pleasing. See the tops I cut off? Oh goodness, please save those. The tops boast the sugary, browned crusts, sharp and bit stiff when bitten into, giving way to the most pleasurable, mildly sweet and lemony bite. Coo for crust. These have it all.

Mini Lemon Bundts (makes 12 4-inch wide mini bundts)

150g all-purpose flour

1 1/4 teaspoon baking powder

75g melted, unsalted butter, cooled slightly

zest of one lemon

juice of half a lemon

2 eggs

110ml natural yoghurt or sour cream

large pinch of salt

125g white caster sugar

For the icing: 170g icing sugar, one teaspoon vanilla extract and the juice of one lemon (do this to taste)

Preheat the oven to 170C. In a large bowl, sift together the flour, sugar, salt and baking powder. In a measuring jug or smaller bowl, whisk together the eggs, melted butter, lemon zest, juice and yoghurt. Pour the wet into the dry mix and slowly mix everything together, transferring from a wooden spoon to a spatula. the batter should a little thick, of spoon-dropping consistency. Make sure that there are no lumps or streaks of flour at the bottom. Grease your mini bundt tin and pour the batter into the molds. Bake in the preheated oven for 23-25 minutes.

Whilst waiting for the buns in the oven, make the icing. In a medium-sized bowl, whisk together the icing sugar, vanilla and lemon juice. The mix should be thick and runny, not too opaque, and  won’t harden after a few seconds of stirring in the bowl. If you need more liquid, add more water, drop by drop. Once the bundts are done, remove from the oven and let cool on a cooling rack. Pour the icing on once they’re cool; it’s actually fine to do so when they’re still a little warm because the heat will help the icing along down the sides.

Mini Orange Layer Cakes With Blackberry Lavender Buttercream

Processed with VSCOcam with f2 preset

I’ve learnt a few things in the past few days. Firstly, it is actually impossible for me to do a tripod headstand. I’m sure this is a familiar term for all you yogis out there. I’ve been practicing yoga for years (to be fair, not so much during the later years of high school) and I still haven’t mastered it. It bothers me to no end.

Secondly, 1984 is almost blowing my mind. Not the literal 80s, of course, but Orwell’s magnum opus. I’m almost done and can’t wait to get my hands on Animal Farm. Sadly, I’m pretty slow with the classics.

Thirdly, right about this time of year, I feel completely and utterly at ease. Yet, I’m perfectly aware of the fact that way, way too much suffering is going on in the world to be ignored. Everyday I go about my business– practicing yoga, journalling, a little revision for my future course here and there, baking (what’s new!), fretting about hair and makeup… And all around me, bombs are dropped, little ones suffer, the clocks stop ticking for thousands, millions. With all the privileges that surround me, it’s easy to take things for granted. To continue living in a bubble of selfishness and oblivion. I just hope most people in the world are more.. aware. That’s all. Me included.

I shall now proceed to wax lyrical about my favourite (orange) cake recipe in the world. And that says something because I’ve made a fair bit of cake in my lifetime.

Processed with VSCOcam with f2 preset

Oranges, oranges. I initially thought lemon, but lemon and blackberry is already a kill-me-classic, and with fresh, sweet oranges in the pantry, what’s there to fear? The citrus note of the cake using these was indeed milder, yet the flavour and goodness of that pulp and zest did all the talking. It still feels odd to have so much free time with the holidays in full bloom. Experimentation takes flight all the time, anywhere. Ideas flying left, right and centre. If I’m not thinking about what biology/biochem or fiction book to buy next, I’m recipe brainstorming, and goodness does it feel good. I was dying to sculpt mini layer cakes, because they’re the epitome of simple, refined, easy bakes. The blackberry lavender buttercream sandwiched between three layers of incredibly light, orange sponge adds aesthetic and textural oomph. The sweetness hits the palate just before you enjoy the moist and tender cake crumb. It truly is one of my favourite cake recipes.

Processed with VSCOcam with f2 preset Processed with VSCOcam with f2 preset Processed with VSCOcam with f2 preset

You added actual blackberries…? With the… seeds?

Alright, that part is optional. Though most recipes state the addition of blackberry puree sans all the gritty bits, I personally prefer the addition of the seeds for added flavour and texture. Combined with the dried lavender, each bite is like pink fairy dust. Pink and purple aren’t exactly up there on my list of favourite colours (which actually just comprise black and burgundy), but the saccharine delicacy of each little cake is irresistible. I had to adjust the initial buttercream recipe because it yielded too thin a consistency. It all worked out pretty well in the end. If anything, I might just add a touch more tang, be it salt or cream cheese, to the buttercream.

Processed with VSCOcam with f2 preset

Mini Orange Layer Cakes With Blackberry Lavender Buttercream (makes around 4 mini 3-layer cakes)

For the cake:

188g (1.5 cups) all-purpose flour

3/4 tablespoon baking powder

large pinch of salt

113g (half a cup) of soft, unsalted butter

225g (1 cup) sugar

2 eggs

1 teaspoon vanilla extract

zest of one small or medium-sized orange

160ml (2/3 cup) whole milk

50ml freshly squeezed orange juice

For the blackberry lavender buttercream:

226g (one cup) unsalted butter at room temperature

500 grams icing sugar

1 tbsp vanilla extract

large pinch of salt

1-2 tablespoons of dried lavender (optional)

55g fresh or frozen blackberries (around half a cup)

Preheat your oven to 177C (350F) and grease a 7×9-inch (or 8×8-inch) baking pan. In a medium bowl, whisk together the flour, baking powder and salt. In a larger bowl and with either a normal or electrical whisk, beat the butter and sugar for at least a couple of minutes, until light and fluffy. Beat in the zest of the orange, 2 eggs, and vanilla extract. Add a third of the flour mix, stir briefly with a spatula (no need to fully incorporate), then add half of the milk. Fold in briefly again. Add another third, the rest of the milk and the orange juice. Fold in briefly for a few seconds, before adding the rest of the flour. Mix until just combined. That part is so important, for there is a fine line between tender crumb and dull, dense, bleh. Don’t forget to scrape down the sides of the bowl and make sure the flour at the very bottom is well incorporated.

Pour the batter into the pan and bake in the preheated oven for 19-22 minutes. Put 21 to be safe (that’s how long it took mine). While you wait, make the buttercream.

In a large bowl and with an electrical whisk, beat the butter until it looks lighter and, well, fluffier. Add half of the icing sugar and vanilla, and beat. Take your blackberries and microwave on high for around 20 seconds, until you can see the juices seeping out and they are easy to mash. Mash them with a fork. Add to the mixing bowl, together with the remaining icing sugar. Beat until all is well combined. If you wish, fold in the dried lavender with a spatula. Place most of the buttercream in a piping bag fitted with whatever tip you like. Leave all the buttercream in the fridge for later use.

Assembly:

Once the cake is done, remove from the oven. It should be light brown and ever so slightly domed on top. Let cool in the pan on a wire rack. It will take at least half an hour to fully cool.

Once cool, take a 3-inch round cutter (or scallop-edged, up to you) and cut out little circles. Remove the buttercream from the fridge to let it warm up a little. Save the cake scraps for your family, before you eat everything yourself. You should get around 6-7 little circles, around 2 inches thick. Using a serrated knife, cut each little cake in half horizontally so you end up with two thinner cake discs. Pipe a circle of buttercream on the centre of one half, and press down with the other half. Pipe another circle on this half and then take a half from another cake and press down on that, so you end up with a mini 3-layer cake, each layer around 1 inch thick. Using a normal or palette knife, smear the sides and top with buttercream (reserved from the bowl) for make the crumb coat. Leave the cakes in the fridge to set and firm up for at least 2 hours, or overnight.

Take your piping bag and pipe more buttercream on top, then sprinkle with extra dried lavender.

Ah, life’s a playground.

Mini Speculoos Bundts

Processed with VSCOcam with f2 preset

I’m sure a few of you would have come across the term ‘caveman diet’ in some magazine, book or newspaper article. The whole phenomenon is intriguing and sensible; we basically are advocating a reverting to our ancestors’ lifestyle in the hopes that such a change will propel some sort of advancement in human health. We’ll be healthier, have lower BMIs, stronger bones, etc. It’s all very well and good, right? In a sense, yes. The diet itself is meant to promote a healthier lifestyle. You eat more red meat, fruits, vegetables and natural whole grains, whilst reducing the amount of processed wheat and dairy you consume. You benefit from increased energy and concentration, and better blood sugar levels which don’t shoot up and down like a roller coaster like 90% of the American population. When I first came across this idea, I took it lightly, the brioche and caffeine and egg fan that I am. Heck, the usual ingredients I touch in the kitchen are refined flours, eggs and sugar. Everything which promotes slower metabolisms, obesity, impeded thinking, and heart disease. In one way or another, indirect or not. And now, despite acknowledging its benefits, my attitude towards the caveman phenomenon hasn’t changed drastically. But why scoff at something proven to be beneficial?

I mentioned one of my favourite books in a previous post– The Story of the Human Body by Daniel Lieberman. His writing is superb, impactful; I haven’t come across another book which has altered my perspective on the human body quite as much. The thing is, we as humans evolve to accommodate change. We are so darn flexible, proven by the fact that we aren’t all dead at this point in modern time. I don’t think we need to fully revert to the caveman diet because our bodies have evolved to accommodate all that is available to us. I’m not saying we should gorge ourselves on cakes and sweets all day throughout the year, but in the end, eating more red meat and completely eliminating all the pleasures of the world (you know what I mean here) won’t exactly do your mood or health a tremendous amount of good. I’m no nutritionist, but can’t we advocate balance and not rigid dietary restrictions? I personally cannot take stomach a lot of red meat because I feel as if I have a little animal cemetery cradling my stomach afterward, hence I tend to eat more fish. Let’s just not stop having the cupcake, or mini bundt, treat on the weekend. Let’s live for the balance of what us, these smart cookies, have grown to learn, tweak and love. I’m all for the (occasional) elimination of those horrid processed foods, aka anything in a packet, but sweet tooths, I’m on your side. Go ahead, bake a tray of these. I implore you!

IMG_8826 Processed with VSCOcam with f2 preset Processed with VSCOcam with f2 preset

My mum recently bought mountains of speculoos/biscoff cookie spread for her own kitchen experiments. Yes, another reason why I love her so much. Lotus Biscuits are actually the best thing dunked into hot and milky English Breakfast tea. And there are a million things one can dip into hot and milky tea. Speculoos and cream cheese has been done before, and I love how this recipe incorporates both without overwhelming either flavour. The speculoos is the obvious flavour in the cake batter, which is on the slightly denser side to hold up the integrity of a robust mini bundt. Topped with crushed speculoos biscuits, salted caramel sauce (had some extra left over), and coconut date sugar. The cream cheese frosting and crushed biscuits are enough here; I just happened to have leftover ingredients which amped up the light and otherwise more predictable bites of speculoos heaven.

The crushed biscuits on top offer the loveliest texture contrast. The recipe itself is so simple because the speculoos spread already has flavours like cinnamon and vanilla, so the rest is just a matter of 5-minute mixing, tops.

Speculoos Mini Bundts (makes 12, adapted from Baked Bree)

58g soft, unsalted butter

140g Speculoos/Biscoff spread (a half cup)

225g (1 cup) white sugar

2 eggs

80ml whole milk

1.5 teaspoons vanilla extract

188g all-purpose flour (around 1.5 cups)

1 1/4 teaspoons baking powder

quarter teaspoon of salt

For the cream cheese frosting:

113g softened cream cheese

1 teaspoon vanilla extract

125g icing sugar

2-3 tablespoons milk (test according to preferred consistency)

Preheat your oven to 177C and butter a mini bundt or cupcake tin. In a small bowl, briefly whisk together the flour, baking powder and salt. In a large bowl, beat together the speculoos spread, butter and white sugar. Beat for at least a minute, until light and fluffy. Beat in the eggs and vanilla. Add the flour mix and mix briefly to incorporatel the mix should look a bit dry but still sticky. Pour in the milk and fold in to incorporate. The batter shouldn’t be too thick or thin, and will resist ever so slightly when allowed to drop from the spatula.

Fill the cupcake/bundt molds full with the batter. Place in the preheated oven and bake for 16-20 minutes. Mine were done at the 18-minute mark. Test the inside by poking in a wooden skewer. They should have risen significantly but still look smooth and golden-brown on top. Allow the bundts to cool on a wire rack whilst you make the cream cheese glaze. Beat together the icing sugar, cream cheese and vanilla. Add milk, a teaspoon or tablespoon at a time, until you reach the desired consistency.

Remove the bundts from the pan once cool and using a knife, cut off the tops. This step obviously isn’t necessary if you’re just making cupcakes! The cupcake tops you get from making mini bundts are like an added bonus. I had a couple toasted for breakfast the other morning and they go wonderfully with nut butter and honey…. or the classic butter and marmalade, though the cake is already pretty sweet on its own. Place the bundts the right way up on the cooling rack, and drizzle the cream cheese glaze on top, allowing it to dribble down the sides, down the ridges formed by the cute little molds.

Optional: Sprinkle crushed speculoos biscuits on top