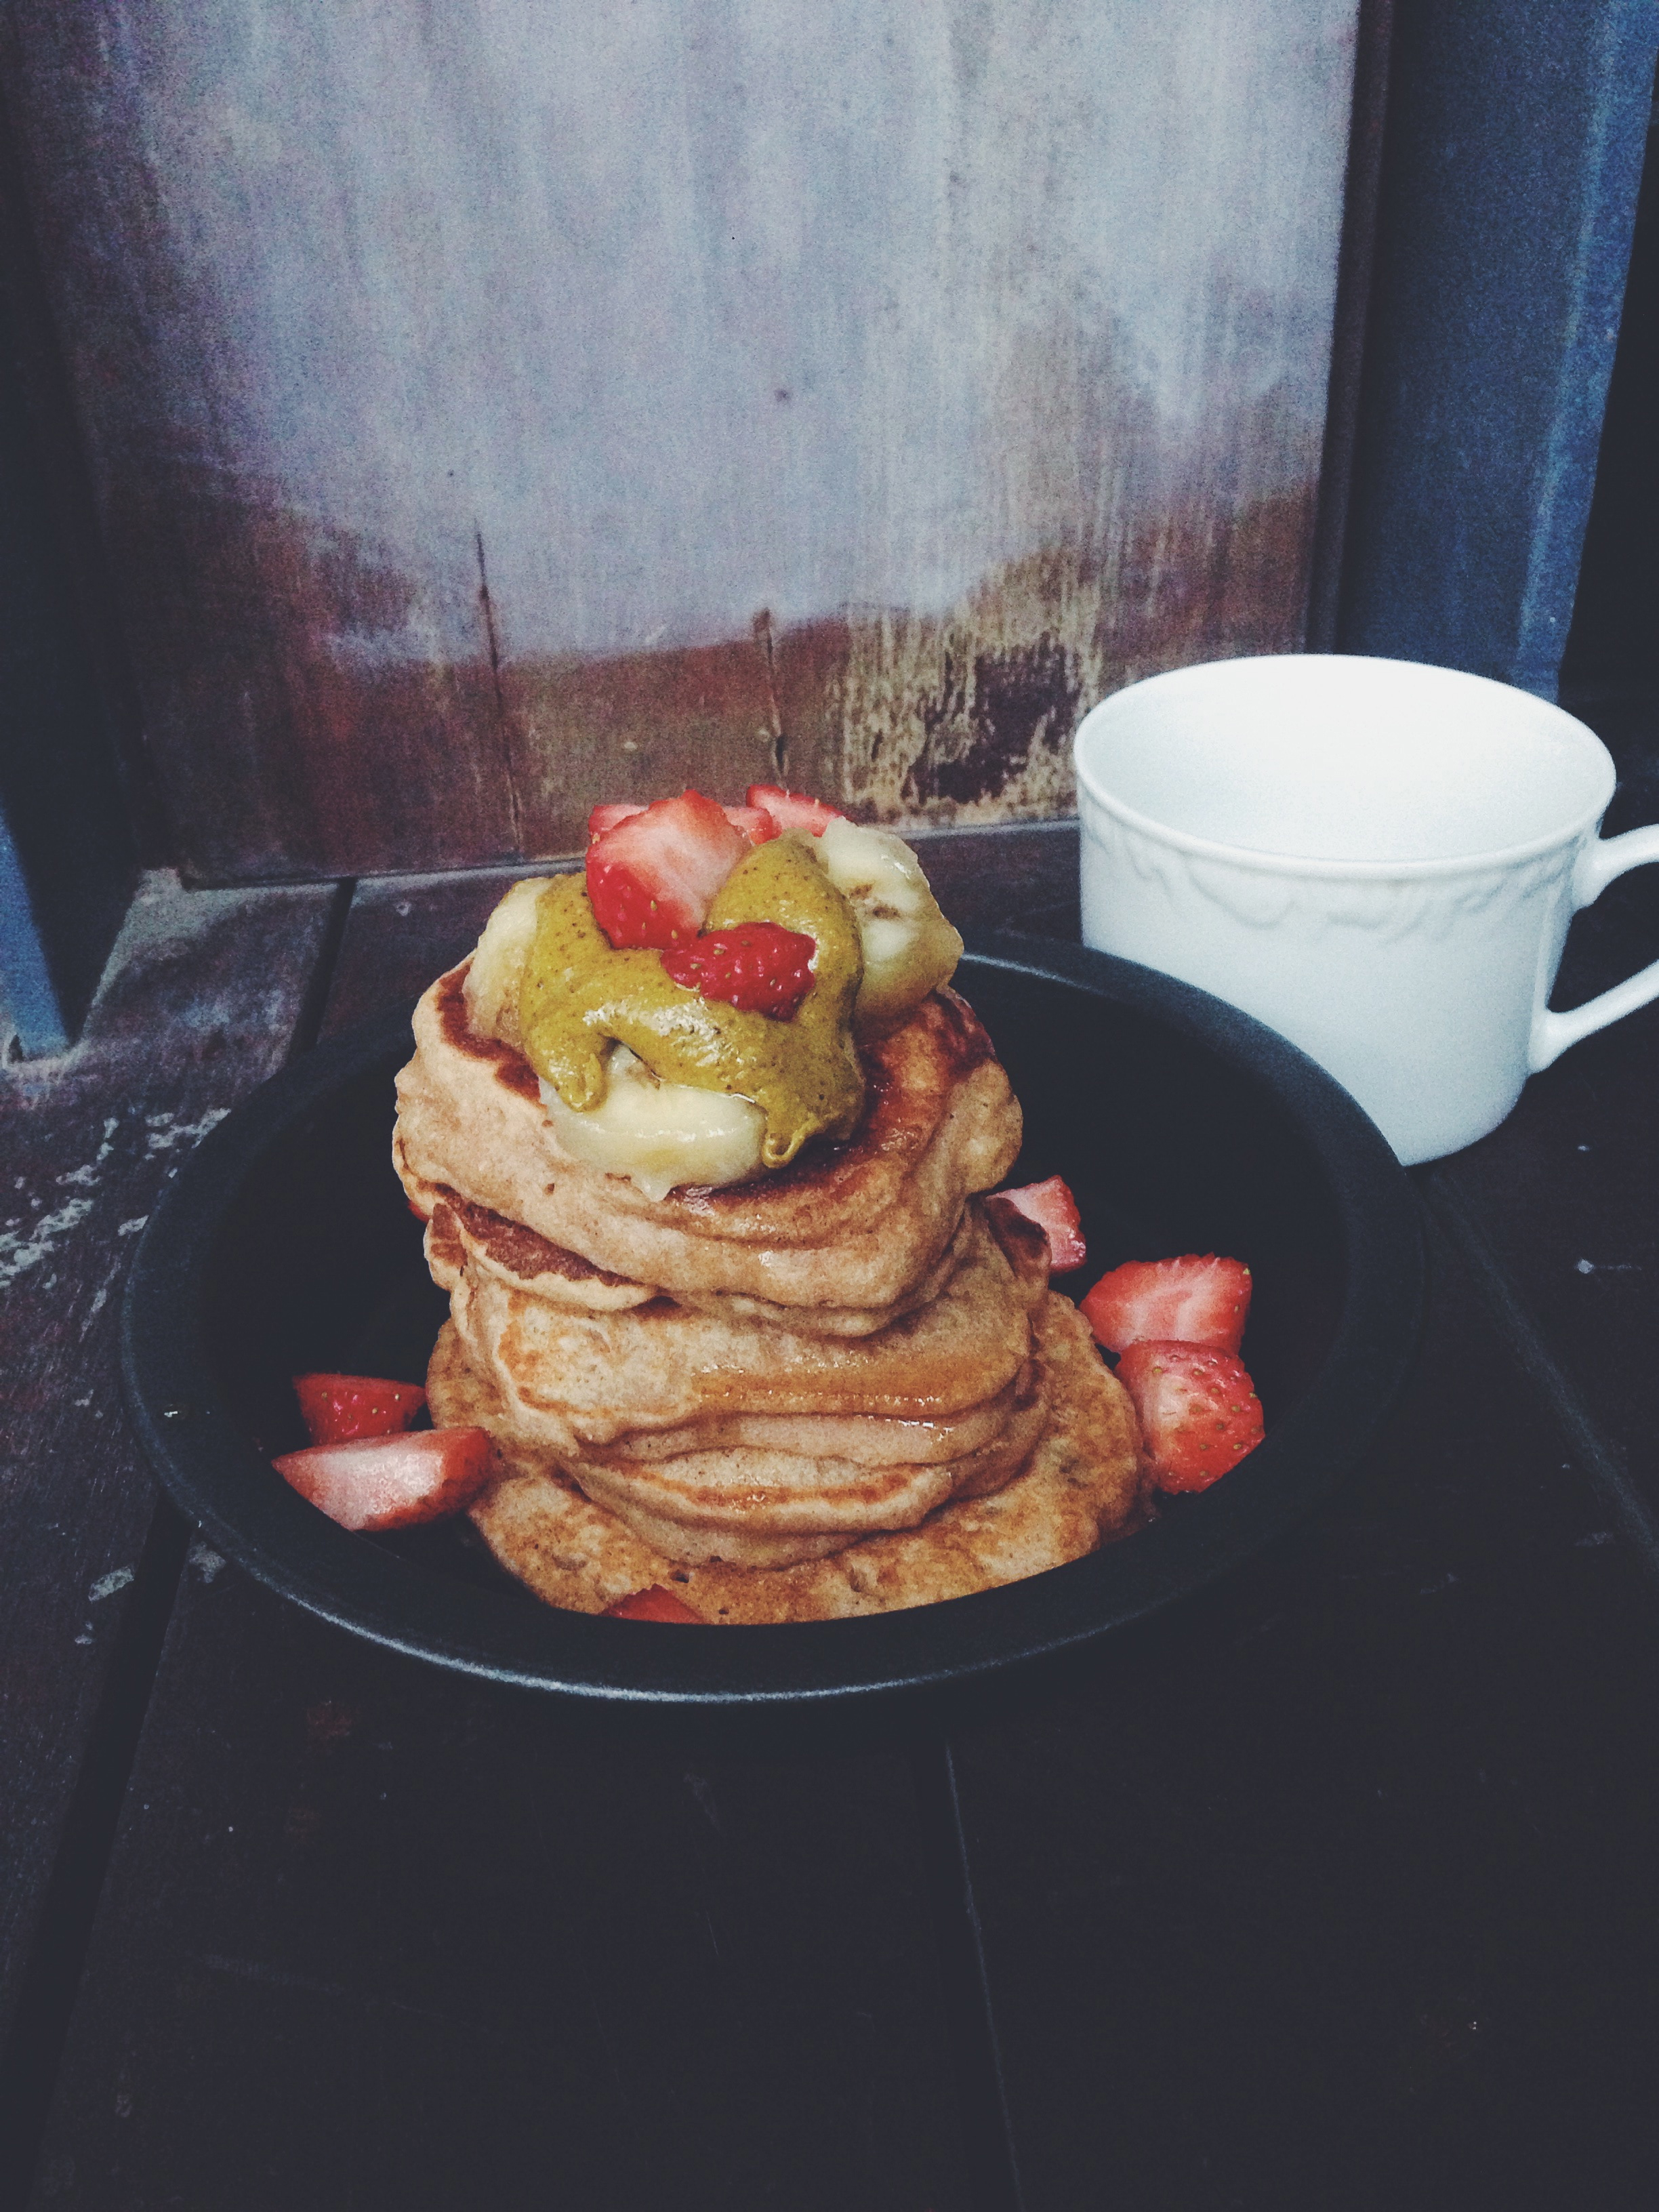
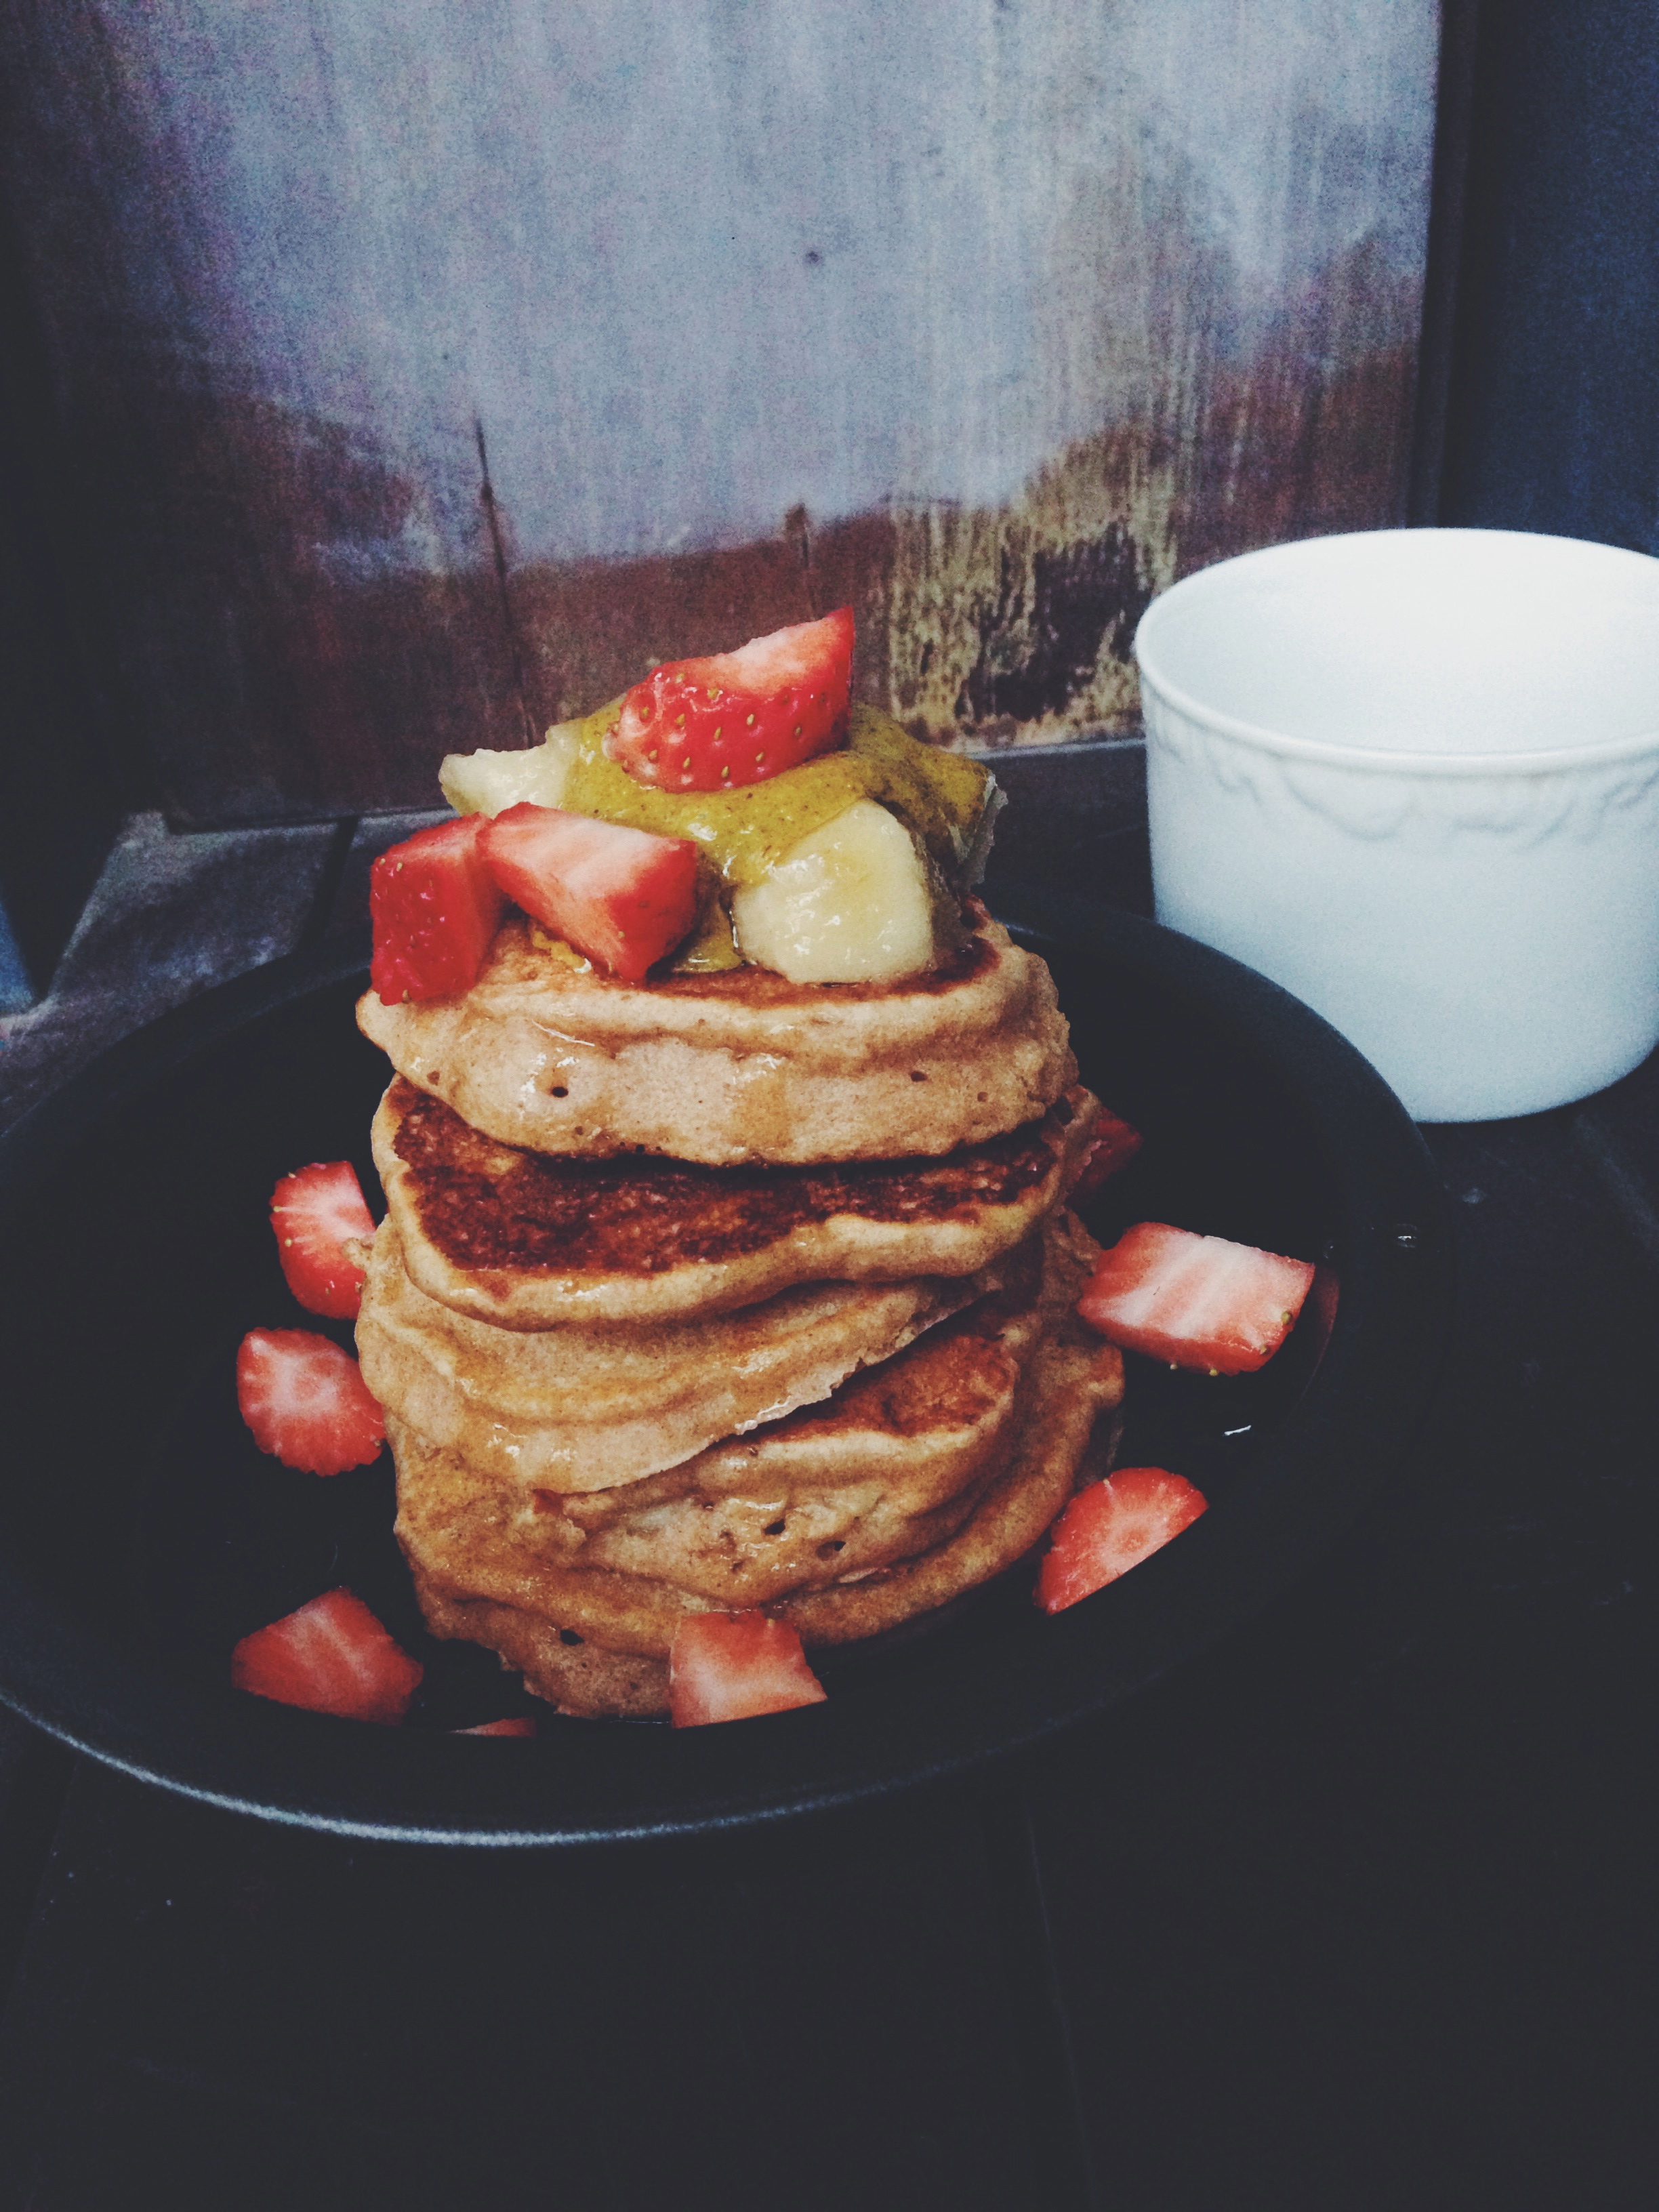
topped with pistachio butter, ripe banana, strawberries and maple syrup
The world has invented a myriad different types of pancakes. You get thick and fluffy, thin and fluffy, thick and dense with sparse holes for maximum stodge factor in each bite, crepes (if you’re talking all English, that is)… And you get pancakes which are basically hybrids between cake and fluff. Like this. I termed it banana bread because that’s the first thing which popped into my head when I took my first bite, warm and fresh off the stove. It tastes like the stuff– thick, bread-like without being dense or packed, tender and fluffy. Look at how thick each one is! Solid yet soft, like fat lazy men (was that a bit too much? Oops). Gives way to the fork as it glides easily down the stack. The best thing? You can whip up a whole load of these and freeze them for more pleasure in the following days of the week.
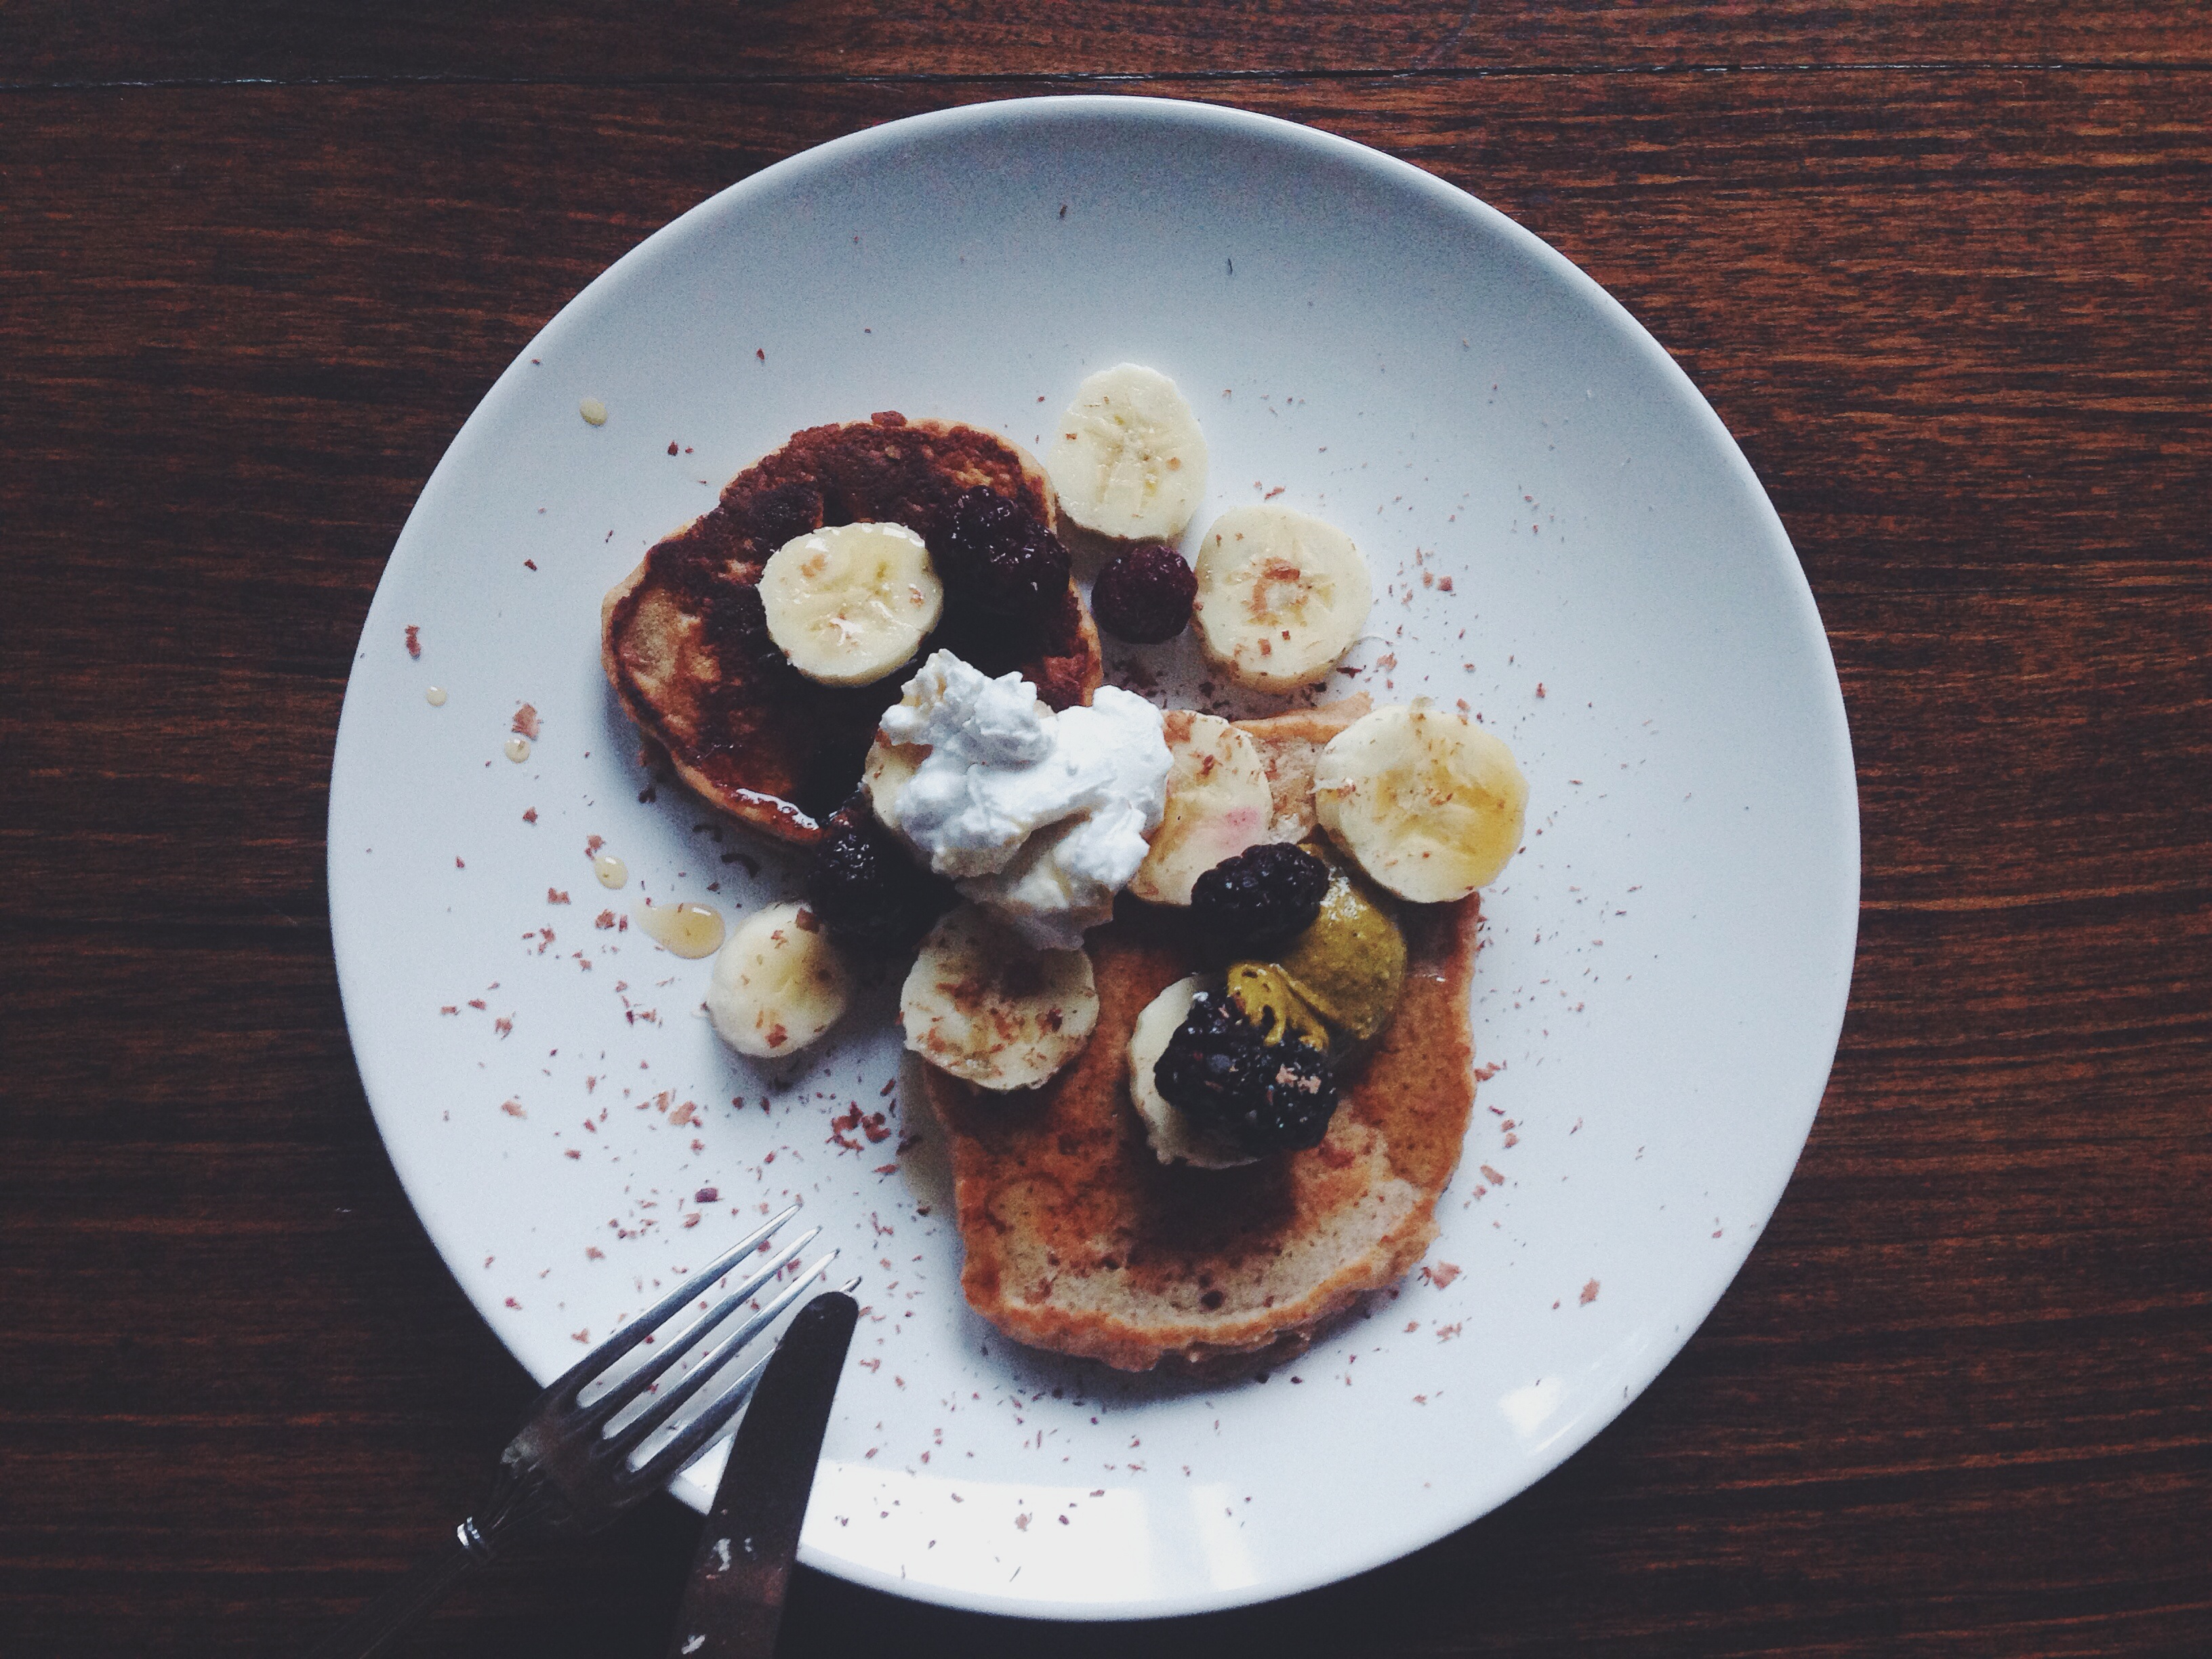
with whipped coconut cream, pistachio butter, banana coins and maple syrup
Banana Bread Pancakes (makes around 10, adapted from here)
170g all-purpose or whole wheat flour (I used whole wheat here)
2 tsp baking powder
1 tbsp brown sugar
1/2 tsp salt
1/2 tsp ground cinnamon
1.4 tsp ground nutmeg
1 egg
1 tsp vanilla extract
1 tablespoon honey
2 mashed, ripe medium bananas (or 3 small, or 1.5 large)
1 cup whole milk (or buttermilk if you have that on hand)
45g melted butter (a little more than 3 tablespoons), cooled to room temperature
In a large bowl, whisk together the dry ingredients– flour, baking powder, brown sugar, salt, cinnamon and nutmeg.
In a medium bowl, whisk together the milk, melted butter, egg, vanilla, honey and mashed banana. Add this mix to the dry mix and, using a spatula, fold until just combined. Which means there will be lumps. It won’t be smooth and that’s what you want.
Butter a pan or griddle on low-medium heat. If the heat’s too high, the bottom will brown too quickly but the insides will remain raw. Using a quarter cup measurement, dollop on the batter and spread into circles or whatever shape you like, because it’s too thick to spread freely by itself. Wait to see a few little bubbles come to the surface, around 1-2 minutes, before flipping and waiting for another 30 seconds or so. The second side always takes a shorter time. If serving for many people, put the ones you’ve cooked in a heated oven, until all the batter is used up. If not, just set aside a few for yourself and put the cooked ones on a kitchen towel to absorb excess moisture.
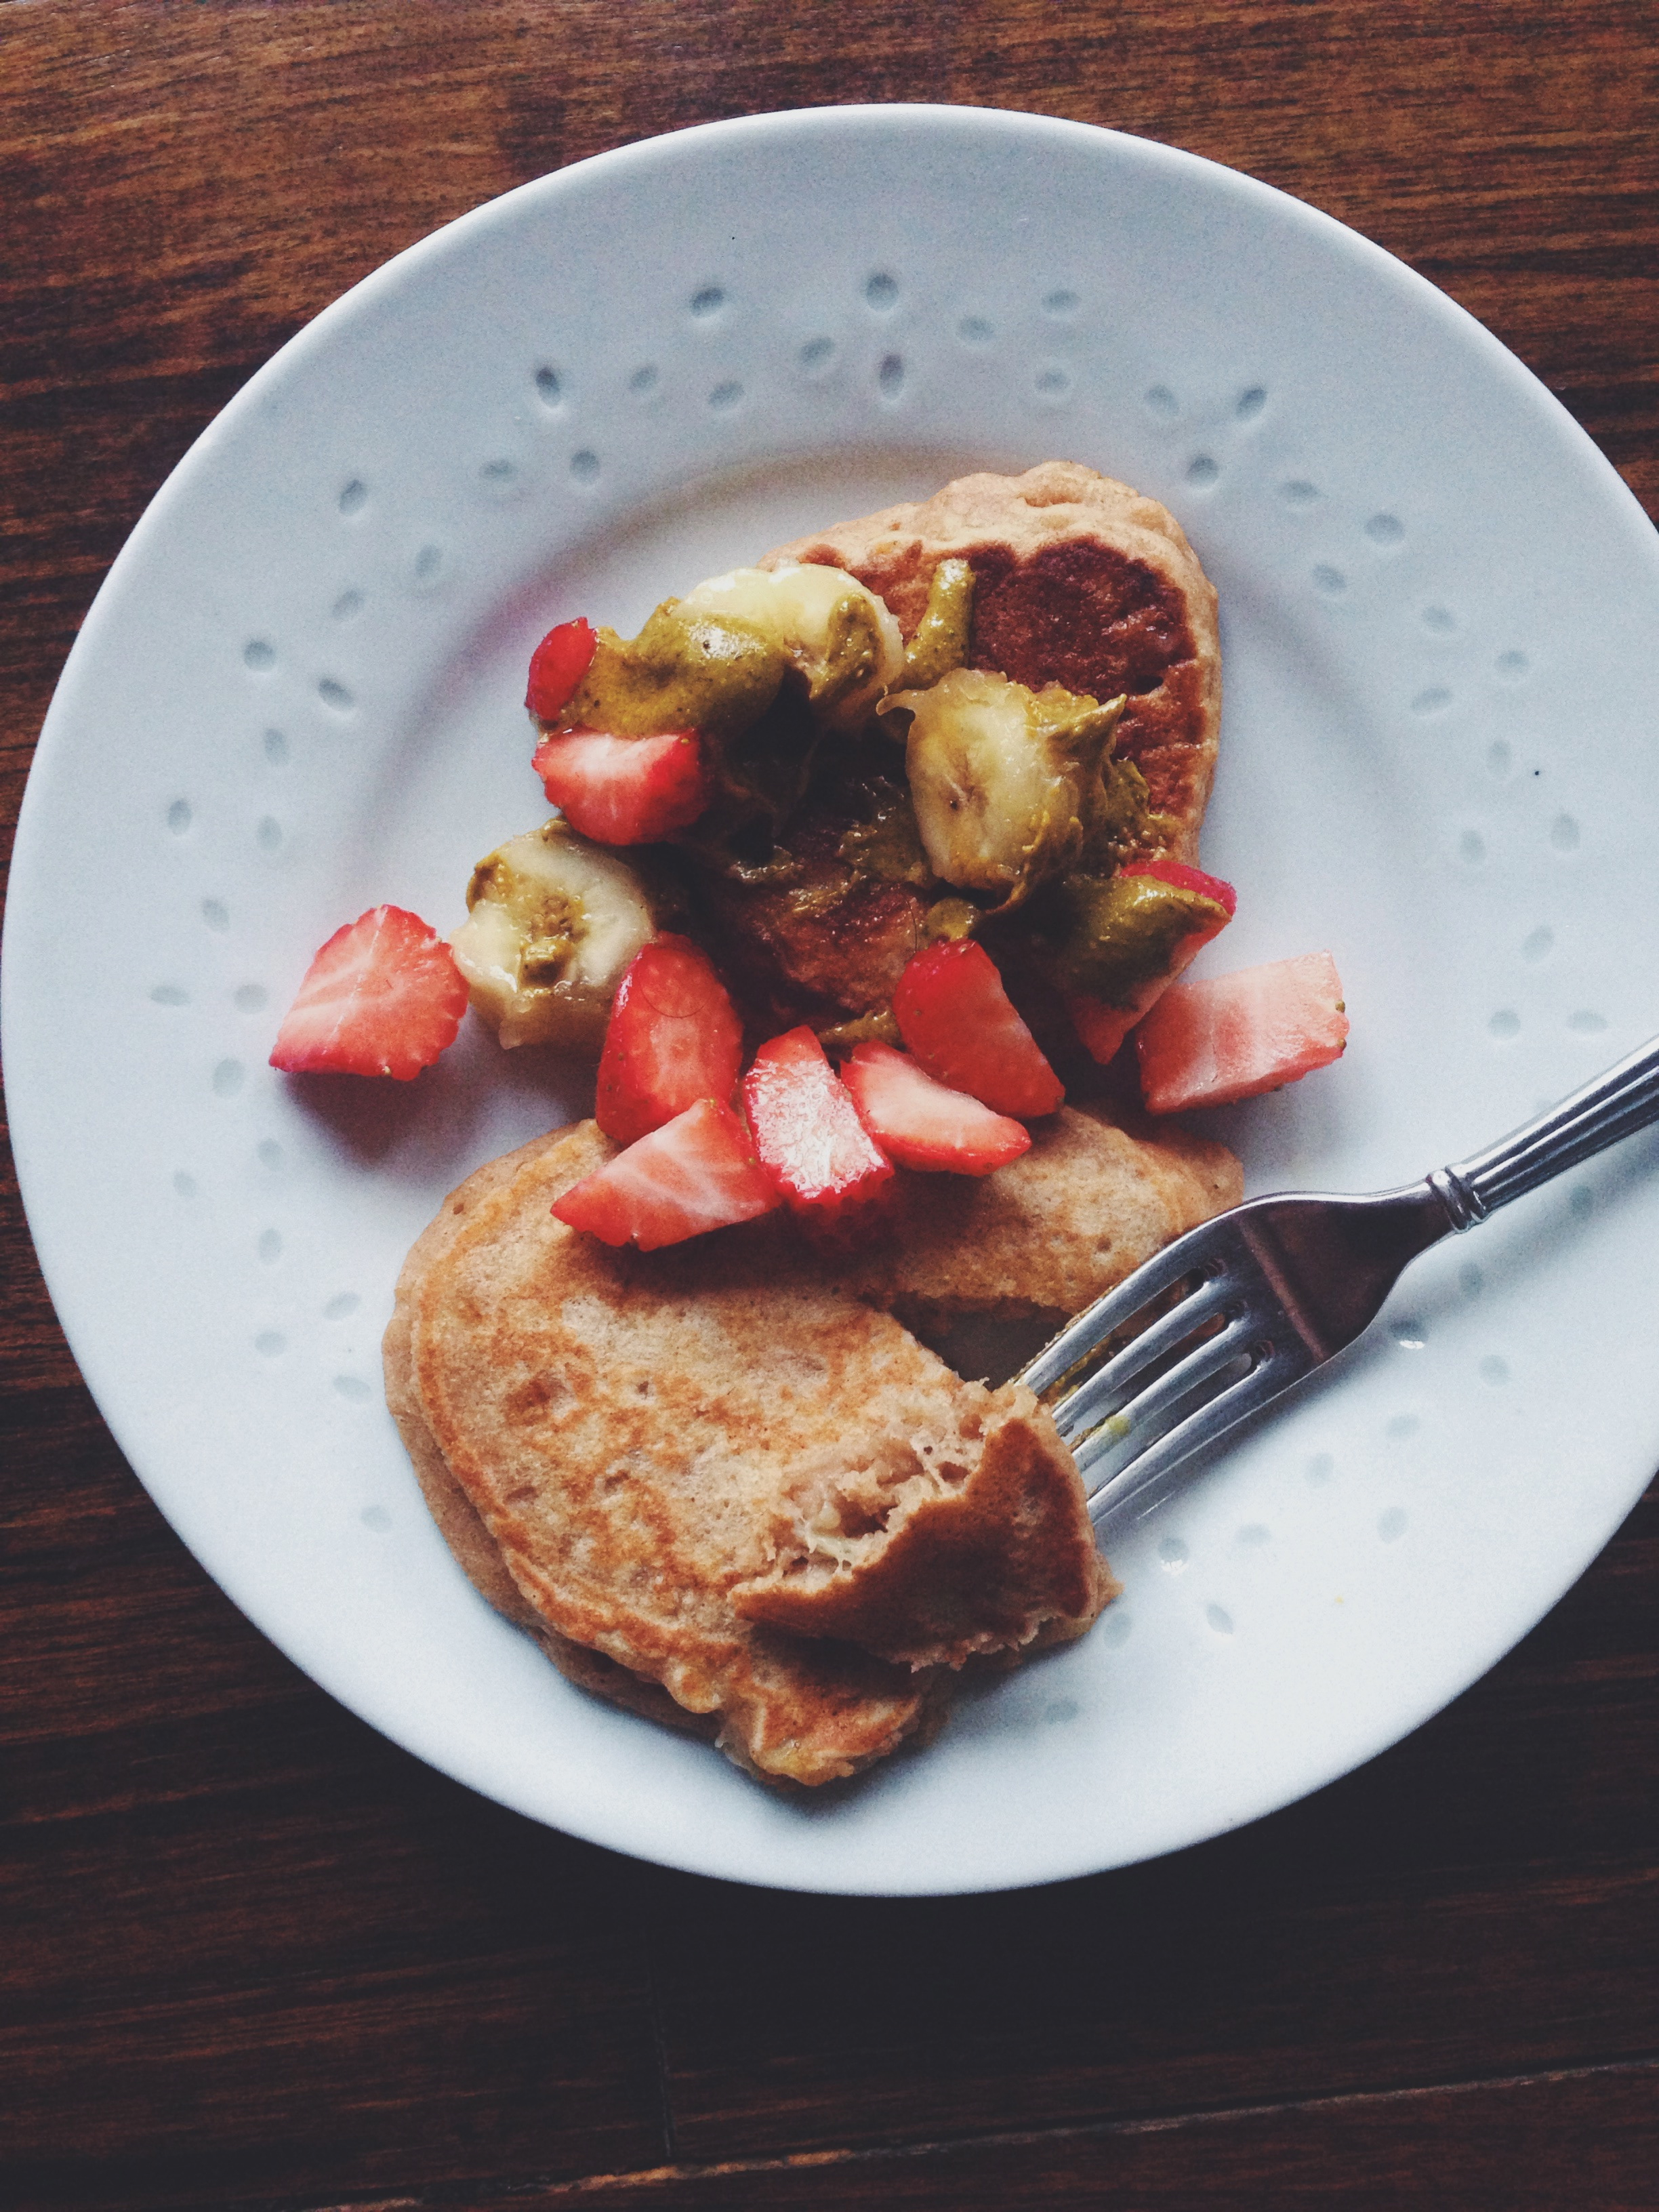
Top with whatever you want, be it butter and maple syrup, or fruit, nut butter and honey/maple syrup (my personal favourite combination).
I’m sure a few of you would have come across the term ‘caveman diet’ in some magazine, book or newspaper article. The whole phenomenon is intriguing and sensible; we basically are advocating a reverting to our ancestors’ lifestyle in the hopes that such a change will propel some sort of advancement in human health. We’ll be healthier, have lower BMIs, stronger bones, etc. It’s all very well and good, right? In a sense, yes. The diet itself is meant to promote a healthier lifestyle. You eat more red meat, fruits, vegetables and natural whole grains, whilst reducing the amount of processed wheat and dairy you consume. You benefit from increased energy and concentration, and better blood sugar levels which don’t shoot up and down like a roller coaster like 90% of the American population. When I first came across this idea, I took it lightly, the brioche and caffeine and egg fan that I am. Heck, the usual ingredients I touch in the kitchen are refined flours, eggs and sugar. Everything which promotes slower metabolisms, obesity, impeded thinking, and heart disease. In one way or another, indirect or not. And now, despite acknowledging its benefits, my attitude towards the caveman phenomenon hasn’t changed drastically. But why scoff at something proven to be beneficial?
I mentioned one of my favourite books in a previous post– The Story of the Human Body by Daniel Lieberman. His writing is superb, impactful; I haven’t come across another book which has altered my perspective on the human body quite as much. The thing is, we as humans evolve to accommodate change. We are so darn flexible, proven by the fact that we aren’t all dead at this point in modern time. I don’t think we need to fully revert to the caveman diet because our bodies have evolved to accommodate all that is available to us. I’m not saying we should gorge ourselves on cakes and sweets all day throughout the year, but in the end, eating more red meat and completely eliminating all the pleasures of the world (you know what I mean here) won’t exactly do your mood or health a tremendous amount of good. I’m no nutritionist, but can’t we advocate balance and not rigid dietary restrictions? I personally cannot take stomach a lot of red meat because I feel as if I have a little animal cemetery cradling my stomach afterward, hence I tend to eat more fish. Let’s just not stop having the cupcake, or mini bundt, treat on the weekend. Let’s live for the balance of what us, these smart cookies, have grown to learn, tweak and love. I’m all for the (occasional) elimination of those horrid processed foods, aka anything in a packet, but sweet tooths, I’m on your side. Go ahead, bake a tray of these. I implore you!
My mum recently bought mountains of speculoos/biscoff cookie spread for her own kitchen experiments. Yes, another reason why I love her so much. Lotus Biscuits are actually the best thing dunked into hot and milky English Breakfast tea. And there are a million things one can dip into hot and milky tea. Speculoos and cream cheese has been done before, and I love how this recipe incorporates both without overwhelming either flavour. The speculoos is the obvious flavour in the cake batter, which is on the slightly denser side to hold up the integrity of a robust mini bundt. Topped with crushed speculoos biscuits, salted caramel sauce (had some extra left over), and coconut date sugar. The cream cheese frosting and crushed biscuits are enough here; I just happened to have leftover ingredients which amped up the light and otherwise more predictable bites of speculoos heaven.
The crushed biscuits on top offer the loveliest texture contrast. The recipe itself is so simple because the speculoos spread already has flavours like cinnamon and vanilla, so the rest is just a matter of 5-minute mixing, tops.
Speculoos Mini Bundts (makes 12, adapted from Baked Bree)
58g soft, unsalted butter
140g Speculoos/Biscoff spread (a half cup)
225g (1 cup) white sugar
2 eggs
80ml whole milk
1.5 teaspoons vanilla extract
188g all-purpose flour (around 1.5 cups)
1 1/4 teaspoons baking powder
quarter teaspoon of salt
For the cream cheese frosting:
113g softened cream cheese
1 teaspoon vanilla extract
125g icing sugar
2-3 tablespoons milk (test according to preferred consistency)
Preheat your oven to 177C and butter a mini bundt or cupcake tin. In a small bowl, briefly whisk together the flour, baking powder and salt. In a large bowl, beat together the speculoos spread, butter and white sugar. Beat for at least a minute, until light and fluffy. Beat in the eggs and vanilla. Add the flour mix and mix briefly to incorporatel the mix should look a bit dry but still sticky. Pour in the milk and fold in to incorporate. The batter shouldn’t be too thick or thin, and will resist ever so slightly when allowed to drop from the spatula.
Fill the cupcake/bundt molds full with the batter. Place in the preheated oven and bake for 16-20 minutes. Mine were done at the 18-minute mark. Test the inside by poking in a wooden skewer. They should have risen significantly but still look smooth and golden-brown on top. Allow the bundts to cool on a wire rack whilst you make the cream cheese glaze. Beat together the icing sugar, cream cheese and vanilla. Add milk, a teaspoon or tablespoon at a time, until you reach the desired consistency.
Remove the bundts from the pan once cool and using a knife, cut off the tops. This step obviously isn’t necessary if you’re just making cupcakes! The cupcake tops you get from making mini bundts are like an added bonus. I had a couple toasted for breakfast the other morning and they go wonderfully with nut butter and honey…. or the classic butter and marmalade, though the cake is already pretty sweet on its own. Place the bundts the right way up on the cooling rack, and drizzle the cream cheese glaze on top, allowing it to dribble down the sides, down the ridges formed by the cute little molds.
Optional: Sprinkle crushed speculoos biscuits on top
I include two different nut butter options here– pistachio and almond. Oh yes, and two special frostings. I guess you have to read on if you want to know the specifics *annoying seductive winky face*.
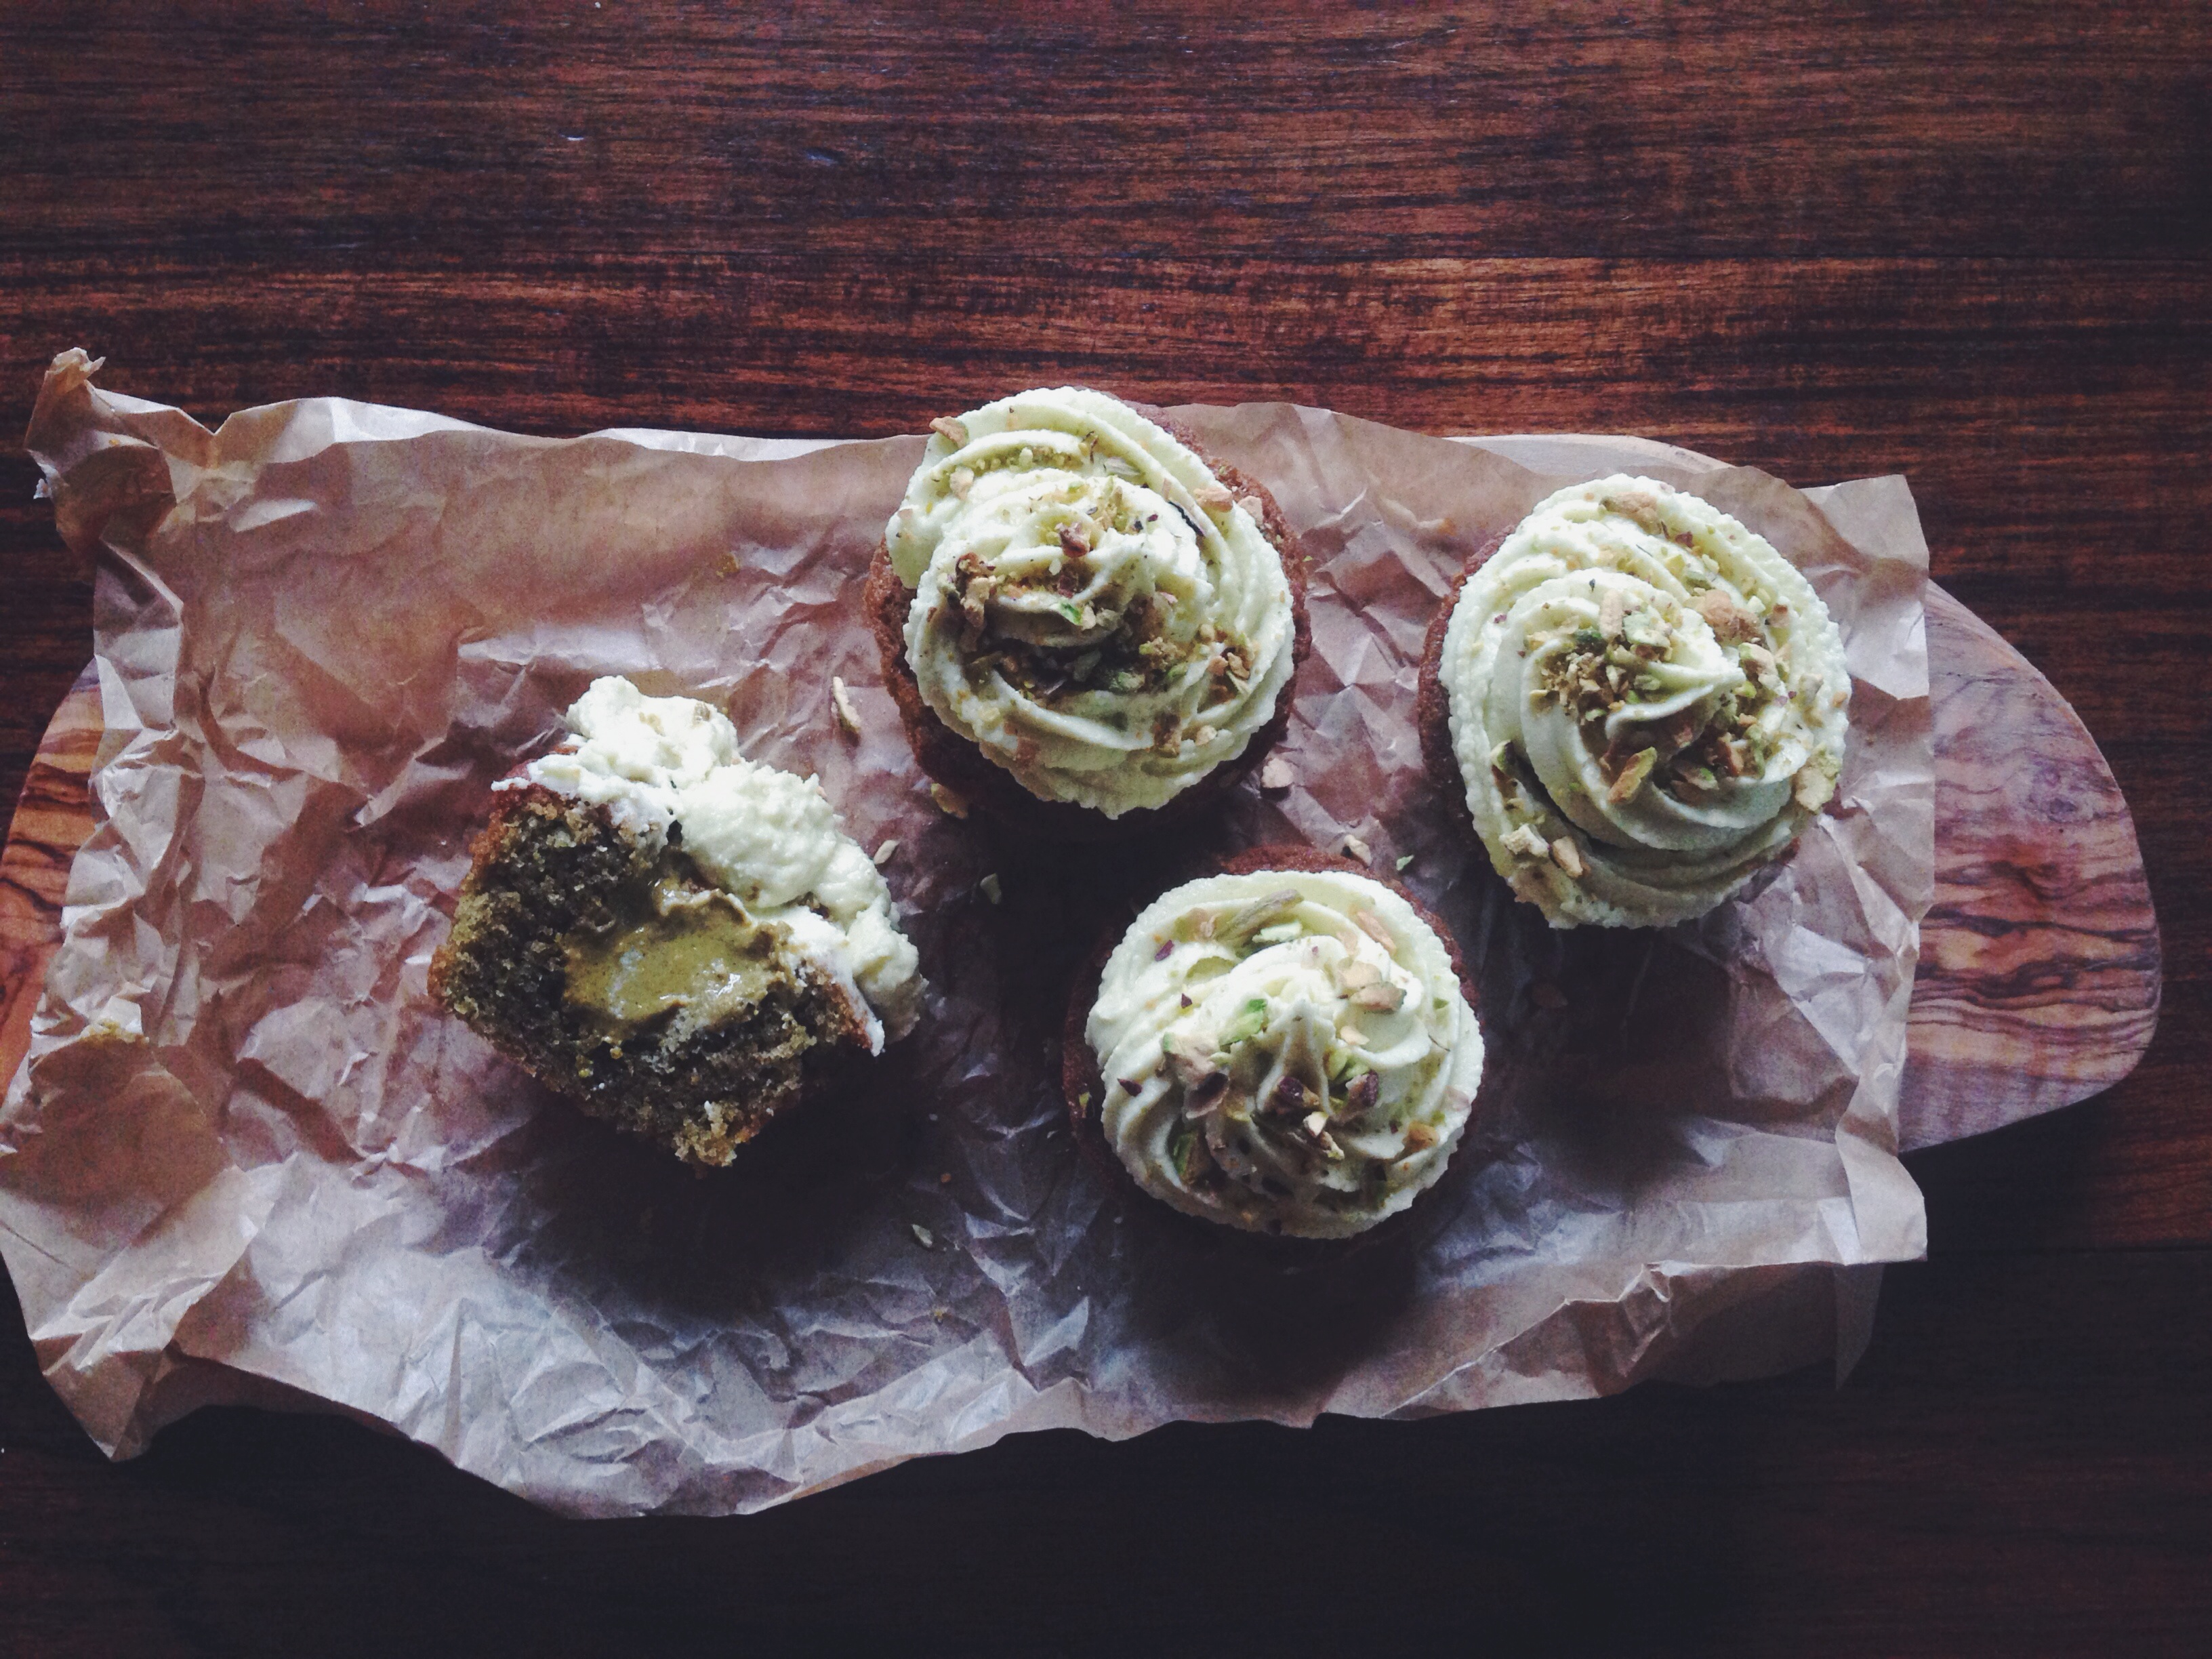
almond butter stuffed; topped with salted caramel cream cheese frosting and speculoos biscuitpistachio butter stuffed; topped with matcha buttercream and chopped pistachios
The first time I made these cupcakes, I relied purely on instinct and an old, old recipe found deep in the recesses of my dusty and grainy mental archives. The second time round, I modified a recipe from Cupcake Jemma, and they turned out absolutely perfect. No really. I hate these sorts of exaggerations, all the ‘reallys’ and ‘trulys’, so I’m officially going against personal principle for the sake of emphasis and honesty. These are the lightest, fluffiest little things, and I adore how the flavour of green tea is pronounced, and not hidden like some odd side element.
Anyways, it was a lucky shot. I always start a baking experiment with some wild or novel idea, but the initial framework always ends up being littered with side details and spontaneous ‘wait, I should use this instead of that!’ moments. They speckle the total perfection, so whatever I end up with is never what I meant it to be. Take this, for instance. I’ve recently been on a slight matcha roll (note to self: try out matcha rolls) because of its subtle green tea flavour. The bitter aftertaste lingers on the back of your tongue, never quite overwhelming it, making whatever you’re tasting just that much more sophisticated. Almost healthful, and no, not just because of that deceiving light green hue. I could list all the healthy characteristics of a teaspoon of matcha powder, but let’s face it, we’re talking about cupcakes here. I guess it’s further redeemed by the soft, oozing, rich dollop of almond butter right in the centre, but I haven’t gotten on to the frosting yet. Life is about balance. This is balance.
I was a little afraid of making cupcakes for two reasons.
1. I’ve made them (well, everyone makes them a lot) so many times that I was afraid the repetition bug would strike out against me and unleash a sudden curse on my beauties. Call me deranged.
2. They could very well and most likely be sub-par cupcakes. People want astounding, not average things.
That second point got me thinking. So if I made a good cupcake, it has to be made even better by some novel pairing or ingredient.. we’ve all been down the red/blue/green velvet path at least once, or maybe tried that wonderful chocolate or vanilla buttercream frosting to up the ante a bit, but something an inch more atypical would work better. That’s when I thought of matcha and almond (not quite novel just yet)… topped with salted caramel cream cheese frosting, topped with crushed speculoos biscuits (Lotus biscuits as everyone knows them here) and drizzled with more salted caramel. Think soft matcha sponge encasing a large dollop of creamy, rich nut butter, topped with lightly salted caramel cream cheese swirls and light, cookie-based crunch on top, or, in another case, delicate swirls of thick and fluffy matcha buttercream. The crumb is soft and firm, and the best part of these cupcakes is that post-baking, you get this wonderful sugar-crusted, crumbly top, which breaks away easily when you want to stuff the little holes with nut butter. I do love this matcha and almond/pistachio pairing, the upper-class rigidity of the flavours totally offset by the playful done-it-before frosting options.
Nut Butter Stuffed Matcha Cupcakes
For the cupcakes (makes 10-12, adapted from Cupcake Jemma):
125g self-raising flour
135g soft, unsalted butter
125g white sugar
2 eggs, lightly beaten
1 teaspoon vanilla
pinch salt
quarter teaspoon bicarb soda
1 teaspoon matcha powder
Option 1: Matcha buttercream
270g icing sugar
150g softened, unsalted butter
1 tsp vanilla extract
1 teaspoon matcha powder, dissolved in a splash of whole milk
Option 2: Salted caramel cream cheese frosting (after many personal trial and error stints):
170g cream cheese, at room temperature
150g brown sugar
75g icing sugar
75g butter, softened
1 tbsp salted caramel sauce (store-bought or homemade)
for the topping: crushed speculoos biscuits and extra salted caramel sauce for drizzling
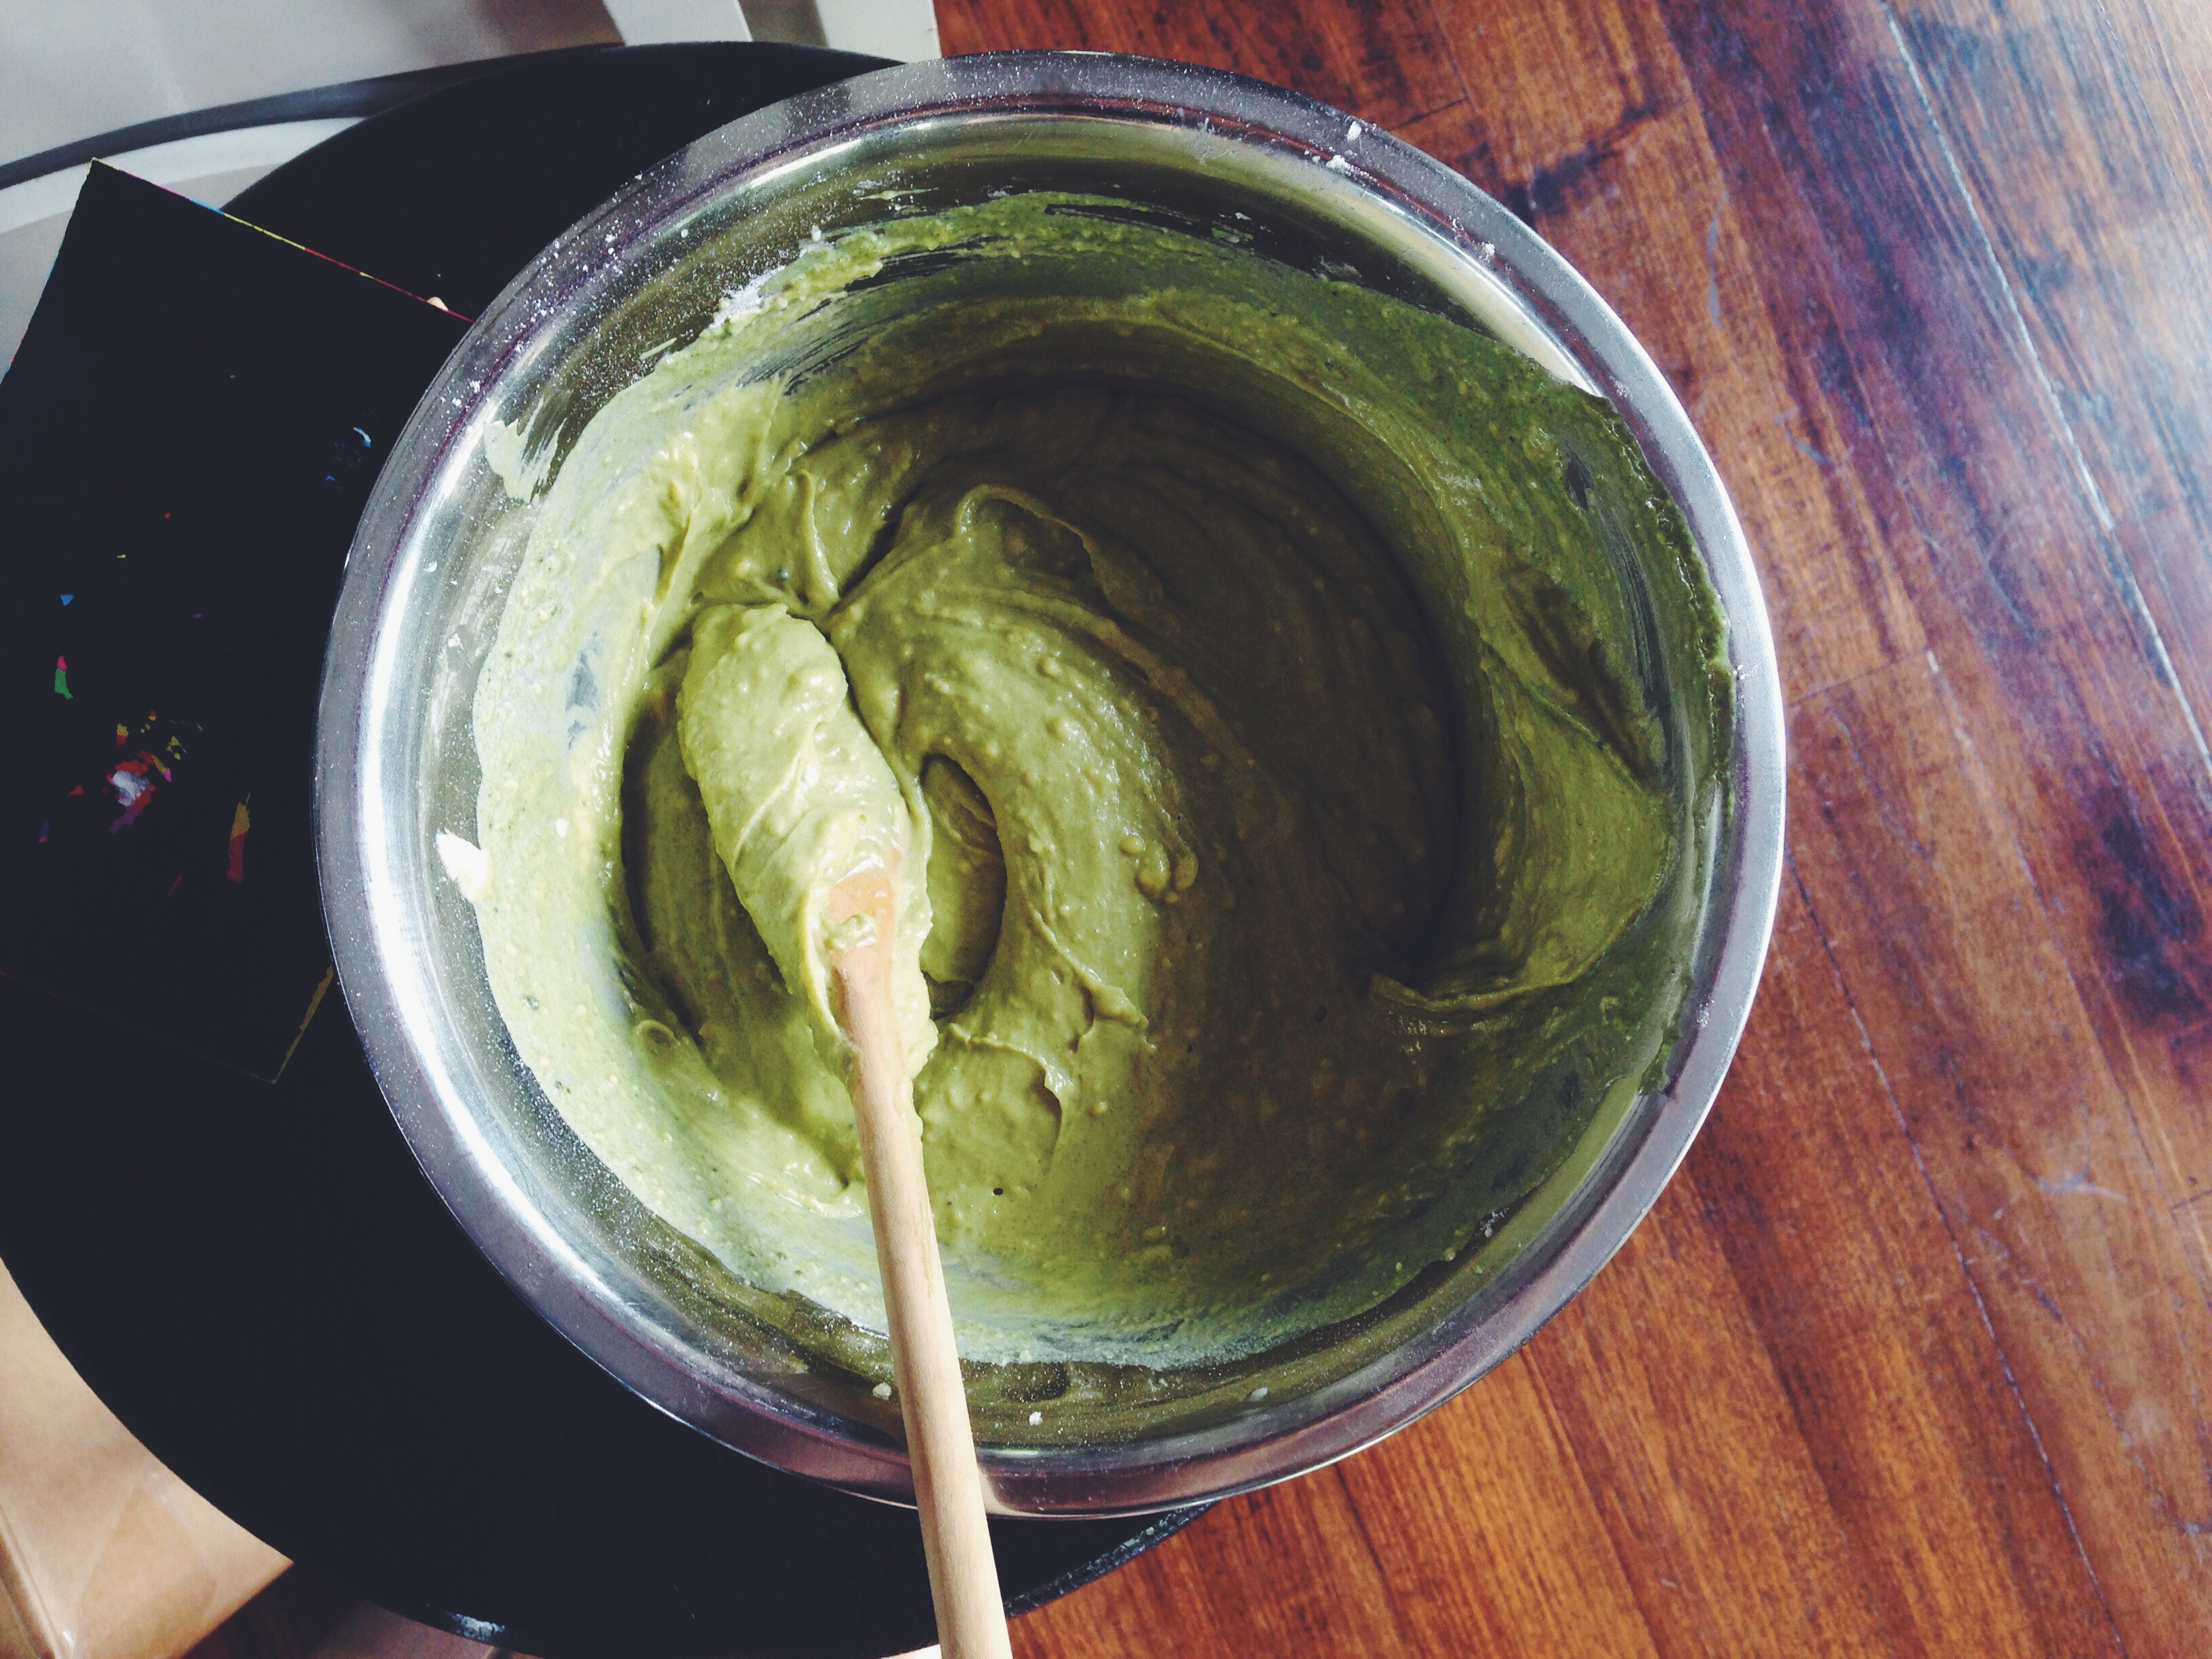
Preheat your oven to 170C (350F) and spray a muffin tin. In a large bowl and with a normal or electrical whisk, beat the butter and sugar together on high until pale and fluffy. Beat in the eggs and vanilla. In another smaller bowl, whisk together the dry ingredients- flour, bicarb, matcha powder and salt. Using a spatula, fold the flour and matcha mixture into the wet mixture.
Place the cupcake tin into the preheated oven and bake for 20-22 minutes. I took mine out at the 21-minute mark. Leave them to cool on a wire rack. The tops will be crusty and a light golden, and will look relatively flat. Leave to cool on a wire rack before removing to dig holes and stuff them silly.
Salted caramel cream cheese frosting:
Whilst they cool, make the frosting. Beat the brown sugar and butter together using a handheld electrical whisk, then beat in the cream cheese, icing sugar and salted caramel sauce. This is my favourite salted caramel cream cheese frosting which uses more brown rather than icing sugar, so it’s handy when you’re running low on icing sugar. Put the mix into the fridge until ready to use.
Matcha buttercream:
In a large bowl, beat together the icing sugar, softened butter, teaspoon of vanilla, and matcha/milk mix. Beat until visibly light, thick and fluffy. Stuff a piping bag with the mix and leave in a cool place (I put mine in the fridge overnight and let thaw for around 15 minutes the next morning) until ready to use.
When the cupcakes are mostly cool (around 15-20 minutes post-baking), take a teaspoon and dig right into the heart of the cupcake, before scooping out some cake. This part is mostly up to you; if you want more nut butter per mouthful (you lovely hedonists) then go ahead and dig deep, but if not, a teaspoonful of cake will suffice. Using another teaspoon, spoon in a heaped (or however much you want) of nut butter into the hole. I used homemade almond and pistachio butter; my mum makes batches in the kitchen all the time and it’s the most divine thing in the world. Using a large spoon or piping bag, frost the cupcakes with the salted caramel frosting or matcha buttercream. For the former, add crushed speculoos biscuits and more salted caramel drizzled on top. For the matcha buttercream, pipe the buttercream on top, whizz up some pistachios in a food processor and sprinkle on top. I also added salted caramel to this version because, well, why the heck not.
There’s nothing wrong with reverting to the classics. I’m a serious fan of innovation and weird mismatches that actually work (referring to my previous post here), but I was overcome by the staunch determination to conquer something truly ubiquitous, something most of us rely on the real professionals for. I’m only an amateur baker who does all this whizzing, whisking and whipping in the kitchen for pure fun, but knowledge of and experience with the classics is required for any further exploration, right?
I’ve made brioche pretzels before, dived right in the deep end, no basic loaf or anything first, just a ‘ah-how-posh-and-fun’ kind of feel. Even added some chocolate chips and lemon zest to add to the childish fun. However, thanks to underestimation of the proofing and kneading time, I merely scraped by with a pseudo-brioche. Flat, dense, and just a little too hard on the bottom. The inside was fluffy, but the exterior betrayed a better could-be texture. Think I’ve got it this time, but the method I use here is adapted from something a little more unorthodox, whereby it’s all in the hand work, and the kneading time isn’t too horrid. I also used a little less yeast, because the first loaf I got using the original recipe was a tad too yeasty and the rise wasn’t as perfect as could be. Making this bread is actually fun, if you like to get down and dirty. It’s going to be sticky, wet and yellow, but that’s the magic of excess fat, eh? Rich, eggy, sublime.
The crumb is light and tender, with the slightest stretch, though never feeling or tasting under proofed. The final result will look yellow. Easy to freeze, then microwave and cut for whatever you want really, be it toast, topped with good butter and honey or maple syrup, or dunked in freshly whipped eggs for a french toast morning.
Brioche (makes one standard 9×5-inch loaf, adapted from La Tartine Gourmande)
For the loaf:
210g all-purpose flour
5g instant yeast
78g unsalted butter at room temperature, cut into medium-sized chunks.
2 tbsp white sugar
pinch salt
80ml milk, warmed slightly in the microwave
2 eggs
1 egg for the egg wash before baking
For the maple pearl sugar:
60g white sugar
1tsp maple syrup
The day before you make the brioche or earlier in the day, make the maple pearl sugar. Mix the sugar and maple syrup in a bowl using your fingertips. It should be wet and clumpy. Tip the maple sugar on a plate and flatten using your fingers, about a half-inch thick. Cover the plate with cling wrap and leave in the fridge to set. After 4-6 hours, the sugar will have formed a malleable, solid layer, which can be broken up into smaller chunks, similar to that of pearl sugar. Yum yum. Leave it in the fridge before using.
Now for the brioche. Use a mixer if you wish, but I used my hands for everything. In a large bowl, whisk together the flour, sugar, salt and yeast. Make a little well in the centre and, with your hands or a wooden spoon, mix in the warm milk briefly. Work in the butter (I find it easier to use your hands for this part) chunk by chunk, making sure each chunk is mostly incorporated before adding the next. It will be sticky and oily, but don’t fret.
Add in the eggs one by one. Stir the first egg in with a wooden spoon, then use your hands to really work it in. It will look messy and clumpy at first, but keep trying to incorporate the dough and egg together. I ended up working the dough when it was suspended in the air, stretching it then folding it over itself again, like kneading in mid-air. It worked, and I saved myself a lot of clean-up hassle later on. Do the same for the second egg. It will be very sticky, difficult and incredibly wet. That’s exactly what you want.
Once the eggs are worked in, dump the soft, yellow mass of dough into the same bowl and continue to ‘knead’ with a wooden spoon. Beat it with your wooden spoon, mimicking the kneading action in the bowl. Knead for a good 5-7 minutes. The dough will look like a pale baby’s bottom, smooth, taut, flawless, but still very sticky. After kneading, leave the dough in bowl (it’s already greased enough), cover and let the dough rise for an hour. After an hour, put the dough in the fridge and leave for another 2 hours, or overnight.
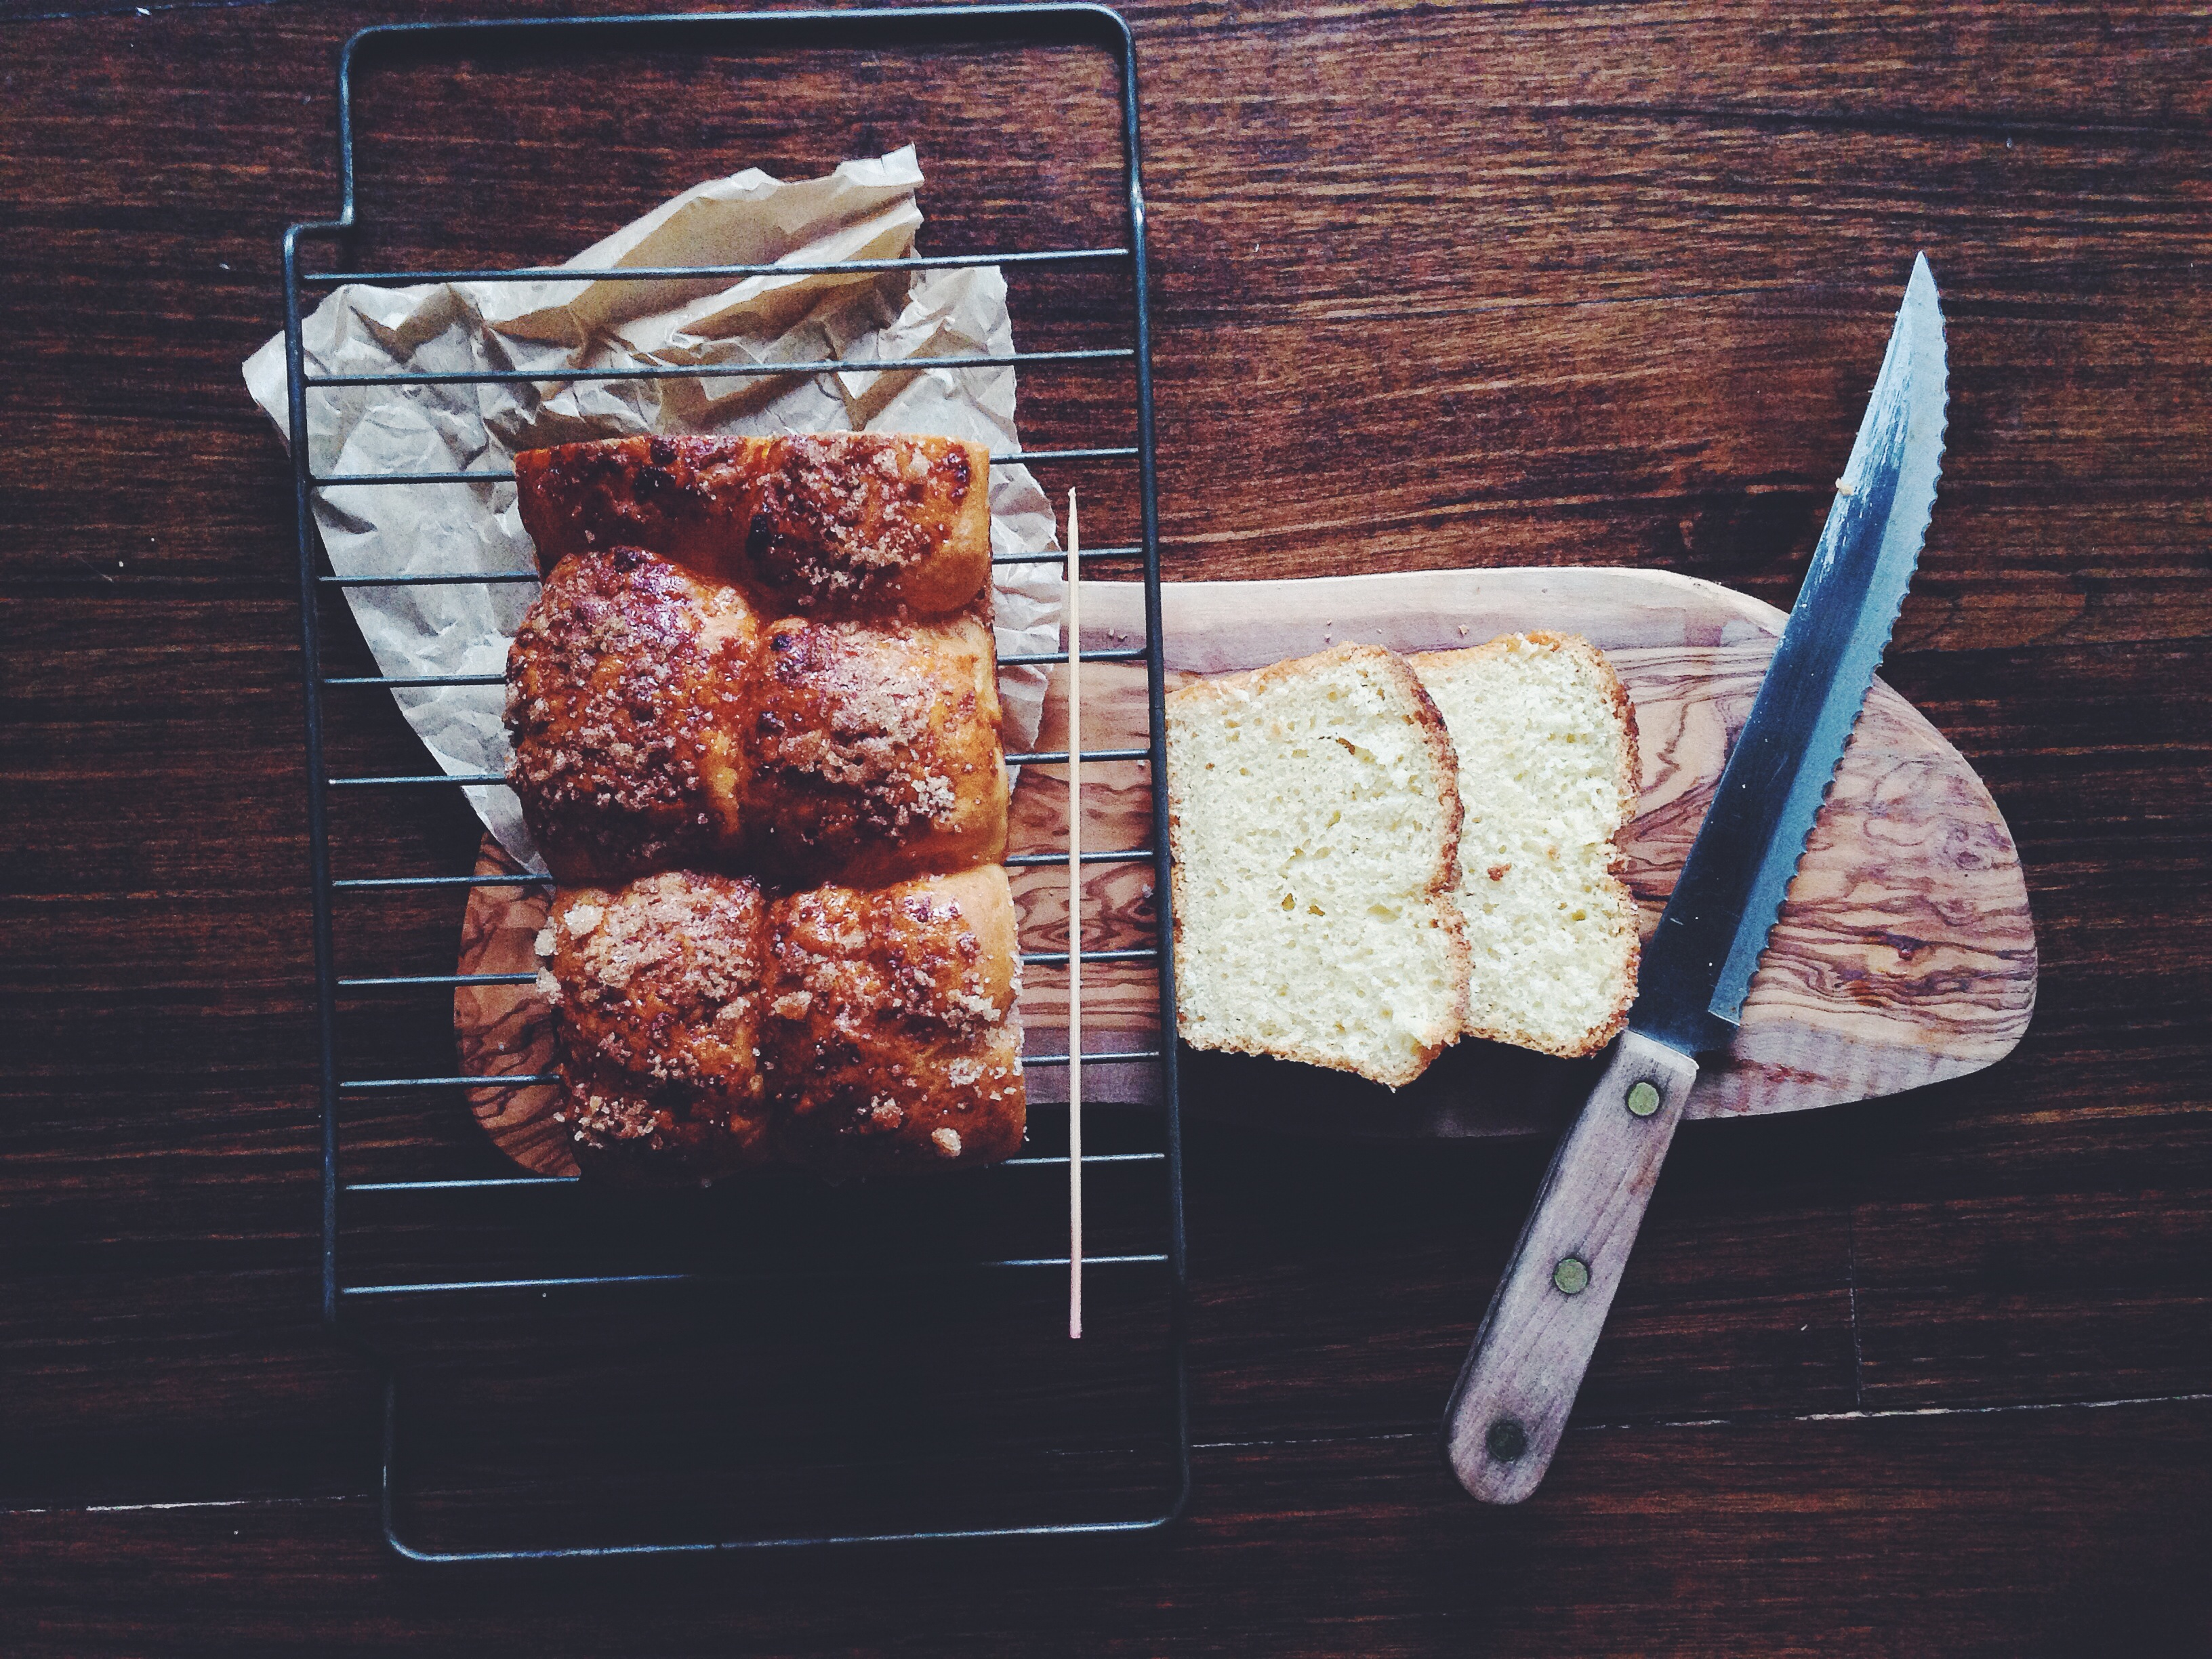
After the couple of hours, take the dough out of the fridge and the bowl. Preheat your oven to 190C and grease a 9×5-inch loaf tin. Punch the dough down a little, then weigh the dough and divide it into 6 equal pieces. My dough weighed around 450g total, so each piece was 75g. The cold dough is a dream to touch and work with. Roll each piece into a ball and pop into the greased loaf pan. After rolling all the pieces into balls of the same size, you should get a 2×3 row of balls in the loaf pan. Beat an egg and brush the top of the loaf with the egg wash. Finally, take the maple pearl sugar and sprinkle it on top of the loaf. You will get pea-sized chunks as well as normal sprinkles.
Bake the loaf for 30-35 minutes. If you wish, take a piece of aluminium foil and cover the top of the loaf after 15 minutes to prevent over-browning. I used the middle mark and stopped the baking after 33 minutes, and it turned out perfectly.
This loaf can be put in a freeze-safe container and left in the freezer for a couple of months. It can be left at room temperature for 1-2 days and nothing more (especially in this bloody hot weather). Whenever you want a nice, slightly sweet treat, just take the loaf out, microwave on high for 20 seconds, cut with a bread knife, then toast or dunk in egg for… Well, does french toast need any explanation anyway?
I first came across the idea on Entertaining with Beth, aka one of the few domestic channels I bother to watch on Youtube. This wonderful lady labours tirelessly in the kitchen to find the perfect formula for the most basic whip-ups, be it pancakes, waffles, cupcakes or brownies, and I admire her efforts to help us peasants. But! I was hesitant to try this out for a few reasons:
– I don’t have a proper belgian waffle maker. There. I said it. So how on earth was I to recreate some glorious dish without the proper instrument? I live with Child No. 1, who’s Swedish (Sevren), thin, with scalloped edges. It’s not the same (on the point that I don’t have a belgian waffle maker.. yeah, something must change).
– Secondly, I always have a problem with timing… and storage. I was worried about how well these would freeze and toast up, and how long it would take for the same crisp factor to be achieved in a very different waffle maker.
– Third… okay fine, it’s just two.
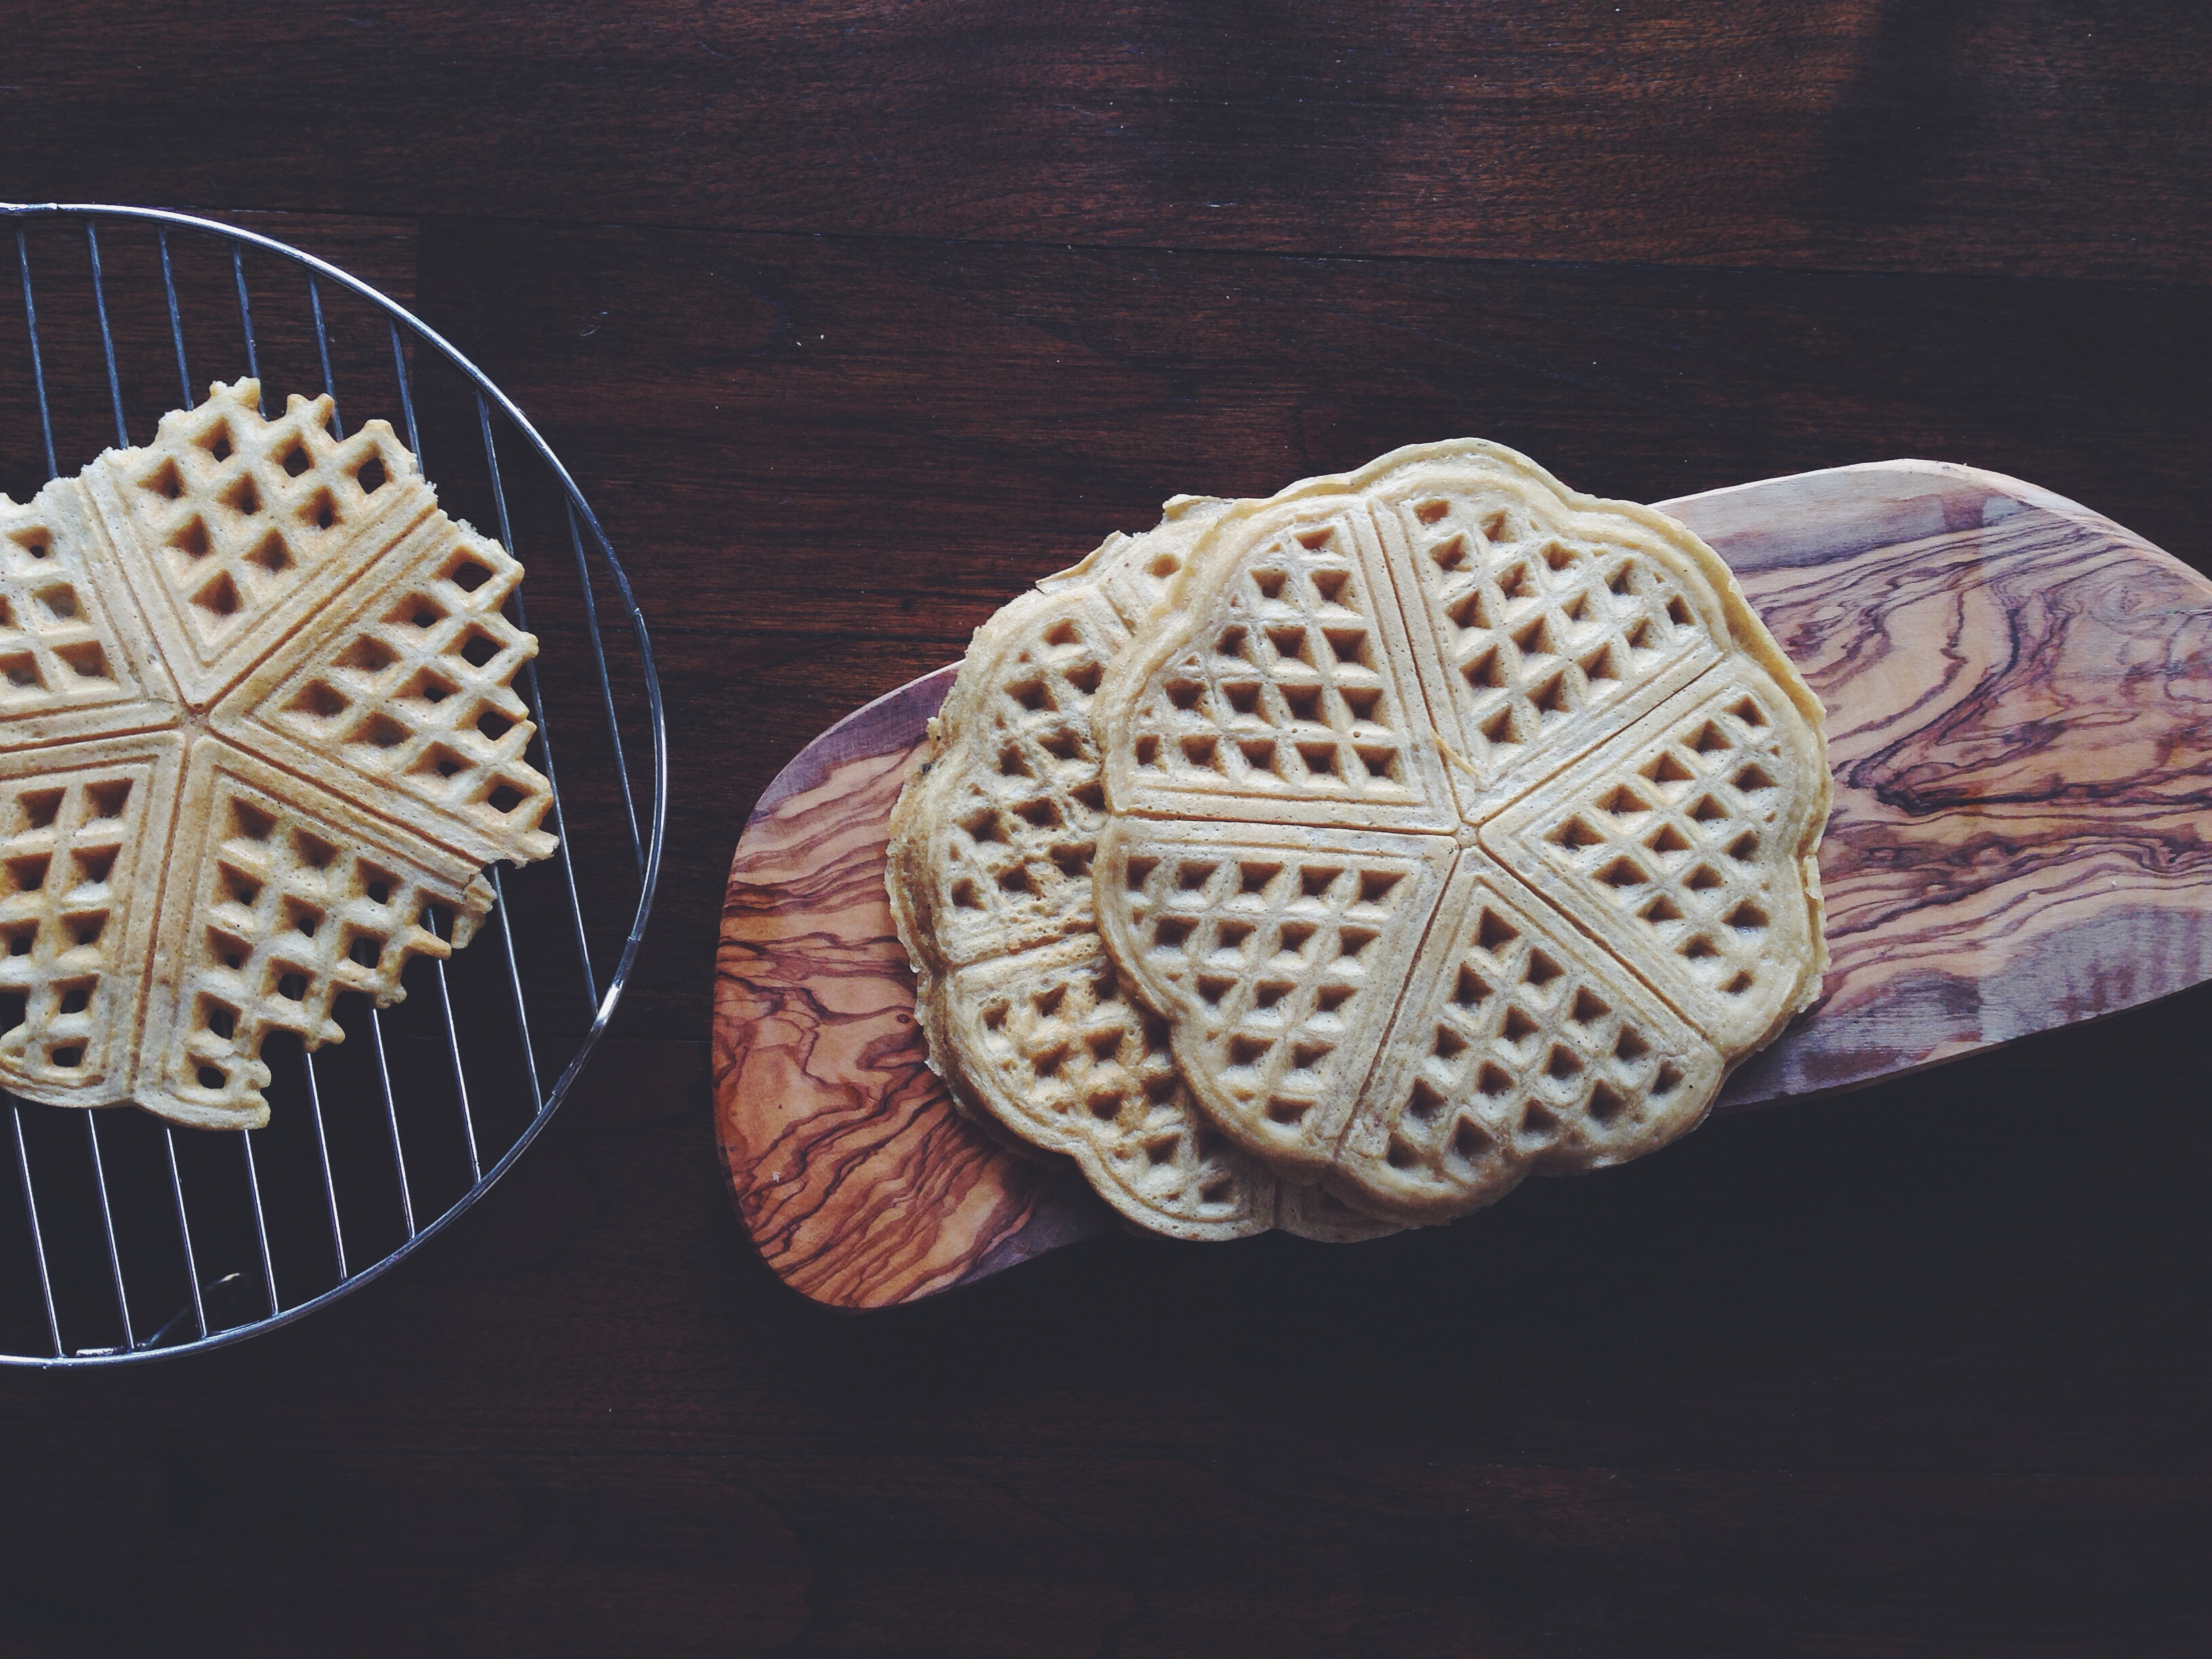
I obtained the desirable crunch factor on my third waffle… By accident (above picture). Third try. During the first two tries, I got some lovely crisp ones, but they were thick and still a little dense in the middle. It was only on my third go, with hardly any batter left, that I realised that the trick to The Rich Crisp, if you’re using this waffle maker, is to use less than half a cup of batter, so that there are still holes and gaps are pouring into the mold. It’s only this way that the entire waffle can get nice, dark and crisp.
They are light, slightly tender in the middle, and the edges are thin enough to break off like gingersnap. The magic lies in all that butter and soda water, providing tenderness and lift respectively. The base batter itself is plain and versatile, so go crazy with the toppings in the morning.
Soda Water Waffles (makes 6-7 thin waffles)
180g white flour
1 tbsp baking powder
3/4 tsp baking soda
pinch salt
1 tbsp brown sugar
2 eggs
1 cup (240ml) milk of choice (I used almond)
80g melted, unsalted butter
1 1/2 tsp vanilla
1 cup (240ml) soda water
Preheat your waffle iron according to the manufacturer’s instructions. In a large bowl, whisk together the dry ingredients– flour, leavening agents, salt and sugar. Add the egg, milk, vanilla extract, melted butter and lastly, the soda water. Cook in the preheated iron according to the iron’s instructions. In my Sevren waffle maker, it took 4-5 minutes before the edges went crisp and golden.
These freeze wonderfully. Let the waffles cool on a cooling rack, before layering them with pieces of parchment between each waffle so they don’t stick together when you take them out the next morning. The next morning, take them out, microwave for 20 seconds, then stick in the toaster until golden and crisp again.
Topping suggestions:
– a cookie crumbled on top (I used Lotus caramelised cookies), chopped fruit, sprinkled with some coarse salt and maple syrup
– good old salted butter and maple syrup
– nut butter, banana and honey
Treat the little fellas like toast and have a b.a.l.l.