The Bravery

Processed with VSCOcam with f2 preset

Shabby chic.

I don’t know about you, but I’m quite liking the old industrial theme of some places. Including this one. There was massive self-conflict this morning, when I was debating between hopping off to a more convenient spot, or deliberately trudging along unknown sidewalks in the heat to arrive at this signless, but rather enticing spot in the Lavender Street area. Neon red and black, almost translucent windows, stark, straightforward pale wooden furniture, the exclusive hidden feel. It felt as if there was a children’s party right before I walked in and they forgot to take home some decorations. Child VS sophisticate. I liked it.

Lavender Latte–$5.50

‘Weird’, I can already hear some of you say. Ok, no. If you’re planning to come for the coffee, you can’t, just can’t leave without trying this. Exquisitely smooth, creamy, mildly sweet and tickled with the fine infusion of lavender. Understated, milky elegance. This is a latte after all. Skip if you’re not a fan of floral-infused drinks. My mother would empathise.

IMG_0276
Crostini– $6.50 Aubergine, chickpeas, mint, feta and onion atop sourdough toast

IMG_0277 IMG_0278


They are famous for their banana triple-stack pancakes, but for some ridiculous reason I was craving something a little more on the savoury side, and so I ordered this hulk of a brunch dish. Mushy, plump pieces of aubergine, translucent onions, fading mint. The chickpeas were tainted with the juices of the dark and stubborn vegetable they were cooked with. Looks quite a mess up there, but my fork told otherwise. There could have been more feta (sprinkles don’t cut it) to enliven the dish a little more, adding a better kick of flavour. Perhaps a bit more spice or pepper, but on the whole this was pretty darn delicious. I started to enjoy the dish even more as time went by, since the toppings melded so nicely with one another as they cooled down, allowing the flavours to emerge properly on my palate. The sourdough yielded a wonderful flavour and was properly oiled and toasted.

Processed with VSCOcam with f2 preset
Cappuccino– $4.50

Processed with VSCOcam with f2 preset


‘It’s on the house’, he said. Kind, kind barista!

Stumped and stunned. But hell, free coffee only makes one a better person, right? I’m really quite impressed by the service here; I got to talk to most of the staff at the counter, and the lady told me I was free to stay for as long as I wanted to, unless it got too crowded. So there I sat, working at my computer, and the hours went by in the best way possible. The tables are perfect for work, and the music isn’t too loud either. What immense pleasure.

Smooth, sophisticated, but a little too milky and not enough punch than what I’m used to. It was a dream to sip, but a more acidic edge would have been preferable. That being said, I wouldn’t mind ordering this again, for the sake of sentiment and that creamy consistency.

Other menu options include eggs poached or fried on artisan bread, the pancakes I mentioned earlier, Mediterranean-inspired eggs, avocado and bacon, smoked salmon sandwiches and a small selection of sweet treats at the display counter. They also serve iced coffee with shots of mocha, espresso or soy, as well as Gryphon (ooh, how aristocratic) tea. In all honesty, I didn’t feel too bad paying for the quality of what I got.


Rating: 4.5/5

The Bravery Cafe

66 Horne Road

8:00am – 8:00pm daily, closed on Tuesdays

Dark chocolate and sea salt on toast

No, this does not need a recipe. I’d just like to revel in the glory of two of my favourite things in the world– dark chocolate and toast. Just.

Processed with VSCOcam with f2 preset Processed with VSCOcam with f2 preset

I don’t think it’s right not to have this at least once in your life.

I bought a new loaf of campagne yuzu bread yesterday on impulse, because that thing looked too good to pass up. It just sat there, lonely, cold, at the display counter. How could I not?

Here is what you need:

  • your favourite bread, whatever that might be. Grab a white bloomer if that satisfies you!
  • couple squares good quality dark chocolate (70% is ideal)
  • sprinkle of coarse salt (I used pink Himalayan)
  • a toaster
  • I’ll stop here
  • too simple

I always have dark chocolate around. Somewhere. Anything less than 70% might just be child’s play, but nothing against that.

Literally take the chocolate, pop it on your favourite slice, slide into the toaster or broiler for 3 minutes until crusty and darkened. Sprinkle on pinch of coarse sea salt, before doing your business.

That’s all I have to say (!)


Salted Caramel Apple Cheesecake

IMG_9963 IMG_9989

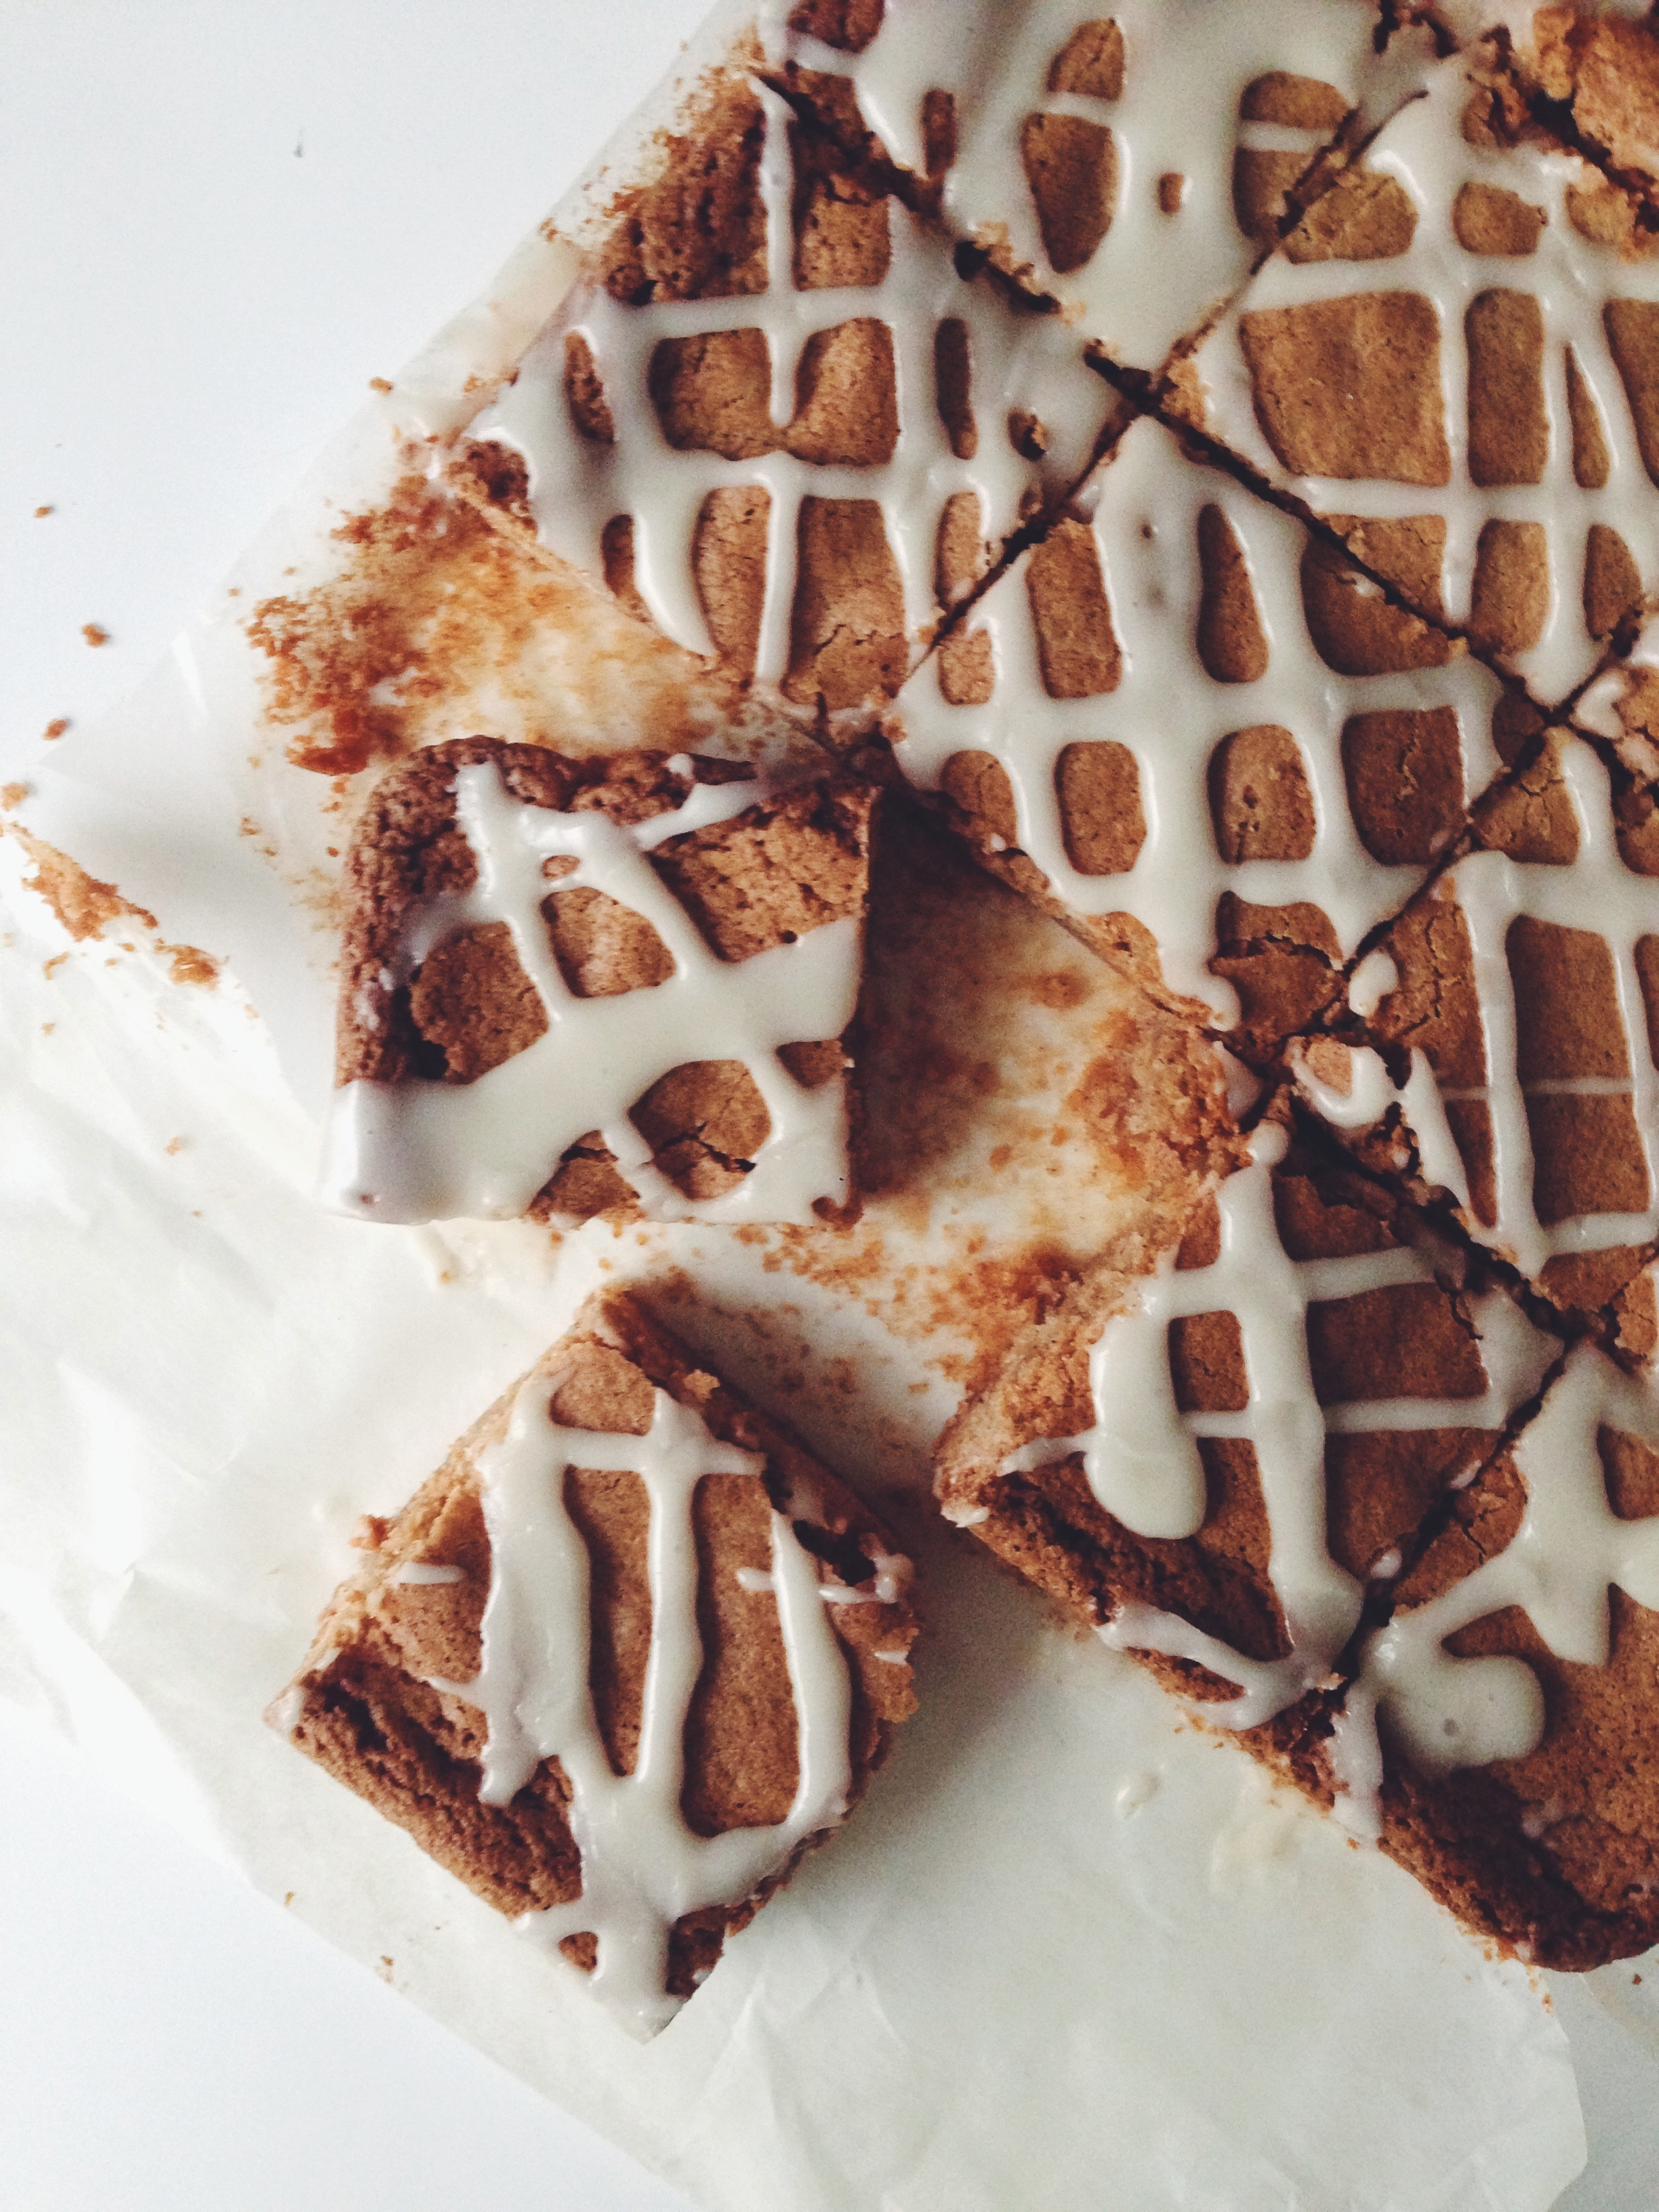
Because I actually cannot believe this is a (mostly) improvised, pseudo-original recipe. Honestly, it’s pretty glorious. Ok fine, if that’s a little too much undeserved self-praise, I guess I’ll just say that darn, I’m one enlightened cake-maker. A mixing of some fine ingredients, a thrusting of good pink ladies on the top, a sudden decision to say…

YES, I really do think salted caramel will go nicely with that.

Off the whim, all too sudden. Yesterday was the due date for the IB’s Extended Essay, so I feel it very fitting to celebrate with this recipe. It was a short return to my childhood of tree-climbing and grazed knees, after which I’d come home to find a well-sized slice of cheesecake my mother or grandmother bought from some gourmet store, which I enjoyed anyway because… cheesecake. I never found the rich tang displeasing as a kid; it was one of the few sorts of cakes I didn’t mind having at birthday parties. The flimsy, airy stuff never fascinated me. I lusted after half-cloying goop. I admit that this batch actually could have used twice as much salt in the caramel topping to counter the lemony, apple-y sweetness of the cheesecake, so I’ll put the better amount in for your benefit.

And with that, let’s go.


Ingredients

For the base:

  • 1 cup flour
  • 1 egg yolk
  • 1/4 cup light brown sugar
  • 1 teaspoon salt
  • 1/2 cup (113g) softened, unsalted butter. Good butter, please.

For the filling and apple top:

  • 2 packages Philadelphia cream cheese, left to soften at room temperature (this would take at least a good half hour)
  • 1/2 cup white castor sugar
  • 1/4 cup freshly squeezed lemon juice
  • 1/4 cup sour cream (or Greek yoghurt, which was what I used since I didn’t have sour cream on hand)
  • 1 1/2 tablespoons vanilla extract
  • 3 eggs

For apple topping:

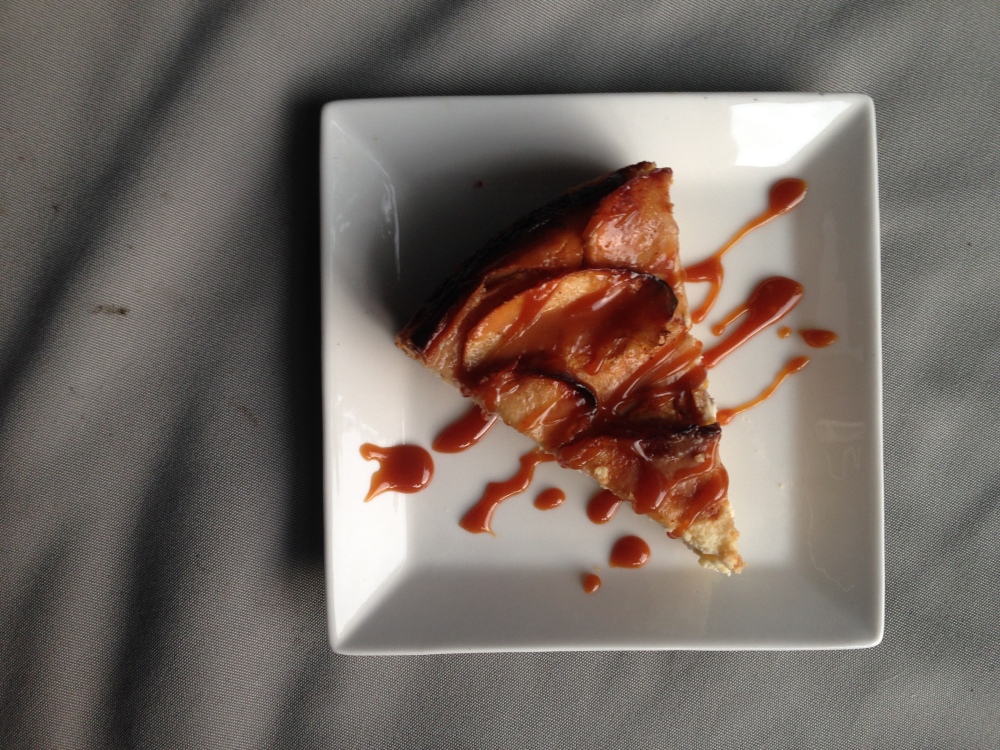
  • 2 small pink lady apples, or any sort which you enjoy eating on its own. Grab a green one if that’s all you have; doesn’t change the final product a whole lot. It actually depends how much of a flamboyant apple character you want your cake to have– the more the merrier, though I find thin layers atop the filling work well to even out the caramelisation process during baking.
  • 1/3 cup white sugar
  • one teaspoon ground cinnamon

For the divine gift of God that is salted caramel (makes a medium batch so it may be used in the future):

  • 1 cup white sugar
  • 95g salted (!!) butter
  • 3 teaspoons fine salt
  • 1/2 cup heavy whipping cream (either single or double is fine)


Procedure

Before I start, I just want to say that I’ve recently become more inclined to writing method in prose, mostly due to how I had to do so for my extended essay, and I enjoy the more personal feel it establishes. But yes, cheesecake.

Start of by preheating your oven to 200 degrees C (400 degrees F), and grease a 9-inch round cake tin.Thinly slice your apples and toss them in a medium-sized bowl with the sugar and cinnamon. Set aside for now.

Make the base: With a wooden spoon, or if you’re 80% Neanderthal like me, your hands, mix the five ingredients together well in another medium bowl. Press into base of your cake tin and half an inch up the sides. Make sure the bottom is even. If you live in a supremely hot climate like I do, put the base in the fridge to prevent the butter from melting and causing the pressed-up sides to sink and go limp.

Make the filling: Using a whisk (not the electrical sort, just the single whisks), cream the cream cheese and sugar together till no more sugar lumps are present in mixture. Add in the eggs one by one and whisk well between each addition. Then, add in the fresh lemon juice, sour cream/greek yoghurt and vanilla. Use a wooden spoon to mix the last few ingredients in order to incorporate as little air as possible. I found this really helped with the final texture of the cheesecake.

Assemble and bake: Take tin out of fridge and pour filling on top. No pre-baking of crust, no nothing. Just pour and plop in the oven. Oh, after you scatter those moreish, cinnamon-y apples on top, of course. Please don’t forget that bit. As I said earlier, I find that thin layers arranged in rings starting from the edges serve to kick the look factor up 10 notches. Just so… Pretty. I could’ve been neater, but I was too excited embarking on this exciting baking expedition. Literally an expedition too, because I was running around grabbing ingredients and whatnot. I need to organise myself. Anyways, once the layers are done (I just did one nice layer), put the cheesecake into the preheated oven and bake it for 15 minutes. Once 15 minutes is up, turn down the temperature to 190 degrees C (375 degrees F) and bake for another 30-35 minutes. I took mine out after 33 minutes, because that’s the way I did it the first time I baked a cheesecake this method, and there were no cracks whatsoever. Works a dream.

Make the salted caramel (adapted from Sally’s Baking Addiction): Heat sugar in a medium saucepan over medium heat, stirring occasionally with wooden spoon. Continue to do so until all the sugar melts into a pool of dark, glossy amber liquid. Once this stage is reached, add the salted butter. It’s a pretty vigorous reaction, this one. Stir with spoon to help the melting process. Once all the butter has melted, slowly add in heavy whipping cream. This part is even more vigorous that the previous one; it will spit and rise as it starts to boil. Let the mixture boil like this for another minute before taking the pan off the heat. Let cool for another couple minutes before stirring in the salt. Store in an airtight container for future use, and reserve a half cup for later.

Once cheesecake is done in the oven, carefully take out. It should still be a little wobbly and tender in the middle. Leave to cool in the same pan on a cooling rack for 15 minutes. After 15 minutes, microwave half of the reserved caramel (it would have gone a little thicker and less liquidy) for a few seconds and liberally drizzle all over top of the cheesecake. Place the cake inside the fridge and leave for at least 4 hours or overnight. It’s good to make this kind of thing the day before. No sweat.

After at least 4 hours (or overnight), take cake out of fridge. Microwave the remainder of the reserved caramel and drizzle it over the top, however you like, however much you want. You’ll probably have some caramel left.

Bam. Double salted caramel whammy.

I’m thinking grape and crisp rice cheesecake next time, just because.


Toby’s Estate

DSC_2852 DSC_2861


SO. It’s been, what, a year since I’ve visited Toby’s? I just love how I say Toby’s like that. So casual and upfront. My little brother, my coffee maker, my Robertson Quay pit stop. My luscious wooden enclave. My, my, my. This place was what I should like to term ‘unavailable’ for a while, due to renovations the past few weeks. So once they opened, I’ve been meaning to come back. For a comparing of standards and perhaps another trip to crema heaven. The last time I went, it was my virgin experience. I had their cappuccino and ‘Toby’s Big Breakfast’ set, which made me drool and gape, all lolled-jaw and star-spangled. I fell in love with the pale, sleek wooden decor, the high brick ceilings, the stone walls, how I could sit at the wooden study desk-like table right by the window and people watch, whilst doing work or journalling. This, I remember saying to myself, is the high life. Literally, too, because I was on a high chair. And thank God it wasn’t the sort which made me feel the creases of my skirt attacking an inappropriate crack.

Second visit. More chairs, I observed, and sophisticated still lifes and photo captures on the familiar brick. They even display their coffee goods and machinery along the walls for any caffeine nerd to check out. Once I earn my own money, I told myself. The smell of good business? Check. A white-people majority with either an iPad in hand or young child feeding? Check. Gorgeous, soft light streaming through the large rectangular window by my favourite study desk? Check, check, check. I was waiting for café buddy (or should I say, bunny) Liz, so I ordered first. All ready.

DSC_2857
Iced Black– $5 Hot Latte– $5
DSC_2856
Toby’s French Toast: Brioche, espresso maple bacon, berries, diced apple and maple syrup– $14.90

And may I admit– I came here specially for this french toast. Because I’ve seen too many darn pictures of it and it looked too good to pass up this opportunity. And so I patiently waited (no induced anger this time, because the cooking time was surprisingly fast and I don’t remember tapping or humming as I sat waiting with a growling, breakfast-deprived tummy). The iced coffee was outstanding, because, well, the coffee here is always impressive. There’s nothing I could fault about the aftertaste. Refreshing, light, singing, not too acidic. An easy pass down the good ol’ oesophagus.

But the french toast. Oh, no. The waiting time may have been impressive, but the actual dish, not so much. Yes, there was the extravagant and marvellous addition of ‘espresso’ maple bacon, though there wasn’t so much a hint of espresso, let alone full-bodied flavour. It was well-cooked, crispy and beautifully maple-glazed, but I expected more from the given title. Wouldn’t have minded a little acidity or perhaps even a smidgen of coffee aroma. Perhaps the stuff evaporated completely during the lavish fry-up. The actual french toast was severely disappointing, and not even the thick, sticky maple syrup could do much to salvage it. The brioche they used was too dense to allow for complete egg saturation; the poor slices couldn’t enjoy an aristocrat’s bath long enough to have the golden goo penetrate their pores properly. The outside was nice and golden, but the inside was virgin-white, almost as if completely untouched. Normal, placid, mildly sweet white toast, without so much as a one-time dunk. Left in the cold. I might be behaving a little dramatically right now, but I really expected so much more out of this. I also think they should’ve tried making a fruit purée or compote, mixed with chunks of fresh fruit, instead of straightforward fruit. I appreciate the freshness and all, but it would’ve done more to enhance the flavour of both sweet and salty on the plate and on the palate. I picked at the outer eggy, fried bits, my heart dimly lit. Oh, Toby.

DSC_2854
Poached eggs on sourdough with a side of sautéed mushrooms– $8.50+$5

DSC_2858

This was Liz’s, and she was kind enough to give me some of her mushrooms, because if you ask me, mushrooms are one of the most genius things to survive on this planet. I could live on them fried, sautéed, pickled. Squished or raw, even. That’s how far I’ll go to proclaim my love for the stuff. But at restaurants or cafés, if they say ‘sautéed’, it damn well be just that. These were a little mediocre; they could’ve used a little more butter and a longer cooking time to yield a more moreish, juicy result. Though well seasoned, it lacked the slight indulgent factor. It would have paired even better with the flowy yolk. Yum. their poached eggs looked very well done, and must’ve fared much better than my own dish. The side salad with balsamic reduction was a good pucker-up accompaniment, and the sourdough was good and hearty.

Should like to conclude by saying that if you’re trying to find a rather conducive, slightly isolated but sophisticated hideout and a good cup, this is it. Ponder life and the universe while you’re at it, as you stare out into the Singapore River. It’s cool on the inside, so you could pretend you’re isolated from the gnawing heat. Just, well, skip the french toast. Perhaps it was a  one-off thing. If not, long live One Man Coffee’s version.


Toby’s Estate

8 Rodyk Street, Singapore 238216
6636 7629

Cinnamon Roll Blondies

Processed with VSCOcam with f2 preset

Post school, I experienced a humble but waking urge. The uzhe, I guess you could say, but I only  wanted to bake something simple; something well-loved and relatively straightforward. This recipe in particular is dedicated to my lovely Em, who I wish was here at the moment just to share some with me. I have a large family already, but having her around would definitely be the coolest.

I used my favourite chewy blondie recipe as a base, and a simple maple vanilla icing to round it off to add some disastrous sweetness. The final yield: thin, dense, firm little slabs of sticky chewiness, made all the more decadent by a sudden hit of maple and vanilla at the top of your palate. Not all too sinful, not all too modest either. I experimented a little with the icing and modified it from my previous icing recipe, in which I use a little more milk. To obtain a firmer yet moist and pliable consistency, I stuck to two tablespoons of rich, whole milk. As for those blondies, the outrageous chewiness (as how I quoted on my instagram), is achieved by the use of soft, sticky brown sugar, with a little of the normal white stuff as a less serious accompaniment.

Note: I use cup measurements here only because the base recipe I derived this from does the same, and the ratios work out perfectly. For accuracy’s sake, always use the the scoop-and-sweep method when measuring flour– scoop the flour (gently) into your cup measurement, then use the back of a knife to scrape off the excess on top. I also noted that you can do this with all white sugar, and you will get blondies just as extravagantly chewy, but there will be less depth of flavour and less cinnamon hints.

Ingredients

For blondies:

  • 1 cup all purpose flour
  • 1/2 tsp baking powder
  • 1/4 tsp baking soda
  • 1/4 tsp fine salt
  • 1 tsp ground cinnamon
  • 1/4 teaspoon ground nutmeg (or fresh, if you have that wonderful sort of thing on hand. I didn’t, though of course fresh is always best)
  • 72g unsalted butter, melted and cooled
  • 1/2 cup white caster sugar
  • 1/3 cup packed light brown sugar
  • 1 egg
  • 2 tsp vanilla extract

For maple vanilla icing:

  • 3/4 cup icing sugar (being the sloth I am, I didn’t even sift mine, but a hard whisk is all you need to get those lumps out of the way. Really. Lazy? It’s ok. The world isn’t going to end.)
  • 1/2 tsp vanilla
  • 1 tsp maple syrup
  • 1-2 tbsp of milk, depending on your surrounding temperature or preference with regard to runniness of the icing. Yes, I just made up that word. You might even need more than 2! Once again, the world will not end. We are all human. Follow your heart.

Directions

  1. Preheat the oven to 180C (350F). Line and grease an 8-inch square pan. Alternatively you can do this in an 9×5-inch loaf pan, it just means you have to bake the blondies for longer, at least 25 minutes. Always check with a dry wooden skewer– if the batter is wet bake for 4-5 more minutes, if there are moist crumbs you’re good to go.
  2. In a medium bowl, briefly whisk together the flour, baking powder, baking soda, salt, cinnamon and nutmeg.
  3. In a separate, larger bowl, whisk together both sugars and melted butter, then whisk in the egg and vanilla extract.
  4. Using a spatula, fold dry into wet ingredients, and you should get a relatively thick, grudgingly mousse-like batter. It will be a little hard to drop off the spatula.
  5. Pour into the square pan and bake in oven for 20-22 minutes (or as previously mentioned, 25 minutes if baking in a loaf pan). The golden-brown top should form a sugary crust and the edges should have started pulling away from the sides.
  6. Let cool completely in the tin. Whilst you tolerate the wait, make the icing. Whisk all the icing ingredients together in a small bowl, with a fork/whisk and generous dollop of bicep power. Add the milk drop by drop, not spoon after spoon. Careful now.
  7. Once the blondies have completely cooled, drizzle the icing in whatever patterns you desire all over the blondies.
  8. Cut into square pieces and enjoy a bit of chewy, crusty, cinnamon heaven.

Processed with VSCOcam with f2 preset Processed with VSCOcam with f2 preset

Basically.