Chocolate Banana Mascarpone Sandwich

Sundays can be more magical than you ever think them to be.

A quickie, because I want you to make it now, or at least soon, before the magic of what you see above dissipates. Chocolate and banana is a sworn classic, at least to me anyways, and this sandwich has all the goods and more. I wouldn’t call it ‘chocolate and cheese’, because that juxtaposition looks and sounds sacrilegious, because I might as well say ‘chocolate and cheddar’ and make you all gag.

Saturday night made me too pink from the drink. With a late start on Sunday, something easy but lush was much needed. Thrown together in haste, but well astonished afterward. I must thank the gooey, perfect, sinful result of melting chocolate, mascarpone and gooey ripe banana mashed between commercial brioche.

Easy sin.

Chocolate Banana Mascarpone Sandwich (serves 1)

Directions

Heat a pan on medium high heat and ready a generous knob of butter. On one slice of brioche, spread a thick layer of chocolate spread (nutella/chocolate peanut butter/chocolate spread) and layer on slices of banana. On the other slice, spread a thick layer of mascarpone, and then layer on either one big square of dark chocolate or many small chunks of chocolate. Sandwich the slices together. Place butter in preheated pan, spread around a little, then place one side of the sandwich on the hot pan. Leave for 2 minutes, then flip to cook the other side. The surface should be a golden-brown.

Slice on the diagonal (it’s a rule), admire the oozing chocolate and then bite right into the middle while still hot and moist.

Pumpkin Pecan Chocolate Chip Muffins

This is a special dedication to the one and only Emily Olivia Tapp, AKA the girl I’ve been meaning to see for more than a year…? Or a sister-like figure who’s finally on the same continent as me. Blessings are real.

As we sat in Mildred’s in Soho consuming all sorts of outrageously delicious vegan fare (cue sweet potato fries, roasted cauliflower!!, colourful salads and a pretty memorable apple crumble), it suddenly occurred to me just how long it’s been since I’ve seen her, or since I’ve written her a letter, for that matter.  But next to Em, it felt as if not much time has passed between us. In the middle of a million lectures, lab reports and walking everywhere all the time, Tuesday night was peace. Peace and Happy.

So, pumpkin. With chocolate, granola, and pecans. Everything lovingly encased in a golden batter, speckles of everything in each bite. Not a particularly daring experiment, but armed with a new baking pan, cupcake liners and instinct, I did my best. The rooty, earthy pumpkin marries well with the chocolate, and who doesn’t love gooey hot chocolate pockets in the middle of a warm, fluffy muffin?

Pumpkin Pecan Chocolate Chip Muffins (makes 6 muffins)

Ingredients

95g (3/4 cup) (95g) plain all-purpose flour

100g (1/2 cup) white sugar

120g (1/2 cup) pumpkin puree

1 tsp baking powder

1/4 tsp baking soda

pinch salt

1 tbsp ground cinnamon

1/2 tsp vanilla extract

30ml (1/8 cup) vegetable oil

1 egg

1 tbsp whole milk

1/4 cup granola or rolled oats

45g (around 1/3 cup) chopped chocolate

30g (around 1/4 cup) chopped pecans

Directions

Preheat your oven to 180C. In a medium bowl, mix together all the dry ingredients, except for the last 3 (chocolate, pecans and oats/granola). In a larger bowl, mix together all the wet ingredients– egg, oil, pumpkin, milk and vanilla. Mix in the dry ingredients, and just before everything is incorporated, mix in the remaining 3 ingredients. You really only need 2 clean bowls and a wooden spoon for this entire process!

Divide the batter amongst 6 cupcake liners (double the recipe of you want of course), then bake for 25-27 minutes (mine took 25) in the preheated oven. Let cool once finished baking and tuck in. Any uneaten ones can be stored at room temperature for a couple of days, or in the freezer for however long you want.

White Chocolate Caramel Banana Bread

Because we all know banana bread is actually cake.

Side note: I’m back!!

An apology is necessary and expected. The past few weeks have been an absolute blast, busy busy busy, what with moving to London to embark on a very science-y and exciting adventure. Early lectures, lots of note-taking, and the constant fear that I’ve done nothing to deserve a place in this wonderful university. The people are amazing, the work intriguing, and nothing beats the nighttime kitchen adventures, midnight study sessions and later-night parties. Nothing I say here could ever fully justify the experiences that have been thrown at me as well as those which I have yet to encounter. It’s still incredibly surreal; like a dream come true, yet somehow better.

IMG_0719

A modification on one of my previous banana bread recipes, this one has a gallant twist with the incorporation of white chocolate and caramel. If ever I do this again, I’ll be sure to add in a nuttier texture or more earthy flavour component to up the ante of everything else going on in the picture. It’s the sweetest pick-me-up, and a one-bowl wonder. Don’t you love the easy stuff? Remember: I’m all about simple. Sometimes. Ok, most of the time. With college matters whirling around my head, this loaf was a nice and easy break, which took no time at all to put together and bake. Feels good to get into mixing, picking ingredients and experimenting again in the kitchen. Made it with one of the sweetest people I’ve met here, and everyone loved (and then attacked) it. Crowd-pleaser. Bananas. White chocolate. Caramel. Good play.

Now, it feels like home.

White Chocolate Caramel Banana Bread (makes 1 loaf)

Ingredients

3 ripe bananas, mashed

1 1/2 cups (190g) plain white flour

2 1/2 tsp baking powder

1/2 tsp ground cinnamon

1/2 tsp salt

1 egg

1 tsp vanilla extract

1/3 cup (76g) melted unsalted butter

2 tbsp milk

2 heaping tbsp caramel sauce

1/3 cup (68g) white sugar

3/4 cup white chocolate chips (I cut up a good bar)

Directions

Preheat your oven to 180C (350F). In a large bowl, mix together the mashed bananas, milk, sugar, melted butter, egg, salt and vanilla. Then add in the flour, baking powder, cinnamon, milk, caramel sauce. Finally, gently stir in the white chocolate chips. Pour into a greased loaf and bake for 50-55 minutes. This one was ready by 53 minutes.

To serve, slice up and serve with more caramel, marmalade (a touch I personally adore) and more chopped chocolate. I’m guessing whipped cream or ice cream would sort out any lonely evening, too.

No-Bake Fridge Brownies with No-Churn Three-Ingredient Vanilla Ice Cream

Proud (me), happy (my stomach), sublime (everything about this).

If you’re in dire need of a some sin in your life, then I implore you to make these

no-bake, chocolatey, fudgy fridge brownies with no-churn vanilla bean ice cream.

AKA the epitome of i-am-lazy-and-my-oven-is-sometimes-incompetent type of baking. I have those days too.

When I’m all about easy, I mean it. This pairing of deep chocolate and smooth vanilla is irresistible. Classic. The best part is that you unload an inappropriate whopping of ice cream on a piece of brownie and nothing becomes goo for quite a while. I’m the sort who loves a beautiful melting mess, but the time delay prolongs the sensory pleasure of digging into the harmony of sweetness come together by the distinct separation of flavour. Then everything melds together, and the symphony is complete.

These brownies are fudgy, but still retain the texture of a brownie more so than plain old fudge. The addition of crushed biscuits gives it both sweetness and stability. An important point to note in this recipe is that the milk, cream and sugar should be boiled for at least 5 minutes so most of the water content has evaporated, before the other things are mixed in. This will yield the best fudgy texture after less time in the fridge. And the ice cream? It just couldn’t be more straightforward.

Ingredients

For the fridge brownies:

280g (1 1/4 cups) white sugar

120g unsalted butter

90g (less than 3/4 cup) plain flour

240ml evaporated milk/ whole milk/ light whipping cream/ coconut cream

1 cup crushed biscuits (I used Nice coocnut biscuits, but you can use anything you have in the pantry, such as crushed cereal or oreos!)

175g (1 cup) chocolate chips or chunks

pinch of salt

optional add-ins: more chopped nuts/ chocolate chips

For the no-churn ice cream:

600ml whipping cream

450ml (1 can) sweetened condensed milk

1 tbsp vanilla extract/ 1 tbsp vanilla bean paste/ the insides of one vanilla bean

Directions

Pour the milk, butter and sugar into a large saucepan and heat on medium heat until everything comes to a boil. The mixture will froth and seem to double in volume so it’s important to have a large, not small saucepan here. Let the mixture boil for 5 minutes, then take it off the heat and stir in the flour, salt, crushed biscuits and chocolate. The chocolate will melt and turn everything a rich brown colour. Pour this mixture into a greased 8×8 or 9×9-inch baking pan and place in the fridge to set for 3 hours, or overnight.

In a large bowl and with an electrical whisk, pour in the can of condensed milk, whipping cream and vanilla. Beat until you have soft peaks, then pour into a freezer-safe container (I just used a plastic tupperware box), cover and place in the freezer for at least 4-5 hours, or overnight.

And that’s it! Since these components are meant to be left in a cold environment, they last for ages in the freezer (or just leave the brownies in the fridge), and they can be taken out at any one point in time to enjoy together.

Lemon Curd Muffins

If there’s anything I’m a true sucker for, it’s lemon anything. No really. I love chocolate and a lot of other sweet things, but when it comes to citrus-based desserts, my salivary glands go haywire and my head fills with buttercups and sunshine.

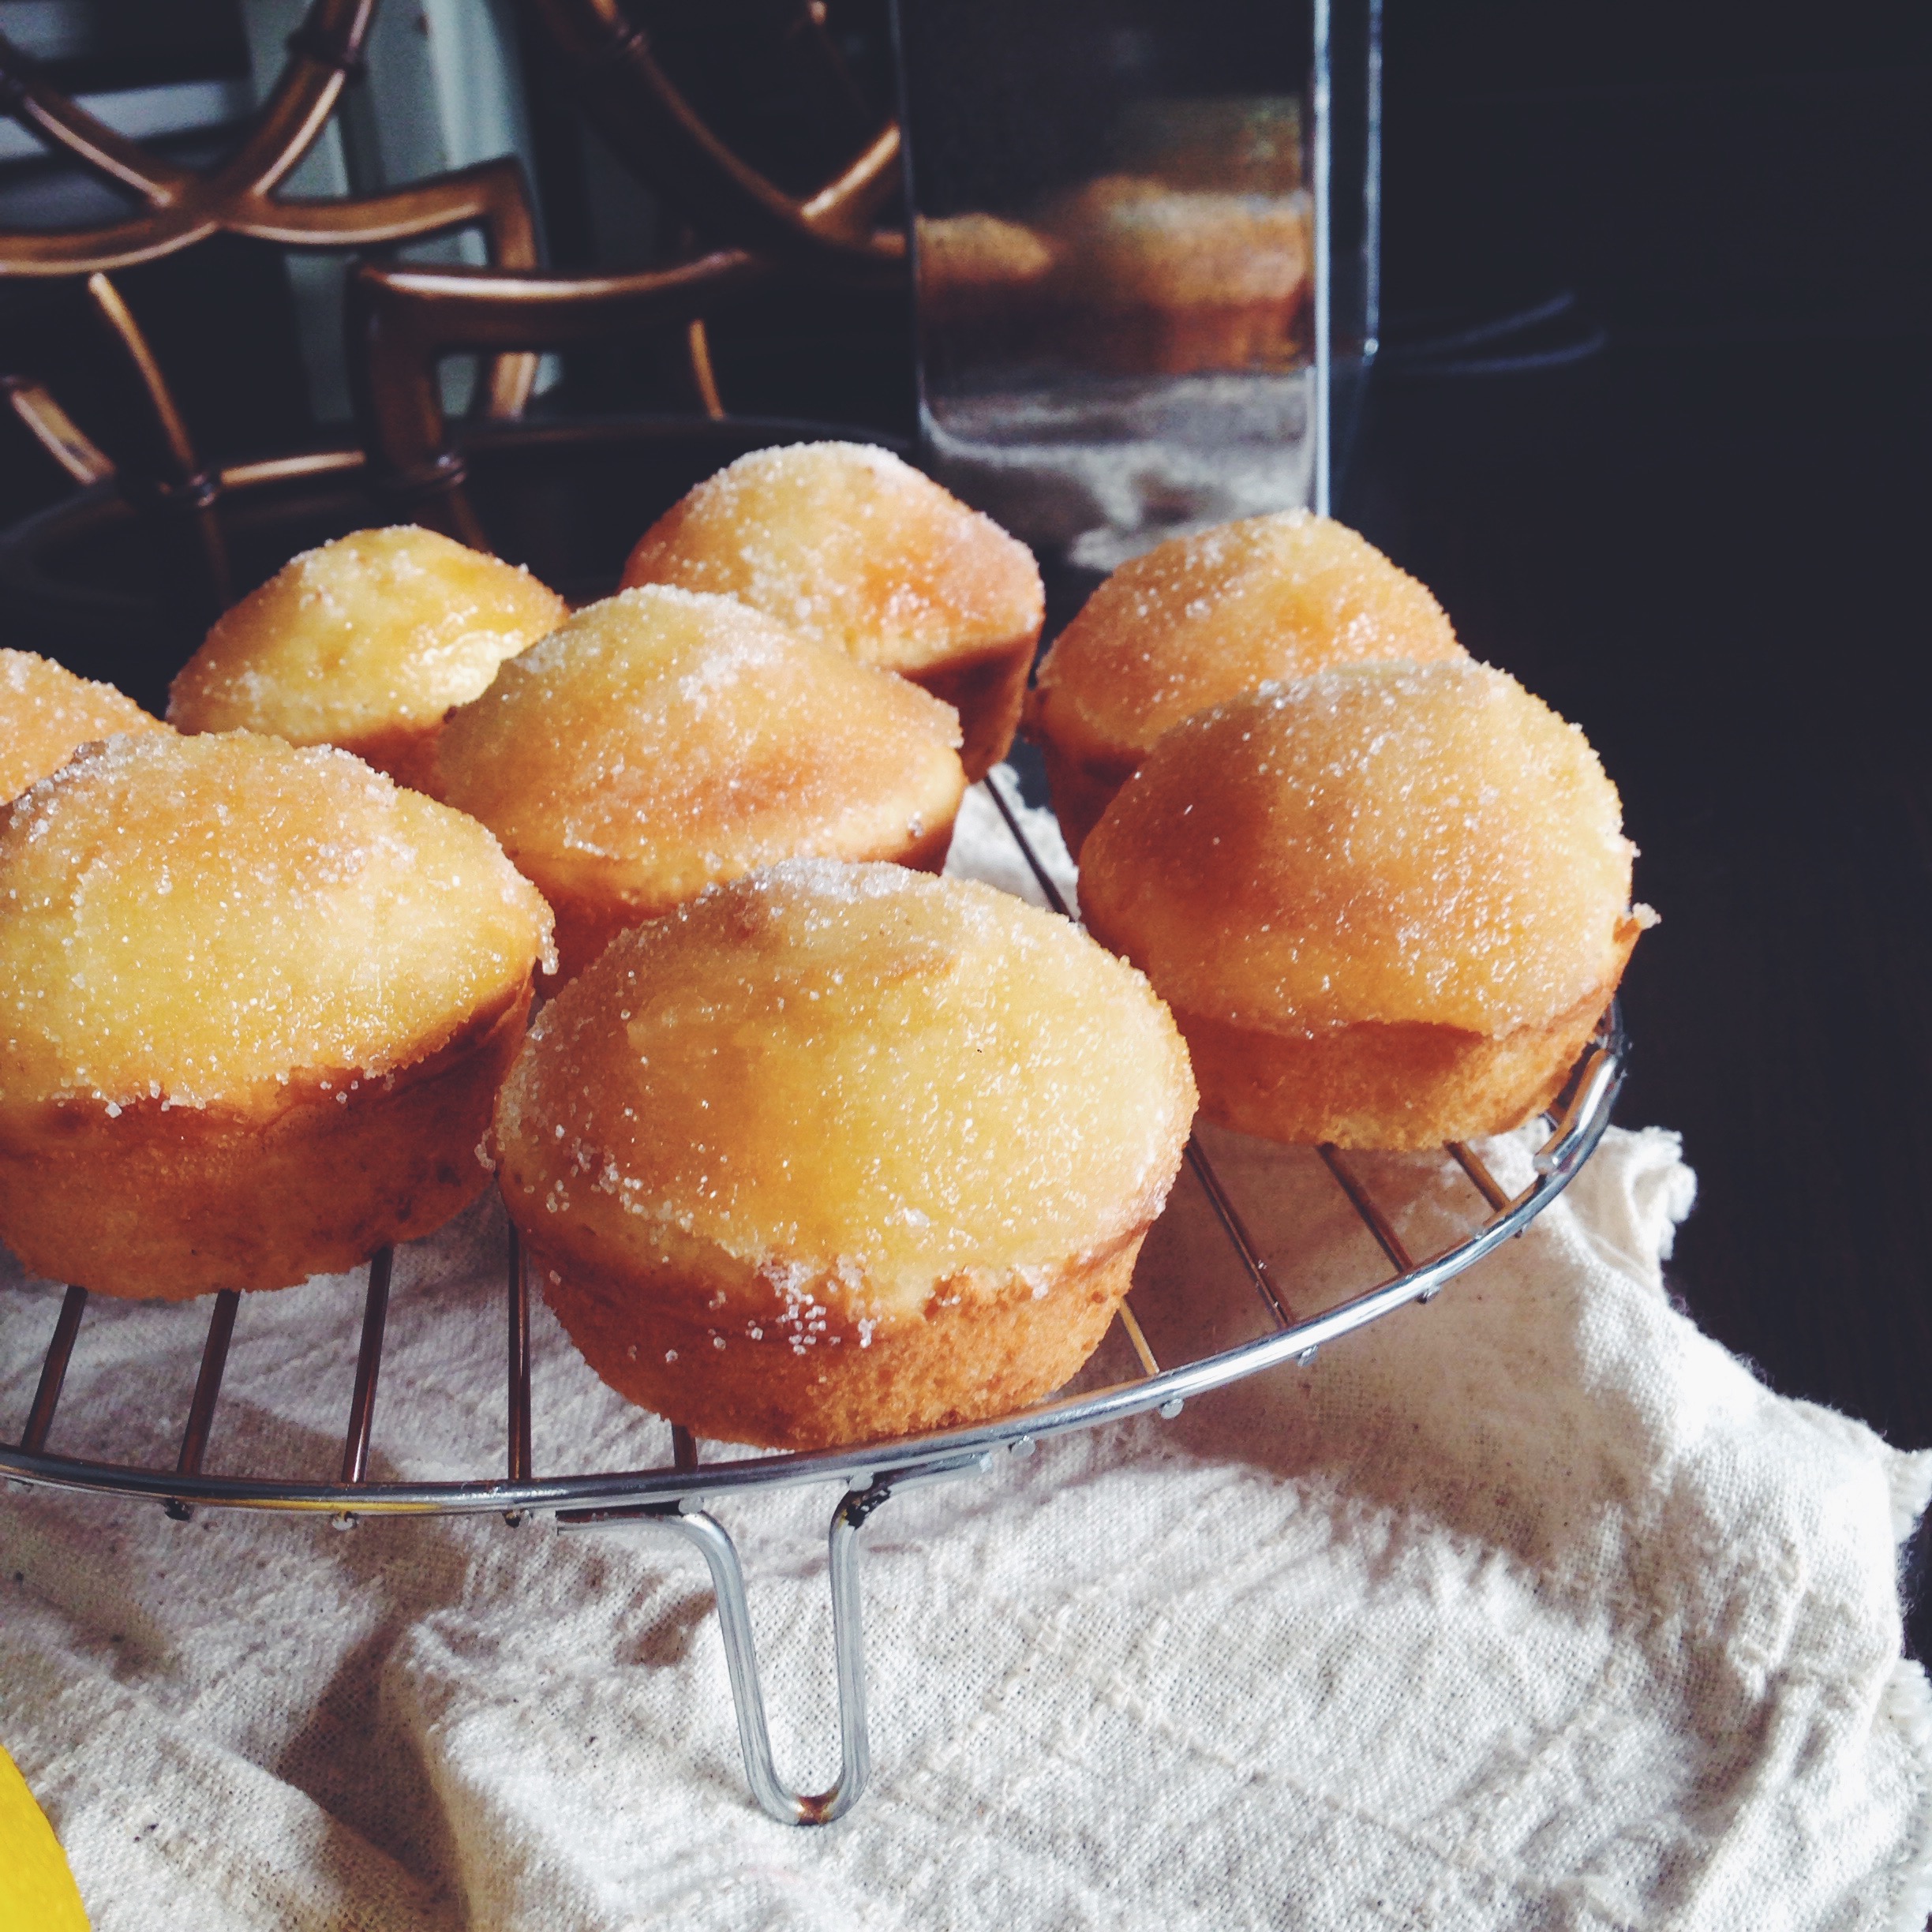
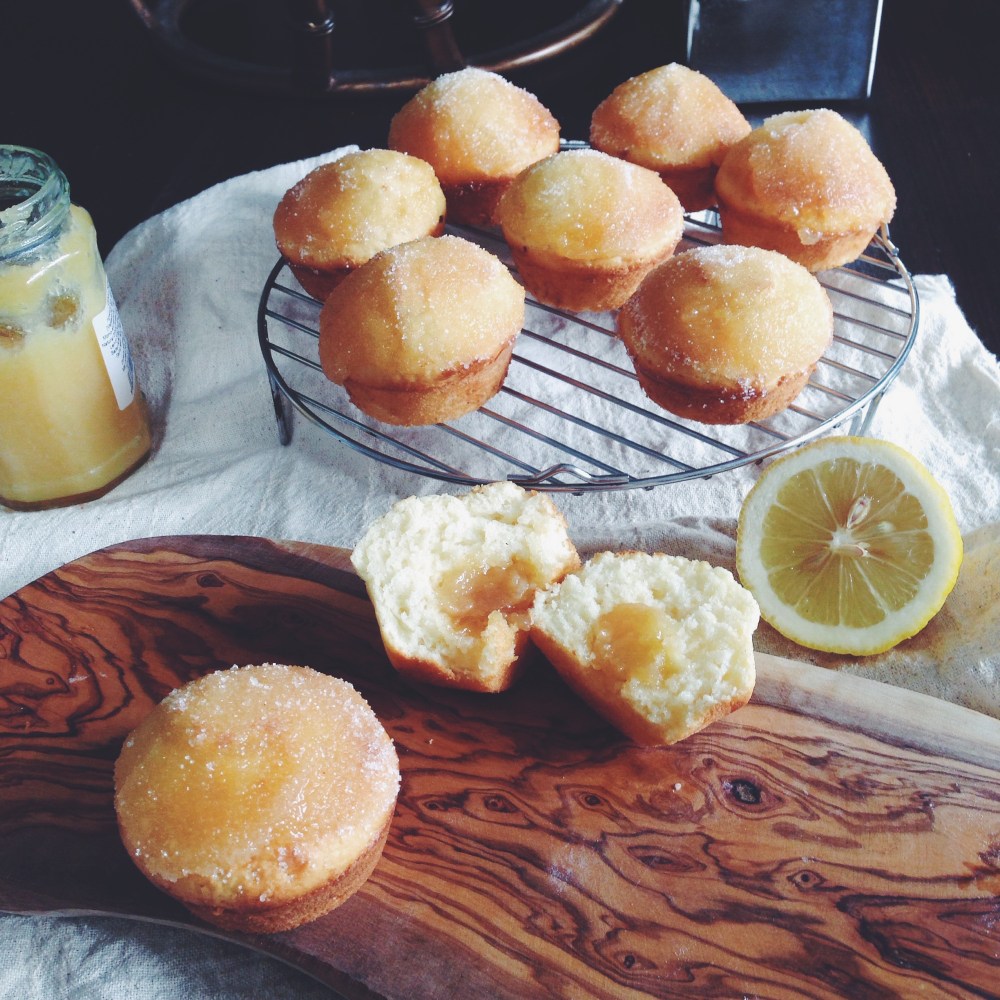
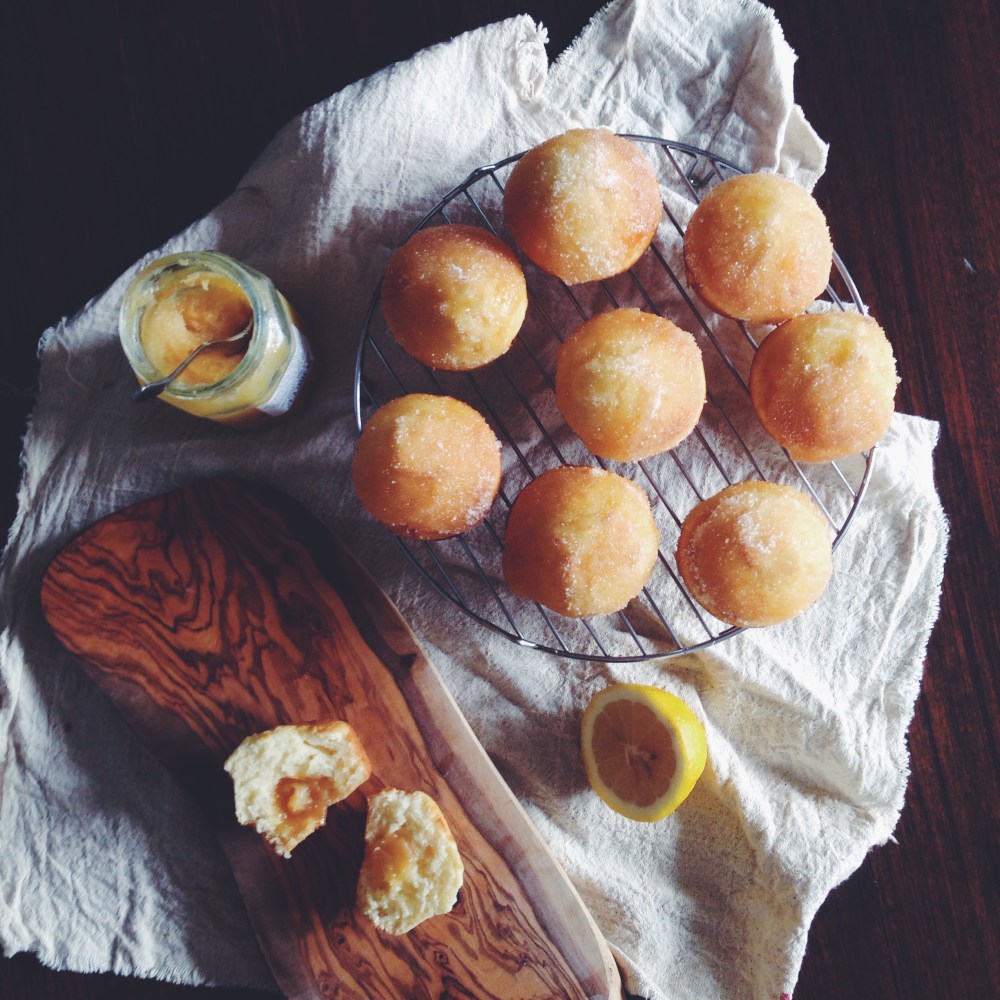
Fluffy, white lemon muffins with a lemon curd belly, topped with a lemon curd-sugar coating

What do I like about these muffins? Well. You mix the wet ingredients together, you mix the dry ingredients together, pour one into the other and voila, you have perfect golden muffins in a matter of 15 minutes or less. I mean it’s really not any harder than perusing the morning paper or making a cup of coffee. If you can tie your shoelaces, these are a piece of cake (got that). Wake up, make your coffee, work, take a half-hour break, and maybe during that time you can make these without breaking a sweat. There is just no excuse now.

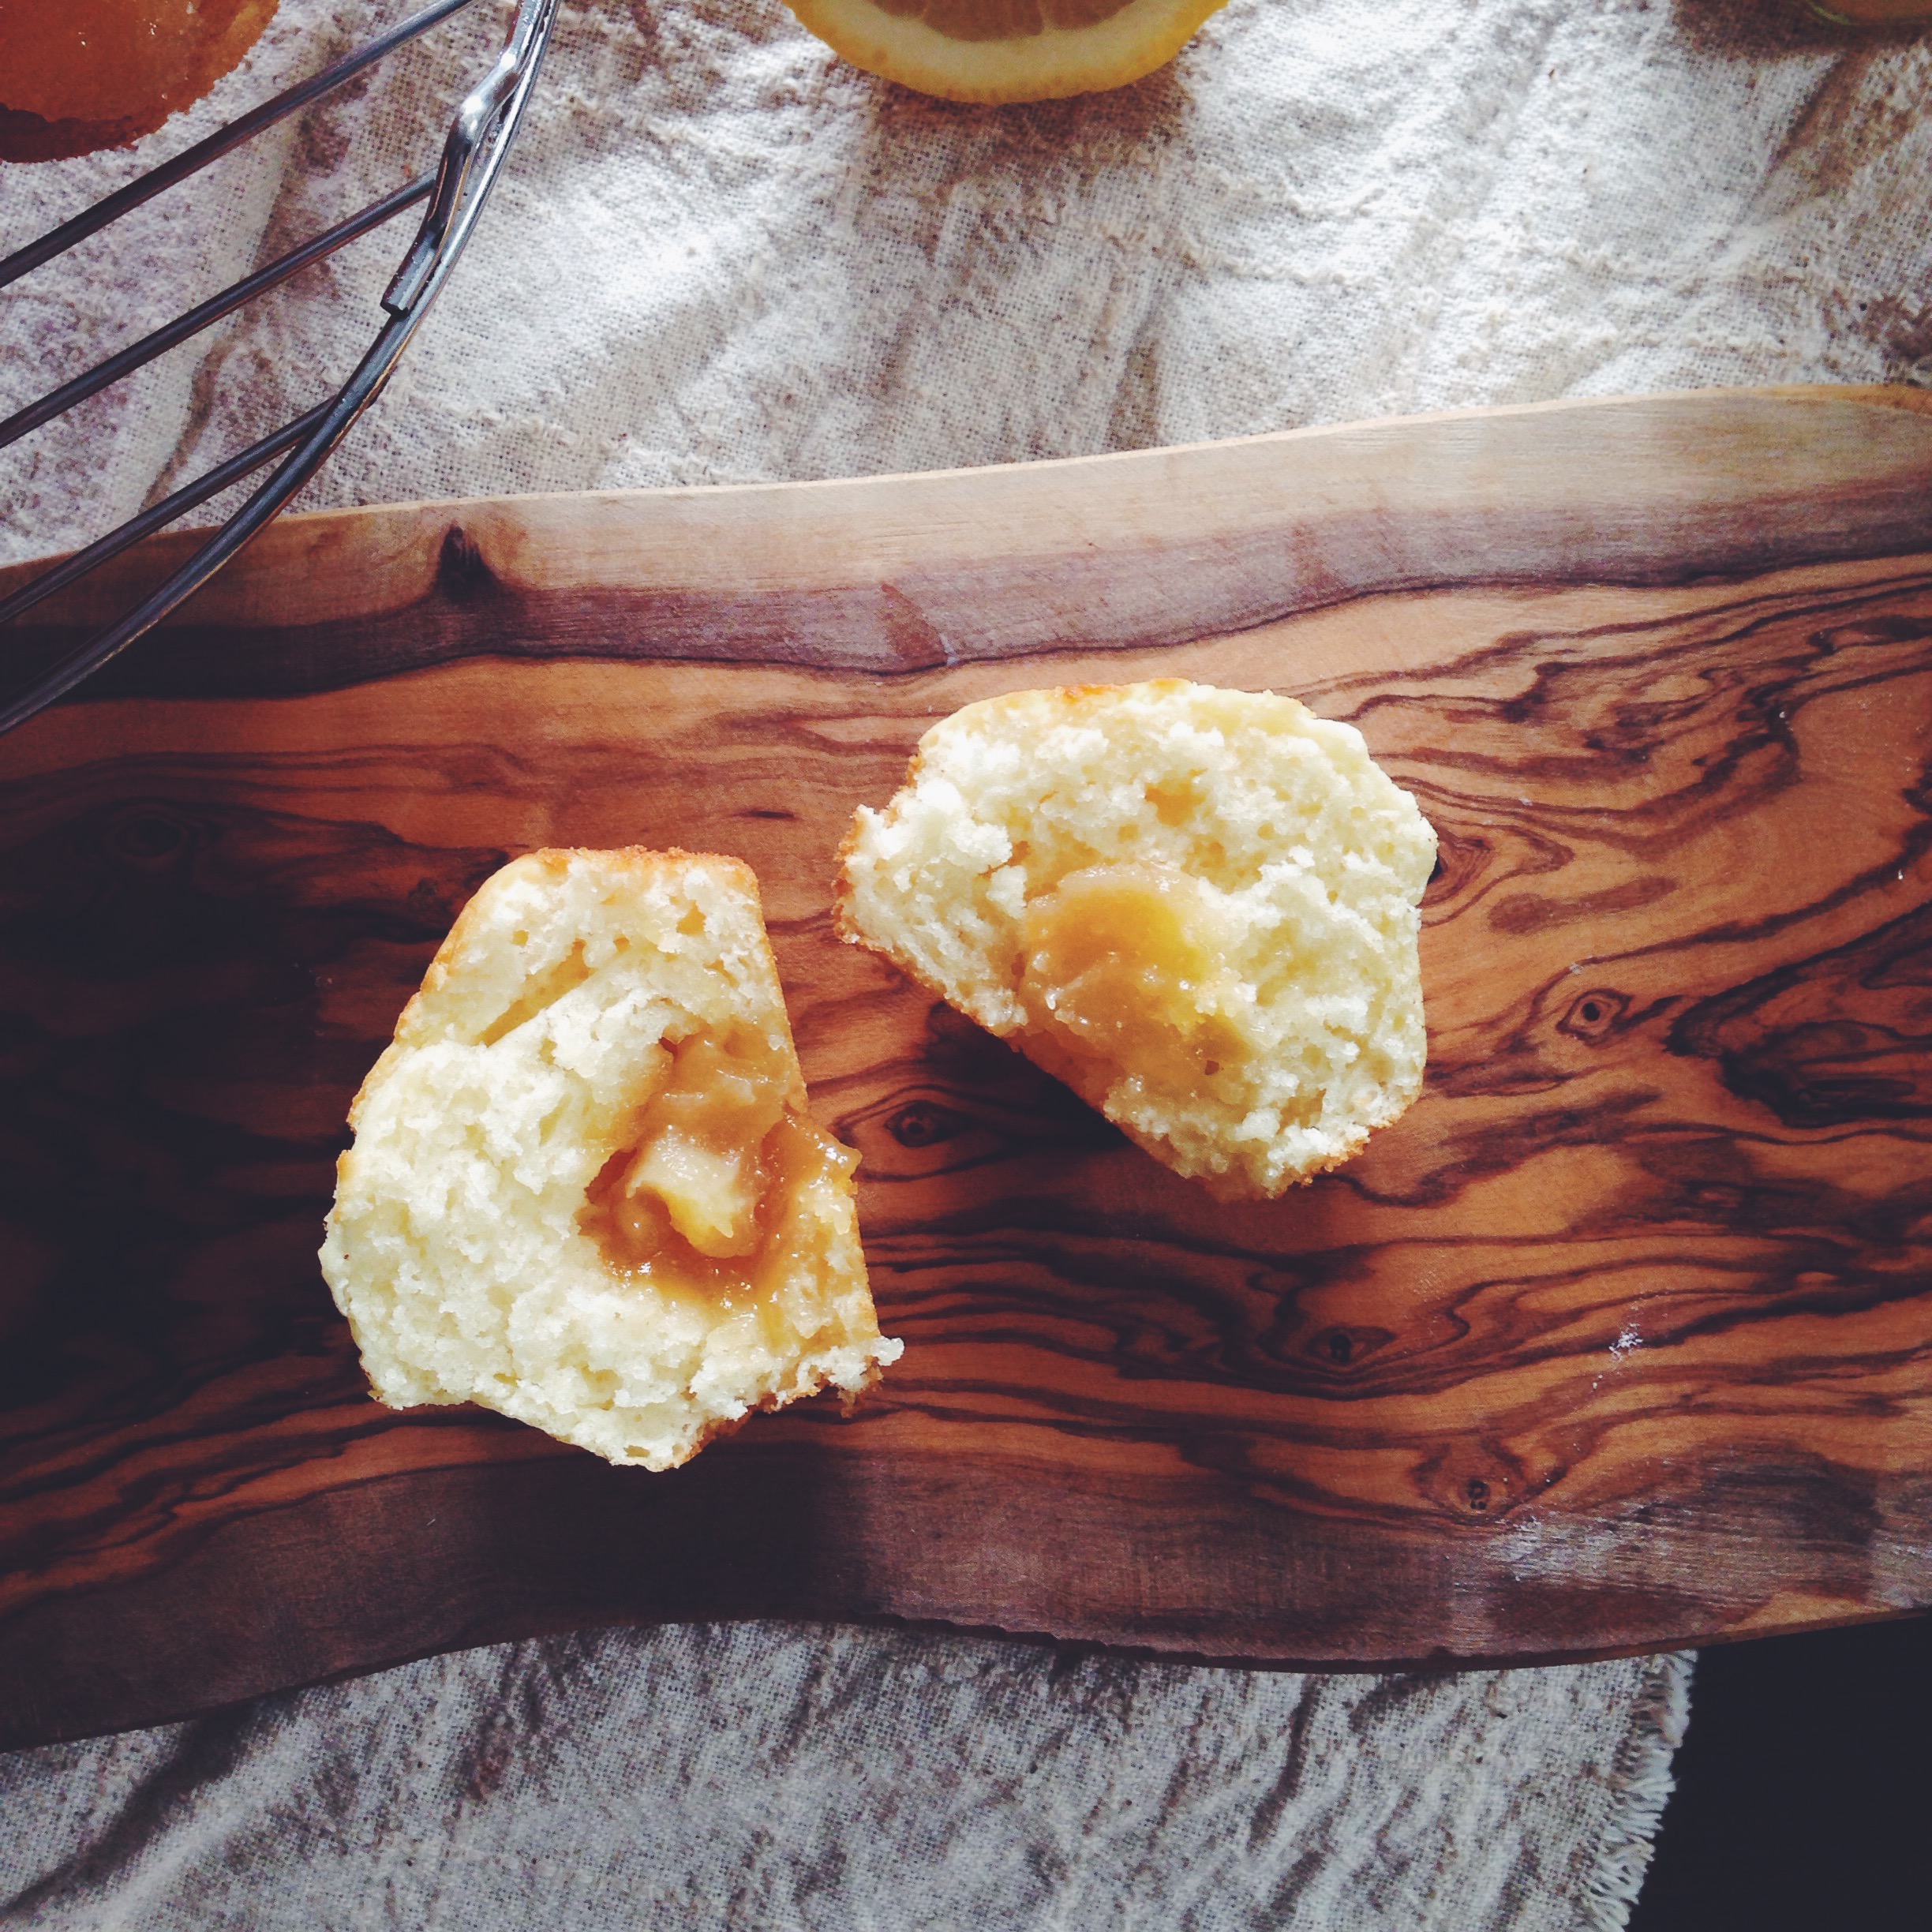
I had to satisfy the lemon fiend in me a couple of days ago, and did so well with these muffins. I had an incredibly hard time labelling this either a muffin or cupcake, because although this one ticks the boxes for all things which make a muffin, well, a muffin, the insides reminded me more of a cupcake than anything– light as air, pale, tender and not as dense as any muffin you might come across. It’s 80% muffin and 20% cupcake in technique, but 100% cupcake in texture. The crumb is neither robust or rigid, but holds up enough to provide the perfect amount of bite. Add this to the mix of half-molten lemon curd centre and sugar-crusted, sharp-tongued top and you’ve got yourself a winner.

Just for general info, muffins generally:

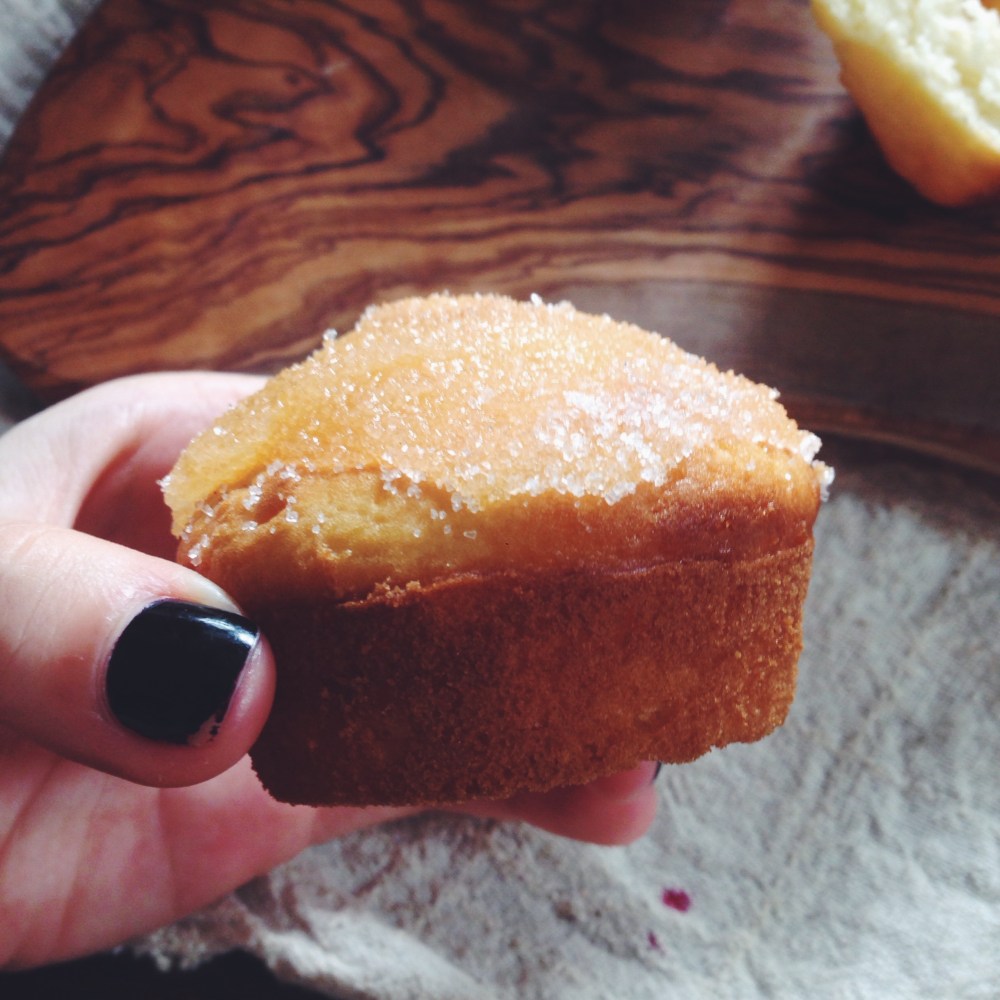
  • have a domed top (as is evident above)
  • a denser crumb
  • little if any frosting (usually a sugar coating such as this one)
  • require the wet and dry ingredients to be mixed separately before one is added to the other, instead of the typical creaming method utilised in the making of cupcakes.

Therefore, I present to you the cuffin.

Delight is a synonym for that wonderful lemon curd-sugar topping, which once again couldn’t be easier. Delight is also a synonym for the feeling you get when you bite into a soft, white, lemony bit of cake, rounded off with the sharp notes of homemade (or store-bought, that’s good too) lemon curd. Sharp on soft. White and black. It’s meant to be.

Lemon Curd Cupcakes (makes 10-12 cupcakes, adapted from here)

Ingredients

For the cupcakes:

200g self-raising flour

100g white castor sugar

pinch salt

1 egg

75ml vegetable oil (canola/sunflower is good here)

zest of one lemon

juice of half a lemon

120ml whole milk

60ml (1/4 cup) lemon curd, homemade or store-bought

For the lemon curd topping:

60ml (1/4 cup) lemon curd

70g white sugar (granulated/castor)

Directions

Preheat your oven to 190C (375F) and grease a cupcake or muffin tin. In a large bowl  whisk together the whole milk, egg, oil, lemon zest and lemon juice. In a medium bowl, briefly whisk together the self-raising flour, sugar and salt. Pour the dry into the wet mix and mix everything together until just combined with a wooden spoon. Using a tablespoon, half fill a mould in the tin with some batter, then use 2 teaspoons to put a small dollop of lemon curd in the centre, then fill to the 3/4-mark of the mould or case with more batter. Repeat for the rest of the cupcake moulds. Bake in the preheated oven for 12-15 minutes (mine took 13 minutes exactly). Check at the 12-minute mark; a wooden skewer inserted into the side (because the centre has lemon curd) of one should emerge clean. They should be nicely domed with a golden top, and no cracking on the surface.

Whilst these are baking, make the topping (YUM). In a small bowl, microwave the lemon curd until warm but not totally liquidy. Put the white sugar in a shallow dish and set these two aside until the cupcakes are done baking. Once they are fully baked, leave to cool for 5 minutes before rolling the tops in the lemon curd, then rolling again in sugar.

Devour, and know that life is good.