Frozen berry pudding (two options)

Processed with VSCOcam with f2 preset

I never was one of those girls who have greek yoghurt and fruit (maybe honey, oh my!) for breakfast. Nah. I always needed something carby, or at least warm. The typical day starts with warm oats and tea. Hot on hot on hot… Yes, in this bloody hot weather. But (there’s always a but). I’ve recently experienced a health kick, and decided to experiment a little with all the frozen berry smoothies I’ve been seeing all over the internet. It’s always ‘frozen this’ and ‘frozen that’. The trend has seriously taken the world by storm, but I tweaked it just a little so one need not have to blend everything the morning of. Tired? Got work? Then try this. You may not be the greek yoghurt girl with logos strapped across her bottom, but nevertheless it’s worth a go.

It’s filling, nourishing, chock-full of antioxidants and vitamins. Creamy yet sharp, pseudo-lush yet clearly one of the most healthy things you can have in the morning. This would traditionally be called a smoothie/slushy/ice-cream variant, but I label it a pudding because that’s the word that jumped at me the moment I dug my spoon in the bowl the next morning. Thick, not quite the full-on pudding consistency, but still more pudding-like to me than anything. The chia seeds voluminised the entire body of fruit, so it almost seemed aerated. There are 2 options for this recipe: blend it all in the morning, or blend most the night before, mix in the chia and let sit in the fridge overnight. The second yields a more liquidy, pudding-like result, whilst the former is like ice cream’s sister. Outrageous.

Frozen berry pudding (for 1)

one cup frozen mixed berries

half frozen banana (you can pop in the chopped up banana in the freezer earlier in the day)

40ml milk of choice (I used my mum’s ridiculously thick and creamy almond milk)

pinch of salt

one teaspoon maca/acai/vanilla/cacao powder (optional)

one tablespoon chia seeds

Toppings: nut butters, sliced banana, honey, whatever your heart desires

Option 1: Blend everything except the toppings in a blender (I used a Vitamix) and serve yourself some morning ice-cream!

Option 2: Blend the first 5 ingredients in a blender, then dish out into a bowl. Mix the chia seeds throughly into the thick and cold mixture. The next morning, take the mix out of your fridge and top with whatever you like.

Eggless French Toast

Processed with VSCOcam with f2 preset Processed with VSCOcam with f2 preset Well here’s to the longest hiatus ever, everyone! I have finally emerged from underneath the suffocating mounds of work. Free from an aching heart, mind and soul. It’s ridiculously liberating, and what better way to celebrate than a long-awaited post? It feels weird to have the time to do things like this, but I guess I better get used to it. I’ll be keeping more updated on comments, questions and posts. There’s just no excuse this time. This one’s a short recipe, nothing grandiloquent. But. This french toast is special to me because I’ve been using it quite frequently for the past 3 years or so, after modifying it myself from various sources. I only recently realised that it’s never been properly shared with anyone. It’s basically a vegan french toast recipe, with my own twist on a basic formula of mashed banana and milk. The quirk? The kind twang of yoghurt and a burst of cinnamon. Simple, fresh, wholesome. Its just french toast, but the glorious main star of the batter, mashed banana, makes for the most wonderful naturally sweet exterior. It yields a caramelised banana crust, almost with a charred taste and texture, depending on how ‘done’ you want the final result to be. Who am I kidding, it’s just french toast. But I must talk about it, before I forget tomorrow, and probably the day after. My french toast. The toppings are totally subjective. In the picture above, I used maple syrup, fruit and my mum’s homemade pistachio butter, which goes superbly with most everything you can think of. Breakfast foods, at that. Butter and maple syrup or honey would work a peach. Keep in mind that you don’t need too much sweetener thanks to the natural sweetness of the bananas. A caramelised golden banana coat to keep the inside warm and fluffy. The same goes for having it straight-up plain. Or why not make it a glorious peanut butter and jelly-stuffed sandwich. Maybe some chocolate spread and melted marshmallows. I might be taking it a bit too far here. Just, you know, some ideas. And if you have some ice cream…

Eggless French Toast For One

Preheat your pan on medium-high heat. Take two slices (or three, if you wish) of soft bread of your choice, such as buttery brioche or, unsalted butter from the fridge to let it warm up a little. Take half a banana (ripe if you’re lucky) and mash it up with a fork. Add a good splash of whatever milk (quarter cup, or 59ml) you want and mix that in well. My favourite is my mum’s gorgeous homemade almond milk– all thick, creamy and rich. Whole milk will work beautifully as well. The texture should be thick, much thicker than your typical liquidy french toast batter, and little chunks of banana are fine. Add a tablespoon of yoghurt, a squeeze of honey or any sweetener you desire, and a dash of cinnamon. Mix mix mix. Just one fork, a shallow dish and a handful of ingredients. No mess, no fuss. Take a good knob of butter (around a tablespoon) and let that sizzle on the pan. Drench both sides your slices, one by one, in the thick mixture. A little excess is fine– it actually makes for a better crust. Place slices on the preheated, buttered griddle or pan and let cook for around 2-3 minutes on each side. Have a quick peek underneath if you’re not sure, because every pan and fire is different. It should be golden, with little smears and streaks of brown, and incredibly fragrant. Once one side is done, flip using a spatula. It should take around half a minute less to cook this side. For more people, simply multiply the proportions of each ingredient appropriately.

Rustic Grape Tart

Processed with VSCOcam with f2 preset

It feels as if I’m caught in a storm right now, papers flying everywhere, head quite the mess. I told myself I’d buckle down 110% (those same words!) today, and yet, I feel a strong sense of guilt as I look over all my past recipe posts, the embodiment of one of my main passions in life. It’s funny because I actually read an excellent article on procrastination in the papers today; and yet, I don’t see this as a form of such a term, but more so a physical and mental extension of what I love wholeheartedly. It’s small things like the juxtaposition of fruit and custard cream which to be are akin to that of life and love, or books and work, or friends and family.

This grape tart, as you can see above, is not perfect. The shell has shrunk, the grapes aren’t all luscious and plump, but it is through these imperfections that I am willing to share what I’ve learnt to bolster your own attempt in the kitchen. The shrunken shell is my fault really, because I failed to spread the baking beans evenly during the blind baking process. That, together with the fact that I sort of wanted the whole rustic appeal of pseudo-slipshod work. Hey, it’s a tart!

Processed with VSCOcam with f2 preset Processed with VSCOcam with f2 preset Processed with VSCOcam with f2 preset

The pastry is abominably crisp, the sort which shatters and melts in your mouth real quick. And I have only recently discovered just how darn easy pastry cream is to make, and I used a simple recipe which yields a smooth and decadent texture and flavour. I attempted to keep cooking the cream until it was thick, and thus hold itself better in the fridge, or when cut through with a knife during serving. If possible, use fresh, thick grapes, which I unfortunately didn’t have on hand at that point in time (hence the tiny little blobs you see pictured!) Since I was trying out my new fluted rectangular tart tin, I was forced to leave out a significant amount of crust, but it would also be perfect in a round 9-inch pie tin.

Rustic Grape Tart

Ingredients

For shortcrust pastry:

157g all-purpose flour

125g cold, unsalted butter, cut into cubes

1/2 teaspoon salt

1/2 teaspoon sugar

2-3 tablespoons water

For pastry cream:

355ml whole milk (around 1.5 U.S. cups)

2 egg yolks

68g white castor sugar

1 tablespoon cornstarch

1/2 tablespoon all-purpose flour

1 teaspoon vanilla extract

optional: zest of half a lemon and a splash or brandy/cognac

For the topping:

around 100g of grapes, cut in half (or you can cut as you fill the top, after pouring in the pastry cream)

2-3 tablespoons grape/apricot jam, warmed in the microwave for a minute or so

Make the pastry. It’s extremely versatile and can be used for things like quiches and other sweet or savoury tarts as well. My mum uses it all the time for her savoury wild mushroom and blue cheese quiche. Anyways. Freeze the cubed butter for at least a half hour. If you’re using a food processor, combine flour, salt and sugar, and pulse to mix. Add the butter and pulse around 6-8 times until the mixture resembles a course meal with pea-sized pieces of butter. Add the iced water, 1 tablespoon at a time, pulsing until the mixture just begins to clump together. The dough should hold together when pinched lightly. If you’re just using your good old hands and a bowl, rub the cold butter into the flour mix, rubbing across the knuckles, and quickly, so the heat doesn’t melt the butter at a faster rate. Continue until you get the aforementioned result. Remove dough from machine/bowl and place on a clean work surface. Shape into a disk and wrap with cling film. Refrigerate for at least an hour, and up to 2 days (so you can make this way ahead of time, hoorah).

When ready to use, remove the disc and leave on the counter for around 10 minutes, just to soften a little. Roll out on a lightly floured surface with a rolling pin, according to the size of the tart tin you are using. For my own rectangular one, I rolled it out to around 9×11 inches, around 1/8-inches thick, so there could be sufficient dough hanging over the edges. Press the dough into your tin (no need to grease) and press down so it reaches all the corners and sides. Trim the edge, leaving about 1/2 an inch excess from the edges. Put the crust in the fridge for around 10 minutes and preheat the oven to 177C (350F). Line the chilled crust with parchment/wax paper and fill with pie weights. Bake for 20 minutes in the oven. Remove to cool for a few minutes. Remove the weights, poke the bottom with little holes and return to oven for another 10 minutes. Cool completely before adding any filling.

During the baking time, make the custard. In other words, the most fun part! In a saucepan, medium or large, over medium heat, warm the whole milk until it comes to a simmer. Whilst waiting for that, whisk the eggs, sugar, cornstarch, optional alcohol and lemon zest, flour and vanilla in a bowl. Whisk a little of the hot milk into the egg mixture, and then slowly, very slowly, whisk the slightly tempered egg mixture into the rest of the milk, constantly stirring. Continue to stir for around 3-5 minutes, until the mixture thickens and you have what rightly resembled a luscious, thick custard. It will be a fine, pale yellow, which leaves a slightly slimy trace when you sneak a lick off the back of your wooden spoon. Remove from the heat and let it cool for around half an hour.

Once cool, spread the custard onto the pie shell. Cut up your grapes and assemble them, cut-side down, onto the cream. It will take a while, yes, but it’s absolutely worth it in the end. Place your gorgeous little tart in the fridge, and cover with plastic wrap. Just before serving, warm some jam in a saucepan over light heat or in the microwave for a few minutes. Brush over little butts of grapes, remove from the tin and prepare yourself for a light and slightly unorthodox dessert.

Who doesn’t love grapes.

Frozen strawberry banana slushy

Processed with VSCOcam with f2 preset

 I was trying to think of something to post, just as I was whizzing up this baby you see in the picture above. Hence, it felt rather apropos to blow away the dust on my wordpress homepage with this recipe. A smoothie, really? I daren’t label it a recipe. It’s silly to think of it as a methodical process, accessorised with a baker’s meticulousness and precision, when in reality I half-heartedly thrust a few ingredients into the magical bullet robot that is the Vitamix. Whizz-bam-shoot– done. In literally a few seconds. I apologise for being dreadfully inconsistent, and I know some people have requested me to put up something new. I’ve been so caught up with work and university applications recently, it almost feels as if I need a good amount of time to get my head together and sort my life out. This whole life thing can get pretty messy, don’t you think? I wanted to do a short write-up for the sole sake of showing just how darn easy a smoothie is. Especially this one, because it’s so easy to modify and tweak.

Processed with VSCOcam with f2 preset

 Before I list the paltry amount of ingredients (and there really is nothing more to it), I want to address one of the questions I got on my ask.fm account. A lovely someone wanted to know if and how I overcame any specific personal problem, so I guess I’ll share it here. When I was in 9th grade, I was involved in a spate of cyberbullying. I was the bullied (surprise surprise). It all started when a couple of nasty girls decided it would be fun to call me bad things. At the time, I had a Formspring account (goodness, doesn’t that word sound ancient?), and they used this platform to send anonymous questions, in which they called me all sorts of things, including a word which starts with an ‘s’ and basically means excessively promiscuous. Of course, I didn’t do anything of the sort. I think it stemmed from the fact that I happened to like someone who the bully fancied first. It was all very childish and unnecessary. And yet, it pulled me into one of the darkest phases of my life. I loved books and science and yes, I liked boys, but not to that extent. So to hear all this, from some faceless ‘stranger’, perturbed me. My self-esteem went right down the drain. I clearly remember looking in the mirror in the mornings and giving a start to my swollen eyes. Even if I woke up feeling alright, those eyes gave way to all the horrid thoughts of the day before, clouding my nights with salty waterfalls. School was an unbearable thought.

Little did I know that this person, or the supposed leader of this small group, was someone I considered one of my very good friends. Someone I shared secrets and corny jokes with. Someone I sat next to the year before in English class. One day I couldn’t take the online comments any longer, and told my mum. Initially, I desperately didn’t want to get her involved, because I refused to make a mountain out of a molehill. But the pain ate at my gut for days on end. Rumours about me spread in school. All these false, ear-bending whispers. I didn’t know who to trust, who I could talk to. I couldn’t concentrate on anything else properly. Thank goodness I confided in her, for it felt like the biggest load was lifted right off my shoulders. She was shocked, but sympathetic. ‘God, of course not!’ I shrieked, when she told me she was making plans to report it to the school councillor. I would be known as the coward without the confidence to face the enemy. But how could I, given I had no clue who it was? Ah, my mother. I’m truly grateful for her existence; she really did make me feel at least thrice as better. Her support was solid, unwavering. It always has been. Anyways, as I was about to report the situation to an ‘adult figure’, one of the bullies confessed to me in school. Just one. Although I was hurt, I was grateful she approached me, for at least then I didn’t have to walk around school suspecting the motives of every single person I walked past.

Ultimately, what helped me recover from that phase was confidence. Confidence to just take one step forward, and stop caring so much about what other people thought of me. The melodrama made me value who my close friends really were, and I’m grateful for all the new ones I’ve made in recent years. The bullies made my life a living nightmare for a while, especially at that age when social circles pretty much determined my degree of self-worth. But that’s exactly it– for a while. The Bard says that ‘time and the hour runs through the roughest day’. You can’t trust everyone, but you can trust yourself to let your confidence do the talking. It was simply no use to let myself be bogged down by mere comments, or let the quality of my life suffer. Be confident. Be independent. Smoothies help too, you know.

Processed with VSCOcam with f2 preset Processed with VSCOcam with f2 preset


Frozen strawberry banana slushy (serves 1)

One cup of frozen strawberries 

One frozen, ripe banana

half cup milk of choice (I used almond here)

2 tablespoons greek yoghurt

good squeeze of thick honey or maple syrup, if you’re feeling particularly decadent (the imprecision here is horrifying, but in the morning, with gunk-crusted eye corners and droopy lids, a ‘good squeeze’ is indeed subjective…)

Optional: a few cubes of pineapple/ handful of spinach/ a splash of vanilla extract

To freeze the fruit, chop your bananas into rough coins and lay them in a single layer on a tray, before putting it in the freezer. The single layer makes it easier to remove when you take it out of the freezer, though you have to wait a couple of minutes or so. You could just put them in a bowl, but it’ll take a tad longer to thaw. It’s like a nightly ritual for me. I should really start doing normal teenage things….

In the morning, or whenever you feel like having something luscious, creamy and refreshing, throw all the ingredients into your Vitamix or blender, and… well, not much explanation is needed from this point, is there? Adjust the thickness to your liking, by adding more frozen fruit or more milk, to make it thicker or thinner respectively. Stick in a straw or opt instead for the frozen fruit-stache. That’s a fun one. I personally like it very thick and icy, so I can spoon it all with glee. Morning ice cream, anyone?

Overnight Yeast Brown Butter Waffles

Processed with VSCOcam with f2 preset

Curved edges. Waffles. Graphs and polynomials. It’s officially that time of year again, when the work eats at you like a parasite but the grey matter just doesn’t feel quite up to it. I wish I could blog more regularly, but then again it’s pretty comforting to know that I’ve found a nice momentum, one which doesn’t eat into too much of my time. Seeing that mock exams are nearing, this will probably be the last post for quite a while. But back to the subject and good mood of it all. This waffle beats so many I’ve tried elsewhere, and it was only my first time!

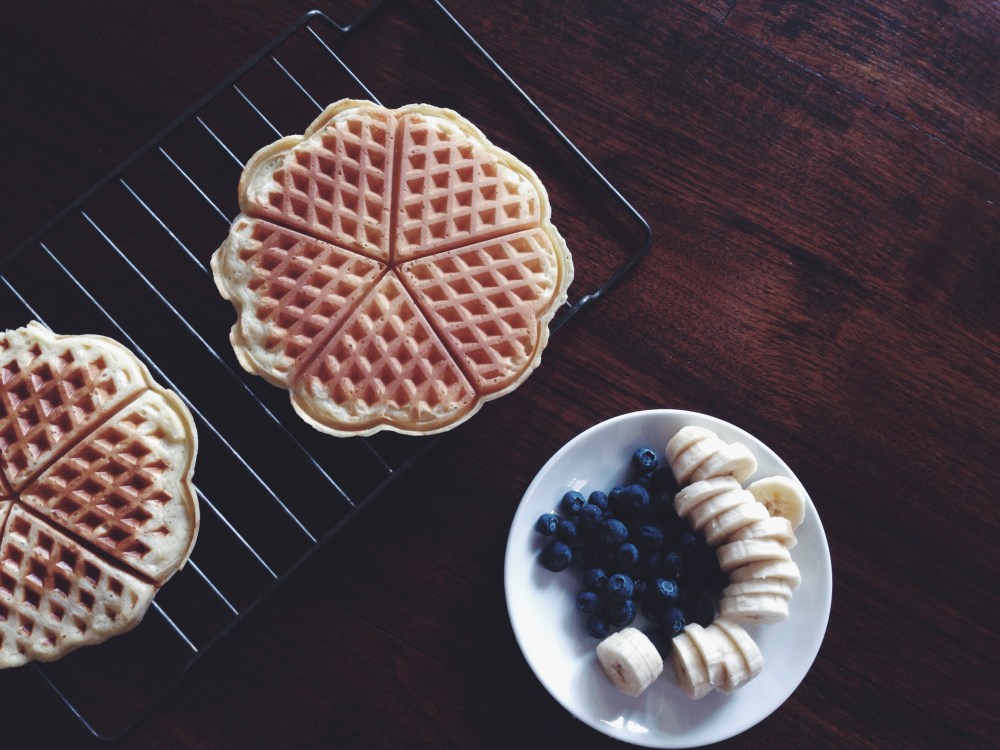
I don’t think it’s right to proclaim myself a waffle lover without having tried to make the enigmatic things myself. I mean honestly, I’ve tried too many to keep track. Call one a café hopper, waffle connoisseur, waffle whatever, but what’s criticism without humility gained from the unpredictability of a single waffle iron? And what better way to celebrate life in all its breakfast-laden glory than to use my new Severin waffle maker, with its sweet little collar? I didn’t know where to start. The problem I always have, with any recipe, is choosing from the countless resources available online. My favourite waffle, after a million waffle outings, is one with both an outrageously crisp edge, surface and interior, with just a tinge of fluffiness strewn throughout it’s (preferably thin) body. Nothing bread-dense nor tooth-shattering. It’s towards the tooth-shattering end of the spectrum, but not at all dramatic. See the picture above? Yeah, that was more of a trial. Crisp factor improved as the ladling progressed. I’m still learning, friends. It’s earthy, dark from the searing heat of the iron, mildly sweet and crisp. This recipe provides the perfect overall texture, and the secret lies within the use of both yeast and brown butter, to create a good deal of air pockets for providing the perfect crunch and chomp on first bite, and a hot, hot oven, to maintain and finalise the crisp created by the heat of the iron. The best thing is that you throw everything together the night before, which takes practically no time at all, and simply ladle in the batter into a preheated iron the morning after. Zilch waiting.

Processed with VSCOcam with f2 preset


After scrolling through so many Swedish waffle recipes, I eventually settled and adapted a normal one, which isn’t exactly made for a Swedish waffle iron, but hey, it’s a waffle iron all the same. It has one job, for goodness sake.

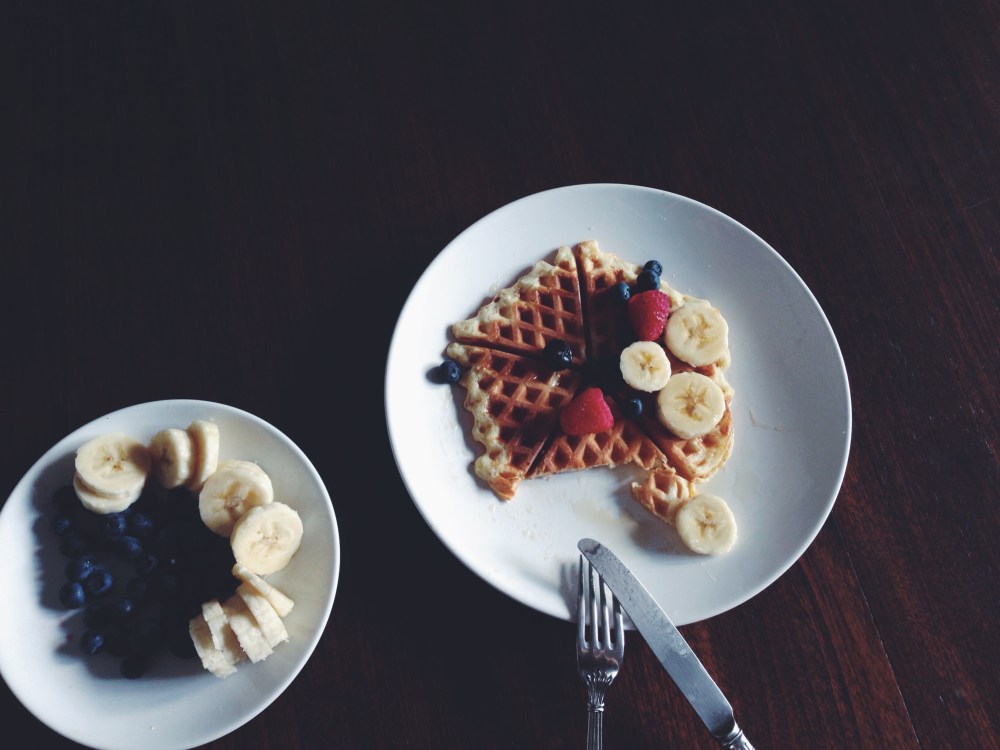
I myself enjoy a thin, absurdly crisp waffle with tart fruit, or a small side of crisp bacon and banana coins, which complements the mildly sweet nature of the main centrepiece. Simple. Maple syrup is must; I don’t think honey, thick or runny, or anything else actually (Hershey’s chocolate or agave syrup is a straight-up no) will ever live up to the honest, musty notes of the former majesty of a condiment.

Processed with VSCOcam with f2 preset

Processed with VSCOcam with f2 preset

Just a note on the pictures above: As you can see, the edges are not at all firmly crisp and only the centre yielded the perfect bite. After increasing my oven temperature and watching over my waffle babies oh-so carefully, I found that the perfect time to remove them was approximately 3-5 minutes. This will ensure a perfect crust and crunch both immediately after removal, and the texture is lovingly sustained for a good few minutes afterwards. This means that my sisters could still be getting washed up in the bathroom upstairs and by the time they’re ready, the waffles don’t go all soft and moist (gross!). As compared to the original recipe, I actually added a little more yeast than intended, and used a slightly lower oven temperature, since the first trial using the higher temperature of 180C caused a couple of burnt accidents. My own fault, really, but the end result was nothing short of spectacular. I also used vanilla extract in place of the vanilla paste, and it was perfectly fine, together with a hit of cinnamon and nutmeg, for a little aroma and spice-bite.

Yeast Waffles (makes 4-5 thin waffles. Adapted from here; this article opened my eyes to the wonderful world of waffle-making and brown butter. Brown butter is gorgeous. BB. So. Gorgeous.)

30g unsalted butter

125g all-purpose flour

1 egg

1 tbsp castor (fine) sugar

1 tsp fine salt

1 tsp instant yeast

1/2 tsp each of ground cinnamon and nutmeg (omit if you wish to keep your waffles plain)

200ml whole milk

The night before

That’s it! So, here we go. Make the brown butter. Melt the butter in a small saucepan (it won’t look like a lot), and continue to heat until you observe small flecks in the pan and the most gorgeous nutty smell starts wafting around the kitchen. These are the milk solids separating from the liquid. Keep heating over a medium heat; it will bubble and crackle. You’ll be able to see the entire thing darken, from a yellow pool of liquid with odd white bits into a golden amber. You might have to sweep up the bits of foam and bubbles to check the colour. At this point, remove the white flecks with a spoon. Set it aside, either on the counter or in the fridge. Put it in the fridge if you’re scared you overworked the lump of butter, but it should really be fine.

In a large bowl, whisk together the flour, sugar, salt and yeast. Whisk in the egg, and before it’s fully incorporated (it’ll look like a groggy mess of egg-white and yellow splotches), add the milk in thirds. Add a third, whisk. Add the second third, whisk. After all the milk is stirred in, add the vanilla, cinnamon, nutmeg and brown butter, and gently fold everything together. The batter will be of a medium-thick consistency. If it looks too thick, add a tablespoon or two more of milk. Cover the bowl with a piece of cling film or aluminium foil and pop it in the fridge.

The morning after

Preheat your oven (this is the important step!) to 170C (340F). Remove the bowl from the fridge and turn on your waffle maker. By now you should know that these things are worth investing (in my brutally honest opinion). Mine is preheated within five minutes, and turn it to its highest setting. While waiting for everything to warm up (oven, iron and batter), make a cup of good iced coffee (or tea, if you’re that sort) and ready whatever toppings you want. Use a small ladle or quarter-cup measurement to ladle in the batter, spreading it evenly. Follow the instructions on your own iron’s manual for heating and cooking. Mine take 5 minutes exactly to reach that perfect brown shade and hard exterior. You can keep peeking under (though not too much) to check on how it’s doing. Once it’s done to your liking, immediately remove it from the iron using a spatula and pop it into the hot oven. Ladle in more batter for your second waffle. The waffle will be perfectly crisp and golden after a couple minutes in the oven, but just check on them to be sure, and don’t burn the babies.

I’m thinking of trying out a chocolate batter next time round, and perhaps changing the volume of brown butter used. In the meantime, these work a treat. Anyone can do it.