Black Sesame Cinnamon Rolls (easy, eggless)

Processed with VSCO with f2 preset Processed with VSCO with f2 preset

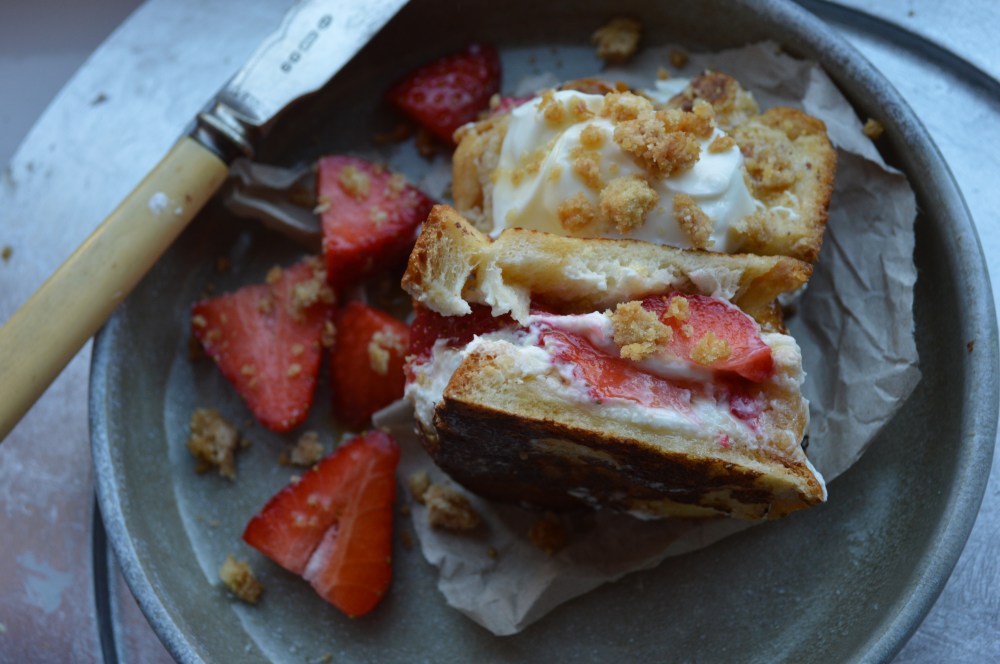
I never expected a single public holiday to represent such freedom. Quite loving this mind shift, this change of tide, in the sense that I now savour small things like this. Like a short breather in between a long-range marathon. After all this time, I still get excited about writing blog posts for you guys, and creating different, easy-to-make (usually) recipes on all things breakfast and sweets. So it feels good to finally getting round to blabbering a little bit more in the morning. Indeed, I wouldn’t mind some pipette work in the lab, mind to matter, but days away from its calming sterility call for things I love most– drawn-out bouts of journalling, reading, watching, feeling, thinking, loving. With lots of coffee and tea, of course.

IMG_1768

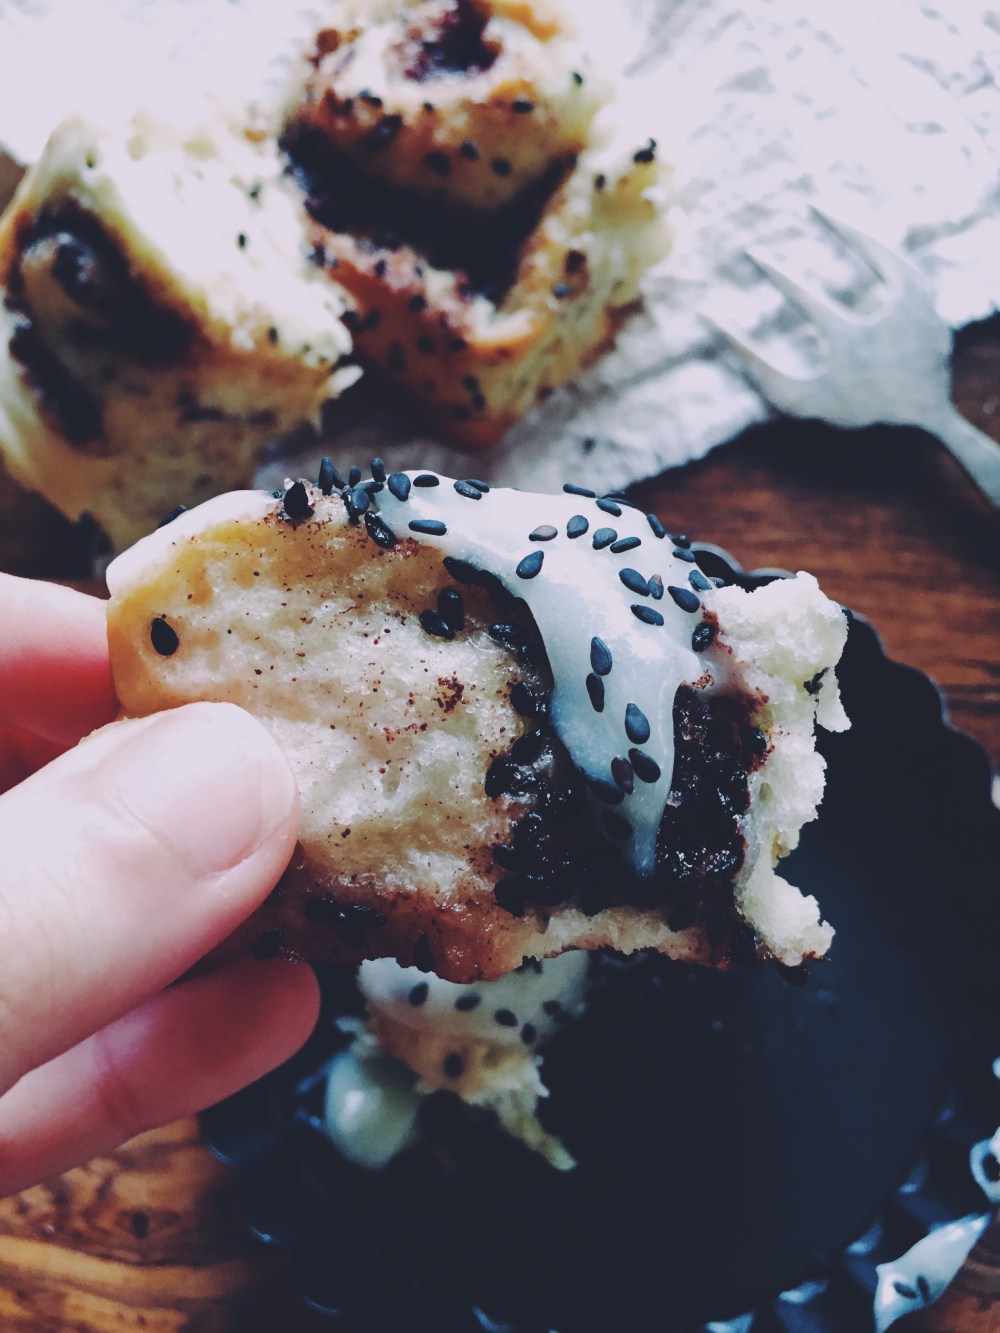
Back in my first term at college, I modified a recipe for eggless cinnamon rolls out of pure circumstance. I didn’t wish to make them specifically for a vegan friend, though these turn out to be quite the treat if you do wish to make it vegan (simply change the milk and butter you use), and one wouldn’t be able to tell the difference anyway. The crunch of the black sesame pressed into a cinnamon-sugary-sweet filling is heaven in this one. The dough itself is satin and fluff, easy to tear and almost melt-in-your-mouth.

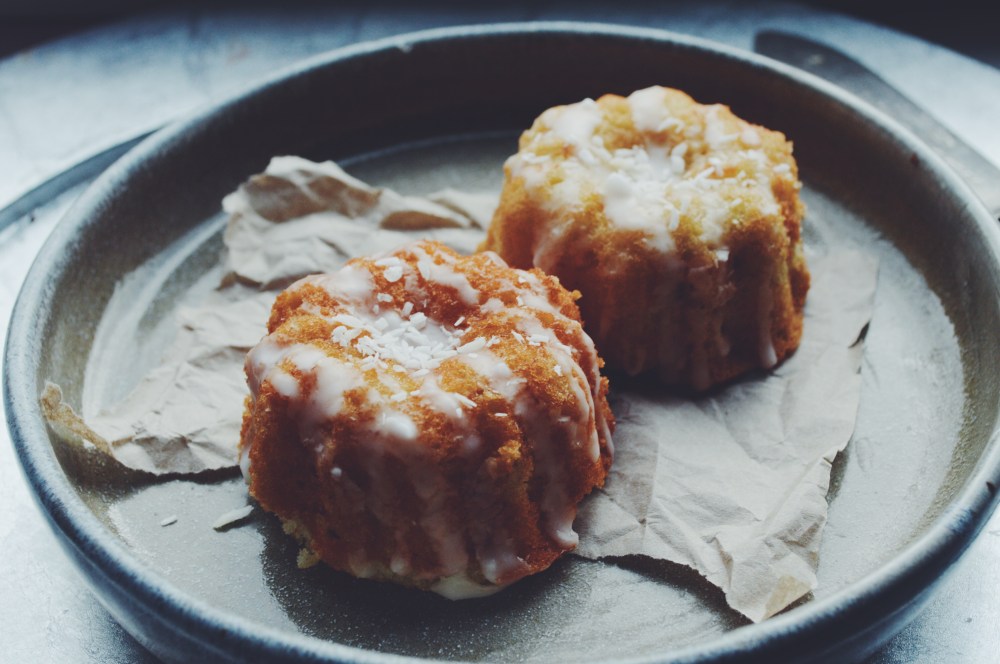
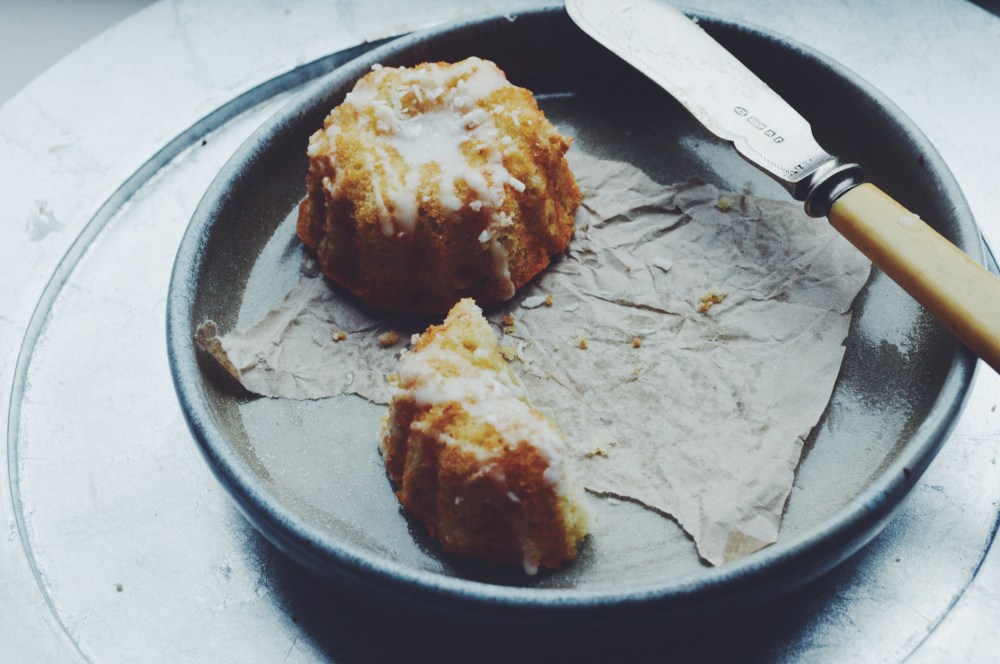
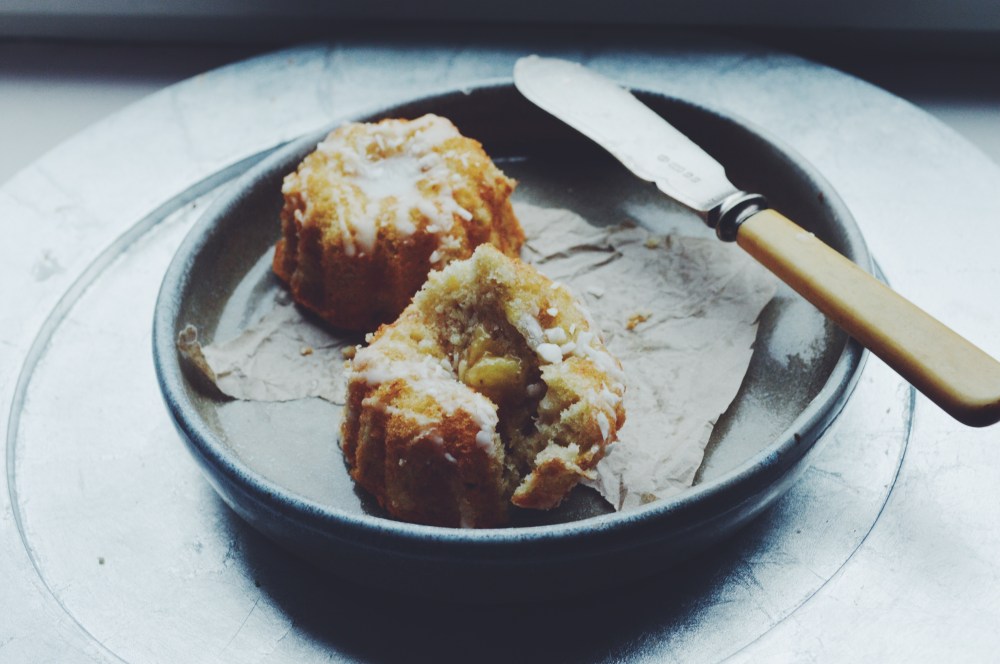
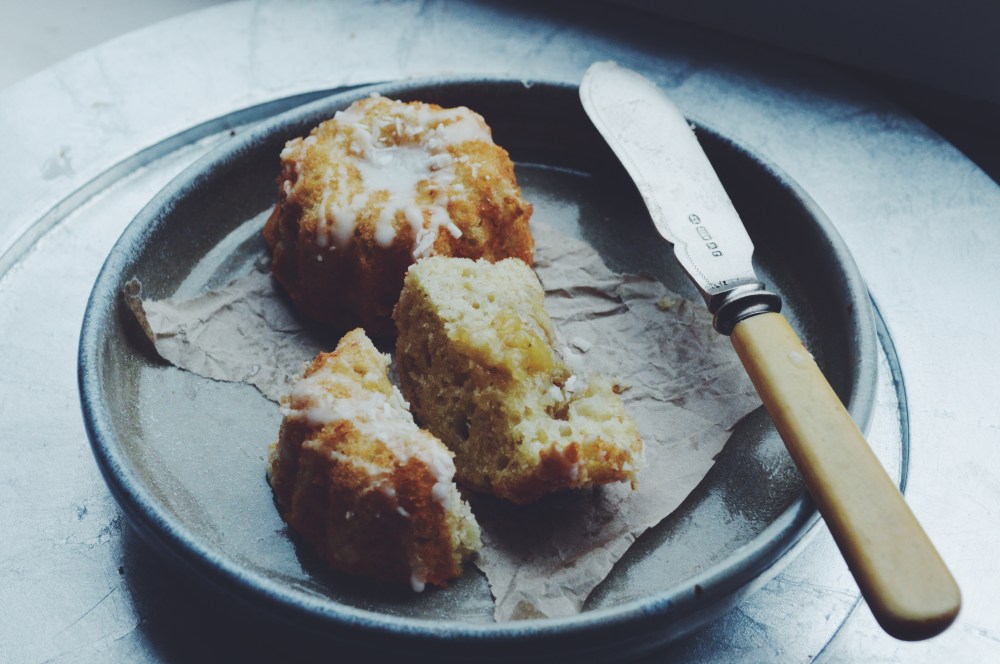
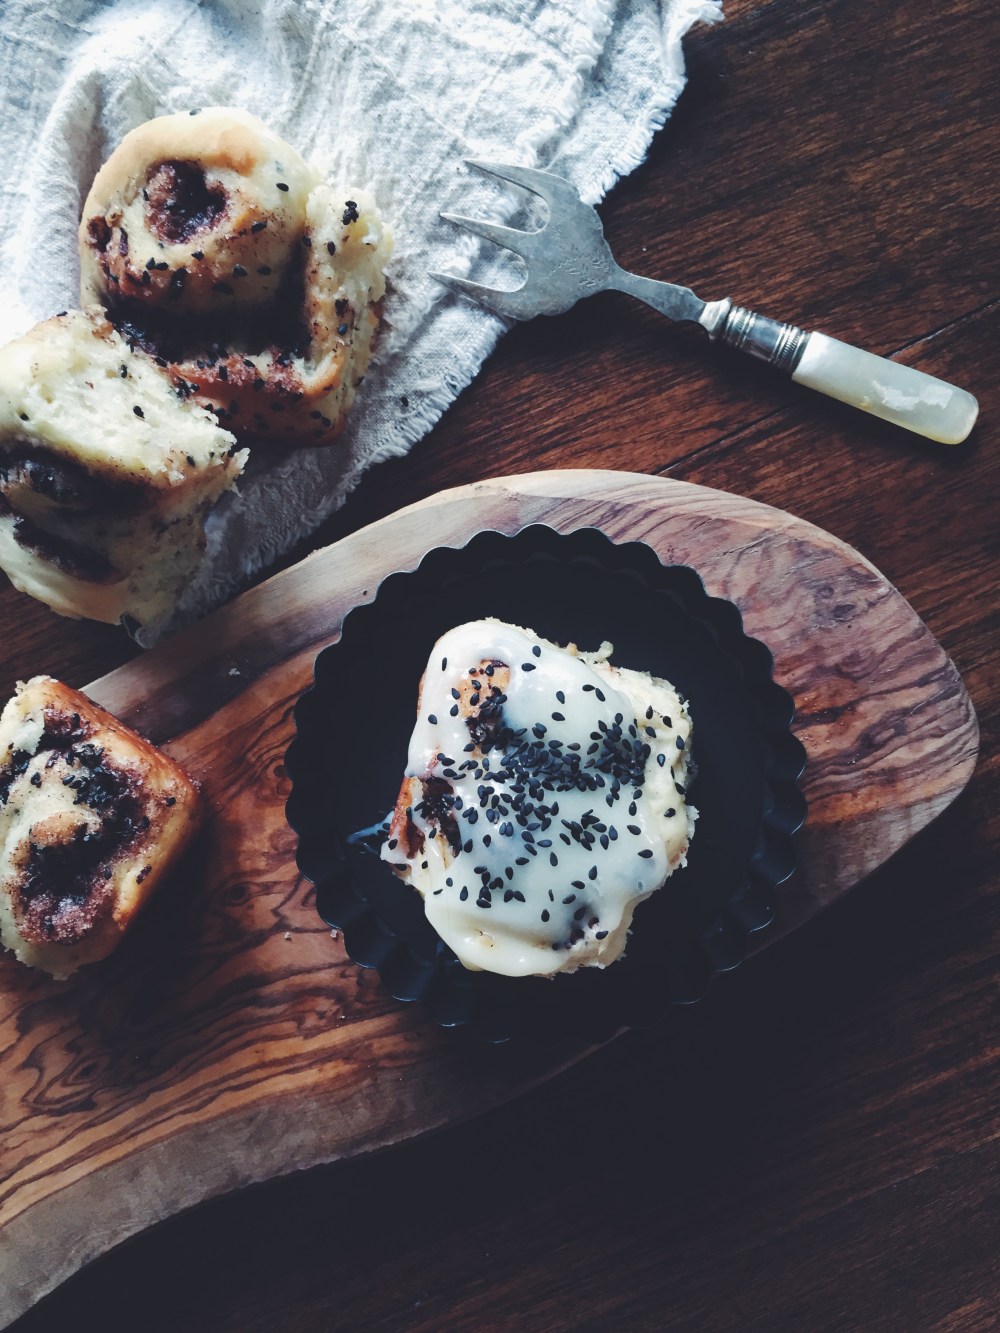
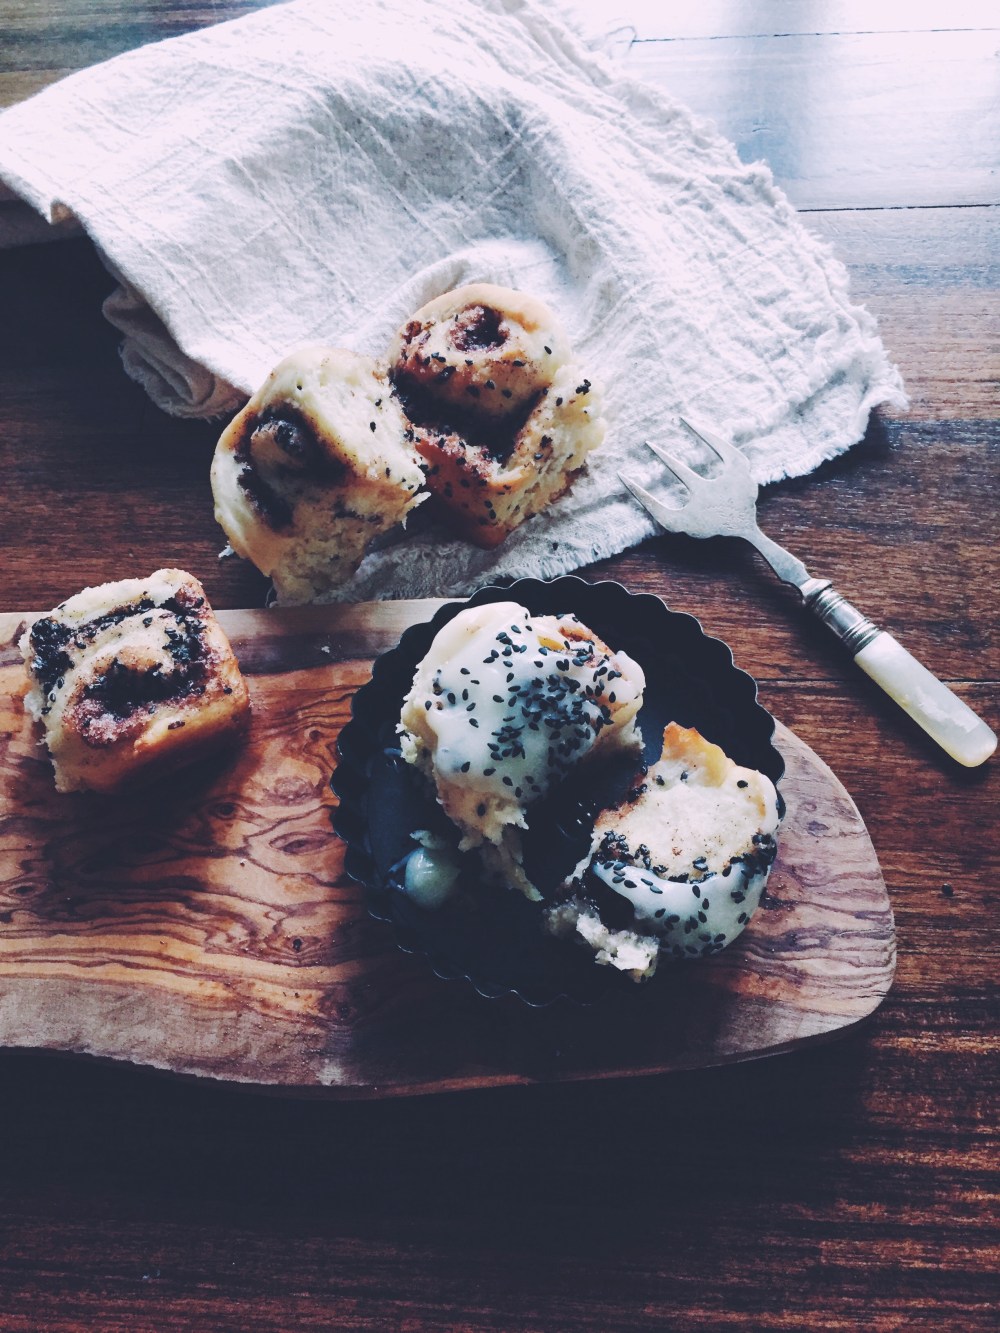
Black sesame cinnamon rolls, stuffed with a cinnamon sugar sesame filling, topped with a classic cream cheese frosting. 

Processed with VSCO with f2 presetProcessed with VSCO with f2 preset Processed with VSCO with f2 preset

I’ve talked about these already in my first post on the recipe, so do go check it out, especially for some side profile sass and another cute flavour approach. The black sesame in this one elevates the humble bun’s sophistication, and adds several health benefits to something that’s not exactly the most healthful breakfast (ha). Rich in iron, calcium, zinc and B vitamins, just a sprinkling of the seeds lends quite a boost to your day’s nutritional profile. I’m not trying to deceive myself or any of you into thinking these are actually good for you, but hey, the sprinkle is still something, and it’s intriguing and fun to think about, at least to me.

Processed with VSCO with f2 preset Processed with VSCO with f2 preset

Black Sesame Cinnamon Rolls (makes 9 mini rolls)

Ingredients

For the dough:

2 1/4 tsp instant yeast

1 cup (240ml) milk– I used a mix of almond and whole

45g (3.5 tbsp) butter

250g (around 1 3/4 cups) plain flour, plus more for sprinkling on counter before kneading

3 tbsp black sesame powder, which you can usually buy from your local oriental store

pinch of salt+1 tbsp sugar

Vegan version: use a plant-based milk (almond/rice/soy) in place of regular milk, and vegan butter (Earth Balance)


For the filling:

45g (3.5 tbsp) butter, softened to room temperature

3 tbsp black sesame powder

large handful black sesame seeds

7 tbsp sugar mixed with 2 tbsp ground cinnamon


For the glaze:

50g icing sugar, sifted

25g cream cheese, softened

2-3 tbsp cream


Directions

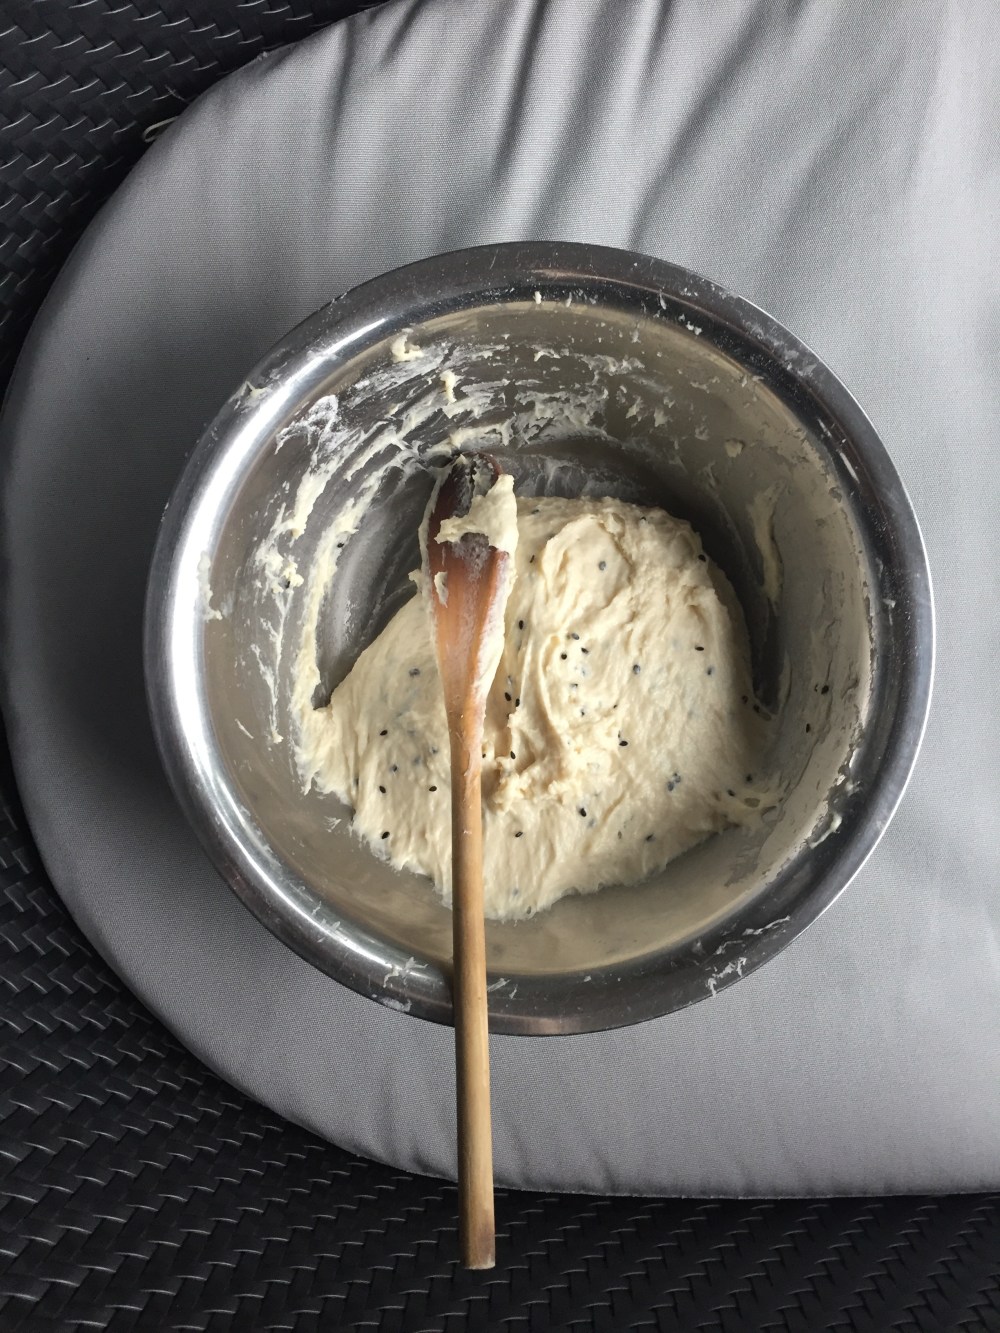
Dough: In a microwave-safe bowl or in a saucepan over low heat, heat together the milk and butter until the butter has melted and the mix is warm (not scalding) to touch. Pour the mix into a larger bowl, then sprinkle on the yeast on one side of the bowl, and the salt and sugar on the opposite side. Wait 5 minutes, then add a half cup of flour at a time, stirring with a wooden spoon between each addition, followed by the black sesame powder. Once the dough is too thick to stir, transfer to a lightly floured counter and knead for 2 minutes. The final result should be a smooth, rather taut ball of dough, so you may need slightly more or less than the aforementioned quantity of flour. Briefly grease the same bowl, pop the ball of dough in and let it rise until it doubles in size–around an hour. At this point, preheat your oven to 176C (350F) and liberally grease an 8×8-inch pan.

After the dough has risen, lightly flour your counter again and turn the dough out onto the counter. Roll it out into a half-inch thick rectangle. Brush on (I just used my hands here) the butter that’s softened to room temperature, then sprinkle on the cinnamon-sugar mix, black sesame powder and black sesame seeds. Tightly roll the dough from the long end, so you end up with a long, pale tube of dough. Place the roll seam side down, and using a serrated knife, cut your tube into 8-9 rolls, each around 1.5 inches thick. Place them into the greased square pan. Cover the pan with foil to avoid over-browning and place inside your preheated oven. Bake the rolls for 20-25 minutes.

While they’re baking, mix together the ingredients for the glaze in a small bowl. Once the rolls have finished baking, leave to cool for 10 minutes, then go ahead and glaze the heck out of them. Sprinkle on some black sesame seeds to top. These rolls are best eaten immediately or at least the day they’re made, however you can keep them for the next day and microwave them to revive a bit of tenderness.

Pandan Waffles

Processed with VSCO with f2 preset Processed with VSCO with f2 preset

Really a pretty great thing.

After a long day at the lab (currently participating in a long but fascinating internship involving incredibly novel anticancer research, and I couldn’t be more grateful at this point in time), I relished a wholesome family dinner, then tried to resist a nighttime urge to bake, or do anything at all in the kitchen. As usual, I failed miserably.

I don’t like to stick to a certain theme more than once or twice at a go, but after making kaya mochi just a few days ago, there lingered the odd inclination to play around with one of my favourite childhood spreads once again. Kaya, if you don’t know already, is the most delicious South East Asian coconut pandan spread, which to me is right on par with drippy, sweet, delicious almond butter or a lovingly homemade marmalade– yes it’s that sublime. Pandan is the tropical leaf from which kaya is made from. Earthy, sticky, sweet. There are lots of made-for-toast spreads out there that I adore, but kaya is childhood, kaya is rich nonchalance. What I spread on my burnt toast with butter, each bite a sticky mess of equal parts green and white (from unmelted butter).

This recipe is based on one of my favourite personal recipes– soda water waffles! Clickidy click that link for a classic version, or if you don’t really have a thing for kaya/anything pandan-flavoured. It’s the soda water that breathes life into the batter, added just before the kiss of heat, making the final result as light and airy as ever. Another perk? Made using sweet potato flour as a rather haphazard and weird experiment, it’s entirely gluten-free. Haphazard because this is my first time experimenting with sweet potato flour, which is one of the finest, almost delicate flours I’ve come across. Everything made with it will be of a relatively thin consistency, permeated with an au natural chew. Definitely looking into using it more, for what I’m not sure just yet; I’m only excited to incorporate more gluten-free options to accommodate any of you coeliacs out there. Of course, you can substitute this with normal flour, and this will yield a slightly less chewy and probably more refined-looking waffle. Indeed, this isn’t the prettiest of waffles, but goodness the outside crisp is outrageous. The chew on this is also slightly ridiculous, and funnily enough reminds me of that kaya mochi I made not too long ago. An eerie similarity resulting from subconscious fashioning of the past. Processed with VSCO with f2 preset

Pandan waffles (makes 6-7 thin Swedish waffles, modified from here)

Ingredients

240g sweet potato flour (substitute with 200g all-purpose flour)

1 tbsp baking powder

1/2 tsp baking soda

pinch salt

2 tbsp coconut sugar (or brown sugar)

2 eggs

1/2 cup milk of choice (I used almond)

3 heaping tbsp store-bought or homemade kaya

1 drop pandan extract (bought at your local oriental store)

80g melted, unsalted butter

1 cup soda water


Directions

Preheat your waffle iron according to the manufacturer’s instructions. In a large bowl, whisk together the dry ingredients– flour, leavening agents, salt and sugar. Add the egg, milk, pandan extract, melted butter, kaya, and lastly, the soda water. Cook in the preheated iron according to the iron’s instructions. In my Sevren waffle maker, it took 4-5 minutes before the edges went crisp and golden.

These freeze wonderfully. Let the waffles cool on a cooling rack, before layering them with pieces of parchment between each waffle so they don’t stick together when you take them out the next morning. The next morning, take them out, microwave for 20 seconds, then stick in the toaster until golden and crisp again. Go wonderfully with banana, anything coconut-themed (I used coconut sugar), and peanut butter!

Kaya Mochi

A few of you have asked me previously about my diet, and why I blog about breakfast and dessert specifically. I must say, I have recently made a minor, albeit profound change. To sum it up, I adopt a mostly plant-based, whole foods diet. The main reasons for this are:

Eating Animals

Forks over Knives

The China Study

Why the deprivation? Meat tastes the best!! I modified my About and FAQ’ page to cover a few points, but the above links are what induced a fixated curiosity on our warped nutritional conventions in the 21st century. So go ahead, click click click. On all the links.

Despite everything I say on adopting this diet, part of me feels a little sad because I do still eat a little meat, rendering my conviction less extreme, less concrete. It’s cultural convention to eat meat prepared for you, say, by your genius cook of a grandmother. This is why I still eat meat, albeit much less, replacing most of it with more starch and vegetables. And you know what? I haven’t felt better. Since the difficulty is justified, for reasons both ethical and environmental, ‘plant-based’ no longer carries the weight of ‘deprivation’ anymore. It really doesn’t. And I’ve finally come to realise that this is the right thing to do. If any of you have a similar experience with this, I’d love for you to share.

The second bit on why I choose to blog about breakfast and dessert specifically is also in the FAQ. I mean, my sweet tooth obviously deserves a bit of criticism. So check out the page for all that jazz as well.

Ok. Let’s talk about mochi!

Actually, I don’t know why that elicited an exclamation, because truth be told, I never was the biggest fan of mochi. I honestly just felt like trying something a little different. Increased exposure and this experiment indeed reversed my dislike.

Mochi is a delicate Japanese dessert, its name being derived from the type of flour used to make it– mochiko (rice) flour. Plus points for anyone who would potentially benefit: rice flour is gluten-free, with a substantial amount of niacin and B6. Amazing how it still yields such a chewy texture after being combined with the other ingredients. Typically stuffed with this divine, sticky red bean paste, but I changed it up just a little, deciding instead to fill it with homemade kaya (pandan spread). Weaved nostalgic taste into a minor innovative tweak. Each bite was sticky, slightly chewy, and bursting with the earthy, coconutty goodness of kaya.

Processed with VSCO with f2 presetProcessed with VSCO with f2 presetProcessed with VSCO with f2 preset

Kaya Mochi (makes around 10 depending on how big you like them, mochi dough recipe)

Ingredients

160g mochiko (rice) flour

180g icing sugar

300ml (1.25 cups) water

cornstarch for dusting

8-12 tsp kaya

Directions

Ready a large bowl full of cornstarch for dusting your hands and the mochi.

In a saucepan, whisk together the flour and water. Turn the stove heat to medium, add the sugar, and use a wooden spoon to continue stirring. Cook the mixture until it starts to look almost gelatinous, around 7-10 minutes. You will see the mixture thicken, and look slightly glassy on top. Leave to cool for another 10 minutes before touching and fiddling. Dust your hands with cornstarch, then scoop a bit of the mixture with a teaspoon. This bit onwards is a slightly sticky ride, but it’ll be worth it! Roll between your palms until you get a smooth, white ball. Use your fingers to flatten it a little, and place a tiny dollop of kaya in the middle. Gently pull the sides over the ball, and gently roll the mochi again to get an even sphere.

Dust with a mix of cornstarch and icing sugar before eating. Store in the refrigerator for up to a couple of days.

Strawberry Cheesecake French Toast

DSC_4194

Surreal. There’s no other way to describe it.

Yeah I’m talking about the french toast, but more so the fact that a whole term, just like that, in the scary blink of an eye, has come, passed, loved, and gone. Well, almost, with the imminent hurdle of exams, that glint of mild doom, but it’s always worth trying to look at the glass half full, and contemplate a rising, not falling.

DSC_4189DSC_4193

Breakfast is served, everyone. A soft, fluffy french toast sandwich stuffed with strawberries and a yoghurt-based cream cheese batter, topped with a digestive biscuit crumble. 

Was pondering this article earlier, acknowledging the benefits of not forcing oneself or others to eat breakfast in the morning. Many studies finally show that there is indeed no point thrusting yourself into routine if your gut is not up for that rude awakening at 7 30am. It once again points to the rather misleading nature of nutrition and health research; there are too little trials with too many variables to control.

Having always been an advocate of breakfast, both on a nutritional and creative level, I’ve extrapolated this idea to the fact that it’s actually ok to eat things like strawberry cheesecake french toast once every while. It’s alright to be unhealthy once a week, perhaps once a day. It’s a cut in the system, but breaking out of self-serving routine (e.g. the morning ‘kale juice fuel’ mindset categorising breakfast as something to always be healthy and the same thing every day) could well be good for just practicing day-today flexibility. Less rigidity, more creativity, more quiet time. Just you and breakfast (or no breakfast at all, which is perfectly fine). I noticed and was stunned by a slight reluctance on my part when I was thinking of what to make with fresh, in-season strawberries my aunt handed me earlier on in the week– I used to be more inclined to ideas letting them take over the mornings, let the flow take hold, creativity carving some scaffold of structure and stability for the rest of the day.

It struck me that rigidity, despite the calmness of its structure and how it makes more brain space for more things to worry about in the mornings, also can be a barrier in succumbing yourself to little joys in life, like finding a pocket of cheesecake batter-covered strawberry in the soft, fluffy insides of a well-made french toast sandwich, or finding a quote in a book (the one I’m reading now is The Diet Myth by Benedict Carey– fantastic so far and I’m just eating it up!) that you can really relate to. It’s the little things that spark glee, and let you look out for other little cute or glee-inducing things later on in the day, that perhaps inject a little more hope and happiness into other aspects of your life.

DSC_4195

Strawberry Cheesecake French Toast (serves 1)

Ingredients

2 slices challah/brioche bread

large handful fresh strawberries

2 heaping tablespoonfuls of cream cheese (softened)

2 tbsp icing sugar

60ml (1/4 cup) greek yoghurt

1 egg

splash of milk of choice

1/2 tsp ground cinnamon

1 tbsp butter (for cooking)

*optional topping: 1 crumbled digestive biscuit, mixed with a teaspoon of melted butter

mandatory topping: maple syrup


Directions

Preheat your pan on medium heat and ready a paper towel on your plate to place your french toast on afterwards. In a bowl, whisk together the egg, milk and cinnamon, and set aside.

In another smaller bowl, whisk together the cream cheese, icing sugar and yoghurt. The mix should be thick and spreadable, which is why greek yogurt is preferable in this case. Chop your strawberries lengthwise. Spread half of the cream cheese mix on one slice of the bread, and the rest on the other slice. Layer the strawberries on top, then sandwich the 2 slices together.

Add the tablespoon of butter to your pan and let sizzle. The butter should not burn or turn brown; turn down the heat if that’s the case. Dip one side of the sandwich into the french toast batter and let it soak for half a minute, then flip it over and do the same for the other side.

Fry each side in the hot pan for half a minute– you don’t want a full cook all the way through as this will result in a more rubbery, less soft and forkable final texture. Top with the digestive biscuit crumble, more yoghurt, strawberries and maple syrup.


One Bowl Banana Coconut Mini Bundts


Processed with VSCO with f2 preset

Sitting here at midnight, only thinking about the transience of so much. Day by day, shadows work their way around my feet. Before I’ve even come to terms with fact that term time is almost up, people in other unis have started summer, champagne bottles are being popped. Hyperactivity everywhere.

With all the frantic house-hunting and exam stress (and worrying over the efficacy of actual study technique), there’s comfort in the close strong bonds you know you always have with loved ones, and the smell of something warm and sugary rising in the oven. I knew I had to use my one precious, scratched mini bundt pan at some point before the end of first term. I hauled all my stuff from Singapore for a reason, right? Yeah, it’s been a while, but mea culpa.

Before I move on, a few things that’ve caught my eye this week. I do feel more inclined to share what I read regularly on this platform, which is pretty much everything nutrition/science-related:

Fascinating

Darya keeps linking the best, most informative and relevant articles

‘good science writing is not just about about turning over conventional wisdom about complex things.’ So much yes.

Love this man. A great retelling

And now.

DSC_4155Processed with VSCO with f2 presetDSC_4161Processed with VSCO with f2 preset

The fluffiest, softest mini cakes you will ever make, stuffed with mashed banana, topped with a coconut milk icing.

Now with blogging comes honesty. I’m not kidding when I add the ‘you will ever make’ bit, because they really truly are.  I just can’t kid when it comes to this sort of thing. Despite its ease and speed, this recipe has yielded the softest cake texture I have attempted by far. Stuff of cloudy dreams. I hate overhyping something, but the excitement is all too real right now. THE absolute best bit?

It’s all made in one bowl, just a bit of mixing, no elbow grease or sweat or fiddling whatsoever. No worrying about whether you have to ‘make time’, because you will have the time.

Processed with VSCO with f2 presetProcessed with VSCO with f2 presetProcessed with VSCO with f2 presetProcessed with VSCO with f2 presetProcessed with VSCO with f2 preset

These little cakes really are quite special. Perhaps it’s the irresistible fluff factor, or the mashed banana in the middle, making it a triple-layer banana hit. Probably both, not forgetting the slightly balmy, creamy addition of coconut. The next time I make these, I’ll add more coconut extract for an extra exotic kick. The delicacy of the crumb in this cake deserves the trueness of flavour.

You definitely don’t need a mini bundt pan for these, and can do the same thing in a mini muffin tin, or spread the batter in a square tin and bake for the same amount of time, then cut little squares/whatever your wild heart desires out of the final product.

And if you’re in the mood for more…

Feeling like cookie butter?

Or perhaps a little lemony?

Clearly I’ve run out of humour.

Processed with VSCO with f2 preset

One Bowl Banana Coconut Mini Bundts with Coconut Icing (makes 12-14 mini cakes)

Ingredients

For the cakes:

60g soft, unsalted butter

1 1/2 mashed bananas (should amount to a half cup)

an additional 2 mashed bananas for the filling

225g (1 cup) white sugar

2 eggs

60ml each of coconut cream and coconut milk

1 teaspoon vanilla extract

190g (1 1/2 cups) all-purpose flour mixed with a half tsp of baking powder (alternatively, use self-raising flour)

quarter teaspoon of salt


For the coconut milk icing:

2-3 tbsp coconut cream (or use coconut milk)

75g icing sugar


Directions

Preheat your oven to 180C (350F) and butter your mini cake/bundt/muffin tin. In a microwave-safe bowl, heat the butter and mashed banana together in a microwave to add a little caramelised effect to your already-ripe bananas, around 20 seconds. Pour contents into a larger bowl (makes mixing a bit easier later on), then add all the other ingredients for the cake, except for the 2 mashed bananas which you need for the filling afterwards.

Spoon a tablespoonful of batter into the bottom of a well in your tin, add a teaspoon of mashed banana in the middle, then fill the rest of the well with batter. Bake in the preheated oven for 18-20 minutes (mine were fine at 18). Whilst they are baking, mix the icing ingredients in a bowl and set aside. It’s hard to test for doneness due to the moist banana filling, but a little poke into the sides with a wooden skewer should reveal a mostly clean tip. A few moist crumbs clinging to the tip are fine; these cakes are pretty fragile and need to rest in the tin for a good 20 minutes before removing anyway.

If using a mini bundt pan, use a serrated knife to cut the tops off (these make wonderful little snacks). Loosen the edges with a blunt knife (just use a normal dinner knife), then tip the pan over to remove the little cakes. You don’t need to do this if using a normal muffin or cake tin. Drizzle with the coconut icing and top with coconut flakes. Fragile, sugarplum fairy-esque teatime treats await.