Rhubarb Phyllo Galette

4288212 Processed with VSCO with a5 preset
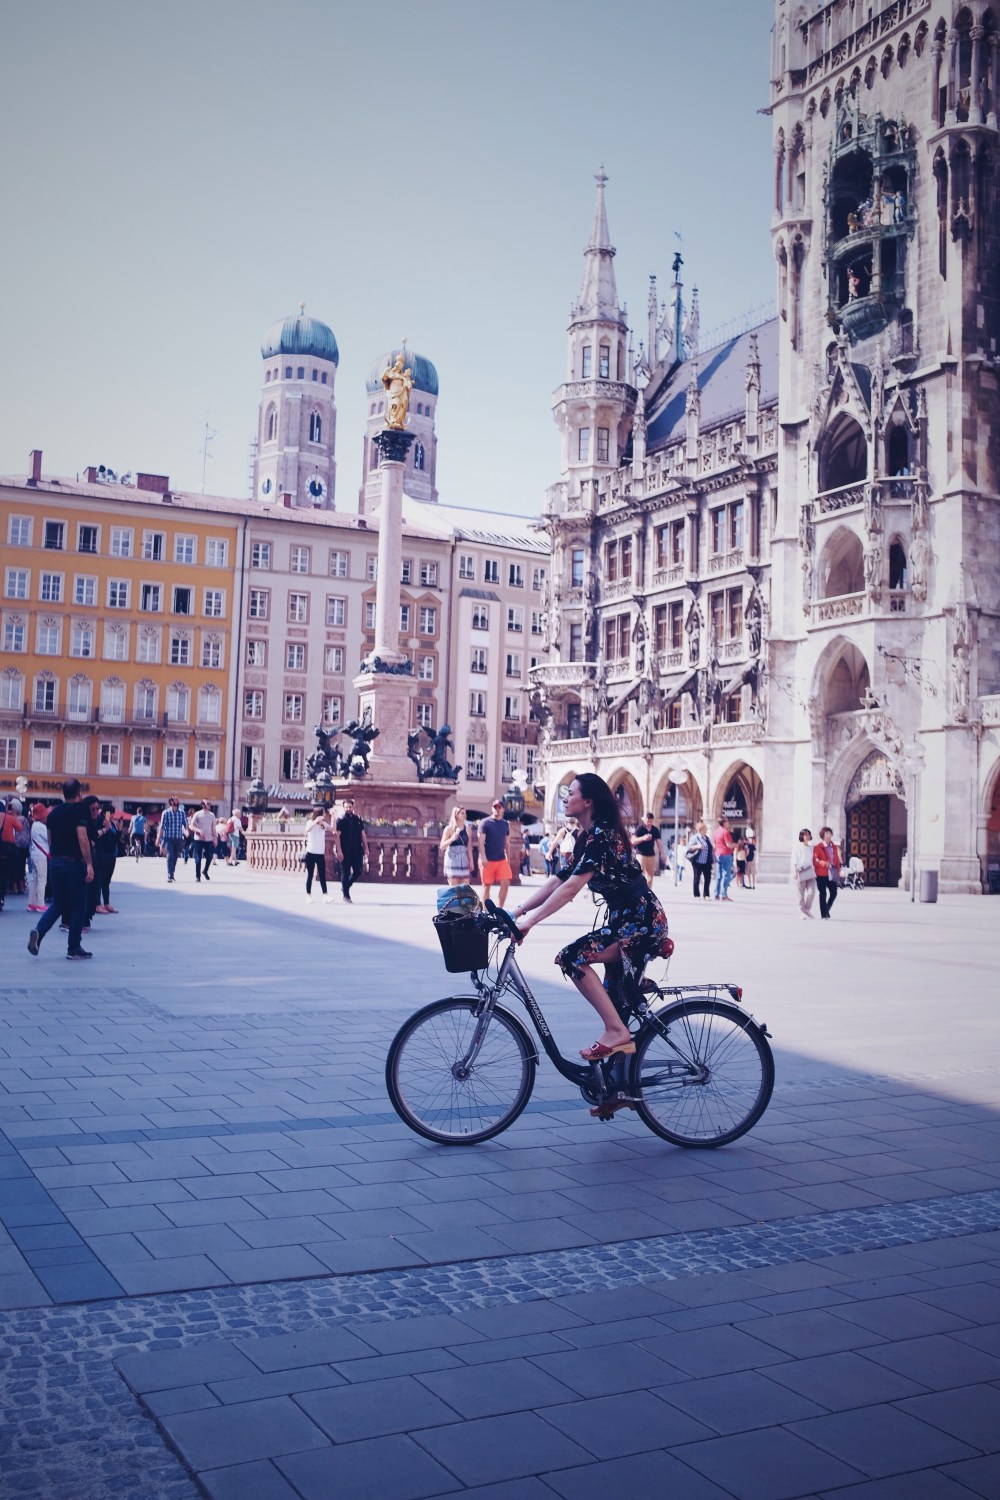
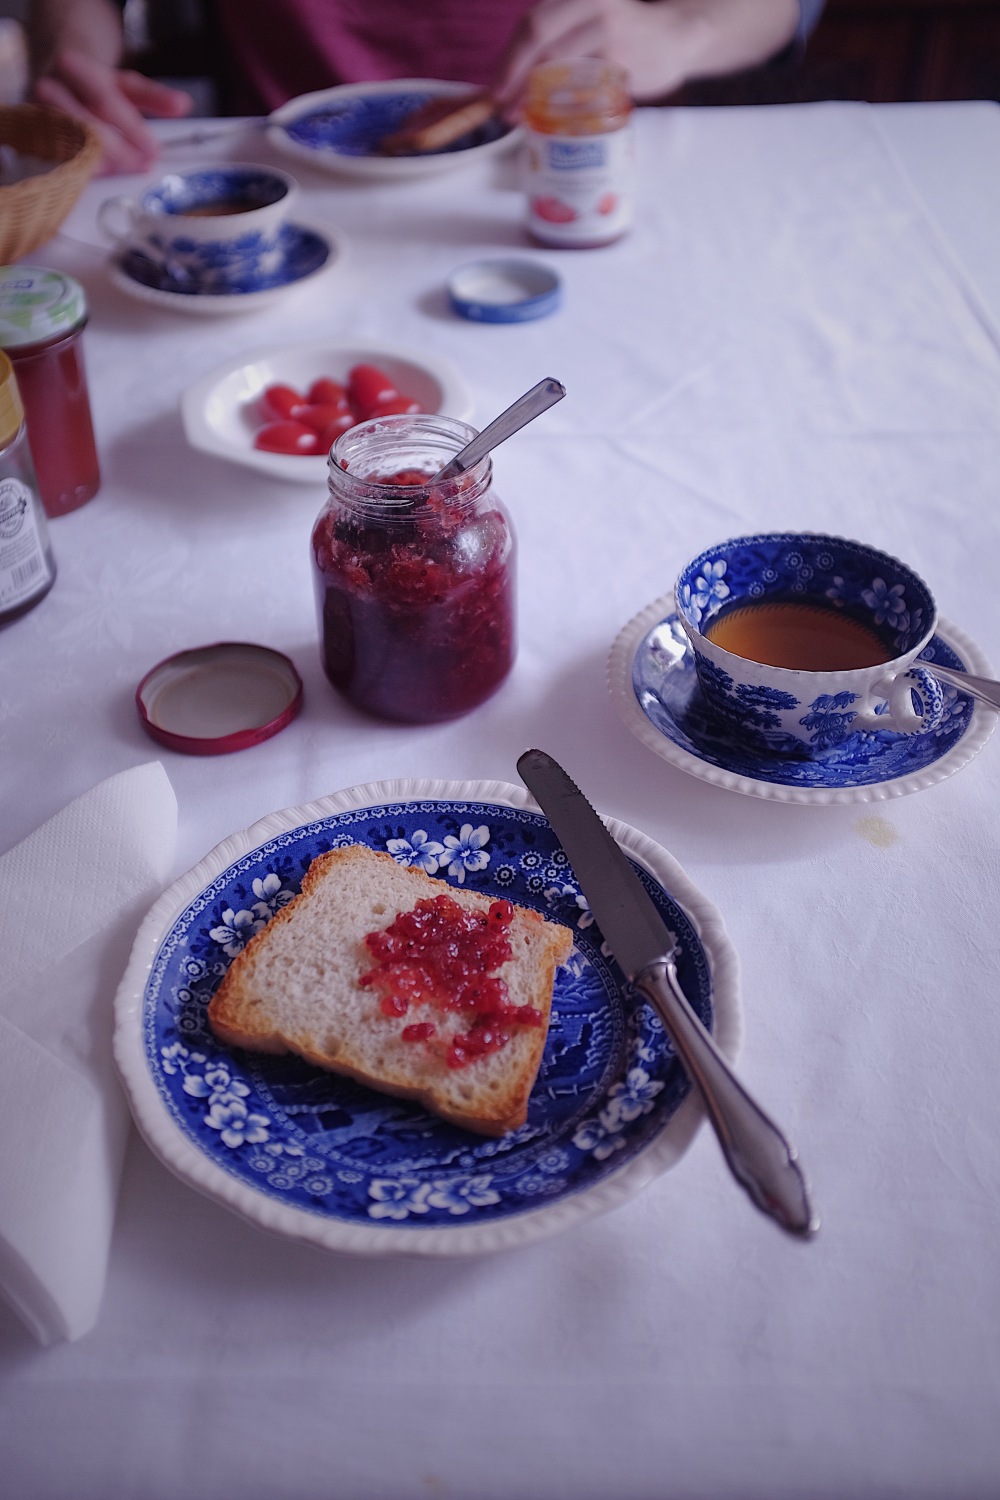
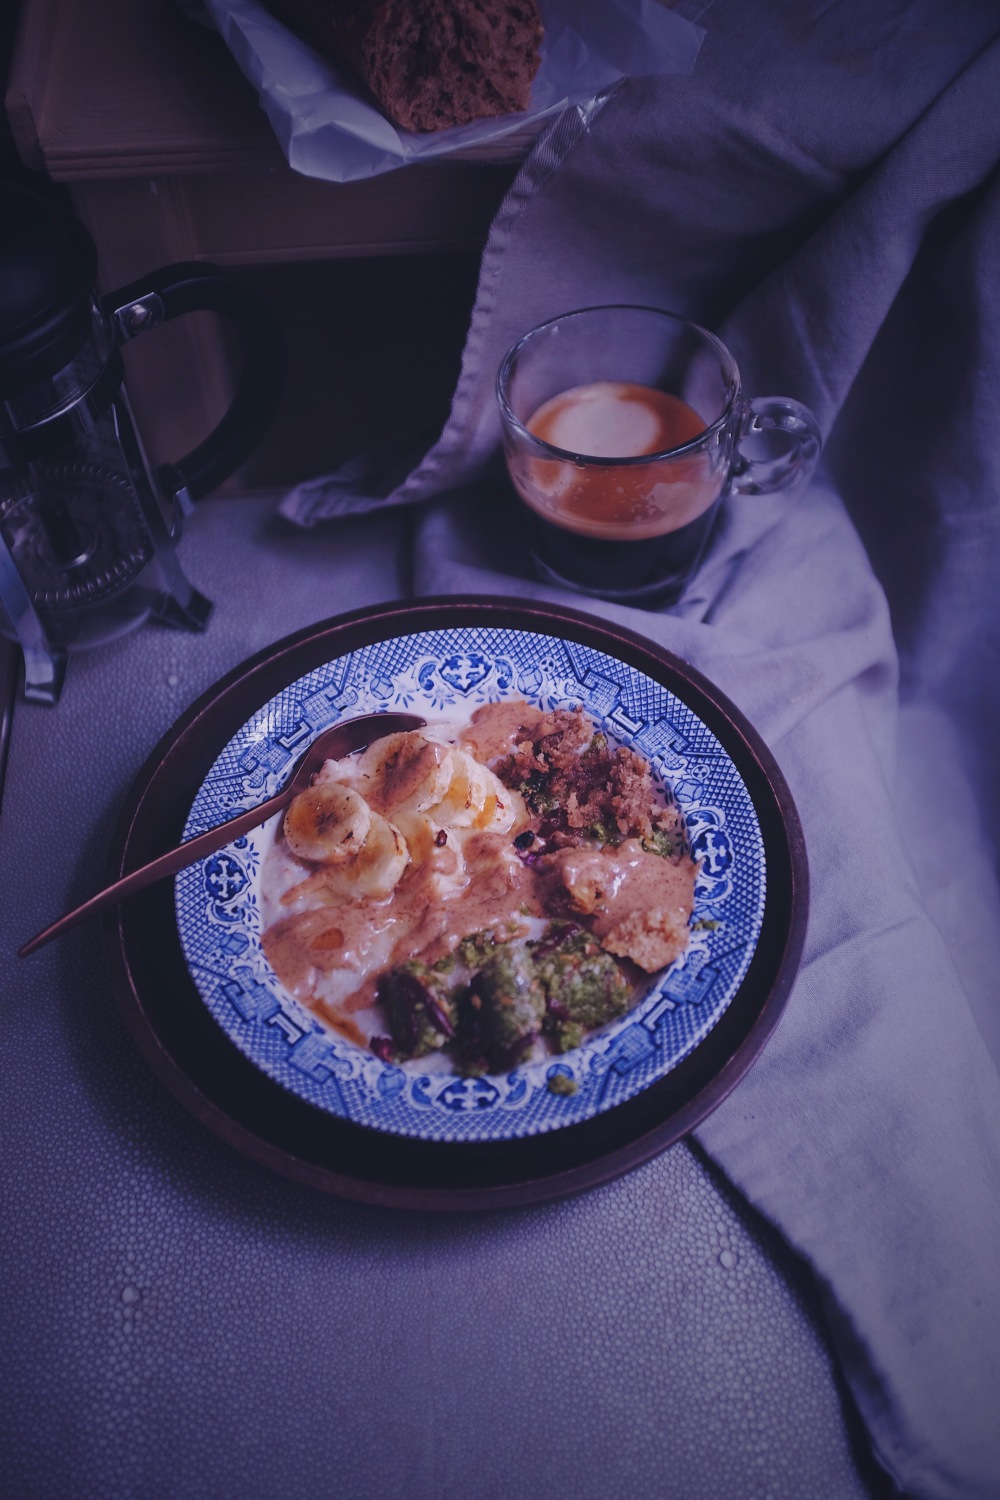
Nothing like sitting down in a cosy café to write up another yummy recipe. Just had a double salad full of gorgeous greens and beans, the sort of thing which this recipe perfectly complements. Going through recent journal entries always bring forth the necessity of consistency, self-belief, self-growth, and routine, but they also revealed how easy it is for me to get lost in a tangle of unhealthy mentality and unnecessary indecision. I guess it’s okay to excuse oneself for wondering which food photography backdrop to get next and whether the bananas I just caramelised with vegan butter and a lush deep muscovado sugar would pair better with melting dark chocolate or a simple cinnamon and coconut nectar drizzle (the former was quite the mouth show, and I need to do that more often. It’s basically a wholesome sundae for breakfast). The peril of freedom of choice! How superficial it seems, and yet, what changes they bring– to my entire outlook on life, on the way I behave. Just like how I had mushrooms on toast for brunch last Saturday and I could actually feel my heart leap with joy upon seeing perfectly caramelised onions, browned and gooey, stuffed between morsels of juicy oyster and morel mushrooms heaped on a bordering-carcinogenic piece of toast lovingly slathered with homemade hummus. Sweet moments make themselves known. Because they do make life that much sweeter.

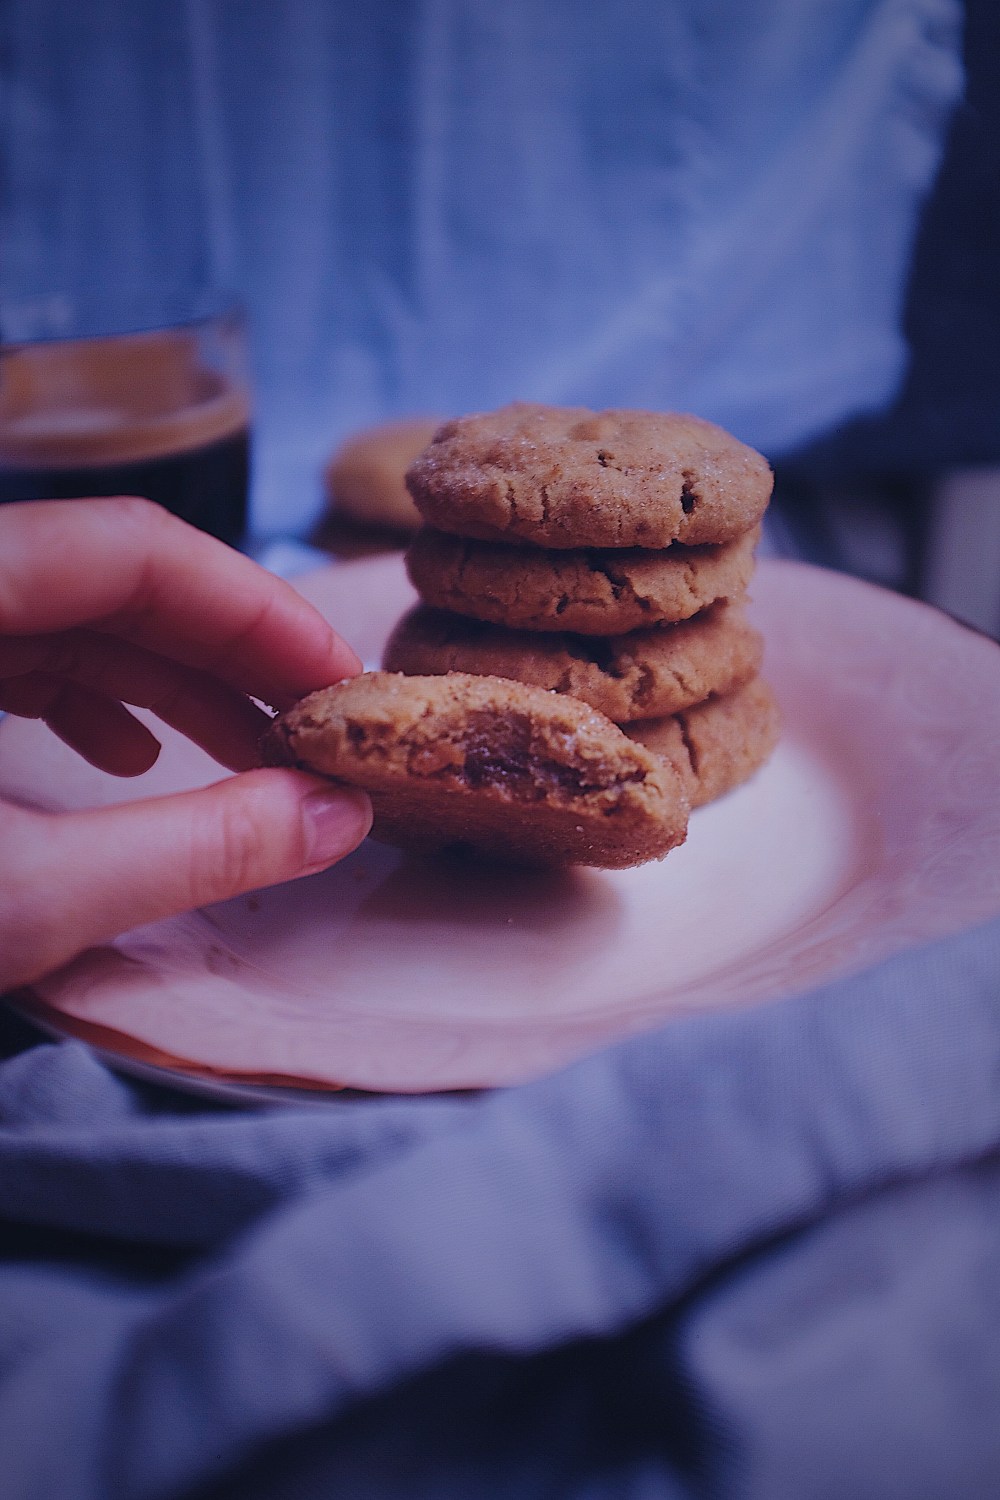
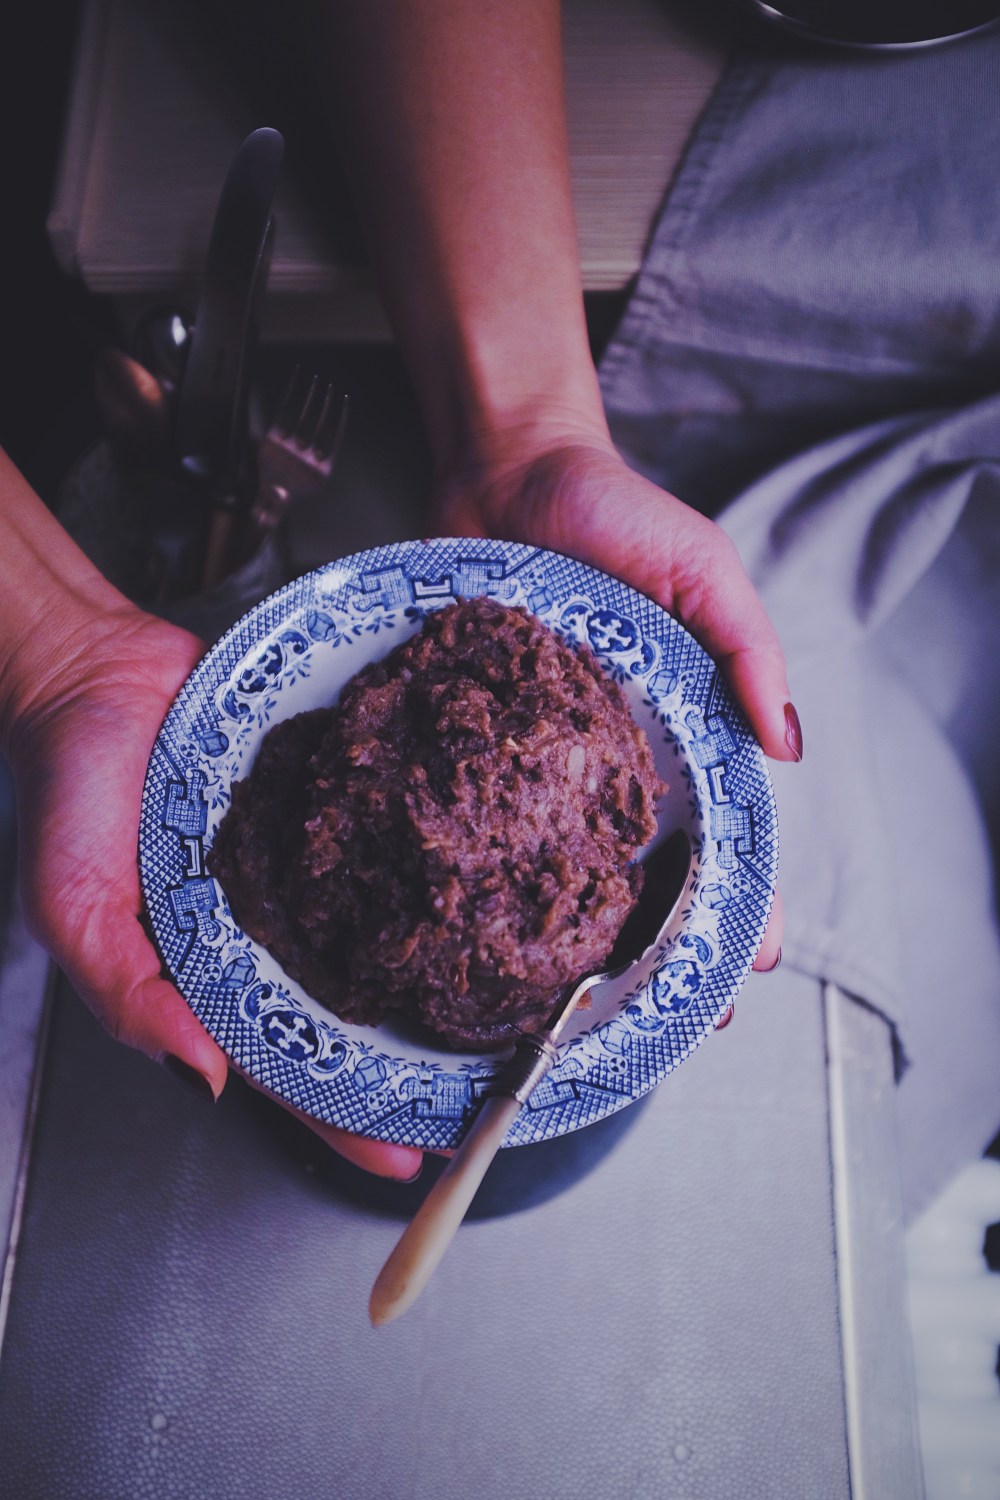
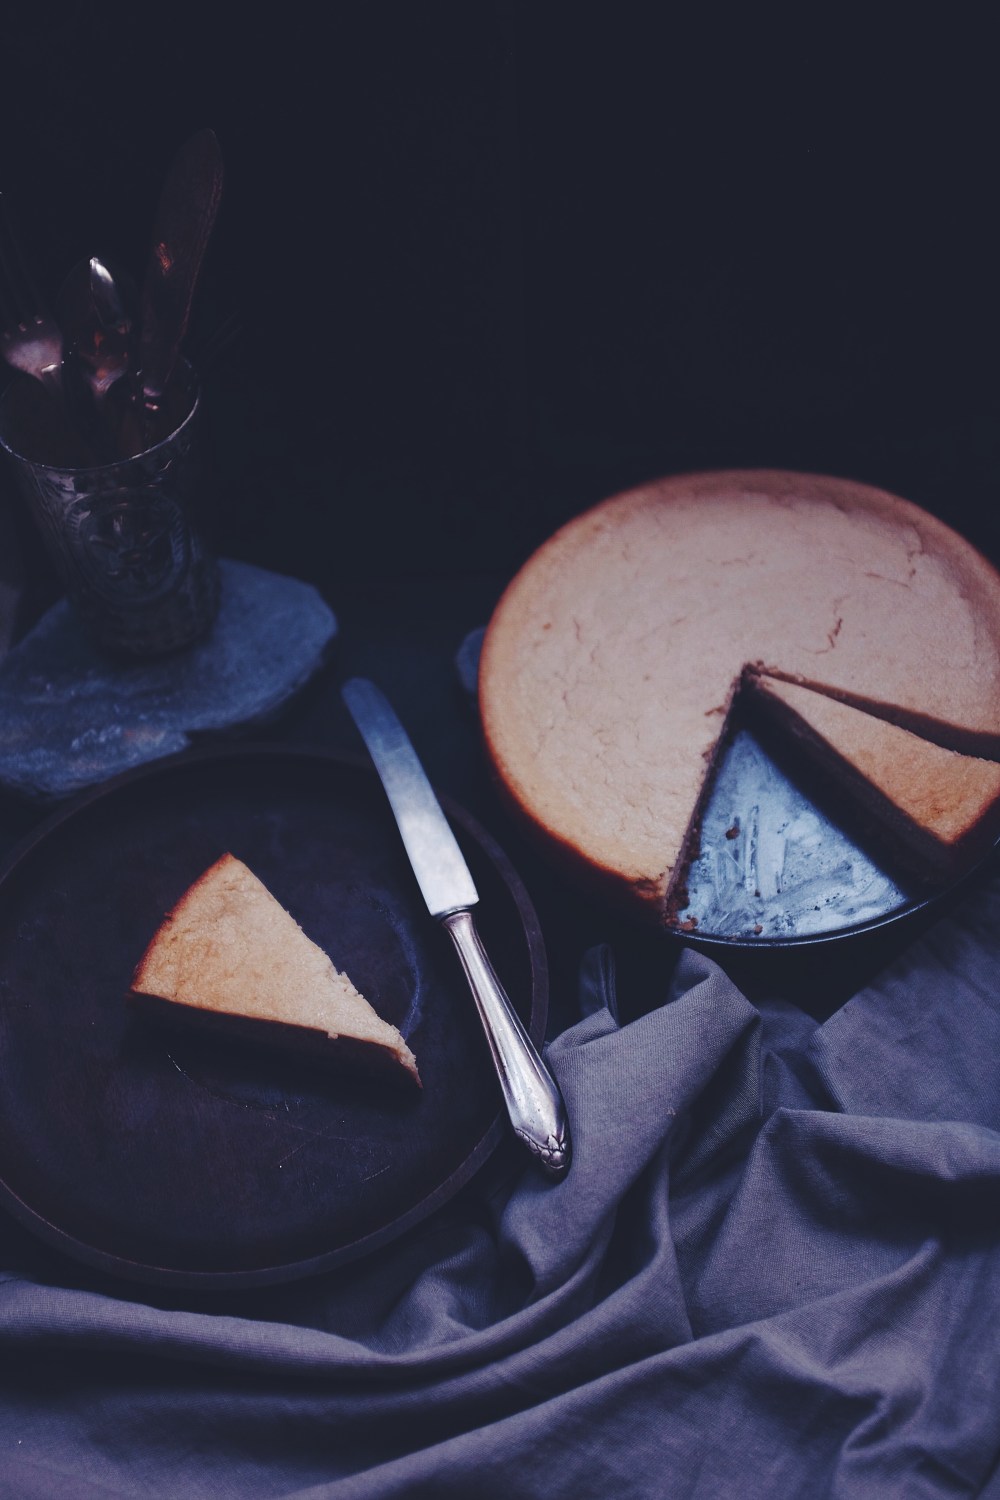
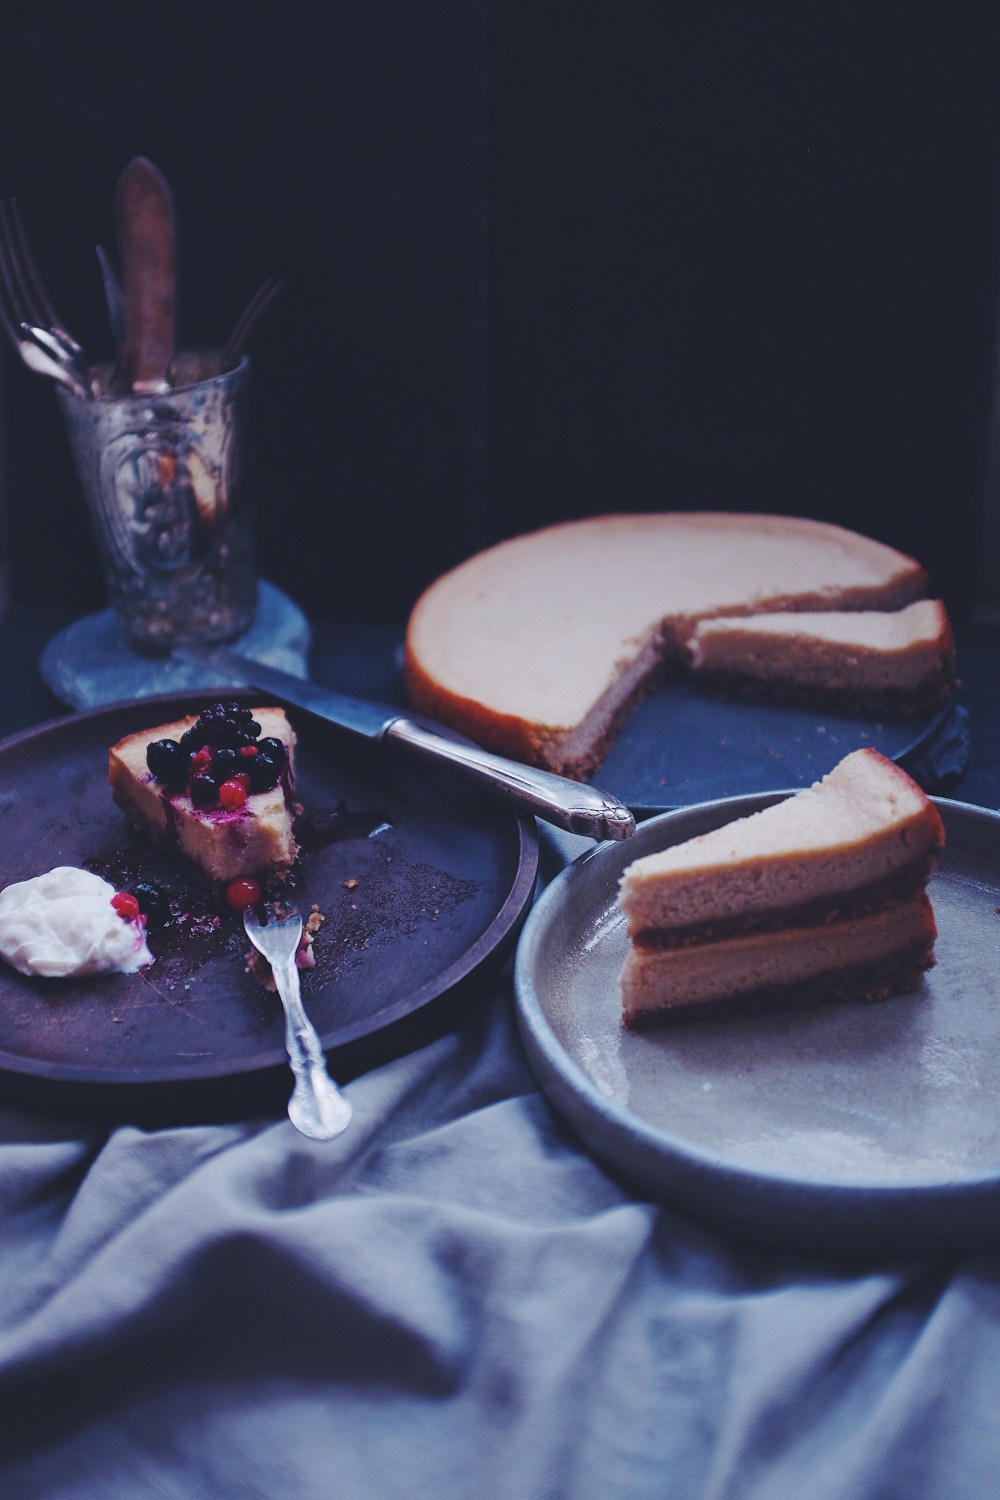
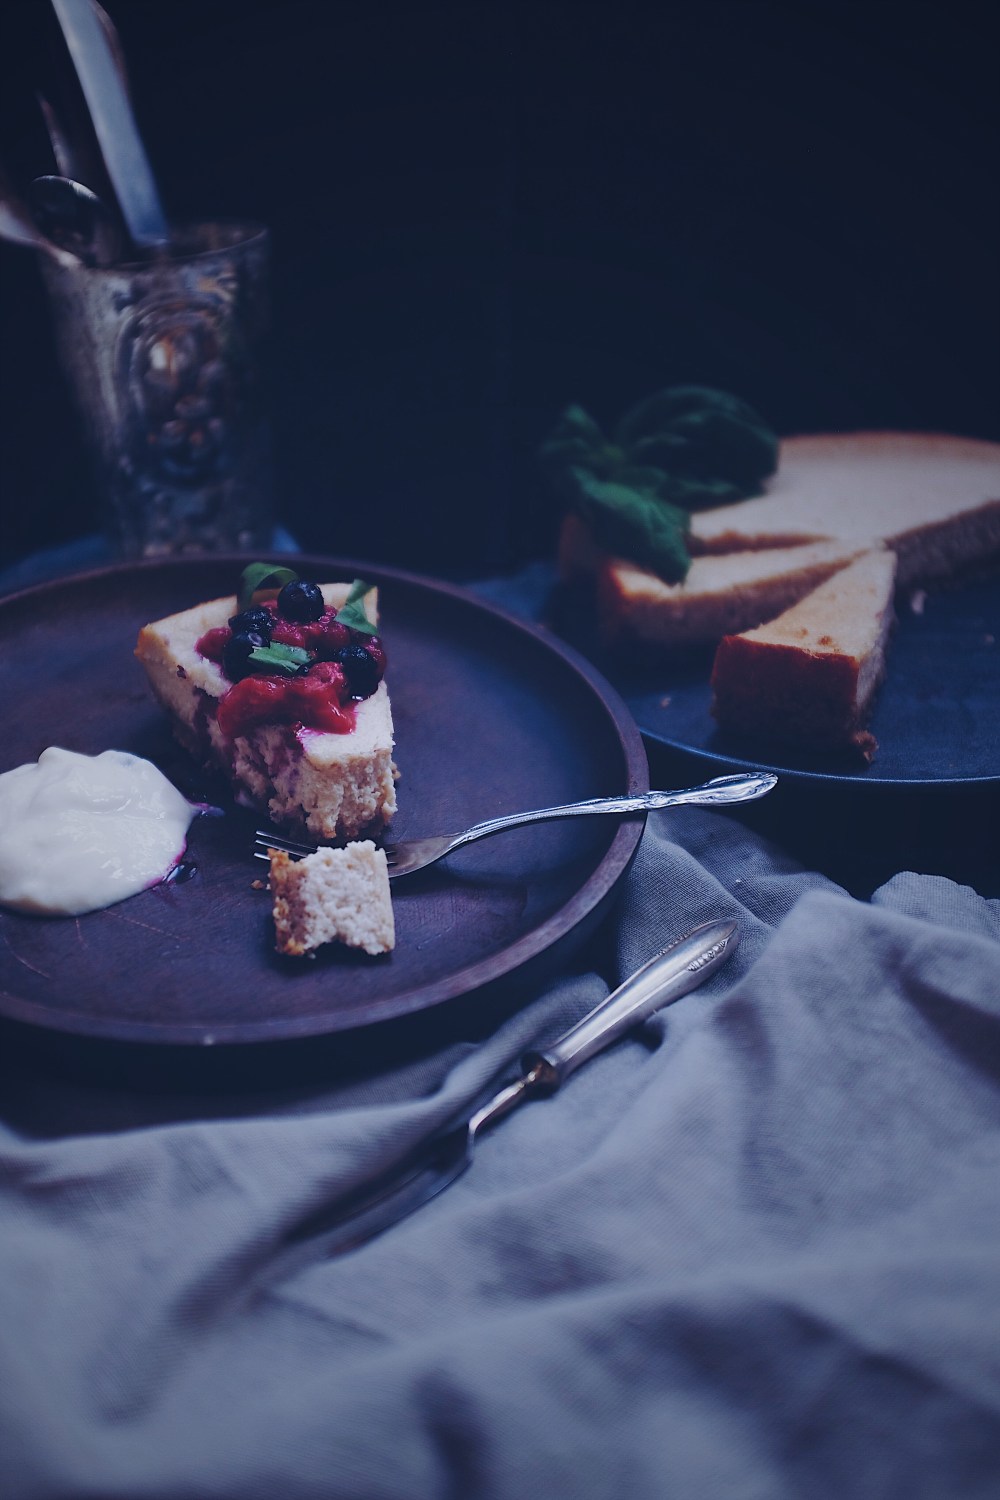
Yesterday I ate a delicious carrot cake chockfull of walnuts. Not the most salubrious thing to have at 2pm, but it did hit the spot like nothing else. Typically a big green apple does it, but yesterday, that fine Tuesday, the cake was a brio in my mouth. If you’ve been following me for a while, you’d know just how much I resonate with the idea of moderation, so necessary in this age of health and nutrition information advertised to propagandic effect. Cake and coffee by myself, mindful and beautiful. Life is about health, and also about letting go. A pure, one-dimensional sweet this cake was, but what was missing was the hint of tart from the cream cheese component (if only vegan cream cheese wasn’t so pricey, right?) in the icing. Tart, the cousin of sweet, is sometimes necessary to balance whatever saccharine loveliness a baked good or breakfast item has to offer.

3575144 Processed with VSCO with a5 preset Processed with VSCO with f2 preset

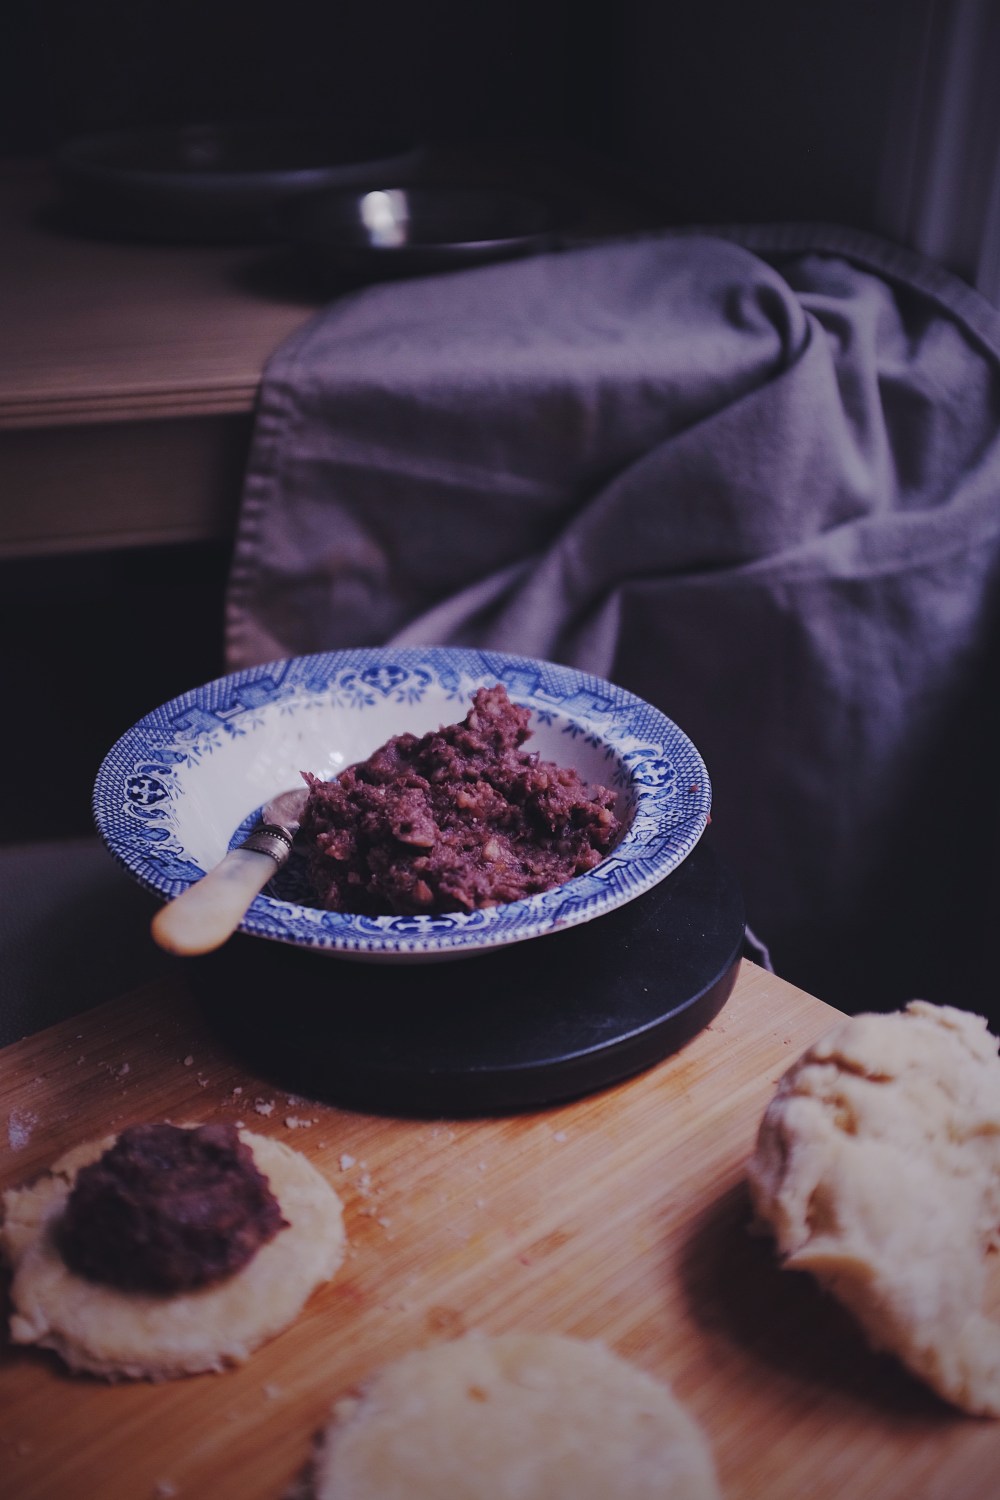
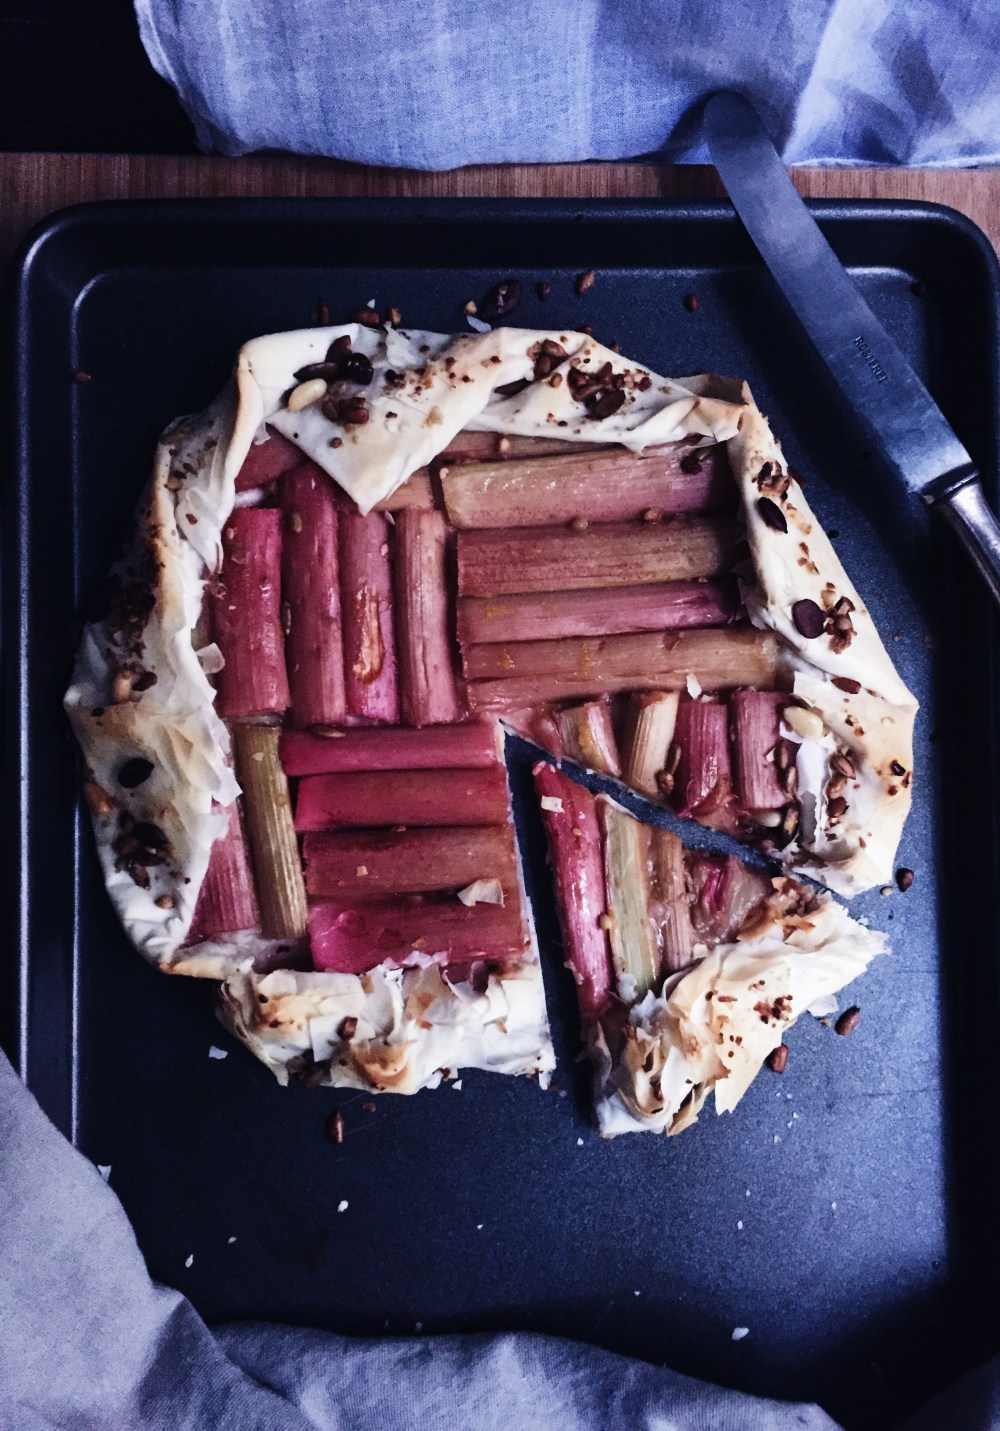
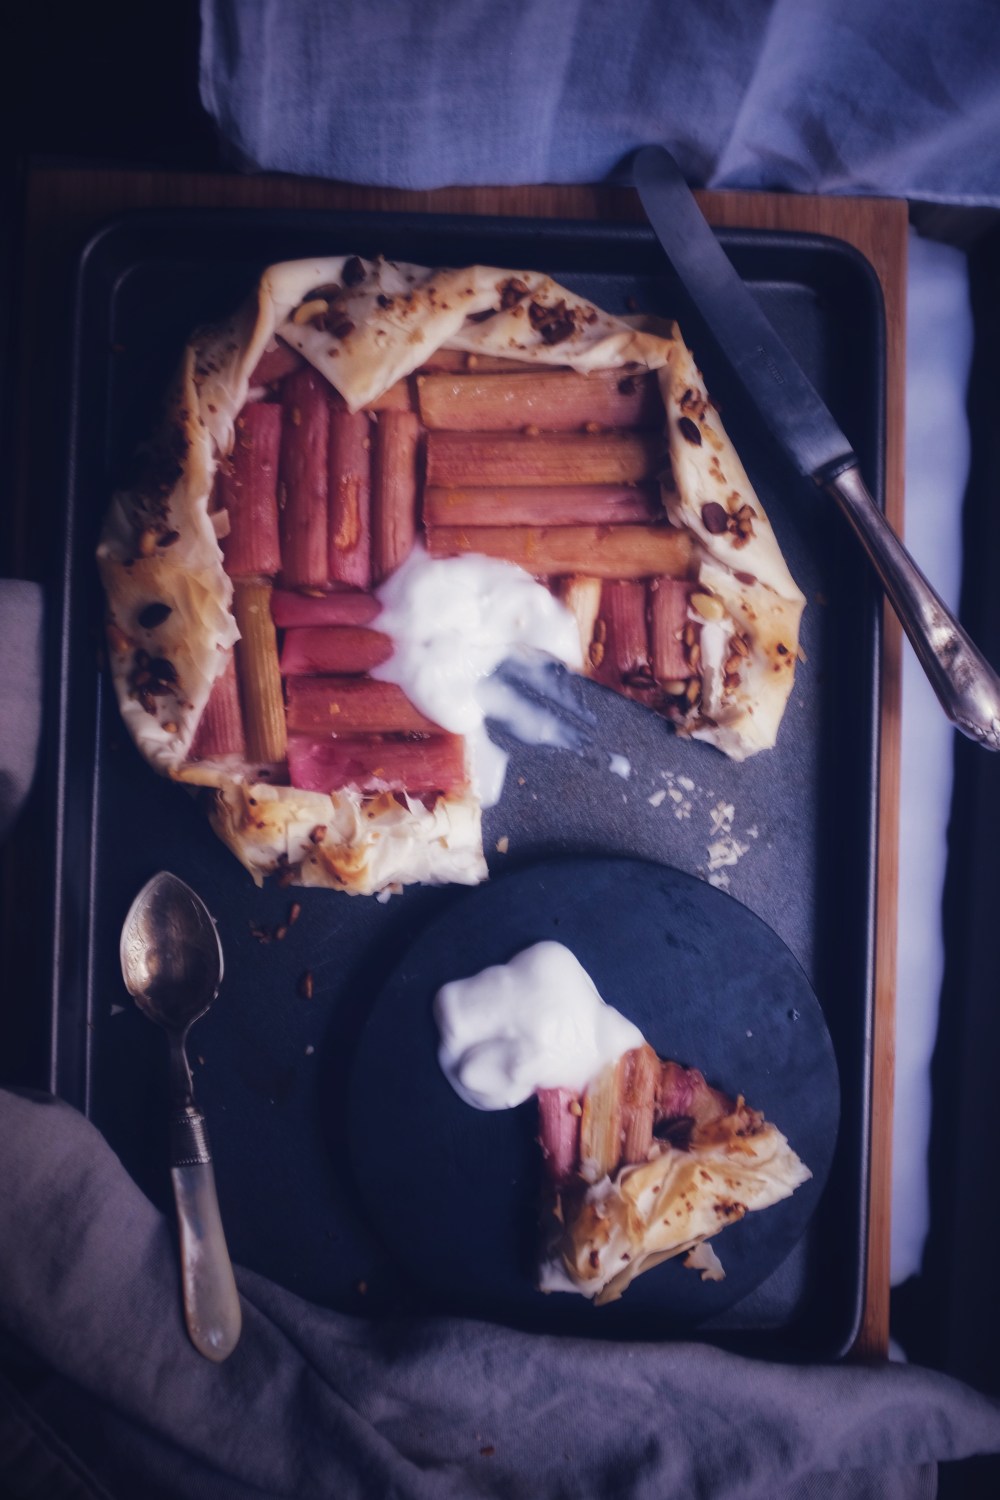
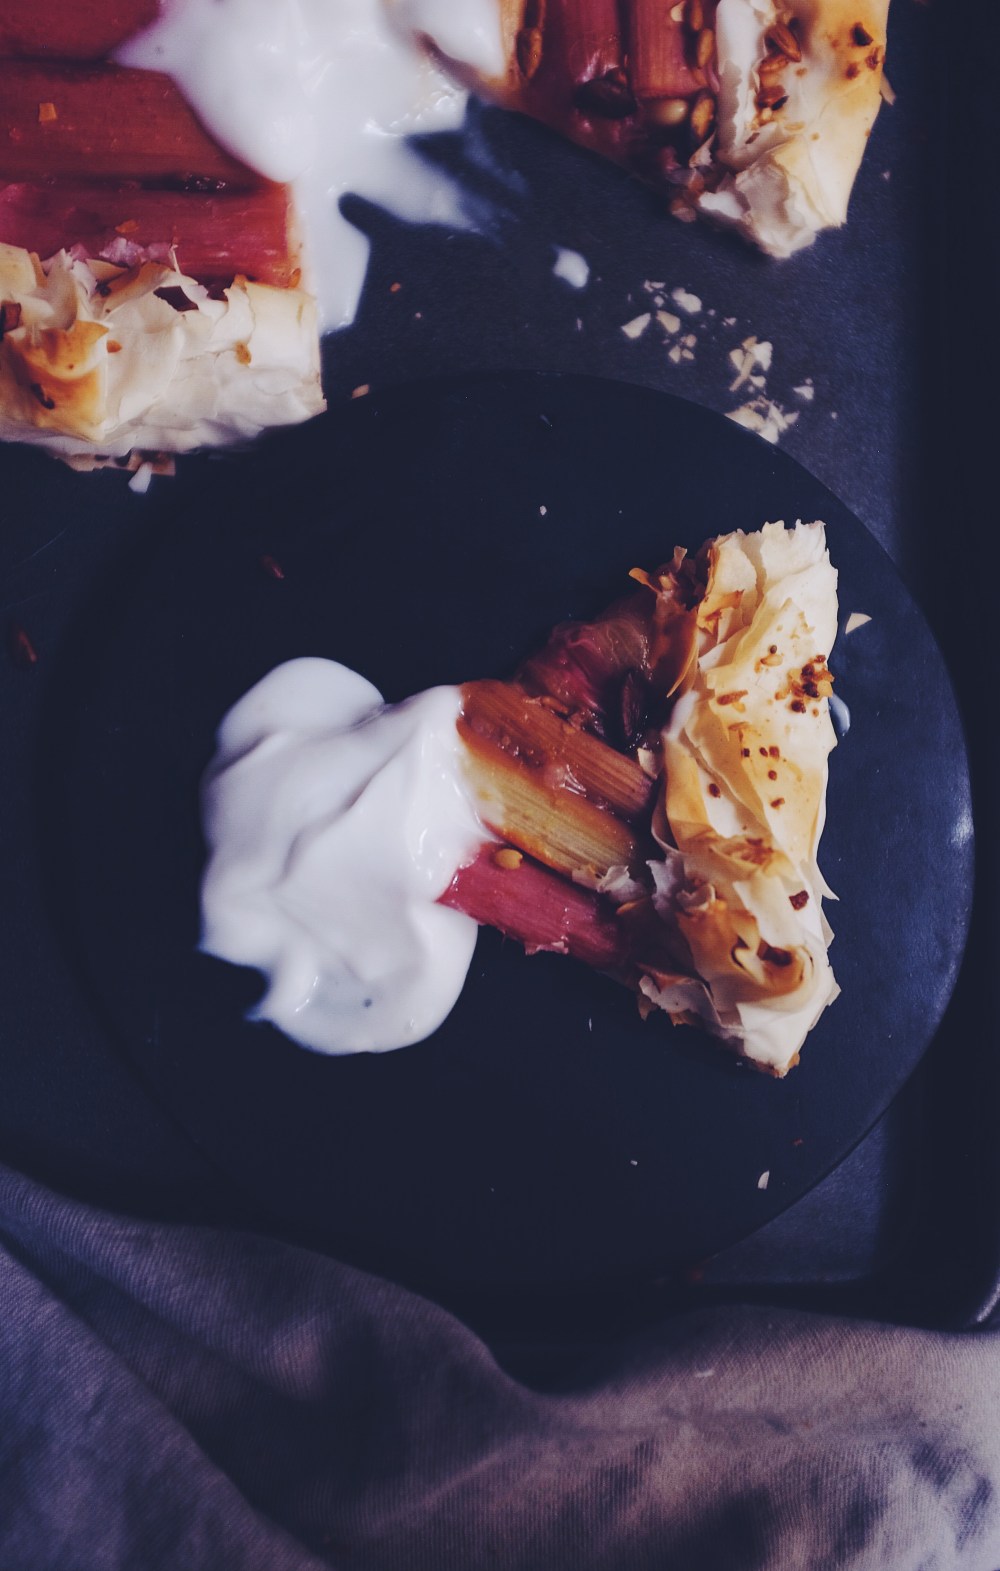
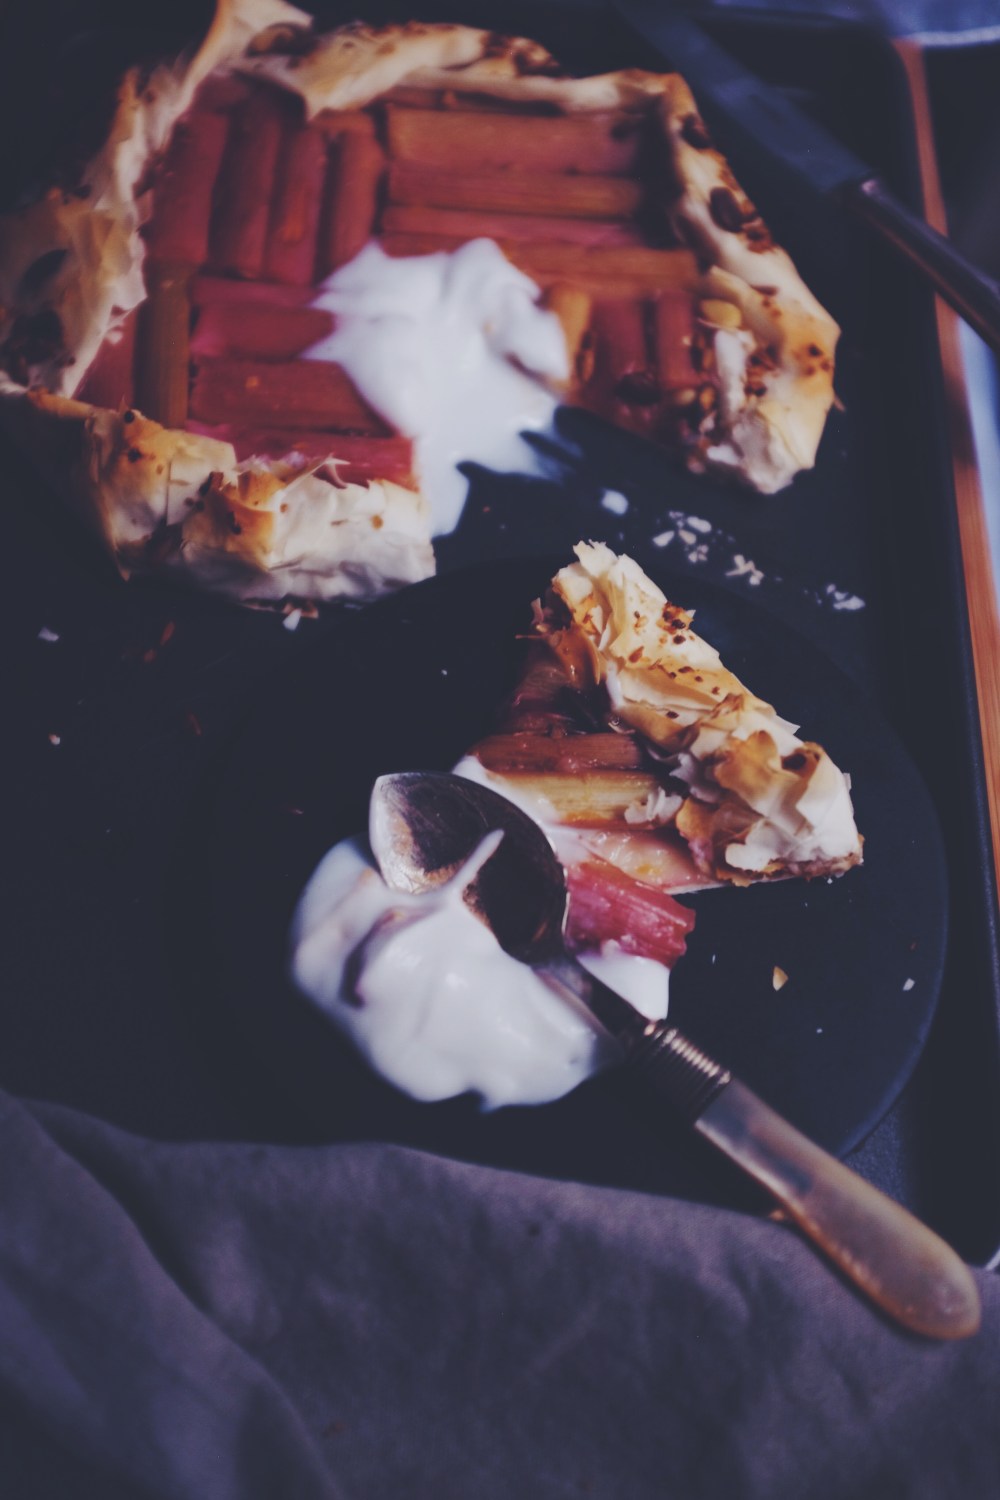
Tart, this pinch of sour, to round off the sweet. Tart, like this rhubarb phyllo galette. Thank you Aldi for 50p on-sale fresh, seasonal rhubarb! This is a twist on a recipe recently written up by Linda Lomelino, one of my favourite baking and dessert bloggers. With plenty of phyllo pastry left over in my freezer, I thought it would be interesting to see what would become of it. Phyllo pastry may be delicate, but it’s also incredibly versatile, and should not be reserved just for baklava and other Middle Eastern desserts. Here is what happens: You layer half-sheets of phyllo pastry on top of each other, each layer brushed with a delicate layer of olive oil to help them stick together, whilst allowing the galette edges crisp up nicely in the oven (without burning). Broken pastry? No big deal. A galette is meant to be rustic, and tears and breaks here and there will only enhance, not detract, from this.

Processed with VSCO with a5 preset3427941 Processed with VSCO with a5 preset Processed with VSCO with f2 preset3653074 Processed with VSCO with a5 preset

Notes:

  • For whole, unscathed sheets of phyllo pastry, leave the frozen pastry in the fridge overnight, so do that the night before baking, or at least a couple of hours before. Microwaving the phyllo pastry to heat it up in a rush might leave some parts too delicate and others frozen stiff. That being said, you may still try microwaving the pastry (cover removed but still in its plastic wrap) for 30 seconds at a time, on medium power. Not the highest!
  • Cutting up the rhubarb into batons of equal length may leave you with little pieces of rhubarb. Don’t discard these, you could try fit a few cut-up pieces into nooks and crannies in the galette. Any remaining pieces can be eaten there and then.
  • The seeds and sugar sprinkled on top of the galette before baking is optional but highly recommended. The crunch gives the galette more textural fun.
  • It’s important to watch the galette carefully as it bakes– it’s done once the pastry is pale brown and edges are crisp. Baking time may vary depending on the brand of phyllo pastry you use, or strength of the oven.

3090366 Processed with VSCO with a5 preset Processed with VSCO with f2 preset3060263 Processed with VSCO with a5 preset Processed with VSCO with f2 preset

Rhubarb Phyllo Galette (adapted from Linda Lomelino’s recipe for a rhubarb almond galette– makes one 6-inch galette)

Ingredients

200g rhubarb (about 4 large stalks), washed and leaves/ other possible dirty bits and bobs cut off

juice and zest of half a lemon

1 tsp cornstarch

1 tbsp sugar (coconut or brown)

9 half-sheets of phyllo pastry, thawed (from frozen) in the fridge overnight

60ml vegetable oil or melted butter (use vegan butter or margarine if you are vegan)

2 tbsp granulated or turbinado sugar

*optional: sprinkle of mixed seeds (I used a very random mix of sunflower and pumpkin seeds, and some homemade buckwheat granola)

Directions 

Preheat your oven to 180C (350F). After weighing out the rhubarb, cut each stalk in half lengthways, then cut into batons, each 4cm in length. Put the rhubarb batons in a bowl, add the lemon juice and zest, cornstarch and sugar, and mix well with a spoon, until the batons are all coated in the lemony-sugar mix.

On your work surface, place one half-sheet of phyllo pastry down. Brush this with a thin layer of oil or melted vegan butter, then place a second layer on top. Repeat, until you have three layers on top. Rotate this thin stack 90 degrees, then do the same with the next three half-sheets, not forgetting to brush each layer with  oil each time. Rotate 90 degrees again until you are at the same orientation as you were in the beginning with the first three sheets, and then layer on the last three half-sheets so that all 9 half-sheets are used up at this point. You should get what looks like a thick cross shape, with 8 corners

Fold each of the 8 corners down, so that you have an octagon shape. Take your rhubarb batons and place them in whatever pretty pattern you wish, in the centre of the octagon. I did a series of horizontal and vertical batons, but you could also just heap the stuff in the middle. Then fold over, somewhat in a rough and random manner, the perimeter of phyllo pastry, over the border of rhubarb to get the shape of a galette. Brush the pastry with more butter/olive oil, sprinkle on the 2 tablespoons of sugar, and the optional sprinkle of mixed seeds. Bake in the preheated oven for 13 minutes. Watch the galette carefully– it’s done once the pastry is a pale brown.

Leave the galette to cool a while on the counter, before slicing and serving with coconut yoghurt or a refreshing scoop of vanilla bean ice cream.

The Best Chewy Snickerdoodles

3245639 Processed with VSCO with a5 preset Processed with VSCO with v5 preset

I have made these cookies at least 3 times, all within the same week I realised these cannot be anything less than the best vegan snickerdoodles EVER. Really, I was so excited. Just sitting there, spatula in hand, the other covered in a greasy mix of cinnamon, butter and sugar. How could this be? These must be one of the best things ever to savour (in moderation, of course). Preceding the most wonderful vacation I’ve had in a while (Belgium, Germany and Austria, woot!) were these cookies. Just these, nothing more and nothing less, and nothing more was needed, to be very honest. Now I’m babbling, but clearly you can tell how excited I am about these. I considered sharing the recipe for these on a whim on Instagram, but realised they’re too special not to have a reserved spot in the archives.

The word ‘best’ of course elevates everyone’s expectations, and I promise these won’t let you down. All my friends who tried it said various things:

‘Better than Ben’s (with reference to the popular Ben’s Cookies here in London)?!’,

‘Oh my God I can’t stop’

‘Holy s***.’

But enough with the all bark and no bite. I’ll rat this one out, you deserve at least that. These are by far the most chewy, delicious, cinnamony snickerdoodles I have ever had. Loving the cracks and crags of these, which you can enjoy below, alongside some shots of the trip I just came back from, where every day ended with a full belly and fuller heart.

3111032 Processed with VSCO with f2 preset Processed with VSCO with a5 preset

4578569 Processed with VSCO with a5 preset Processed with VSCO with f2 preset
Munich’s harsh light that fine day
3756039 Processed with VSCO with a5 preset Processed with VSCO with f2 preset
Ghent, Belgium: That time someone actually cooked breakfast for me: Hot sautéed cinnamon apples on a bed of warm porridge. Mmmmm.
3988327 Processed with VSCO with a5 preset Processed with VSCO with f2 preset
Schladming, Austria: Where we dined on a dinner of fresh air, a view of the mountains, crisp white wine and a sweet potato eggplant curry

3187828 Processed with VSCO with a5 preset

Stiff and chewy all the way through. Rolling them in my ratio of cinnamon and sugar will yield incredibly chewy outer edges and a perfectly sweet bite each time. Cinnamon goes way back, and this love affair with this spice has no end. Cinnamon is able to prevent cognitive brain decline, whilst boasting many antioxidant and anti-inflammatory properties. Petri dish experiments, as reductionist as they sound, still have shown some potential anti-cancer properties. How cool is that?

Another day, another one-bowl wonder. It’s a simple matter of creaming together vegan butter and sugar, before adding the dry ingredients and mixing everything until you get a relatively dry mixture. But texture should not fool you– this recipe will yield the most chewy cookies after baking, as the butter melts and moistens everything. It is a true dream, I say.

3157501 Processed with VSCO with a5 preset Processed with VSCO with v5 preset3175756 Processed with VSCO with v5 preset

Snickerdoodles (makes around 12 medium cookies)

Ingredients

330g plain flour, or use half whole-wheat if desired (I have not tried the latter, but I guess this would yield a sturdier, more earthy-tasting cookie)

1/2 tsp each of baking powder and baking soda

pinch of salt

1 egg (vegan substitute: 1 flax egg– make it by mixing 1 tbsp ground flaxseed with 2 tbsp water and letting that gel in a small bowl for a few minutes before using)

1 tsp vanilla extract

150g butter at room temp (vegan substitute: vegan butter or margarine)

130g (around 3/4 cup) of white sugar

120g (around a packed 3/4 cup) of light brown sugar.

mixture to roll cookies in: 30g white sugar mixed with 1 tbsp ground cinnamon (you may realise you do not need all of it when rolling your cookie dough in this mixture)

Directions

Preheat the oven to 180C and line 2 baking trays with parchment paper.

Cream together the butter and sugar using a fork or electric whisk. I simply use a fork and spatula to cream it to save on some washing! Mix the butter and sugar until you get a smooth, fluffy consistency. Add the egg/flax egg and vanilla extract and mix until incorporated.

Next, add the flour, salt, baking powder and baking soda. Mix everything by hand or with an electric whisk. The mixture will be quite dry and crumbly (don’t worry, they won’t turn out like this). Roll the mixture into 2-inch balls, then roll in the cinnamon-sugar mixture. Place the balls at least 1 inch apart as they will spread a little.

Bake them in the oven for 18 minutes. Once baked, take the cookies out and use the bottom of a glass to lightly tap on the tops of the cookies to flatten them just a little. This evens out the conduction of heat and makes the cookies incredibly chewy and less raw in the centre. The cookies will look slightly pale and perhaps a little raw once out of the oven, but leave them to cool on your counter and they will stiffen and cook a little more. Resist if you can (I can’t). Enjoy on their own. These last quite a few days in an airtight container.


Banana Bread Oatmeal and Little Lessons

3670897 Processed with VSCO with a5 preset3547176 Processed with VSCO with f2 preset

Having just finished Buddha Brain by Rick Hanson, it’s come to my attention how disengaged and out of focus we tend to be in our stimulated environments, especially in fast-paced cities such as London. Somehow we are always trying to do more in less and less time, and this has potentially devastating lifelong consequences. It’s blind attention. Some days we go through the motions and feel rewarded or successful upon ticking off multiple checkboxes. But life isn’t a checklist, and isn’t supposed to be. How crazy are we to think we can be both productive and happy going about life in this robotic, stress-fuelled way?

This audiobook sort of links to the one I’m reading now– Whole, by one of my idols T. Colin Campbell. All this stress increases risk of certain diseases and accelerates ageing. Food of all things is so underrated in its effects on our mental and physical health, as well as the way we behave towards and learn from others. How could we use food to help us live better lives?

There are a few strategies about both food and lifestyle that I have included in the past few years, each starting at different points in my life, but all practiced towards the same degree. For example, I have done yoga and meditation for 2 years now, but only started mindful eating a few months ago. Naturally I am a rather indecisive person (4-5 delicious Gail’s vegan muffins or a manicure kit? Help??), but these techniques put the minute decisions into the broader context of life better, helping me achieve a better, more logical state of mind.

3346155 Processed with VSCO with f2 preset
The most incredible vegan sorbets and ice cream (coconut, deep and rich dark chocolate, raspberry and lemon basil) at Ballabeni in Munich!

Processed with VSCO with f2 presetProcessed with VSCO with a5 preset Processed with VSCO with f2 preset

  • Make eating a meditation. Eat slowly, and savour every mealtime. Put your fork down between each bite, don’t have blazing screens on for at least 2 out of 3 of your meals, talk to a friend or loved one. Think about where each ingredient on your plate came from. This process clears your head, refreshes the mind. You know you are putting good things into your body. The pictures above are from my recent trip to Munich to see my boyfriend and his family. Every morning welcomed me with fresh bread and jam. Each bite was more alluring than the last, a chunk of fresh hope and energy for the day’s next few steps. Even if it’s a slice of cake, remember where that cake came from, each sweet mouthful airing your body with life and energy. It may not be the slow sustained energy you get from your daily bowl of oatmeal, but it’s food to savour and enjoy all the same, and by practicing mindfulness, you’ll get used to treating your body better, and crave cake a few times a week, not twice a day. And on that note…
  • Include some source of protein and fat at at least 2 of your meals. This way, you are satiated and don’t mindlessly snack on sugary foods throughout the day (I have had enough experience with this, ugh). I bake once a week and indulge in whatever experiment that day holds, but my diet is primarily a whole foods, plant-based (WFPB) one, and I testify to moderation as salvation  Having had a turbulent relationship with food in the past, particularly my early and mid-teens, WFPB has healed me from the inside-out. Nothing else is more satisfying, refreshing and nurturing. Best part? You can be incredibly creative with any WFPB food! Flax in your baking, carrots in your cake, rich cocoa in your hot chocolate… go mad.
  • Immerse yourself in nature once in a while, and move your body. This is especially important if you live in an urban area like London. In Munich, the forest and her sharp air was particularly surreal despite the stroll’s brevity.  Sometimes, there is nothing more beautiful or necessary. Exercise is equally as important to keep the mind fresh and strong.

4145130 Processed with VSCO with f2 preset Processed with VSCO with a5 preset

So here is a little breakfast bowl that I made last week. It’s not your traditional bowl of oatmeal, but it’s just as wholesome and only a tad more fancy. It’s the perfect way to start a mindful day. This was further jazzed up with a matcha bar bite I bought at a café, but that;s optional. The focus here is the natural sweetness of the banana and the thick, almost rich flavour it lends to the oatmeal. Watery business begone. Back to basics, the best way.

Banana bread oatmeal (serves 1)

Ingredients

45-50g (about a half cup) oats (I use a mix of porridge and whole rolled oats for texture)

1 banana, half of it mashed, the other half chopped into coins

120ml (half a cup) each of plant milk of choice (I use almond and oat), and water

1/2 tsp cinnamon

pinch of salt

some crumbled banana bread

2 tsp each of almond butter and maple syrup

Directions

In a saucepan or microwave-safe bowl, mix the oats, salt, mashed banana, milk, water and cinnamon together. If you’re using a saucepan, bring the mix to a boil, then lower the heat a little and stir until you get a thick and only slightly gloopy consistency. If you’re using a microwave, microwave on high for 2-3 minutes. Take it out in between (after 1.5 minutes) just to stir it and make sure nothing bubbles over, because that may happen if your microwave is especially strong.

In a pan heated on medium heat, lightly oil the base and place your banana coins in the pan. after 30 seconds on medium heat, flip over to check if they’re nice and brown. Heat them a little longer if they’re not. Flip and caramelise the other sides. Place the banana coins on your hot bowl of oatmeal, top with the crumbled banana bread, almond butter, maple syrup, and if you want, a splash more plant milk. The cold milk seeping into the thick and gooey, hot oatmeal is divine.

Red (Adzuki) Bean Hand Pies

3339991 Processed with VSCO with f2 preset

So I brought these little hand pies to my mum and two friends for a taste test, and we were all floored. One of my friends, who doesn’t have the biggest sweet tooth, started off with an ‘omg, these are incredible’, before pausing and commencing to talk specifically about the balance in texture and flavour of his delicate, puffed-up pie. ‘I like how it’s mildly sweet and soft in the middle, and crazy crisp everywhere else. Not too sweet either. Whoa.’ I couldn’t agree more. As my mum and I shared one, a tingling warmth rippled through my being. There is nothing like sharing a delicious treat with those you love.

London’s cold spell was brief and impactful. Harsh winds and cancelled train rides aside, the most beguiling thing was to watch my gloved hand traverse the page in my diary, just this time last week. Not once did I ever have to write in my diary with a shivering hand.

3540479 Processed with VSCO with f2 preset3134746 Processed with VSCO with f2 preset

And so comfort had to be in tow. No question about it. Tinker tinker, tinker tinker. A brief encounter with the adzuki bean reminded me how powerful it can be in conjuring up such profound memories and nostalgia. Native to the Himalayas and Southeast Asia, it is especially common in Japan, where it is used in a variety of different desserts. Red bean mochi and red beans scattered in my ice kachang were some of my favourite desserts as a child, ones I appreciate now more than ever in London, where Asian desserts are still rather uncommon. If one is so lucky to find them, they still tend to bear ridiculous prices. Another reason to make these yourself at home!

The best thing about these hand pies, cute filling aside, is the delicious, outrageously crisp crust. Complementing it is the just-right sweetness of red bean paste, smooth and sticky. You could customise the filling by adding things like soft dates (deglet/medjool) and nuts for some interesting dimension and a different mouthfeel.

3339991 Processed with VSCO with f2 preset

Red Bean Hand Pies (makes 10-12 little hand pies)

Ingredients 

For the red bean paste:

200g (1 cup) adzuki beans

240ml (1 cup) water

pinch of salt

200g (1 cup) granulated sugar


For the puff pastry:

280g (about 2 and 1/4 cups) plain flour, and have a little bowl with some extra flour set aside for sprinkling later on (sub: half white and half whole-wheat, or use a gluten-free flour such as coconut or rice)

120ml (1/2 cup) vegan butter (sub: coconut oil)

120ml (1/2 cup) cold water

pinch of salt

1 tbsp sugar


Directions

The night before you make the pies, soak the adzuki beans in the water. In the morning, drain the beans, place them into a saucepan. Add fresh water to the saucepan until there is about an inch of water covering the beans. Turn on the heat and let the beans come to a boil. Once at a boil, reduce to a simmer and cook the beans for about 45 minutes. During this time, start making the pastry. You could use a food processor but I prefer using my hands in a bowl to get a good feel of the dough. In a bowl, mix together the flour, sugar and salt. Add the butter/coconut oil and squeeze it into the flour until you get floury clumps. You don’t have to make sure everything comes into clumps, you should just have a relatively dry and crumbly mixture. Add a quarter cup of water to start, then add the rest slowly until the dough just comes together in a large clump. The mixture will be quite dry. Add more or less water until you get to this point. Put the dough in a bowl and place this in the fridge.

After 45 minutes of cooking the beans (give them a stir every once in a while), add half of the sugar and salt. Continue cooking for 15 minutes. Squeeze one of the beans– if it breaks easily then you’re on the right track. If not, never mind, just continue cooking until most of the beans are easily smushed (I LOVE that word). Continue cooking until most water is evaporated. Add the rest of the sugar and cook for another 5 minutes before taking the pan off the heat. Use a fork to smush the beans more into a paste. Leave the beans to cool in the fridge; this is also when the paste (termed anko in Japanese) will thicken.

Preheat your oven to 190C. Lightly flour a work surface and, using a rolling pin, roll out your dough until about half a centimetre thick. Using the edges of a glass cup, cutters or a measuring cup, cut 5-inch circles in the dough, starting from the edges to save space. Take your bean paste from the fridge and place a heaped teaspoon of the paste in the centre of one circle. Wet your finger to draw a thin layer of water along the borders of the circle surrounding the paste, then place another circle of dough on top. Pinch the pie along its sides to seal the pie. Using a fork, make little fork marks (or claw marks, as I like to call them) around the edges, then flip the pie and do the same on the other side. Repeat until dough is finished. And now for the important part!! Brush the tops of the pies with water– this will make the tops super crisp once out of the oven. Then sprinkle some sugar on the tops, and place the pies in the preheated oven. Bake them for at least half an hour. Check on them at 25 minutes– if they are already golden-brown take them out, but mine took 30 or so minutes.


Classic Baked Cheesecake

2735579 Processed with VSCO with a5 preset Processed with VSCO with f2 preset

‘We die and decay– or are burned– to come up again as wheat or roses, which in turn may form the bodies of future generations of people. Decay is the inevitable and necessary consequence of finite corporeal mortal life.’– Slightly morbid but beautiful quote of the day.

Lots of school, lots of reading, lots of fun. A lot of hesitation, but my head throbs with the chilling promise of a new day, each day.

So I could describe the entirety of my childhood in terms of cheesecake. It was definitely, undoubtedly, completely, a significant part of the reality I encased myself in. There was no such thing as no cheesecake twice a week, and yes, it did my soul a world of good, it was a chunk of my world and sometimes the world itself, when I didn’t feel like facing the real one. This was before I knew anything about the reality of the dairy industry, before I knew how much better it felt to put into myself a real damn cheesecake. A harmless, do-good cheesecake. So I was determined to make one. A proper one. A baked, New York-style cheesecake, soft, dense yet fluffy on the inside, firm and lightly browned everywhere else. They say anything made vegan is a compromise, which is true only if you’re not aware of what goes on in the food you enjoy on a day-to-day basis. Here is a cheesecake I made twice because I got so passionate about it. The ingredients are simple, the product flawless.

2924609 Processed with VSCO with a5 preset Processed with VSCO with f2 preset2986341 Processed with VSCO with a5 preset Processed with VSCO with f2 preset

Whilst meddling about experimenting with Minimalist Baker’s infamous recipe, I realised I could make the crust and filling, leave it in the fridge to set and then bake when I wanted it to (you don’t have to leave it in the fridge before baking though, I just did so due to time issues). Baking it together, without changing the temperature halfway, yielded an equally delicious and beautiful result.

No hint of hubris. It’s just a good, dense, flavourful vegan cheesecake.

2957817 Processed with VSCO with a5 preset Processed with VSCO with f2 preset

Classic Baked Vegan Cheesecake (Serves 8-10, adapted from Minimalist Baker’s stunner of a recipe)

Ingredients

For the crust:

70g (about a half cup) rolled or porridge oats

90g raw almonds (optional:sub with cashews)

pinch of sea salt

2 tbsp coconut/brown sugar

60g coconut oil, either melted or at least at room temperature


For the filling:

120g (1 cup) raw cashews

250g (1 cup) coconut cream

220g (about a tub) vegan cream cheese

1 tbsp cornstarch

150ml (half a cup+ 2 tbsp) maple syrup

1 tsp fine salt

juice of one lemon+the zest of the lemon

1 tsp vanilla extract

Directions

The night or day before you bake the cheesecake, put the cashews for the filling in a bowl and cover with water. Let soak overnight on your counter or in the fridge. You can also do this for half an hour if you have the time earlier on in the day.

The next day, drain the soaked cashews and set aside. Preheat your oven to 170C and ready a 9-inch springform pan. In a food processor or blender, put in the ingredients for the crust and whizz it up until you can press the crust with your fingers and they stick a little. The crust should not be too oily to touch. Press this into a 9-inch springform pan and put it in the fridge to firm up a little while you make the filling.

Briefly wipe down your blender/food processor (don’t go all out to clean here yet!) and whack in your filling ingredients, including the soaked cashews. Blend everything together until you get a smooth, white creamy product. There are usually still bits of cashews after blending for a minute, so continue to blend until everything is smooth and bit-less. Pour this on your crust and then bake for 50 minutes. Check at 50 minutes– the top should be lightly browned. If not, continue baking until you see a light golden colour on top.

Remove, let cool on the counter for a half hour before moving it to the fridge to set a little more.

Enjoy with some vegan whipped cream or coconut yoghurt. Beautiful on its own as well. Dana did such a fantastic job with this recipe, and I’m dying for everyone else to try it! My favourite pairing is with berries and basil, as may be observed in the picture just above the recipe.